
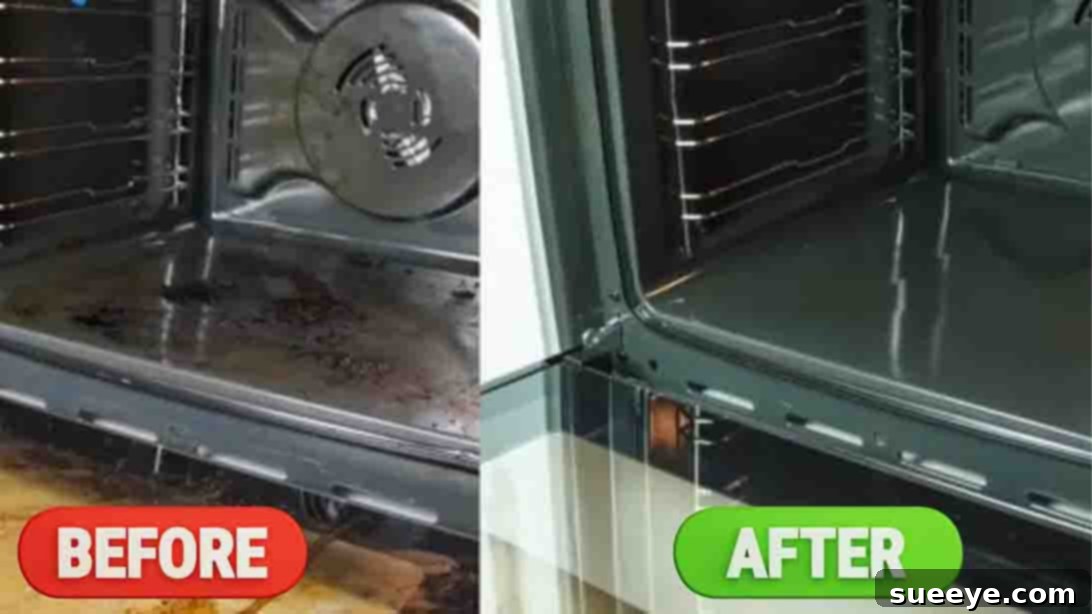
Effortlessly Clean Your Oven: The Ultimate Natural Cleaning Hack
Let’s face it – oven cleaning ranks high on almost everyone’s list of dreaded household chores. The thought of confronting burnt-on grease, baked-in food spills, and stubborn grime can be incredibly overwhelming, often leading us to postpone this essential task. However, what if there was a simple, effective, and natural solution that promised a sparkling clean oven with minimal effort and no harsh chemicals? What if achieving a gleaming oven didn’t require endless scrubbing or inhaling noxious fumes?
Thanks to an ingenious cleaning hack popularized by Cleverly on YouTube, you can transform your grimy oven into a spotless appliance in a surprisingly short amount of time. This guide will walk you through a step-by-step process, leveraging the power of common pantry staples to tackle even the toughest oven messes. Whether you’re a busy parent, a working professional, or simply someone who prefers to spend their weekends on leisure rather than labor, this tutorial is designed to make oven cleaning a breeze.
Say goodbye to the frustration of expensive, chemical-laden oven cleaners and hello to a remarkably clean oven, safely and efficiently. Prepare to be amazed by how easily you can achieve professional-level results with this clever, natural trick. Continue reading for the complete written procedure, or watch the video tutorial below to see the instructions in action. A big thank you to Cleverly for sharing this fantastic cleaning solution!
Why a Sparkling Clean Oven Matters More Than You Think
Beyond aesthetic appeal, maintaining a clean oven offers several significant benefits for your home and health. Understanding these advantages can provide the motivation needed to tackle this often-postponed chore.
Enhance Hygiene and Food Safety
Over time, food particles and grease accumulate, creating a breeding ground for bacteria and mold. When you cook, these contaminants can vaporize and potentially transfer to your food, affecting both taste and safety. A clean oven ensures a more sanitary cooking environment, protecting your family from potential foodborne illnesses.
Improve Oven Efficiency and Longevity
Heavy grime buildup can act as an insulator, forcing your oven to work harder to reach and maintain desired temperatures. This not only wastes energy but can also lead to uneven cooking. Regular cleaning helps your oven operate more efficiently, saving you money on electricity bills and potentially extending the lifespan of your appliance.
Reduce Smoke and Unpleasant Odors
Burnt food residues and grease drips are primary culprits behind smoke and foul odors emanating from your oven during use. These can quickly fill your kitchen and home, making cooking an unpleasant experience. A clean oven significantly minimizes smoke and eliminates those lingering, undesirable smells, contributing to a fresher home environment.
Understanding the Magic: Baking Soda and Vinegar
The brilliance of this cleaning method lies in the synergistic power of two humble, non-toxic ingredients: baking soda and white vinegar. Separately, they are excellent cleaners, but together, they create a formidable grime-fighting duo.
The Power of Baking Soda
Sodium bicarbonate, commonly known as baking soda, is a mild abrasive that excels at scrubbing away dried-on food particles without scratching surfaces. Its alkaline nature also helps to neutralize acidic grease and odors, making it an excellent deodorizer. It works by absorbing stains and breaking down organic compounds, transforming tough grime into a softer, more manageable substance.
The Acidity of Vinegar
White vinegar, a dilute solution of acetic acid, is a natural disinfectant and degreaser. Its acidic properties are superb for cutting through grease and dissolving mineral deposits. When combined with baking soda, the chemical reaction creates a fizzing action that further helps to lift and loosen stubborn grime, making it easier to wipe away.
Synergistic Cleaning Action
The combination of baking soda and vinegar creates a powerful, non-toxic cleaning agent. The reaction between the alkaline baking soda and acidic vinegar produces carbon dioxide gas, which manifests as bubbles. These bubbles physically help to dislodge dirt, while the individual properties of each ingredient work to break down grease and lift stains, providing a deep clean without harsh chemicals or fumes.
Getting Started: Preparation is Key
Before you begin the actual cleaning process, a little preparation can go a long way in ensuring efficiency and safety.
Safety First
While this method uses natural ingredients, it’s always wise to ensure your oven is completely cool before applying any cleaning solution. For heavily soiled ovens, you might consider wearing rubber gloves to protect your hands, though it’s typically not required given the gentle nature of the ingredients.
Pre-Cleaning Steps
Start by removing all oven racks, baking sheets, and any loose debris from the oven interior. Use a dry paper towel or a spatula to scrape away any large, loose food particles. The less large debris you have, the more effective your cleaning paste will be on the stuck-on grime.
Materials You’ll Need: Simple & Accessible
Gathering your materials before you start will streamline the entire process. You likely already have these items in your kitchen.
- Sponge (preferably a non-abrasive one)
- 1 cup of baking soda
- 1/4 cup of water
- 1/8 cup of white vinegar
- Mixing bowl
- Optional: Spray bottle for additional vinegar rinse, clean cloths
Step-by-Step Guide to a Sparkling Oven
Follow these easy steps to unveil a gleaming oven that looks brand new.
Step 1: Create and Apply the Cleaning Paste
The secret to this method lies in creating a potent yet gentle cleaning paste that will work its magic on the baked-on grime.
- Mix the Solution: In a mixing bowl, combine 1 cup of baking soda with 1/4 cup of water and 1/8 cup of white vinegar. Mix thoroughly until you achieve a consistent, spreadable paste. The consistency is crucial here; it should be thick enough to cling to the oven surfaces without dripping. If it’s too thick, add a tiny bit more water; if too thin, a pinch more baking soda. The reaction between the baking soda and vinegar will cause a slight fizzing – this is normal and indicates the active cleaning process is beginning.
- Apply the Paste: Once your paste is ready, grab your sponge or an old brush. Generously dab and spread the mixture all over the interior surfaces of your oven, paying special attention to areas with heavy grease and burnt-on food. Avoid coating the heating elements directly. Ensure an even layer, completely covering the stubborn spots. For optimal contact, you might gently work the paste into the grime with your sponge.
- The Heating Process: This is where the “Cleverly” hack truly shines. With the cleaning paste applied, close your oven door. Set your oven to run at 200 degrees Fahrenheit (approximately 93 degrees Celsius) for 45 minutes. This gentle heat helps to activate the cleaning agents in the paste, softening and lifting the grime more effectively than a cold application alone. The low heat creates a warm, moist environment that allows the baking soda and vinegar to penetrate deeply into baked-on residues, making them much easier to remove. Ensure you stay home during this process and exercise caution when opening the oven later.
Step 2: Wipe Away the Grime
After the heating process, the real magic happens as you effortlessly remove the dissolved grime.
- Cool Down & Initial Wipe: After 45 minutes, turn off your oven and allow it to cool down completely. This is crucial for safety. Once cooled, use your sponge to begin wiping away the now softened grime and the dried paste. You’ll be amazed at how easily the layers of grease and burnt food lift off the surfaces. For very thick areas, you might need to apply a little gentle pressure.
- Rinsing and Final Touches: Once the majority of the paste and grime is removed, it’s time to rinse. Dip your sponge or a clean cloth in plain water and wipe down the oven interior thoroughly. Repeat this rinsing process several times, using fresh water each time, until all baking soda residue is gone and the surfaces are gleaming. For an extra shine and to ensure all traces of baking soda are neutralized, you can lightly mist the interior with white vinegar from a spray bottle, then wipe it down with a damp cloth. This also helps with any lingering odors.
- Dealing with Stubborn Spots: For any particularly stubborn spots that remain, you can create a small amount of fresh paste and apply it directly, letting it sit for an additional 15-30 minutes before wiping away. A non-scratch scrubber or a gentle spatula can also be used carefully for tougher, localized areas.
Tips for the Best Oven Cleaning Results
To maximize the effectiveness of this natural cleaning method and ensure your oven stays cleaner for longer, consider these additional tips:
Don’t Forget the Racks
While the paste works on the oven interior, don’t neglect your oven racks. For heavily soiled racks, you can soak them in a bathtub with hot water and a few dishwasher detergent tablets or a generous amount of baking soda and vinegar. Let them soak overnight, then scrub and rinse them clean. Alternatively, you can apply a baking soda paste to the racks, let it sit for a few hours, and then scrub.
Ventilation is Your Friend
Although this method is chemical-free, it’s always a good idea to ensure good ventilation when cleaning. Open a window or turn on your kitchen fan to allow any steam or minor odors to dissipate quickly.
Regular Maintenance is Key
The best way to avoid a grueling oven cleaning session is to clean it regularly. Wipe up spills as they happen (once the oven is cool) and perform a quick baking soda and vinegar clean every few months. This prevents grime from building up and becoming a major challenge.
Safety Precautions
Always ensure your oven is unplugged or the circuit breaker is off when performing deep cleaning, especially if you are reaching into tight spaces. Never spray water directly into electrical components. While non-toxic, avoid getting the paste into your eyes.
The Benefits of This Natural Method
Choosing a natural oven cleaning solution offers numerous advantages over traditional chemical cleaners:
Eco-Friendly and Non-Toxic
Baking soda and vinegar are biodegradable and pose no threat to the environment. More importantly, they are safe for your family and pets, eliminating concerns about inhaling harsh fumes or leaving toxic residues in your oven, which can affect the taste and safety of your food.
Cost-Effective Solution
These pantry staples are incredibly inexpensive compared to specialized oven cleaners. You’ll save money while achieving superior results, making this method a smart choice for any household budget.
Effortless Cleaning
The beauty of this hack is its simplicity and minimal physical effort required. The gentle heating process and the power of baking soda and vinegar do most of the hard work for you, dissolving tough grime so it can be easily wiped away without strenuous scrubbing.
Conclusion: Embrace a Spotless Oven with Ease
Oven cleaning no longer has to be a daunting task you postpone indefinitely. With this clever, natural hack using baking soda, water, and vinegar, you have a powerful, eco-friendly, and incredibly effective solution at your fingertips. By following these simple steps and incorporating regular maintenance, you can effortlessly maintain a sparkling clean oven that not only looks great but also promotes better hygiene, efficiency, and extends the life of your appliance.
So, ditch the chemicals, embrace the power of natural ingredients, and prepare to be amazed by how easy it is to achieve a gleaming, spotless oven. Try this method today and reclaim your weekends from the chore list!
RELATED: Explore More Natural Cleaning Hacks: How to Clean an Oven with Baking Soda and Vinegar (No Heat Method)