
Create Your Own Cosmic Oasis: The Easy DIY Cardboard Star Lamp Project
Imagine transforming your ordinary bedroom into a tranquil cosmic haven, where thousands of stars twinkle softly on your walls and ceiling. This isn’t a dream from a sci-fi movie; it’s an incredibly fun, easy, and rewarding DIY project you can undertake right at home. Forget about expensive store-bought gadgets; with just a few simple materials, you can craft your very own mesmerizing star lamp. The results are truly spectacular, bringing a unique blend of artistry and serenity to any space.
Unleash the Magic: Transform Your Space with a Handmade Star Projector
There’s a certain undeniable charm that comes with handmade items, and a DIY star lamp is no exception. It’s a project that promises not only a beautiful decorative piece but also a deeply satisfying creative experience. Many have explored making similar lamps from tin cans, but we’ve found that using cardboard offers a significantly easier and more enjoyable process, especially when it comes to cutting out those intricate star shapes. This approach makes the project accessible to almost anyone, regardless of their DIY expertise.
The Brilliance of Handcrafted Ambiance: Why Choose a DIY Cardboard Star Lamp?
Opting for a DIY star lamp over a commercial one comes with a myriad of benefits. Firstly, it’s remarkably cost-effective. You’ll likely find most of the necessary materials already lying around your house or available at a minimal cost. Secondly, the creative freedom is boundless. You’re not restricted by generic designs; you can tailor your lamp to perfectly match your decor, personality, and desired effect. The satisfaction of illuminating a room with a creation of your own hands is truly priceless. It’s more than just a lamp; it’s a personal statement, a piece of art that reflects your unique style and ingenuity.
Bringing the Cosmos to Your Bedroom: The Mesmerizing Effect
The true magic of this DIY star lamp reveals itself when darkness falls. As you switch it on, a breathtaking spectacle unfolds: a constellation of stars dances across your walls and ceiling, casting a soft, enchanting glow. This “cool effect” instantly transforms any room into a peaceful haven, creating an unparalleled ambiance that soothes the mind and calms the spirit. It’s an ideal addition to a bedroom, where it fosters an atmosphere conducive to relaxation and restful sleep, mimicking the gentle embrace of a clear night sky.
This lamp also doubles as a wonderful nightlight for children. The sight of stars shining all over their room and ceiling captivates young minds, sparking their imagination and providing a comforting presence in the dark. We’ve witnessed firsthand how mesmerized children become; it’s like bringing the vast, wondrous outdoors inside, offering them their very own personal starry night right within the comfort of their home. It encourages dreams, fosters a sense of wonder, and helps turn bedtime into a magical adventure.
Gathering Your Galactic Craft Supplies: Materials You’ll Need
The beauty of this project lies in its simplicity and the accessibility of its materials. Here’s a detailed list of what you’ll need to embark on your celestial crafting journey:
- Cardboard: Choose sturdy yet easy-to-cut cardboard, such as a large delivery box, cereal boxes (layered), or craft cardboard sheets. The amount will depend on the size of your desired lamp.
- Cutting Tools: An X-Acto knife or craft knife is ideal for precise star cutting. Sturdy scissors can also work for larger shapes. Always use a cutting mat underneath to protect your surfaces.
- Pencil and Ruler: Essential for accurate measurements and drawing your designs.
- Strong Craft Glue or Hot Glue Gun: For securely assembling the cardboard panels. A hot glue gun offers quicker drying times.
- Lamp Base with a Socket and Cord: This is the foundation of your lamp. Ensure it’s stable and has a standard bulb socket. You can repurpose an old lamp base or purchase an inexpensive one.
- Light Bulb: This is crucial for both functionality and safety. We strongly recommend using a CFL (Compact Fluorescent Lamp) or an LED bulb. If using an incandescent bulb, it absolutely must not exceed 40 watts. Lower wattage is always safer to prevent heat buildup and potential fire hazards, as cardboard is flammable.
- Star Stencils or Templates: While you can freehand your stars, stencils provide uniformity and ease. You can print templates from online resources or create your own.
- Optional Decorative Elements: Paint (spray paint or acrylics), glitter, markers, or even translucent colored films can be used to add personal touches and enhance the lamp’s appearance.
Your Journey to a Star-Filled Room: Step-by-Step Guide to Crafting Your Celestial Masterpiece
Follow these detailed steps to bring your cardboard star lamp to life:
Step 1: Design Your Lampshade
Begin by planning the dimensions of your lampshade. A simple cube or rectangular box shape is easiest. Measure and mark your cardboard for the four side panels and a top lid. Decide on the size and density of the stars you want to project. Will they be tiny pinpricks of light or larger, more defined shapes? Sketch out your desired star patterns on each panel, ensuring an even distribution.
Step 2: Prepare Your Cardboard Panels
Carefully cut out the four side panels and the top lid from your cardboard according to your measurements. Ensure all edges are straight and clean for a seamless assembly later. You might also want to cut a base piece that will sit over your lamp’s existing base, providing stability and a neat finish.
Step 3: Puncturing the Stars
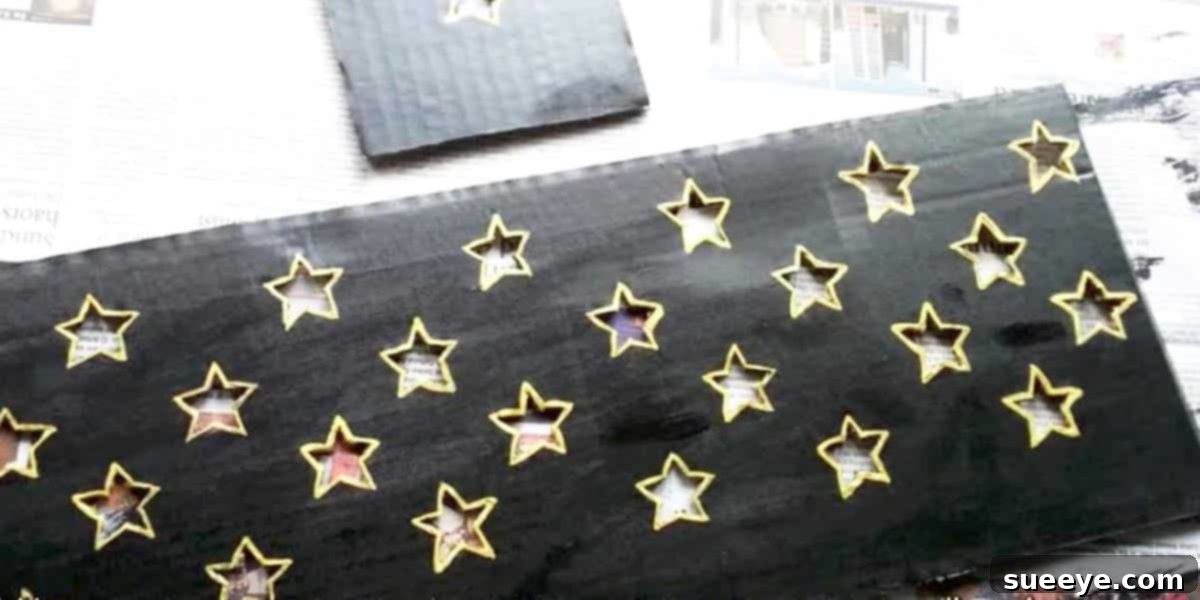
This is where the magic begins! Using your X-Acto knife or craft knife, meticulously cut out the star shapes you’ve drawn on each panel. Take your time, working slowly and carefully to achieve clean cuts. For smaller, more intricate stars, a sharp pointed tool might be helpful to create initial holes before refining them. Safety is paramount here; always cut away from yourself on a protected surface.
Step 4: Assembling the Structure
With all your star-perforated panels ready, it’s time to assemble the lampshade. Apply a strong craft glue or hot glue along the edges of one side panel and attach it to another, forming a corner. Continue this process until all four side panels are securely glued together, forming an open box. Ensure the corners are square and the structure is stable. Hold or clamp the pieces together until the glue sets.
Step 5: Securing the Top and Base
Now, prepare the top lid. You might want to create a small opening in the center of the lid, if your lamp base has an upright component that needs to pass through, or simply make sure the lid rests snugly on top. For the base, if you’ve cut a separate piece, you can glue it to the bottom of your cardboard box. Crucially, the entire cardboard shade must fit securely and stably over your existing lamp base without wobbling.
Step 6: Powering Up Your Stars
Once your cardboard lampshade is fully assembled and dry, it’s time for the moment of truth. Carefully place the finished lampshade onto your lamp base. Insert your chosen light bulb (remembering the safety precautions about wattage). Plug in your lamp and switch it on. Dim the room lights and behold your handcrafted starry night! Adjust the placement for the best projection effect.
Step 7: Personalize and Perfect
Don’t stop at just stars! This is your opportunity to add personal flair. You can paint the exterior of the cardboard for a decorative touch, use glitter for an extra twinkle, or even add translucent colored films behind some stars for a multi-hued projection. Let your creativity guide you in making this lamp uniquely yours.
Important Precautions for Your Starry Night: Safety First
While this is a fun DIY project, safety must always be a top priority, especially when working with electricity and materials like cardboard. We cannot stress enough the importance of using a light bulb that does not exceed 40 watts if you opt for an incandescent bulb. Even better, for maximum safety and energy efficiency, we highly recommend using a CFL (Compact Fluorescent Lamp) or an LED bulb.
Incandescent bulbs generate significant heat, and prolonged exposure of cardboard to excessive heat can lead to a fire hazard. CFLs and LEDs, on the other hand, produce very little heat, making them significantly safer for this type of project. Always ensure there is adequate ventilation around the bulb and that no part of the cardboard directly touches the bulb itself. Also, confirm that your lamp base and wiring are in good condition and securely connected. If children are using the lamp, always supervise them and educate them about electrical safety.
Unleash Your Inner Astrologist and Designer: Customization Beyond the Basic Star
The beauty of DIY lies in its infinite possibilities for customization. While a simple star pattern is classic and beautiful, there’s no need to limit your imagination. Consider making lampshades of different shapes – perhaps a hexagonal prism, a cylindrical design, or even an irregular, abstract form, as long as they fit your lamp base securely. Vary the sizes and densities of your stars for a more dynamic projection. You could even cut out other celestial bodies like moons, planets, or entire constellations. Imagine a themed lampshade for a child’s room featuring rockets and spaceships alongside stars!
Beyond the cut-outs, explore the world of color. Painting the inside of your cardboard shade a different color than the outside can create interesting light effects. You can also experiment with different types of cardboard – some have textured surfaces that could add an extra dimension to your projections. The possibilities are truly endless, allowing you to create multiple shades to change out as your mood or decor evolves.
Embrace Efficiency, Enjoy Creativity: The Art of “Shortcuts” in DIY
In today’s fast-paced world, finding ways to streamline tasks without sacrificing quality is a skill to be celebrated. This project perfectly embodies the spirit of smart DIY, where “shortcuts” aren’t about cutting corners on quality, but rather finding the most efficient and effective path to a beautiful outcome. Choosing cardboard over tin cans for this project, for instance, is a prime example of such a shortcut. It simplifies the cutting process dramatically, making the project more accessible and less time-consuming, while still yielding spectacular results. Embrace this philosophy; be the “Queen of Shortcuts” in your DIY endeavors, because with all the wonderful DIY projects available today, there’s no reason not to make your house pretty in the smartest way possible!
Finding the Perfect Spot for Your Cosmic Creation: Placement and Enjoyment
Once your DIY star lamp is complete, carefully consider its placement to maximize its enchanting effect. Bedrooms are an obvious choice, offering a serene atmosphere for sleep or quiet reflection. It’s also perfect for a child’s room, transforming bedtime into a magical experience. Beyond sleeping spaces, imagine placing it in a cozy reading nook, a meditation corner, or even a living room during an evening gathering to create a unique and conversation-starting ambiance. It makes a truly unique and thoughtful gift for friends and family, allowing them to experience their own starry night.
Your Own Personal Galaxy Awaits: Conclusion
This DIY cardboard star lamp project offers an incredibly rewarding experience, proving that stunning home decor doesn’t require complex skills or a hefty budget. With just a few basic materials and a bit of creativity, you can bring the magic of a starry night sky indoors, creating a peaceful, mesmerizing, and utterly unique ambiance in any room. It’s an opportunity to express your creativity, embrace the satisfaction of handmade crafts, and enjoy the beautiful, tranquil glow of your very own cosmic creation. We encourage you to give this wonderful project a try and watch as your home is transformed into a personal galaxy. For visual guidance, many step-by-step tutorials are available online, such as those provided by GuideCentral English, which can walk you through the process with ease.