
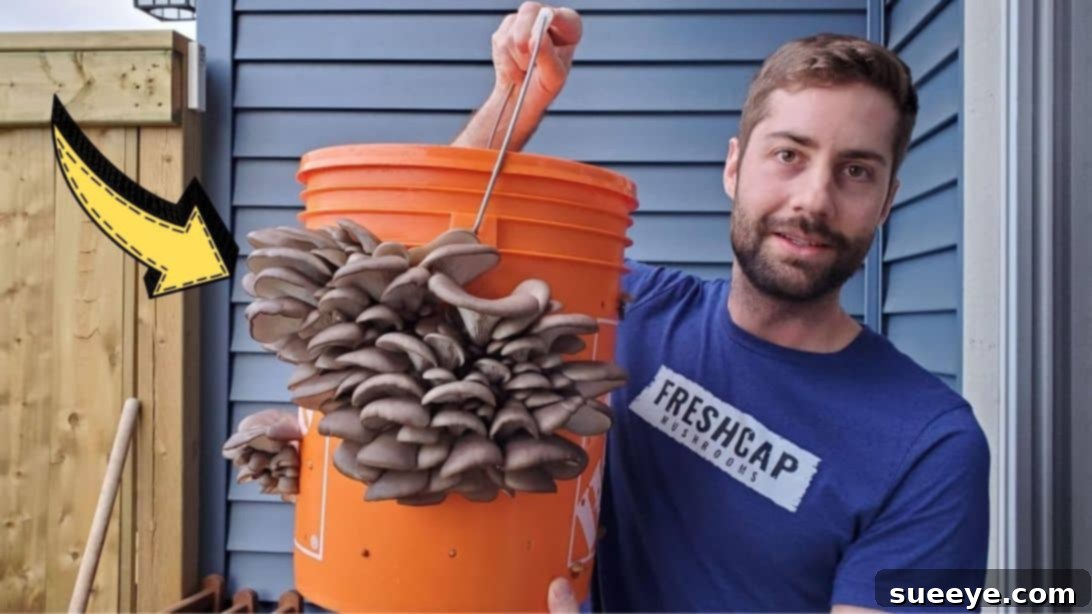
Imagine having an endless supply of fresh, gourmet mushrooms right in your kitchen. Thanks to an incredibly straightforward and effective video tutorial by FreshCap Mushrooms on YouTube, this dream can easily become a reality. You can learn how to cultivate delicious oyster mushrooms at home with minimal effort and materials. This guide will walk you through the process of transforming a common 5-gallon bucket into a thriving mushroom farm, ensuring you never run out of these versatile fungi. It’s an ideal project for beginners and seasoned growers alike, promising a satisfying harvest with just a few simple steps.
How to Grow Abundant Oyster Mushrooms at Home in a 5-Gallon Bucket
Growing your own mushrooms at home is an immensely satisfying endeavor, offering fresh, organic produce right at your fingertips. The 5-gallon bucket method is particularly popular for its simplicity, efficiency, and suitability for growing fast-colonizing species like oyster mushrooms. This technique requires minimal space, a small investment in materials, and yields impressive results, making it perfect for urban gardeners or anyone looking to add a unique element to their home cultivation projects. Let’s delve into why this method is a game-changer for mushroom enthusiasts and how you can get started today.
Why Cultivate Your Own Oyster Mushrooms?
There are numerous compelling reasons to embark on the journey of home mushroom cultivation:
- Unbeatable Freshness and Flavor: Store-bought mushrooms often travel long distances, impacting their freshness. Homegrown oyster mushrooms offer a delicate flavor and firm texture that is truly unparalleled. You’ll taste the difference in every dish.
- Cost-Effectiveness: While there’s an initial outlay for spawn and a few basic tools, the cost per pound of homegrown mushrooms quickly becomes significantly lower than retail prices, especially when you consider multiple flushes from a single block.
- Health Benefits: Oyster mushrooms are packed with vitamins, minerals, and antioxidants. They are known to support immune health and provide a good source of dietary fiber. Growing them yourself ensures they are free from unwanted pesticides or chemicals.
- Sustainable and Eco-Friendly: Mushroom cultivation can be a highly sustainable practice, often utilizing agricultural waste products as a substrate. By growing your own, you reduce your carbon footprint associated with transportation and packaging.
- Educational and Rewarding Hobby: Witnessing the lifecycle of fungi, from tiny spores to mature fruiting bodies, is fascinating. It’s a hands-on learning experience that connects you with nature and offers a tangible reward for your efforts.
- Culinary Versatility: Oyster mushrooms are incredibly versatile in the kitchen. They can be sautéed, grilled, roasted, added to soups, stir-fries, or even breaded and fried for a delicious meat substitute. Having a constant supply encourages culinary experimentation.
Understanding Oyster Mushrooms
Oyster mushrooms (Pleurotus ostreatus) are one of the easiest and fastest-growing gourmet mushrooms, making them perfect for home cultivators. They are resilient, adaptable to various substrates, and produce abundant yields. Their distinctive fan-like caps and mild, savory flavor make them a favorite among chefs and home cooks alike. They thrive in moderate temperatures and appreciate good air exchange, conditions easily replicated with the 5-gallon bucket method.
Essential Materials for Your Mushroom Farm
Gathering the right materials is the first crucial step towards a successful mushroom harvest. What makes this method so appealing is that most items are readily available and affordable:
- A 5-Gallon Food-Grade Bucket: Crucial for safety and successful growth. Ensure it’s clean and has not previously held harsh chemicals. Food-grade buckets are designed to prevent chemical leaching into your substrate.
- Aspen Wood Chips: This serves as your primary substrate. Aspen wood chips are an excellent choice because they provide the necessary nutrients and structure for oyster mushroom mycelium to thrive. You can often find them at pet supply stores (for animal bedding, ensure it’s untreated and free of additives) or garden centers. Other hardwood chips like oak or maple can also work, but avoid softwood chips like pine or cedar.
- Oyster Mushroom Grain Spawn: This is the “seed” for your mushrooms. Grain spawn consists of a sterilized grain (like rye or millet) colonized by oyster mushroom mycelium. Purchasing high-quality, healthy spawn from a reputable supplier is vital for success. The vigor of your spawn directly impacts your yield.
- Drill and ¼-inch Drill Bit: Essential for creating air holes and fruiting points on your bucket. The ¼-inch size is ideal for allowing fresh air exchange while minimizing moisture loss and entry of contaminants.
Step-by-Step Guide: Cultivating Oyster Mushrooms in a 5-Gallon Bucket
Follow these detailed steps to set up your very own mushroom growing system:
Step 1: Preparing Your Grow Bucket
The first crucial step is to prepare your 5-gallon bucket. Begin by thoroughly cleaning the bucket with soap and water, then rinse it completely and allow it to air dry. This ensures no contaminants hinder your mushroom growth. Once clean, use your ¼-inch drill bit to create an array of holes around the bucket. Drill holes a few inches apart from each other, ensuring they cover all sides of the bucket from top to bottom. These holes are essential for two primary reasons: they allow for fresh air exchange, which is vital for mycelial health, and they serve as the exit points where your mushrooms will eventually fruit. Adequate spacing ensures even fruiting and prevents overcrowding. After drilling, give the bucket another quick wipe to remove any plastic debris.
Step 2: Hydrating and Pasteurizing the Substrate
Next, prepare your aspen wood chips. Place the desired amount of wood chips into a large, heat-resistant container – a cooler or a large pot works well. Then, pour boiling hot water over the wood chips until they are fully submerged. It’s important to place something heavy on top, such as a plate or a clean brick, to keep all the chips fully immersed in the hot water. This process, known as pasteurization, helps to reduce the number of competitor microbes that could contaminate your mushroom culture, while simultaneously hydrating the wood chips to an optimal moisture level. Allow the wood chips to soak for a minimum of 8 hours, or preferably overnight, until they have completely cooled down to room temperature. This ensures proper hydration and cooling before the next step.
Step 3: Inoculation: Spreading the Mycelium
Once the wood chips are cool to the touch, it’s time to drain off all the excess water thoroughly. You want the chips to be moist but not soaking wet. A good test is to squeeze a handful – only a few drops of water should come out. Now, working in a clean environment, begin layering the wood chips and your oyster mushroom grain spawn inside the prepared 5-gallon bucket. Start with a layer of wood chips, about 1½ inches thick, covering the bottom of the bucket. Then, sprinkle a generous amount of grain spawn evenly over this layer. Repeat this layering process, alternating between wood chips and grain spawn, until the bucket is nearly full, leaving about 2-3 inches of space from the top. Ensure the grain spawn is well distributed throughout the wood chips to allow the mycelium to colonize efficiently. Cleanliness is paramount during this stage to prevent contamination.
Step 4: Incubation: The Colonization Period
After layering, firmly place the lid on the bucket. This helps maintain a humid environment and protects the growing mycelium. Now, find a suitable location for your bucket to colonize. It should be a dark, cool, and undisturbed spot, ideally with a consistent temperature between 65-75°F (18-24°C). Avoid direct sunlight as it can inhibit mycelial growth and promote undesirable contamination. Over the next 2-3 weeks, the mycelium (the white, root-like structure of the fungus) will spread from the grain spawn, colonizing the entire substrate of wood chips. You’ll observe a white fuzzy growth emerging from the holes and covering the wood chips. Patience is key during this phase; avoid opening the lid frequently. Ensure the environment is not too dry, which can hinder colonization, nor too wet, which can encourage mold.
Step 5: Inducing Fruiting Conditions
Once the mycelium has fully colonized the wood chips – you’ll see a thick, white growth throughout the holes – it’s time to introduce fruiting conditions. This involves providing light, fresh air exchange (FAE), and higher humidity. Move your bucket to a location with ambient light (indirect sunlight is fine, but not direct) and good air circulation. Oyster mushrooms initiate pinning (the formation of tiny mushroom primordia) in response to these environmental cues. You may need to mist the surface of the bucket and the emerging pins several times a day to maintain high humidity (around 85-95%). Within a couple of days, you should start to see small mushroom “pins” emerging from the drilled holes. These will rapidly grow into mature mushrooms under optimal conditions. If your environment is too dry, consider placing a humidifier nearby or misting more frequently.
Step 6: Harvesting Your Fresh Oyster Mushrooms
The final and most rewarding step is harvesting your bounty! Oyster mushrooms grow incredibly fast once they start pinning. They are typically ready for harvest when their caps begin to flatten out or just before the edges start to curl upwards. Harvesting them at the right time ensures optimal flavor and texture. To harvest, gently twist the entire cluster of mushrooms from the bucket. Avoid cutting them, as leaving stubs can lead to rot and potentially attract pests. Be careful not to damage the surrounding mycelium or other emerging pins. After your first harvest (known as a “flush”), you can expect several more flushes from the same bucket, although subsequent yields may be slightly smaller. Keep the bucket in fruiting conditions, continuing to mist and provide fresh air, and new mushrooms should emerge in about 7-14 days.
Caring for Subsequent Flushes
To encourage additional flushes, continue to provide the bucket with adequate fresh air, humidity, and indirect light. After harvesting, you can gently soak the entire block (if possible without dislodging too much substrate) in cool water for 4-6 hours to rehydrate the mycelium, then return it to fruiting conditions. This rehydration helps kickstart the next cycle of growth. You can typically get 2-4 flushes from a single bucket before the nutrients in the wood chips are depleted and the block becomes less productive. Once the block stops producing or shows signs of green or black mold contamination, it’s time to retire it.
Troubleshooting Common Mushroom Growing Issues
While growing oyster mushrooms in a bucket is generally straightforward, you might encounter a few common issues:
- No Fruiting: This is often due to insufficient fresh air exchange, low humidity, or incorrect temperature. Ensure your growing environment meets the optimal conditions for fruiting.
- Leggy or Deformed Mushrooms: “Leggy” mushrooms (long stems, small caps) typically indicate a lack of fresh air. Increase ventilation in your growing area. Deformed mushrooms can also be a sign of fluctuating humidity or temperature.
- Contamination: Green or black fuzzy patches are signs of mold contamination. This usually occurs if the substrate wasn’t properly pasteurized, or if hygiene wasn’t maintained during inoculation. If contamination appears, it’s best to discard the entire block away from your other cultures to prevent spread.
- Dry Pins: If your pins start to form but then stop growing and dry up, your humidity is too low. Increase misting frequency or introduce a humidifier.
By observing your mushrooms and adjusting environmental factors, you can often overcome these challenges.
Conclusion: Your Own Endless Supply
Growing oyster mushrooms in a 5-gallon bucket is an incredibly rewarding and surprisingly easy project that yields fresh, delicious results. This method, popularized by insights from experts like FreshCap Mushrooms, demystifies mushroom cultivation and makes it accessible to anyone with a spare bucket and a desire for fresh, homegrown food. From preparing your substrate to witnessing the rapid growth of your fungi, each step is a journey into the fascinating world of mycology. So, gather your materials, follow these simple directions, and prepare to enjoy an unlimited supply of your very own gourmet oyster mushrooms. Happy growing!
*These amazing images are all credited to FreshCap Mushrooms via YouTube. Check his other content and follow for more inspiring mushroom cultivation guides!