
Unlocking High-End Style: Your Guide to DIY Pottery Barn & Farmhouse Decor on a Budget
The allure of a beautifully curated home, adorned with timeless pieces that exude warmth and character, is undeniable. For many, this dream aesthetic often comes with a hefty price tag, particularly when gazing at the stunning collections from renowned brands like Pottery Barn. Yet, what if we told you that achieving that coveted, rustic farmhouse elegance – reminiscent of Joanna Gaines’ iconic Fixer Upper style – doesn’t require breaking the bank? Welcome to the world of DIY, where creativity meets cost-efficiency, allowing you to craft breathtaking decor for a fraction of the retail price.
Imagine a magnificent farmhouse dining table, robust and inviting, serving as the heart of your home. Now, imagine creating it yourself for an astonishing $55! This isn’t a pipe dream; it’s a testament to the power of smart DIY projects. This article delves into how you can replicate the Pottery Barn and Fixer Upper look, starting with an incredible farmhouse table project and expanding into a myriad of other charming decor items, all crafted with your own hands and tailored to your unique taste.
The Irresistible Charm of Farmhouse & Pottery Barn Aesthetics
Before we dive into the ‘how-to,’ let’s understand *why* this particular style captivates so many. The farmhouse aesthetic, often synonymous with Pottery Barn’s curated collections and Joanna Gaines’ transformative designs, embodies a perfect blend of comfort, functionality, and timeless appeal. It’s a celebration of natural materials, often distressed or reclaimed, bringing an organic texture and a sense of history into modern homes.
Key elements include:
- Warmth and Comfort: Plush textiles, inviting furniture, and soft lighting create a cozy atmosphere.
- Natural Materials: Wood, metal, wicker, and linen are staples, often with visible grains and textures.
- Rustic Elegance: A balance between raw, unfinished elements and refined, classic forms.
- Neutral Color Palettes: Whites, creams, grays, and soft earth tones dominate, offering a serene backdrop for decor.
- Functionality: Pieces are often practical and sturdy, designed for everyday use and lasting beauty.
This style transcends fleeting trends, offering a home environment that feels both lived-in and thoughtfully designed. It’s about creating spaces where memories are made, where family gathers, and where every piece tells a story.
The Pottery Barn Price Tag: A Common Dilemma
While the inspiration drawn from high-end retailers is abundant, the financial reality can often be a deterrent. Pottery Barn’s exquisite craftsmanship and designer appeal come with prices that reflect their quality and brand value. A single farmhouse dining table, for instance, could easily cost upwards of $1,000 to several thousand dollars. Accessorizing an entire room with their unique pieces can quickly become an astronomical expense, making the dream of a Pottery Barn-inspired home feel out of reach for many budget-conscious decorators.
This is precisely where the beauty of DIY shines. It offers a liberating alternative, empowering you to achieve that aspirational look without compromising your financial goals. By leveraging readily available materials, a touch of ingenuity, and some elbow grease, you can bypass the retail markup and infuse your home with personalized, designer-inspired charm.
The Ultimate DIY Project: A Farmhouse Table for Under $60!
The centerpiece of many farmhouse homes is undoubtedly the dining table. It’s where meals are shared, conversations flow, and life unfolds. The idea of crafting a substantial, stylish farmhouse table for a mere $55 might sound impossible, but it’s a brilliant reality, as demonstrated by clever DIY enthusiasts. This project often involves an ingenious ‘IKEA hack’ or similar approach, transforming inexpensive, mass-produced furniture into a custom, high-end piece.
Understanding the Core Concept: The IKEA Lack Table Hack
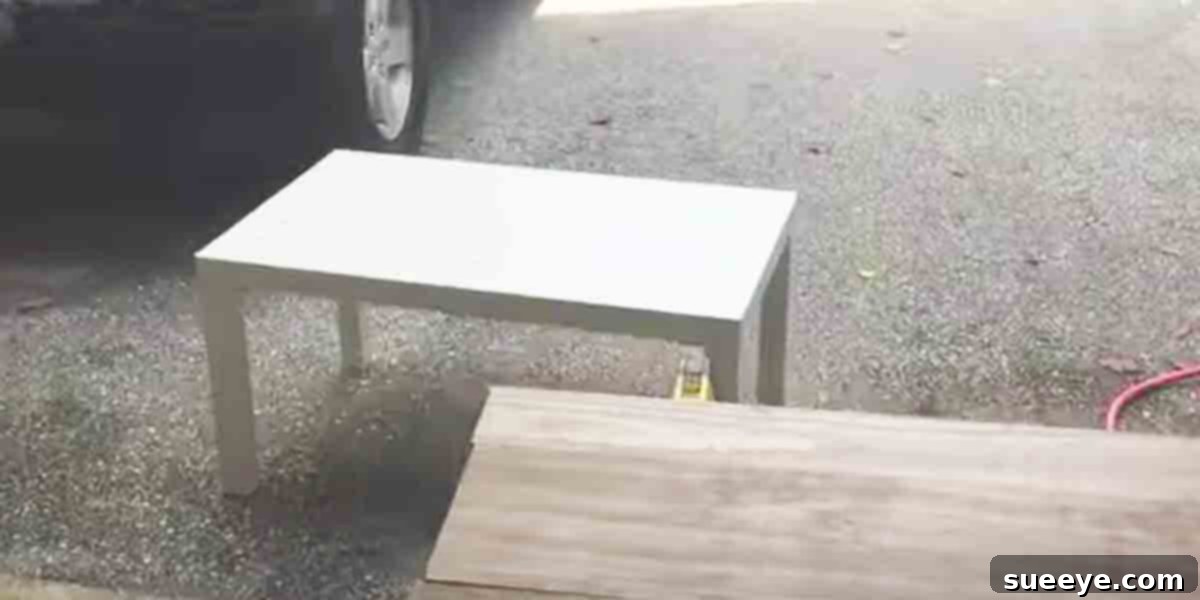
Many successful budget-friendly furniture transformations begin with an affordable base. A common starting point for a project like this is an IKEA Lack table, often available for around $44.99. These tables are simple, lightweight, and provide an excellent structural foundation for a custom overlay. The magic happens when you build upon this basic frame with inexpensive lumber, transforming its humble origins into something truly magnificent.
Materials You’ll Likely Need:
- An inexpensive base table (e.g., IKEA Lack table or a similar sturdy, flat-packed table).
- Common lumber: Pine boards or similar inexpensive wood planks for the tabletop and side skirts. The exact quantity will depend on your desired table dimensions.
- Wood screws and wood glue: For strong, durable assembly.
- Sandpaper (various grits): For smoothing surfaces and preparing for finishing.
- Wood stain: Choose a color that matches your desired farmhouse aesthetic (e.g., dark walnut, weathered gray, classic oak).
- Wood sealer/polyurethane: To protect the finished surface and ensure longevity.
- Optional: Wood filler (for small imperfections), distressing tools (chains, hammers, rasps for an aged look).
Essential Tools for Your Project:
- Measuring tape and pencil: For accurate measurements.
- Circular saw or miter saw: For precise cuts of your lumber.
- Drill/driver: For pre-drilling holes and securing screws.
- Clamps: To hold pieces securely while glue dries or screws are fastened.
- Orbital sander (optional, but highly recommended): For efficient sanding.
- Brushes or rags: For applying stain and sealer.
- Safety gear: Goggles, gloves, and ear protection are crucial.
Simplified Steps to Your $55 Farmhouse Table:
While specific tutorials (like the inspiring one from ‘BeisforBeauty’ often referenced for such projects) will offer exact dimensions and detailed instructions, the general process involves:
- Prepare Your Base: Assemble your inexpensive base table according to its instructions. This forms the sturdy core.
- Cut and Attach Top Planks: Measure and cut your chosen lumber into planks for the new tabletop. Arrange them on top of your base. Using wood glue and screws from underneath (or through pocket holes), securely attach these planks to your base table, ensuring a flat, even surface.
- Add Apron/Side Skirts (Optional): For a more substantial, authentic farmhouse look, you can add additional planks around the sides, creating a decorative “apron” that hides the original base and gives the table more visual weight.
- Sand Thoroughly: Once assembly is complete and glue is dry, sand all wood surfaces thoroughly, starting with a coarser grit and moving to a finer one. This creates a smooth finish ready for staining.
- Distress (Optional): If you desire a rustic, aged appearance, gently distress the wood using various tools to create dents, scratches, and worn edges.
- Apply Stain: Following manufacturer instructions, apply your chosen wood stain. Wipe off excess for an even finish. You may apply multiple coats to achieve your desired depth of color.
- Seal and Protect: Once the stain is completely dry, apply several coats of a durable wood sealer or polyurethane. This protects the table from spills and wear, making it a functional and lasting piece.
The result is a custom, sturdy farmhouse table that looks indistinguishable from its high-end counterparts, all for a fraction of the cost. This feeling of accomplishment, combined with the significant savings, is incredibly rewarding!
Beyond the Table: More Pottery Barn & Fixer Upper Inspired DIY Projects
The farmhouse table project is just the beginning. The principles of transforming inexpensive materials into high-end decor can be applied to countless other items. If you adore rustic farmhouse decor, there’s a world of DIY opportunities awaiting you. Here are some ideas to continue your journey:
- Rustic Wall Shelves: Create floating shelves or simple bracketed shelves using reclaimed wood or common lumber, stained to match your farmhouse table. These are perfect for displaying decor, cookbooks, or everyday essentials.
- Distressed Signs & Wall Art: Craft your own inspirational quotes or farmhouse-themed artwork on wood planks. Simple stenciling and distressing techniques can give them that beloved weathered look.
- Entryway Benches & Consoles: Repurpose old dressers or build simple frames from scratch, then add rustic wood tops and a fresh coat of paint or stain to create charming entryway furniture.
- Decorative Crates & Storage: Transform plain wooden crates into stylish storage solutions by painting, staining, or adding stenciled labels. They add rustic charm while keeping clutter at bay.
- DIY Lighting Fixtures: With a bit more skill, you can craft industrial-style sconces or pendant lights using metal pipes and Edison bulbs, mimicking popular designer fixtures.
- Picture Frames & Mirrors: Frame plain mirrors or prints with custom-made rustic wood frames, often made from fence pickets or pallet wood for an authentic touch.
These projects allow you to expand the cohesive farmhouse aesthetic throughout your home, from the living room to the bedroom and even the bathroom. Each piece you create contributes to a unique, personalized environment that truly reflects your style.
The Undeniable Advantages of DIY Home Decor
The benefits of embarking on a DIY home decor journey extend far beyond just saving money. While cost-effectiveness is a major driver, there are several other compelling reasons to embrace the handmade approach:
- Unbeatable Cost Savings: As exemplified by the $55 farmhouse table, DIY projects drastically cut down on expenses. You pay for materials, not brand names or labor.
- Personalization and Customization: You have complete control over the design, dimensions, colors, and finishes. This means your pieces perfectly fit your space and reflect your individual taste. No more settling for “close enough.”
- Sense of Accomplishment and Pride: There’s an unparalleled satisfaction that comes from stepping back and admiring something beautiful you’ve created with your own hands. It adds a deeper connection to your home.
- Learning New Skills: DIY projects offer a fantastic opportunity to learn woodworking, painting, upholstery, and other valuable crafting skills that can be applied to future projects.
- Sustainability and Upcycling: Many DIY projects involve repurposing old furniture or using reclaimed materials, which is an environmentally friendly way to decorate.
- Therapeutic Process: For many, the act of creating is a relaxing and meditative process, offering a welcome break from daily stresses.
By choosing DIY, you’re not just decorating your home; you’re investing in your creativity, developing new skills, and building a space that is authentically yours.
Embark on Your DIY Journey Today!
There’s never been a better time to roll up your sleeves and dive into the exciting world of DIY home decor. With abundant online resources – from YouTube tutorials to detailed blogs and Pinterest boards – finding inspiration and guidance is easier than ever. Projects like the $55 farmhouse table, popularized by creators like BeisforBeauty, serve as powerful motivators, demonstrating that a high-end, designer look is truly attainable on a modest budget.
Stop simply admiring the stunning interiors you see in magazines or on television. Take the plunge and start transforming your own home with custom-made pieces that tell your unique story. Embrace the rustic charm, the elegant simplicity, and the warm inviting nature of farmhouse and Pottery Barn-inspired decor. Your dream home is just a few DIY projects away, and nobody will ever know that your magnificent pieces weren’t purchased directly from the most exclusive showrooms!