
Mastering Quilt Binding: The Easy Backing Fabric Technique for Flawless Edges
For every quilter, the binding stage is the grand finale – the crucial step that transforms a collection of blocks and batting into a finished, functional work of art. While traditional binding methods often involve cutting, piecing, and attaching separate strips of fabric, there’s a wonderfully convenient and fabric-saving alternative that utilizes your quilt’s existing backing fabric. If you’re new to quilt binding, seeking a fresh approach, or simply want a method that’s both efficient and elegant, this technique, popularized by experts like Fat Quarter Shop on YouTube, is an absolute game-changer.
This innovative method offers several compelling advantages. By repurposing your quilt backing, you eliminate the need to purchase or cut additional binding fabric, making it an eco-friendly and economical choice. Furthermore, many find this technique considerably easier and quicker to execute than its traditional counterparts, especially when it comes to achieving neat corners. It’s also incredibly versatile; whether you prefer the precision of machine sewing or the meditative rhythm of hand stitching, this method accommodates both, meaning you don’t even need a sewing machine to achieve a professional finish. Dive in to discover how to give your quilts the perfect, durable, and beautiful edges they deserve.
Why Choose the Backing Fabric Binding Method?
Before we delve into the how-to, let’s explore why this particular binding technique stands out:
- Fabric Economy: The most apparent benefit is the significant saving on fabric. Instead of dedicating extra yardage for binding strips, you simply extend the backing fabric you’ve already purchased. This is particularly advantageous for larger quilts or when working with a limited fabric stash.
- Streamlined Process: Traditional binding often involves multiple steps: cutting strips, joining them to create one long piece, attaching the binding to the front, then folding and stitching to the back. This backing fabric method consolidates several of these steps, reducing prep time and the overall complexity of the process.
- Seamless Aesthetics: When executed correctly, the backing fabric binding creates a clean, continuous look from the back of your quilt that seamlessly wraps around to the front. This can be particularly appealing if you want your backing fabric to feature prominently on the quilt’s edge.
- Durability: By using the same robust fabric as your quilt’s backing, the binding itself tends to be very durable, designed to withstand the wear and tear a well-loved quilt endures over time.
- Beginner-Friendly: Without the need for precise strip cutting and joining, this method simplifies one of the most intimidating parts of quilt finishing for many novices. The folding and pressing steps are intuitive and easier to manage than manipulating long, narrow strips.
- Hand Sewing Option: For those who enjoy the quiet craft of hand sewing, or perhaps don’t own a sewing machine, this method is perfectly adaptable for hand stitching the final bind, offering a beautiful, personalized finish.
Essential Materials and Tools for Backing Fabric Binding
Gathering your supplies before you begin will ensure a smooth and enjoyable binding experience. Here’s what you’ll need, along with a few tips for selection:
- Needle and Coordinating Thread: For hand sewing, select a sharp, thin needle that glides easily through fabric. Choose a high-quality cotton or polyester thread that matches your backing fabric as closely as possible. A matching thread will make your stitches virtually invisible, contributing to a professional finish. If machine stitching the final bind (though the original method emphasizes hand sewing), choose a suitable machine needle and thread.
- Iron and Ironing Board: An iron is arguably your most important tool for this technique. Crisp, well-defined creases are fundamental to achieving precise folds and sharp corners. Ensure your iron is clean and capable of delivering consistent heat and steam.
- Fabric Clips (or Quilting Pins): While pins are traditional, fabric clips (like Wonder Clips) are often preferred for binding. They hold multiple layers of fabric securely without distorting the edges and are easy to attach and remove as you work.
- Sharp Scissors: For precise trimming of excess fabric and threads. A good pair of fabric shears is invaluable.
- Rotary Cutter and a Self-Healing Cutting Mat: These are essential for making straight, clean cuts. A rotary cutter will make trimming the batting and backing fabric much more accurate and efficient than scissors alone.
- Quilting Ruler (preferably 6″ x 24″ or similar): A clear acrylic ruler with visible markings is crucial for measuring and guiding your rotary cutter, ensuring your cuts are perfectly straight and consistent.
- Optional but Recommended: A thimble for hand sewing (protects your finger), and a seam ripper (just in case!).
Step-by-Step Guide: Mastering the Backing Fabric Binding Technique
This method breaks down into clear, manageable steps, guiding you from your raw quilt sandwich to a beautifully bound quilt.
Step 1: Preparing Your Quilt Edges and Initial Stitching
The foundation of a great binding lies in meticulous preparation. This step ensures your quilt edges are clean, stable, and ready for the folding process.
- Extend Your Backing Fabric: When you assemble your quilt sandwich (quilt top, batting, and backing), ensure you leave a generous overhang of the backing fabric. Aim for approximately 2 to 3 inches of extra backing fabric extending beyond the raw edges of your quilt top and batting on all four sides. This extra fabric is what you will fold over to create your binding, so do not trim it prematurely.
- Trim the Batting: Carefully trim away any excess batting that extends beyond the edges of your quilt top. The goal is to have the batting flush with the raw edge of your quilt top. To prevent accidentally cutting into your valuable backing fabric, gently fold the backing fabric out of the way before you make your cuts. A rotary cutter and ruler will help you achieve a perfectly straight and clean edge for the batting. This step is crucial for preventing bulk and ensuring a neat, flat binding.
- Stitch Around the Quilt Edge: With your batting trimmed flush, now it’s time to stabilize the quilt layers. Using a thread that closely matches your backing fabric, stitch all the way around the perimeter of your quilt. Place this stitch line as close to the raw edge of the quilt top/batting as possible, ideally about 1/8 inch or less from the edge. Strive for a straight stitch line, as this will serve as a guide for your subsequent folds. This initial stitching not only secures the layers but also helps prevent fraying of the quilt top’s raw edge.
- Trim the Backing Fabric to 1 Inch: Now, extend your backing fabric back over the raw edges. Using your rotary cutter and a quilting ruler, carefully trim the excess backing fabric so that it extends exactly 1 inch beyond the stitch line you just created (or 1 inch beyond the raw edge of the quilt top/batting). This precise 1-inch measurement is critical for ensuring a consistent binding width.
- Prepare the Corners with a 45-Degree Fold: At each of the four corners, gently fold the trimmed backing fabric inwards at a perfect 45-degree angle. This fold should create a crisp mitered corner. Once folded, press these corners firmly with a hot iron. The precise pressing at this stage will help establish the sharp angles needed for beautifully finished corners later on. This initial fold ensures that when you wrap the binding, the corners will meet neatly without excessive bulk or gaps.
Step 2: Folding, Securing, and Finalizing the Binding
With your edges prepared, it’s time to form the binding itself. This step involves a series of precise folds and pressing, culminating in the final stitching.
- First Fold: Concealing the Raw Edge: Starting along one edge of your quilt, take the trimmed 1-inch backing fabric and fold its raw edge inwards, so it meets precisely with the raw edge of your quilt top (or the initial stitch line you made). This fold effectively encases the raw edge, creating a clean, finished appearance. Press this fold down firmly with your iron to set the crease. This is your first line of defense against fraying and provides a neat base for the final bind.
- Second Fold: Forming the Binding Strip: Now, take the folded edge you just created and fold it over again, this time bringing it completely over the raw edge of the quilt top and onto the front of the quilt. This second fold creates the visible binding strip. Align this fold carefully so that the binding is a consistent width all the way along the edge. Press this fold down again with conviction. The cleaner and crisper these folds are, the more professional your final binding will look.
- Secure with Clips: As you make these folds and press them, secure the binding in place using fabric clips (or pins). Place clips at regular intervals, ensuring the folded binding stays flat and doesn’t shift. This is particularly important if you’ll be hand sewing, as it maintains the precise alignment.
- Repeat for All Sides: Continue this folding, pressing, and clipping process for all four sides of your quilt. Take your time, especially at the corners, ensuring that your previous 45-degree folds are still neat and that the new binding folds meet them cleanly.
- Trim Excess Fabric at Corners: Once all sides are folded and clipped, inspect your corners. You may find small bits of excess backing fabric poking out where the folds meet. Carefully trim these tiny bits away with your scissors, ensuring a smooth, mitered junction without bulk.
- Stitch the Folded Corners: To secure the mitered corners and give them a very tidy finish, hand stitch them together. This involves making a few tiny, discreet stitches to join the two folded edges of the backing fabric binding where they meet at the corner. This step closes any tiny gaps and reinforces the corner, as demonstrated in the video tutorial.
- Final Stitching – Hand or Machine: Now comes the final, satisfying step of securing the entire binding. While the original description highlights hand sewing, you have a choice here.
- Hand Sewing: Using your needle and matching thread, hand stitch the folded edge of the binding to the quilt top. Use small, invisible stitches (like a ladder stitch or blind hem stitch) that catch just a few threads of the quilt top fabric, making them nearly invisible on the front. This method provides a beautiful, heirloom-quality finish.
- Machine Sewing (Optional): If you prefer a machine finish, you can topstitch the binding down. Using your sewing machine and matching thread, stitch along the folded edge of the binding, catching the backing fabric underneath. This creates a durable, quick finish.
Once you’ve completed the final stitching around all four sides, your quilt is beautifully bound and complete!
Tips for Success and Avoiding Common Pitfalls
Even with a straightforward method, a few expert tips can elevate your results, and knowing what to avoid can save you frustration.
Pro Tips for Perfect Binding:
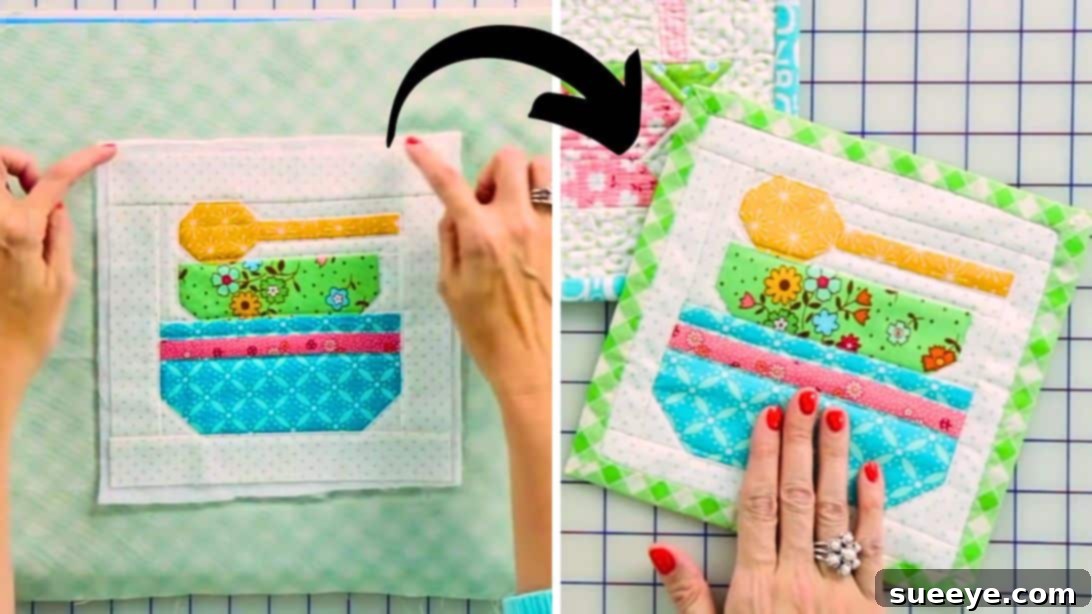
- Practice Makes Perfect: If this is your first time, consider practicing on a small quilt sandwich (e.g., a potholder or a placemat) before tackling your masterpiece.
- Press, Press, Press: We cannot overstate the importance of pressing at every stage. Sharp creases are the secret to crisp, professional-looking binding and mitered corners. Don’t rush this step.
- Measure Twice, Cut Once: Precision in trimming your batting and backing fabric is critical. A consistent 1-inch overhang directly translates to a consistent binding width.
- Good Lighting: Work in a well-lit area to ensure you can see your stitch lines, folds, and fabric edges clearly, especially if hand sewing.
- Patience is a Virtue: Binding is often considered the most enjoyable part of quilting by some, and the most tedious by others. Approach it with patience, and enjoy the process of bringing your quilt to completion.
- Use a New, Sharp Needle: Whether hand or machine sewing, a fresh, sharp needle will glide through your fabric layers more easily, preventing skipped stitches and fabric snags.
Common Pitfalls to Avoid:
- Uneven Trimming: If your initial 1-inch backing trim is inconsistent, your final binding width will also be uneven, creating a less professional look.
- Skipping Pressing Steps: Rushing through the pressing stages will result in rounded, sloppy edges and corners instead of sharp, defined ones.
- Not Enough Backing Fabric: If you don’t leave enough backing fabric overhang (less than 2 inches), you might struggle to create a full, secure binding. It’s better to have a little too much and trim it than not enough.
- Rushing the Corners: The corners are where the quality of your binding truly shows. Take extra time to ensure your 45-degree folds are precise and that the mitered edges meet cleanly.
- Inconsistent Stitching: Whether hand or machine, strive for consistent stitch length and placement. This contributes significantly to the overall aesthetic.
Conclusion: A Beautiful Finish Within Reach
The backing fabric binding technique is a remarkable testament to simplicity and ingenuity in quilting. It’s a method that not only saves time and fabric but also empowers quilters of all skill levels to achieve a polished, durable, and visually appealing finish. By following these detailed steps and incorporating the tips for success, you’ll find that binding your quilts no longer feels like a daunting task, but rather a rewarding final flourish.
Whether you’re finishing your very first quilt or looking to streamline your process, this technique offers a fantastic alternative to traditional methods. We encourage you to try it on your next project and experience the ease and elegance it brings. For a visual guide and further demonstration, be sure to check out the original tutorial by Fat Quarter Shop on YouTube. Happy quilting, and enjoy the satisfaction of seeing your handmade creations beautifully bound!
*All image credit belongs to Fat Quarter Shop via YouTube. Follow and subscribe to their channel for more inspiring quilting tutorials!