
Homemade Bread Recipe for Beginners: Your Easiest Guide to Baking Comfort
There are few culinary delights that can rival the comforting warmth and irresistible aroma of freshly baked homemade bread. It’s a sensory experience that transports many of us back to simpler times, evoking cherished memories of family kitchens and grandmothers’ loving hands. For years, the idea of baking bread from scratch seemed like a daunting task, reserved only for seasoned bakers with years of experience. The intricate steps, the need for precise measurements, and the fear of a failed, dense loaf often deter aspiring home bakers.
However, what if we told you that making delicious, perfectly formed homemade bread could be incredibly simple, even for absolute beginners? This very notion became a delightful reality when we stumbled upon an incredibly straightforward recipe by Deep South Texas on YouTube. His approach demystifies the bread-making process, breaking it down into easily digestible steps that promise success without any complex maneuvers or specialized equipment. This isn’t just a recipe; it’s an invitation to rediscover the joy and satisfaction of traditional baking, bringing that comforting aroma and taste right into your own home.
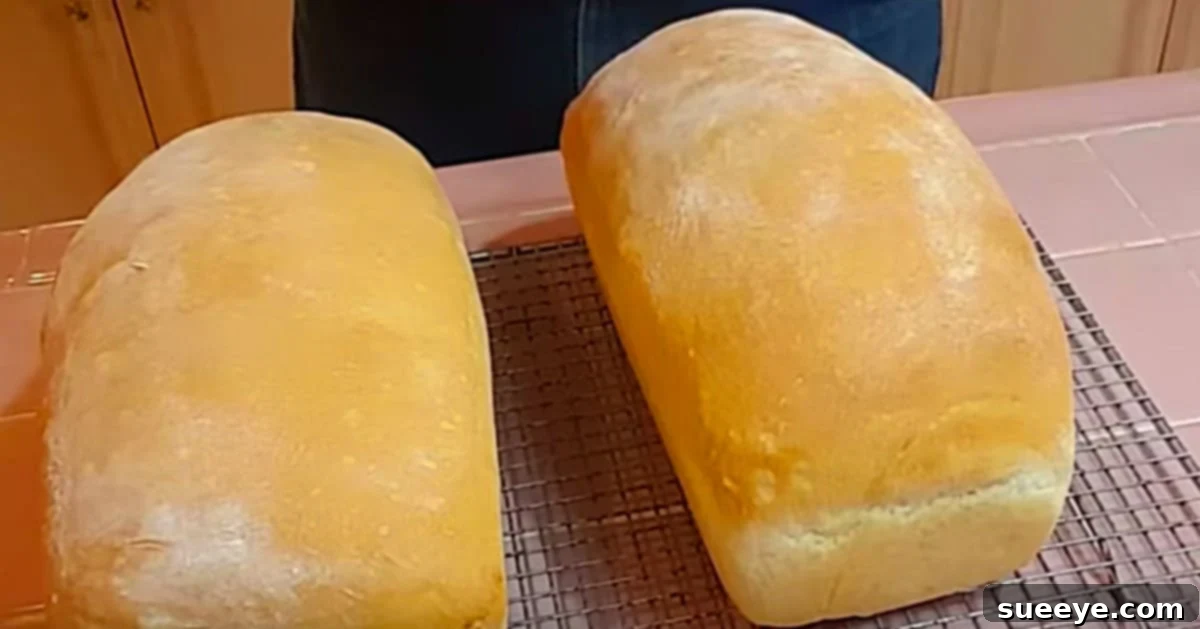
Imagine a loaf of bread, golden-brown and crispy on the outside, yet wonderfully soft and airy on the inside. Whether you slice it thick for a hearty sandwich, toast it to perfection for a quick breakfast, or simply enjoy it warm with a pat of butter, homemade bread elevates any meal and soothes the soul. This particular recipe stands out for its minimal ingredient list, straightforward instructions, and consistently excellent results, making it the ultimate gateway for anyone looking to embark on their bread-making journey. Say goodbye to store-bought bread and hello to the unmatched flavor and pride of baking your own!
Why Bake Your Own Bread? Beyond the Recipe
While the immediate reward of a delicious loaf is undeniable, the benefits of baking homemade bread extend far beyond taste:
- Unmatched Flavor and Texture: Mass-produced bread simply cannot compete with the fresh, nuanced flavor and superior texture of a loaf baked with love at home. You control the ingredients, ensuring a product free from preservatives and artificial additives.
- A Therapeutic Experience: The process of mixing, kneading (or not, with this easy recipe!), and watching dough rise can be incredibly calming and meditative. It’s a wonderful way to de-stress and engage in a creative, rewarding activity.
- Cost-Effective: Basic bread ingredients are surprisingly affordable, often making homemade bread significantly cheaper than purchasing artisanal loaves from a bakery or even standard sandwich bread from the grocery store.
- Kitchen Aroma: There’s nothing quite like the smell of fresh bread baking to make your house feel like a home. It’s an instant mood lifter and a warm welcome for anyone who walks through your door.
- Sense of Accomplishment: Holding a warm, perfectly baked loaf that you created yourself from simple ingredients is an incredibly satisfying feeling. It’s a tangible representation of your effort and a skill worth mastering.
- Nutritional Control: You choose the flour, the salt, and the oil, giving you complete control over the nutritional content of your bread.
Ingredients for Your Simple Homemade Bread
One of the beauties of this beginner-friendly recipe is its reliance on fundamental pantry staples. You won’t need any exotic flours or hard-to-find yeasts. Just a few basic items come together to create something truly magical.
- 7 cups bread flour: While all-purpose flour can work, bread flour has a higher protein content, which is crucial for developing strong gluten. This gluten structure is what gives bread its chewiness and helps it rise to a beautifully airy texture. It’s the backbone of your loaf.
- 3 cups of water: The hydration of your dough is key. Lukewarm water (around 100-110°F or 38-43°C) is ideal as it helps activate the yeast without killing it. Think of it as waking up the yeast to do its job.
- 2 Tablespoons instant yeast (equivalent to 2 packages): Instant yeast is a fantastic choice for beginners because it doesn’t require proofing (dissolving in water first) and can be mixed directly with the dry ingredients. It works quickly and reliably, ensuring your dough rises beautifully.
- 3 teaspoons salt: More than just a flavor enhancer, salt plays a vital role in bread making. It controls the rate of yeast activity, preventing the dough from rising too quickly, and also strengthens the gluten structure, contributing to a better texture. Don’t skip it!
- 2 Tablespoons oil: A touch of oil, like vegetable or olive oil, adds richness to the dough, improves its elasticity, and contributes to a softer crumb and a slightly crisper crust. It also helps to keep the bread fresh for longer.
- Bake at 400°F (200°C) for 40 minutes: The specified baking temperature and time are critical for achieving that perfect golden crust and thoroughly cooked interior.
Directions: Step-by-Step to Homemade Bread Perfection
This recipe from Deep South Texas is a masterclass in simplicity. Follow these steps, and you’ll be pulling two magnificent loaves of sandwich bread from your oven in no time.
Step 1: Combine Your Dry Ingredients
In a very large mixing bowl, combine your 7 cups of bread flour, 2 tablespoons of instant yeast, and 3 teaspoons of salt. Whisk them together thoroughly. This ensures that the yeast and salt are evenly distributed throughout the flour, which is important for a consistent rise and flavor in your finished bread. Don’t underestimate this simple initial step!
Step 2: Add Wet Ingredients and Mix
Next, pour in your 3 cups of lukewarm water and 2 tablespoons of oil into the dry ingredients. Using a sturdy wooden spoon or a Danish dough whisk, mix everything together until just combined. The dough will be shaggy and sticky, and that’s perfectly normal for this type of recipe. There’s no need for extensive kneading here; simply ensure all the flour is hydrated and incorporated. You will be learning how to make a very simple bread recipe from start to finish, using flour, water, yeast, and salt. There will be enough dough to make two loaves of sandwich bread.
Step 3: The First Rise (Bulk Fermentation)
Cover the bowl with plastic wrap or a clean kitchen towel and place it in a warm, draft-free spot. Allow the dough to rise for about 1 to 1.5 hours, or until it has visibly doubled in size. This is where the magic of the yeast happens, producing carbon dioxide that creates those wonderful air pockets in your bread. The rising time can vary depending on the temperature of your kitchen, so use the visual cue of “doubled in size” as your primary indicator.
Step 4: Divide and Shape the Loaves
Once your dough has risen, gently deflate it by turning it out onto a lightly floured surface. Avoid overworking the dough at this stage. Divide the dough into two equal portions. For each portion, you will be guided step by step to raise your bread and form the loaves. Gently stretch and fold the edges of the dough towards the center, then flip it over and gently cup your hands around it to form a round ball. Alternatively, for sandwich bread, you can gently pat it into a rectangle and then roll it up tightly from one end to the other, pinching the seam closed.
Step 5: Second Rise (Proofing)
Carefully place each shaped dough ball or rolled loaf into greased loaf pans. Cover them again with plastic wrap or a kitchen towel and let them rise for another 30-45 minutes, or until they have nearly doubled in size again and are visibly puffy. This second rise, known as proofing, is essential for achieving a light and airy texture in your final baked bread.
Step 6: Bake Your Loaves
Preheat your oven to 400°F (200°C). Once preheated, carefully place the loaf pans into the hot oven. You will cook the loaves in a 400-degree oven for 40 minutes. During this time, the bread will undergo “oven spring,” where it gets one last burst of rise in the heat, and the crust will develop its beautiful golden-brown color and irresistible crispness. To check for doneness, the internal temperature of the bread should be around 200-210°F (93-99°C), or you can tap the bottom of the loaf – it should sound hollow.
Step 7: Cool and Enjoy!
Once baked, immediately remove the loaves from their pans and place them on a wire rack to cool completely. This step is crucial! Allowing the bread to cool on a rack prevents the bottom from becoming soggy and allows the internal steam to escape, resulting in a perfectly textured crumb. Resist the urge to slice into it right away – waiting until it’s fully cooled will give you the best possible texture and sliceability.
Essential Tips for Beginner Bread Makers
Even with a foolproof recipe, a few extra pointers can make your bread-making journey even smoother:
- Accuracy Matters: Especially for beginners, measuring ingredients precisely, particularly flour and water, is important. A kitchen scale can provide the most accurate measurements for flour.
- Yeast Hydration: Ensure your water isn’t too hot (which can kill the yeast) or too cold (which won’t activate it). Lukewarm is key.
- Don’t Rush the Rise: Dough rising is a biological process that can’t be rushed. If your kitchen is cooler, it might take a bit longer for the dough to double. Patience is a virtue in bread making.
- Avoid Over-Flouring: When shaping, use just enough flour on your work surface to prevent sticking. Too much extra flour can make your bread dense and dry.
- Understand Your Oven: Ovens can have hot spots. If you notice one loaf browning faster than the other, rotate them halfway through baking.
- Listen to Your Bread: The “hollow sound” when tapping the bottom of a loaf is a classic indicator of doneness. Trust your instincts and senses!
- Practice Makes Perfect: Don’t be discouraged if your first loaf isn’t absolutely perfect. Each time you bake, you’ll learn more about your ingredients, your kitchen, and your oven.
Serving and Storage Suggestions
Once your beautiful homemade bread is cooled, the possibilities are endless! Slice it thick for classic sandwiches, toast it and spread with butter and jam, or serve it alongside your favorite soups and stews. It’s truly versatile.
For storage, keep your homemade bread at room temperature in an airtight container or a bread box for 3-4 days. Avoid refrigerating it, as this can dry it out and make it stale faster. If you want to keep it longer, homemade bread freezes beautifully. Simply slice the cooled loaf, place the slices in a freezer-safe bag, and freeze for up to 3 months. You can then pull out individual slices as needed for toast or sandwiches.
I’m so happy I tried this recipe! It genuinely lives up to its promise of being foolproof, and it truly didn’t require any fancy maneuvers or advanced baking skills. From the moment I mixed the simple ingredients to the final golden-brown loaves emerging from the oven, the process was pure joy and surprisingly stress-free. This recipe not only delivers on taste and texture but also instills a newfound confidence in baking that encourages you to keep experimenting and creating. It’s an incredibly rewarding experience, transforming basic ingredients into something truly comforting and delicious right in your own kitchen.
So, if you’ve been dreaming of that homemade bread aroma filling your kitchen and the unparalleled taste of a fresh, warm slice, now is your moment. This beginner-friendly recipe is your perfect starting point. Embrace the simplicity, enjoy the process, and savor every bite of your very own homemade bread!