
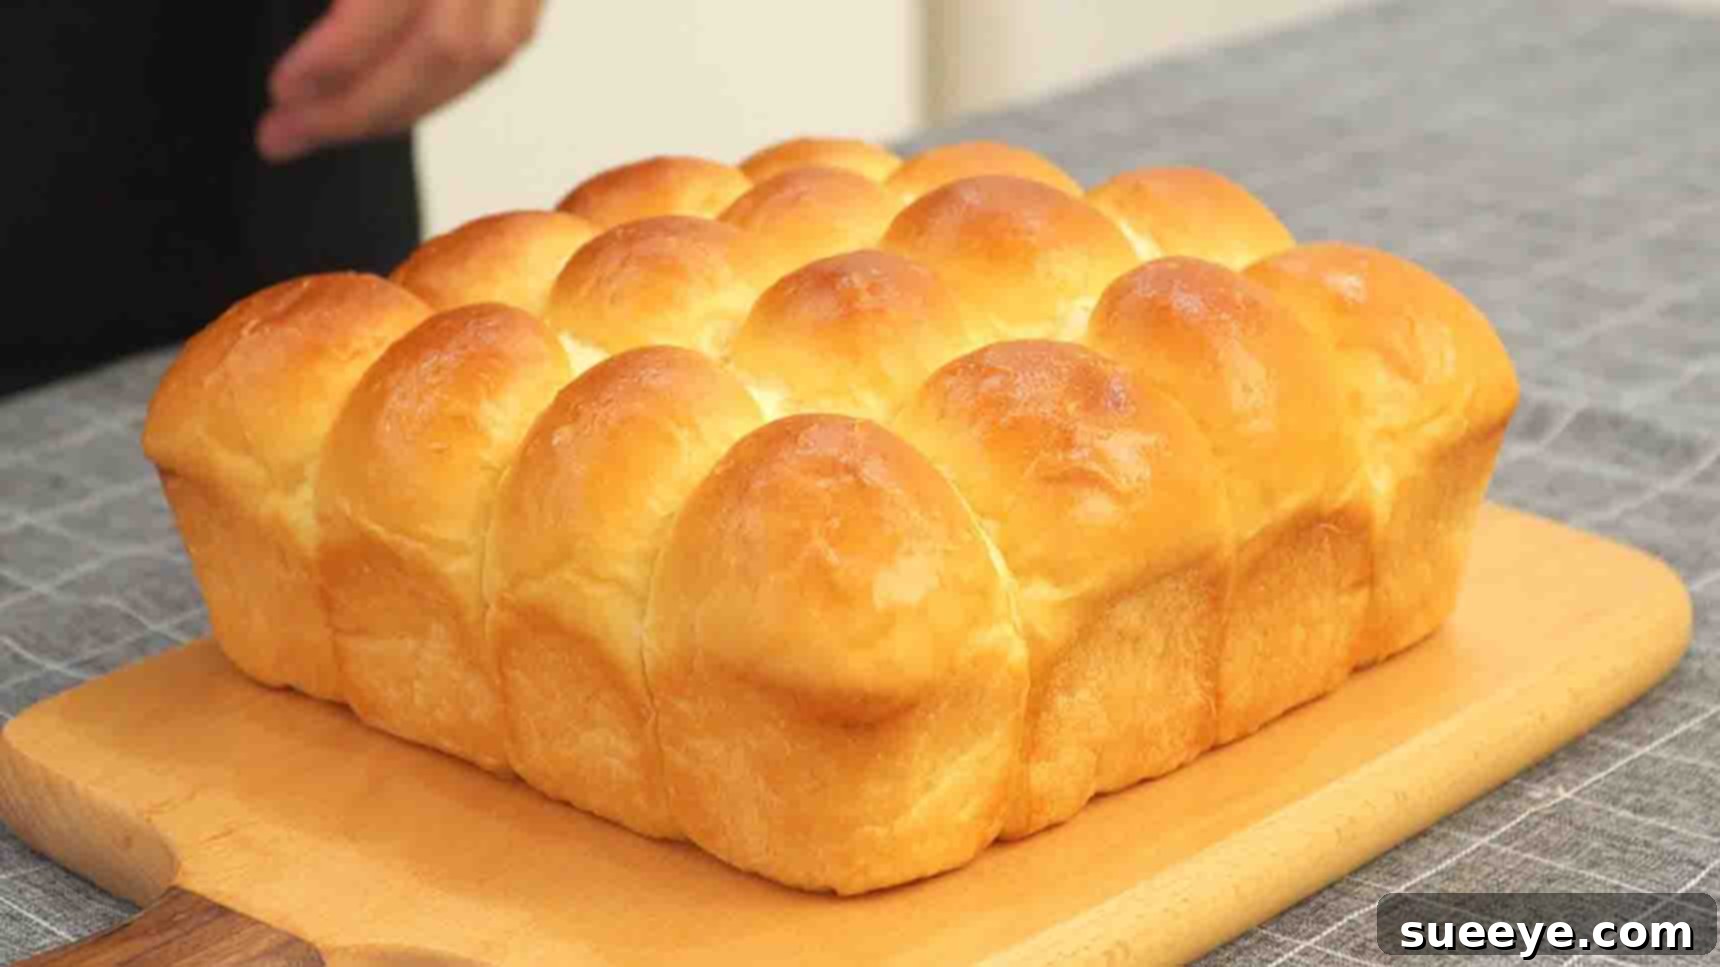
Effortless Soft Bread: Your Go-To 6-Ingredient No-Knead Recipe
Imagine the aroma of freshly baked bread filling your home, its soft, fluffy texture melting in your mouth. Now, imagine achieving this culinary delight with minimal effort, just six common ingredients, and absolutely no strenuous kneading. Sound like a dream? It’s not! We’re incredibly excited to share with you what might just be the easiest and most satisfying soft bread recipe you’ll ever encounter, inspired by the brilliant insights from Nino’s Home on YouTube.
This remarkable recipe transforms the often-intimidating process of bread-making into a joyous, straightforward experience. Perfect for baking novices and seasoned pros alike, it promises a heavenly loaf every time. Forget complex techniques or a pantry full of obscure items; this recipe truly simplifies homemade bread. It’s not only quick and easy but also incredibly inexpensive, making it an ideal choice for a wholesome family breakfast, a delightful snack, or a versatile accompaniment to any meal. Prepare to be amazed by how effortless it is to create bakery-quality soft bread right in your own kitchen.
Why This 6-Ingredient No-Knead Bread Recipe is a Game-Changer
For many, the idea of baking bread at home is synonymous with hours of kneading, intricate techniques, and potential failure. This recipe, however, shatters those preconceptions. Its core appeal lies in its incredible simplicity and efficiency:
- Minimal Ingredients: With just six everyday items, you won’t need a special trip to the grocery store.
- No Kneading Required: The biggest time and effort saver! This “no-knead” approach means less mess and less physical exertion, making it perfect for busy individuals or anyone hesitant about traditional bread making.
- Quick Preparation: The hands-on time is surprisingly short, allowing the dough to do most of the work during its resting periods.
- Economical: Producing your own soft bread at home is significantly cheaper than buying store-bought versions, especially when you consider the quality and freshness.
- Incredible Taste and Texture: Despite its simplicity, the resulting bread is wonderfully soft, fluffy, and incredibly flavorful – a true crowd-pleaser.
- Versatile: Enjoy it plain, toasted, with butter and jam, or as a side to savory dishes.
This recipe isn’t just about baking bread; it’s about empowering you to create something truly special with ease and confidence. Let’s gather our simple ingredients and embark on this delightful baking journey!
Simple Ingredients for Your Fluffy Bread
The beauty of this recipe lies in its minimalist ingredient list. Each component plays a crucial role in achieving that desirable soft and airy texture. Ensure your ingredients are fresh and measured accurately for the best results.
- 200 ml Milk: Acts as the primary liquid, contributing to the dough’s hydration and the bread’s tender crumb. Whole milk often yields a richer flavor and softer texture, but 2% milk works wonderfully too. Ensure it’s lukewarm (around 105-115°F or 40-46°C) to activate the yeast effectively.
- 1 tsp Instant Dry Yeast: The leavening agent responsible for making the bread rise. Instant yeast is convenient as it can be added directly to the dry ingredients without prior activation, though mixing it with the warm milk first can give it a kickstart and ensure it’s active.
- 1 Egg: Adds richness, moisture, and helps with the structure and color of the crust. It also contributes to the overall softness of the bread.
- 2 tbsp Cooking Oil or Melted Butter: Both oil and butter contribute to the bread’s incredible tenderness and moistness. Oil keeps the bread softer for longer, while butter adds a delicious, classic buttery flavor. Choose your preference! Vegetable oil, canola oil, or unsalted butter are good options.
- 2.4 cups Bread Flour: The foundation of our bread. Bread flour has a higher protein content than all-purpose flour, which helps develop stronger gluten networks, resulting in a chewier, more structured, and typically softer bread. Accurate measurement is key here; use the scoop-and-level method if you don’t have a kitchen scale.
- 3/4 tsp Salt: Essential for flavor, salt also plays a role in controlling yeast activity and strengthening the gluten structure, leading to a better rise and texture. Don’t skip it!
Having these simple staples on hand means you’re always just a few steps away from a fresh, homemade loaf.
Essential Equipment for Easy Bread Baking
You don’t need a professional bakery setup to make this bread. Most of these items are likely already in your kitchen:
- Large mixing bowl
- Whisk or spatula
- Measuring cups and spoons
- Plastic wrap or a clean kitchen towel
- Lightly floured surface (countertop or large cutting board)
- Rolling pin (optional, hands work fine too!)
- 9×13 inch baking pan (or similar size for 16 rolls)
- Parchment paper (optional, for easy cleanup)
- Oven
With these basic tools and your simple ingredients, you’re ready to transform them into delicious, soft bread.
Step-by-Step Directions to Your Perfect Soft Bread
Step 1: Mixing the Dough and the First Rise
This initial stage is where all the magic begins. Precision and patience are your best friends here.
Begin by taking a large mixing bowl. Into this bowl, add your liquid and enriching ingredients: 200 ml of lukewarm milk (ensure it’s not too hot, which can kill the yeast, or too cold, which will slow its activation), 1 tsp of instant dry yeast, 1 egg, and 2 tbsp of cooking oil or melted butter. Whisk these ingredients together thoroughly until they are well combined. This ensures the yeast is evenly distributed and has a good start, and that the egg and fat are incorporated into the liquid base.
Next, it’s time to introduce the dry components. Add 2.4 cups of bread flour and 3/4 tsp of salt to the wet mixture. Using a sturdy spatula or a wooden spoon, begin to mix these ingredients. At first, it might look crumbly, but continue mixing until a cohesive, shaggy dough starts to form. Unlike traditional bread recipes, there’s no need for intense kneading here; simply ensure all the flour is incorporated and there are no dry pockets left. The dough will be soft and slightly sticky, which is perfectly normal for a no-knead recipe.
Once your dough has formed, cover the bowl tightly with plastic wrap or a clean kitchen towel. Allow it to rest for a short period of 15 minutes. This brief rest, often called an autolyse, allows the flour to fully hydrate and gluten development to begin naturally, even without kneading. After 15 minutes, gently uncover the dough. You’ll perform a simple “fold.” Lightly pull a section of the dough from the edge, stretch it upwards, and fold it over towards the center. Rotate the bowl and repeat this process a few times (4-6 folds are usually sufficient) until the dough feels slightly smoother and more elastic. This gentle folding technique helps build strength in the dough without any strenuous effort.
After folding, cover the bowl with plastic wrap again. Now, let the dough rise in a warm, draft-free place for about one hour, or until it has visibly doubled in size. A warm oven (turned off, with just the light on) or a sunny spot on your counter can be ideal. Observing your dough double in size is a rewarding part of the process, indicating that the yeast is active and doing its job.
Step 2: Shaping, Proofing, and Baking Your Soft Rolls
After the first glorious rise, your dough is ready for shaping and its final transformation into delicious soft rolls.
Once the dough has doubled in size (after about an hour), gently transfer it from the bowl onto a lightly floured surface. Dust the top of the dough with a little more flour to prevent sticking. Using the palms of your hands, gently flatten the dough into a roughly rectangular or square shape. The goal is to gently deflate it without pressing out all the air. Now, carefully gather the edges towards the center to form a smooth ball. This helps to create a taut surface tension on the dough, which will contribute to a better rise.
Using a bench scraper or a sharp knife, divide this dough ball into 16 equal pieces. Try to be as consistent as possible, as this will ensure even baking. Take each individual piece and roll it into a small, smooth ball. The best technique is to cup your hand over the dough piece on the floured surface and move it in a circular motion, creating friction that forms a neat, tight ball. Arrange these perfectly shaped dough balls into a greased baking pan (a 9×13-inch pan works well for 16 rolls, but you can adjust based on your pan size). Ensure there’s a little space between each ball, as they will expand during the next rise and while baking. Repeat this process with all the remaining dough pieces.
Once all your dough balls are nestled in the pan, cover the baking pan again with plastic wrap or a clean kitchen towel. Let the dough rise for a second time, also known as “proofing,” for approximately 40 minutes in a warm spot. During this period, the rolls will expand and become noticeably puffy, nearly touching each other in the pan. This second rise is crucial for achieving that incredibly light and airy texture.
Towards the end of the proofing time, preheat your oven to 350 degrees Fahrenheit (175 degrees Celsius). A properly preheated oven is essential for an even bake and a good crust. Once the oven is ready and the rolls are nicely puffed, carefully place the baking pan into the preheated oven. Bake for approximately 20 minutes. The rolls should turn a beautiful golden brown on top, and a quick tap on the bottom should sound hollow, indicating they are fully cooked through. If you have a thermometer, the internal temperature should reach around 200-210°F (93-99°C).
Once baked, remove the pan from the oven. For the softest crust, you can brush the tops with a little melted butter immediately after taking them out. Let the rolls cool in the pan for a few minutes before transferring them to a wire rack to cool completely. While warm bread is undeniably tempting, allowing it to cool fully improves its texture and makes it easier to slice or pull apart.
Tips for Homemade Soft Bread Success
Even though this recipe is incredibly forgiving, a few pointers can ensure your soft bread turns out perfect every single time:
- Yeast Freshness: Always check the expiration date on your instant dry yeast. Dormant or expired yeast will lead to flat, dense bread. You can test a small amount in warm milk with a pinch of sugar; if it froths within 5-10 minutes, it’s active.
- Accurate Measurements: Especially with flour, precise measurements make a big difference. If you don’t have a kitchen scale, use the “spoon and level” method: spoon flour into your measuring cup until overflowing, then level it off with a straight edge.
- Warm Environment for Rising: Yeast loves warmth. A slightly warm, draft-free spot is ideal for your dough to rise. Too cold, and it will take forever; too hot, and it might rise too quickly, potentially leading to an off-flavor.
- Don’t Overmix: With a no-knead recipe, overmixing can actually toughen the dough. Mix just until combined and no dry streaks of flour remain.
- Monitor Your Oven: Every oven is different. Keep an eye on your bread, especially towards the end of the baking time, to prevent over-browning.
- Cooling is Crucial: While it’s hard to resist, allowing the bread to cool on a wire rack is important. This prevents the bottom from becoming soggy and allows the internal structure to set, resulting in a perfectly soft crumb.
Serving and Storage Suggestions
This soft bread is incredibly versatile. Enjoy it:
- Warm, straight from the oven, with a smear of butter.
- Toasted, for breakfast, topped with jam, honey, or your favorite spread.
- As small sandwich rolls, perfect for packed lunches.
- Alongside a hearty soup or stew, soaking up all the delicious flavors.
To keep your soft bread fresh, store it in an airtight container or a bread bag at room temperature for up to 3-4 days. For longer storage, you can freeze the individual rolls in a freezer-safe bag for up to a month. Simply thaw at room temperature or gently reheat in the oven for a freshly baked taste.
Embrace the Joy of Homemade Bread
There’s an undeniable satisfaction that comes from baking your own bread, and with this 6-ingredient, no-knead recipe, that joy is more accessible than ever before. You’ll be amazed by how such simple ingredients can transform into something so incredibly delicious and comforting. This recipe is more than just instructions; it’s an invitation to experience the warmth, aroma, and taste of truly homemade bread without any of the usual fuss.
Whether you’re new to baking or looking for a reliable, easy recipe to add to your repertoire, this soft bread is sure to become a cherished favorite. So, go ahead, gather your ingredients, follow these straightforward steps, and prepare to delight yourself and your loved ones with the best homemade soft bread you’ve ever made. Happy baking!