
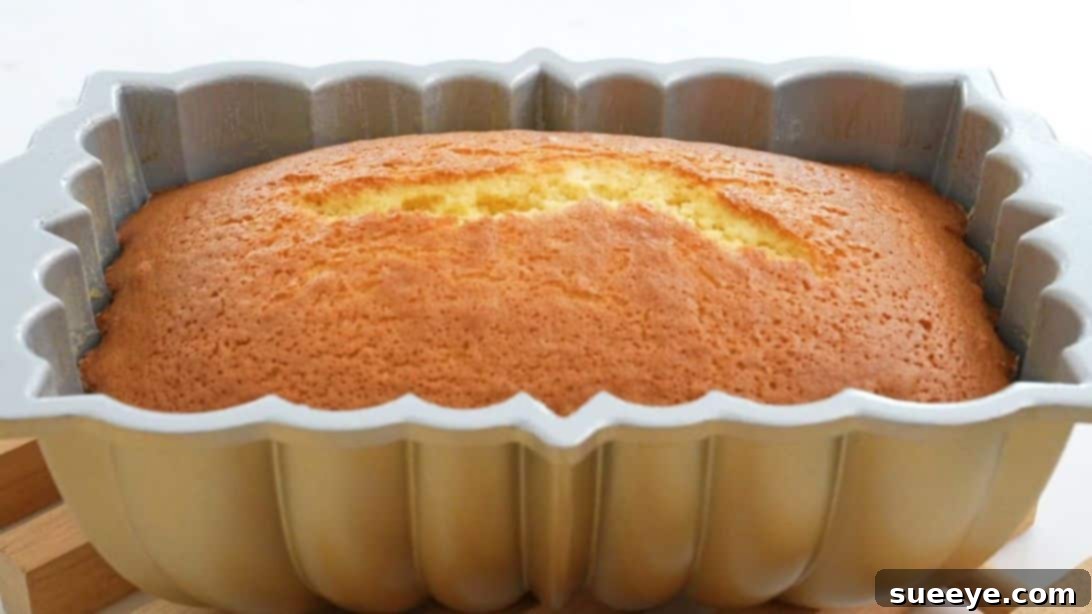
Are you searching for a dessert that strikes the perfect balance between simple elegance and irresistible flavor? Look no further than the classic Hot Milk Cake. This beloved recipe, brought to life beautifully by Apron (as seen in their tutorial), yields a cake that is remarkably moist, incredibly buttery, and perfectly sweet without being cloying. It’s a timeless treat that promises to impress with its tender crumb and delicate taste, making it an ideal choice for any occasion, from a casual family dessert to a special gathering.
The beauty of the Hot Milk Cake lies in its straightforward preparation and the use of simple, everyday ingredients. Despite its humble origins, this cake boasts a sophisticated texture and depth of flavor that belies its ease. Whether you’re a seasoned baker or just starting your culinary journey, this recipe is incredibly forgiving and guarantees a delightful outcome every time. Imagine a slice dusted with a delicate veil of powdered sugar, or adorned with a generous dollop of freshly whipped cream and a scattering of vibrant fresh berries – a truly complete dessert experience awaiting your creation.
What sets the Hot Milk Cake apart is its unique technique: heating milk and butter together before incorporating them into the batter. This crucial step is more than just a culinary quirk; it’s the secret behind the cake’s signature light, airy, and incredibly tender texture. The warm liquid gently melts into the dry ingredients, activating the baking powder in a way that promotes maximum rise and a fine, even crumb. This method ensures a cake that is not only moist but also wonderfully springy, making each bite a pure joy. This isn’t just a cake; it’s a nostalgic journey to simpler times, a comforting hug in dessert form that everyone will adore.
RELATED: Enhance your baking repertoire with our Easy Flaky Buttermilk Pie Recipe for another delightful treat.
Why the Hot Milk Cake is a Timeless Favorite
The Hot Milk Cake has graced dessert tables for generations, and for good reason. Its enduring popularity stems from several key characteristics that make it stand out:
- Unrivaled Moisture: Thanks to the hot milk and butter mixture, the cake remains incredibly moist, ensuring every forkful is tender and delightful.
- Buttery Richness: The generous amount of butter, melted into the milk, infuses the entire cake with a rich, comforting butter flavor that is simply irresistible.
- Light & Airy Texture: The unique heating method creates a fine, even crumb that is wonderfully light and tender, almost melting in your mouth.
- Simplicity of Ingredients: You likely have all the necessary components in your pantry right now – eggs, sugar, flour, milk, butter, and vanilla. No exotic ingredients required!
- Easy to Make: The steps are straightforward, making it an accessible recipe for bakers of all skill levels. It’s a fantastic entry point for those new to baking or a quick go-to for experienced cooks.
- Versatility: This cake is a blank canvas. It tastes amazing on its own, but also welcomes a variety of toppings, from fresh fruit to glazes and frostings.
Once you try this recipe, you’ll understand why it has remained a cherished classic, often passed down through family cookbooks. It’s more than just a dessert; it’s a taste of tradition and warmth.
Essential Ingredients for Your Perfect Hot Milk Cake
Creating this delectable Hot Milk Cake requires a handful of common pantry staples. The quality of these ingredients, however, can make a significant difference in the final taste and texture of your cake. Opt for fresh, high-quality items whenever possible to ensure the best results. Here’s what you’ll need to gather:
- 3 large eggs: Ensure they are at room temperature for better emulsification with the sugar.
- 1/2 cup of granulated sugar: Provides sweetness and helps create a tender crumb.
- 1/4 cup of vegetable oil: Adds extra moisture and softness to the cake. You can also use a neutral-flavored oil like canola.
- 1 1/8 cup of cake flour: The secret to a super tender and light crumb. Cake flour has a lower protein content than all-purpose flour. If you don’t have cake flour, you can make a substitute: for every cup of cake flour, use 7/8 cup (or 1 cup minus 2 tablespoons) all-purpose flour plus 2 tablespoons cornstarch, sifted together.
- 1 1/4 teaspoons of baking powder: The primary leavening agent, which will be activated by the hot milk mixture, giving the cake its rise and airy texture.
- 1/4 teaspoon of salt: Balances the sweetness and enhances all the other flavors.
- 2/3 cup of fresh milk: Whole milk is recommended for richness, but 2% milk will also work.
- 1/4 cup of unsalted butter: Crucial for the rich, buttery flavor and contributing to the cake’s moistness. Unsalted butter allows you to control the salt content precisely.
- 1 teaspoon of vanilla extract: A fundamental flavor enhancer that adds warmth and depth. Pure vanilla extract offers the best taste.
As a reminder for another fantastic breakfast option, check out our recipe for Fluffiest Buttermilk Pancakes!
Step-by-Step Guide: How to Make a Divine Hot Milk Cake
Follow these detailed steps to bake a perfectly moist and flavorful Hot Milk Cake. Precision and attention to detail will ensure a magnificent result!
Step 1: Prepare Your Oven and Baking Pan
Begin by preheating your oven to 350°F (175°C). This ensures a consistently hot environment for baking from the moment your cake enters the oven. While the oven heats, prepare your chosen baking pan. A 9-inch round cake pan or an 8×8 inch square pan works well. Grease the entire interior of the pan thoroughly with butter or a non-stick cooking spray, ensuring every corner and side is coated. Then, sprinkle a generous amount of flour into the greased pan, tapping and rotating the pan to coat the buttered surfaces evenly. Invert the pan and tap out any excess flour. This crucial step prevents the cake from sticking, ensuring a clean release after baking.
Step 2: Cream Eggs and Sugar
In a large mixing bowl, combine the 3 room-temperature eggs and 1/2 cup of granulated sugar. Using an electric mixer (handheld or stand mixer), beat the mixture on medium-high speed until it becomes pale yellow, thick, and creamy. This process, often referred to as ‘ribbon stage,’ usually takes about 3-5 minutes. When you lift the beaters, the mixture should fall back into the bowl in a thick ribbon that slowly dissolves. This aeration is vital for the cake’s light texture.
Step 3: Incorporate Vegetable Oil
With the mixer still running on low speed, gradually drizzle in the 1/4 cup of vegetable oil. Mix until just combined. Be careful not to overmix at this stage; you simply want to integrate the oil smoothly into the egg and sugar mixture.
Step 4: Sift Dry Ingredients
In a separate medium bowl, sift together 1 1/8 cup of cake flour, 1 1/4 teaspoons of baking powder, and 1/4 teaspoon of salt. Sifting is important as it removes lumps and aerates the dry ingredients, contributing to a lighter cake. Once sifted, gently whisk the dry ingredients together to ensure they are thoroughly combined. Gradually add this dry mixture to the wet egg mixture in three additions, mixing on low speed until just combined after each addition. Mix only until no streaks of flour remain; overmixing can develop the gluten in the flour, leading to a tough cake.
Step 5: Prepare the Hot Milk and Butter Mixture
This is the defining step of a Hot Milk Cake! Place a small saucepan over medium heat. Add the 2/3 cup of fresh milk and 1/4 cup of unsalted butter to the pan. Continuously whisk the mixture as it heats, ensuring the butter melts completely and integrates with the milk. Bring the mixture to a gentle simmer, just until small bubbles begin to form around the edges of the pan, but do not let it come to a rolling boil. Remove from heat immediately once the butter is fully melted and the mixture is hot.
Step 6: Integrate Hot Milk into Batter
Working quickly, gradually pour the hot milk and butter mixture into your cake batter while continuously whisking the batter at low speed. The warmth of the milk will gently cook the eggs slightly and activate the baking powder, contributing to the cake’s unique texture. Continue whisking until the hot milk mixture is fully incorporated and the batter is smooth and slightly thinner. Ensure there are no lumps.
Step 7: Final Pan Preparation and Pouring
If you haven’t already, take a moment to double-check that your baking pan is meticulously greased and floured. This prevents sticking, which can be frustrating after all your hard work. Carefully pour the smooth cake batter into the prepared pan. Gently tap the pan on your counter a couple of times to release any large air bubbles that may be trapped in the batter, ensuring an even bake.
Step 8: Bake to Golden Perfection
Place the prepared baking pan in the lower middle rack of your preheated oven. Bake at 350°F (175°C) for approximately 40 to 45 minutes. Baking times can vary slightly depending on your oven, so it’s always best to keep an eye on it. The cake is done when a wooden skewer or toothpick inserted into the center comes out clean, with no wet batter attached. The top should be golden brown and spring back lightly when gently touched.
Step 9: Cool, Slice, and Serve
Once baked, carefully remove the cake from the oven. Allow it to cool in the pan on a wire rack for about 10-15 minutes. This resting period allows the cake to set and prevents it from breaking when you remove it. After cooling slightly, carefully invert the cake onto the wire rack to cool completely. Once fully cooled, slice and serve your beautiful Hot Milk Cake. Dust with powdered sugar, add a dollop of whipped cream, or serve with fresh berries for a truly delightful dessert experience. Enjoy every tender, buttery bite!
Expert Tips for a Flawless Hot Milk Cake
Achieving the perfect Hot Milk Cake is easy with these insider tips and tricks:
- Room Temperature Eggs: Eggs at room temperature emulsify better with sugar, leading to a lighter and more uniform batter. If you forget, place eggs in a bowl of warm water for 5-10 minutes.
- Don’t Overmix: After adding the flour, mix only until just combined. Overmixing develops gluten, which can make your cake tough and dry.
- Sift Your Dry Ingredients: This step is crucial for incorporating air and preventing lumps, leading to a finer, more tender crumb.
- Hot Milk, Not Boiling: The milk and butter mixture should be hot enough to melt the butter and activate the baking powder, but not boiling rapidly. A gentle simmer is ideal.
- Grease and Flour Thoroughly: There’s nothing worse than a cake sticking to the pan. Take your time to properly grease and flour every surface of your baking pan. You can also line the bottom with parchment paper for extra insurance.
- Oven Temperature Accuracy: An oven thermometer can be a great investment to ensure your oven is truly at the temperature it indicates. Inconsistent temperatures can lead to uneven baking.
- Don’t Open the Oven Door Too Early: Resist the urge to open the oven door during the first 30 minutes of baking, as this can cause the cake to sink.
- Cool Completely: While tempting to slice warm, allowing the cake to cool completely on a wire rack ensures it sets properly and is easier to slice cleanly.
Delicious Variations and Serving Suggestions
The Hot Milk Cake is wonderfully delicious on its own, but its simple elegance also makes it a fantastic base for various additions and serving styles:
- Classic Toppings: A dusting of powdered sugar is traditional and beautiful. Freshly whipped cream and seasonal berries (strawberries, raspberries, blueberries) add a burst of freshness and color.
- Simple Glaze: Whisk together 1 cup of powdered sugar with 2-3 tablespoons of milk (or lemon juice for a zesty kick) until smooth. Drizzle over the cooled cake.
- Lemon Zest: Add 1-2 teaspoons of lemon zest to the batter for a bright, citrusy flavor that complements the butteriness beautifully.
- Almond Extract: Substitute half a teaspoon of vanilla extract with half a teaspoon of almond extract for a delicate almond flavor.
- Coffee Cake Style: Swirl a cinnamon-sugar mixture through the batter before baking, or sprinkle a streusel topping over the top for a delightful coffee cake twist.
- Chocolate Hot Milk Cake: Sift 1/4 cup of unsweetened cocoa powder along with the cake flour for a rich chocolate version. You can then frost it with chocolate ganache.
- Fruit & Nut Additions: Gently fold in a half cup of finely chopped nuts (like pecans or walnuts) or dried fruit (such as cranberries or raisins) into the batter just before pouring into the pan.
- With Custard or Ice Cream: Serve warm slices with a scoop of vanilla bean ice cream or a spoonful of homemade vanilla custard for an indulgent treat.
- Afternoon Tea Treat: This cake is perfect alongside a cup of tea or coffee, making it an ideal candidate for afternoon tea gatherings.
Storage and Make-Ahead Tips
Planning ahead or enjoying leftovers? Here’s how to store your Hot Milk Cake to keep it fresh and delicious:
- Room Temperature: Unfrosted Hot Milk Cake can be stored at room temperature in an airtight container for up to 3 days. Ensure it’s completely cooled before storing to prevent condensation.
- Refrigeration: If frosted with a perishable frosting (like cream cheese frosting or whipped cream), or if your kitchen is very warm, store the cake in an airtight container in the refrigerator for up to 5 days. Bring to room temperature before serving for the best flavor and texture.
- Freezing: Hot Milk Cake freezes beautifully! Wrap individual slices or the whole cooled cake tightly in plastic wrap, then an additional layer of aluminum foil. Freeze for up to 2-3 months. Thaw overnight in the refrigerator, then bring to room temperature before serving.
- Make-Ahead Batter: While it’s best to bake this cake shortly after mixing due to the leavening agents, you can prepare the dry ingredients and wet ingredients separately a day in advance. Combine them just before baking. The hot milk step should always be done fresh.
Frequently Asked Questions About Hot Milk Cake
Here are some common questions about baking and enjoying Hot Milk Cake:
- Q: Can I use all-purpose flour instead of cake flour?
- A: Yes, you can. For every cup of cake flour, use 7/8 cup (or 1 cup minus 2 tablespoons) all-purpose flour plus 2 tablespoons cornstarch, sifted together. While it will still be delicious, cake flour yields a noticeably lighter and more tender crumb.
- Q: Why is it called “Hot Milk Cake”?
- A: It gets its name from the unique technique of heating the milk and butter together until hot before adding them to the batter. This step contributes significantly to its moistness and fine, airy texture.
- Q: My cake sank in the middle. What went wrong?
- A: Common reasons for a cake sinking include opening the oven door too early (causing a sudden temperature drop), overmixing the batter, or the baking powder losing its potency. Ensure your baking powder is fresh!
- Q: Can I make this cake in a different sized pan?
- A: Yes, you can. If using a larger pan, the baking time will be shorter. If using a smaller pan, it will be longer. Always adjust baking time and test for doneness with a toothpick.
- Q: Is this cake suitable for making cupcakes?
- A: Absolutely! This recipe can easily be adapted for cupcakes. Fill cupcake liners about two-thirds full and bake for approximately 18-25 minutes, or until a toothpick comes out clean.
With these detailed instructions and helpful tips, you are now fully equipped to bake a truly unforgettable Hot Milk Cake. This recipe isn’t just about making a dessert; it’s about creating a moment of joy, a comforting classic that will bring smiles to everyone at your table. So, roll up your sleeves, gather your ingredients, and get ready to experience the delightful simplicity and rich flavor of this timeless treat. Happy baking!