
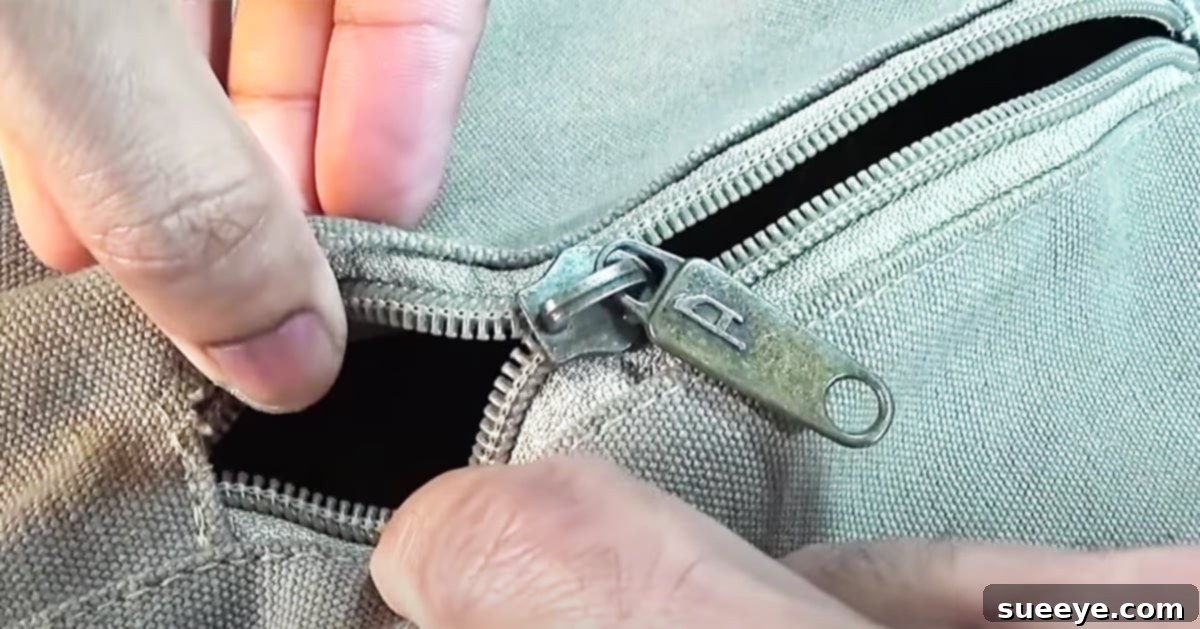
Effortless Zipper Repair: A Simple Pliers Trick to Fix Separated Zippers
A broken or separated zipper can be incredibly frustrating. Whether it’s on your favorite jacket, a trusty backpack, or an essential pair of jeans, a malfunctioning zipper can render an otherwise perfectly good item unusable. Many of us instinctively consider throwing out the item or taking it to a professional for an expensive repair. However, what if we told you there’s a remarkably simple, cost-effective, and quick fix that you can do right at home with a common household tool? This ingenious method, brilliantly demonstrated by Science Sir on YouTube, leverages the power of basic mechanics to restore your zipper to full functionality in just minutes.
The problem of a zipper coming off track or separating often stems from the slider, the small mechanism that glides along the teeth to open and close the zipper. Over time, or with forceful use, this slider can subtly widen, losing its grip on the zipper teeth. This slight deformation is usually imperceptible to the naked eye but is enough to disrupt the intricate interlocking process, leading to separation. Instead of discarding an item for what seems like a major flaw, this simple trick focuses on gently reshaping the slider to reinstate its original tension and effectiveness. It’s a true life hack that not only saves you money but also promotes a more sustainable approach to your belongings.
Why Zippers Fail: Understanding the Common Causes
Zippers are marvels of engineering, designed for countless cycles of opening and closing. Yet, they are not invincible. Understanding why zippers commonly fail can help prevent future issues and provides context for why this pliers trick is so effective. The most frequent culprit behind a broken or separated zipper is a worn-out or deformed slider. The slider consists of two plates that press the zipper teeth together. When these plates become even slightly separated or bent outwards, they lose their ability to properly interlock the teeth, causing the zipper to split open behind the slider or get stuck.
- Vigorous or Rough Use: Frequently tugging, yanking, or forcing a zipper, especially when it’s stiff or caught on fabric, can stress the slider and the teeth, leading to premature wear.
- Wear and Tear: Over extended periods of use, the metal in the slider can naturally thin or bend, losing its tight grip. This is particularly common in frequently used items like coats, pants, and bags.
- Fabric Snags: When fabric gets caught in the zipper teeth, forcing the zipper can deform the slider or bend the teeth themselves.
- Overpacking Bags: Stuffing bags to their maximum capacity puts immense pressure on zippers, making them prone to splitting.
- Low-Quality Materials: Cheaper zippers might be made with softer metals that are more susceptible to bending and breaking under normal use.
The good news is that for many of these common scenarios, especially when the zipper is merely separating or coming off track without missing teeth, the problem is often localized to the slider’s grip. This is precisely what our pliers-based solution addresses.
The Impact of a Malfunctioning Zipper
Beyond the immediate annoyance, a broken zipper carries several implications. For many, it’s a decision point: fix, replace, or discard. Opting to discard an item due to a zipper issue contributes to textile waste, which has a significant environmental footprint. From a personal finance perspective, replacing a perfectly functional jacket or bag just because of a zipper can be an unnecessary expense. Professional zipper repairs, while effective, can sometimes cost a substantial portion of the item’s original price, making the repair seem less appealing.
Learning a simple repair like this empowers you. It transforms a moment of frustration into an opportunity for problem-solving, fostering a sense of self-sufficiency and resourcefulness. Moreover, extending the life of your belongings through simple repairs aligns perfectly with sustainable living practices, reducing consumption and waste. It’s not just about fixing a zipper; it’s about making a conscious choice to value and maintain what you already own.
Essential Supplies for Your Zipper Repair
The beauty of this particular zipper repair method lies in its minimal requirements. You won’t need a specialized repair kit or a trip to the hardware store for obscure tools. In most cases, you’ll find everything you need right at home.
- Small Pliers: The most crucial tool. Needle-nose pliers are ideal because their tapered jaws allow for precision work in tight spaces. However, standard small pliers can also work effectively. Ensure they have a good grip and are not too large or bulky, as you’ll be working with a small, delicate mechanism.
That’s it! With just this simple tool, you are well-equipped to tackle most separated zipper issues.
Step-by-Step Guide: How to Fix a Separated Zipper with Pliers
This repair is surprisingly straightforward, but it requires a bit of patience and a gentle touch. Follow these detailed instructions to bring your broken zipper back to life.
1. Assess the Damage: Identifying the Problem
Before you begin, carefully examine the zipper. The pliers trick is most effective for zippers where the slider has become loose, causing the zipper teeth to separate behind it, or for zippers that have come off track. This method is generally not suitable for situations where teeth are missing, the slider itself is broken into pieces, or the fabric tape of the zipper is torn. In such cases, a full zipper replacement might be necessary. For a simple separation or off-track issue, locate the exact point where the zipper is failing. Observe the gap between the top and bottom plates of the slider; this is often where the problem lies.
2. Prepare Your Tools: Choosing the Right Pliers
As mentioned, small pliers are essential. Needle-nose pliers are highly recommended because their fine tips allow for precise manipulation of the zipper slider without damaging the surrounding fabric or teeth. If you don’t have needle-nose pliers, any small, sturdy pliers with jaws narrow enough to grasp the slider will suffice. Ensure the pliers are clean to avoid transferring dirt or grime to your item.
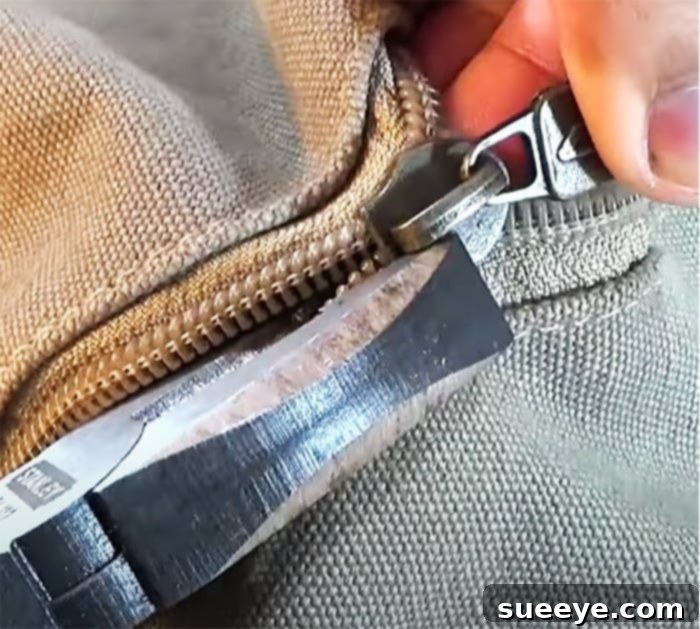
3. The Pliers Technique: Gently Reshaping the Zipper Slider
This is the core of the repair. The goal is to gently decrease the minute gap that has formed between the top and bottom plates of the zipper slider. These plates are what press the zipper teeth together as the slider moves.
- Position the Item: Lay the item flat on a stable surface. If the zipper is fully separated, align the two sides of the zipper as best as you can, bringing the slider to the very bottom or top of the track, depending on where it usually starts.
- Locate the Gap: Identify the wider side of the zipper slider – typically the bottom end, where the two halves of the zipper meet after passing through the slider. You’re looking for the slightly open ‘mouth’ of the slider.
- Apply Gentle Pressure: Take your small pliers and carefully grip the top and bottom plates of the zipper slider, focusing on the wider end. Apply very light, steady pressure to gently squeeze them closer together. The key here is *gentle* and *incremental*. You’re not trying to crush the slider, but merely to reduce the tiny gap that has formed.
- Work Incrementally: Squeeze a little, then release. Check the slider. If it’s still too loose, repeat with another very slight squeeze. It’s much easier to add more pressure than to fix an overtightened slider, which can make the zipper too stiff or damage it permanently. You might need to press on both sides of the slider slightly to ensure even compression.
- Inspect Carefully: Look closely at the slider after each squeeze. You should see the gap between the plates slightly reducing. The objective is to restore enough tension for the slider to properly engage the teeth without being so tight that it can’t move.
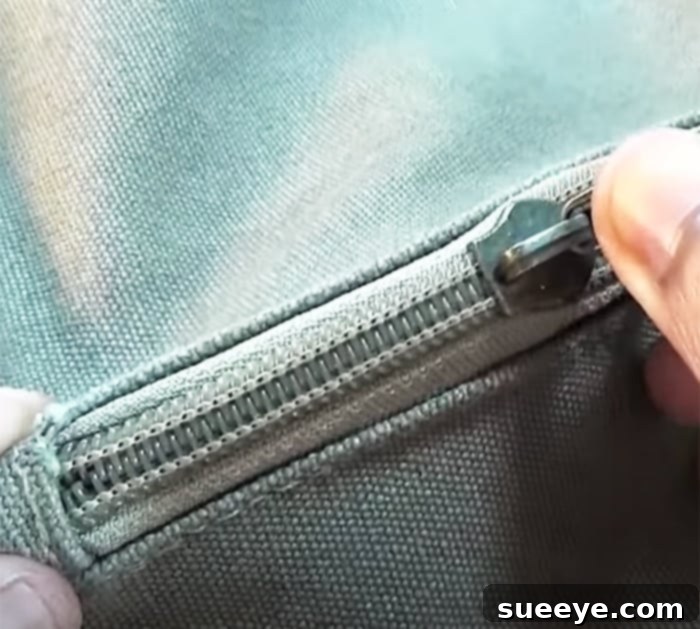
4. Testing the Repair: Ensuring Smooth Operation
Once you feel you’ve sufficiently reduced the gap, it’s time to test your work. This step is critical for confirming the effectiveness of your repair and making any final adjustments.
- Slow and Steady: Gently try to zip the zipper up and down a few times. Do not force it. It should move smoothly without catching or separating.
- Check for Separation: Pay close attention to the area behind the slider. The teeth should interlock perfectly, and there should be no gaps or separations.
- Adjust if Necessary:
- If the zipper still separates, the slider might still be too loose. Apply a tiny bit more pressure with the pliers.
- If the zipper feels stiff, catches, or is very difficult to move, you might have overtightened the slider. If possible, try to very gently pry the plates open *just a fraction* using a thin, flat tool (like a small screwdriver or a sturdy knife blade), being extremely careful not to damage the slider further. This is a delicate process, so proceed with extreme caution.
- Lubrication (Optional but Recommended): If the zipper feels a bit stiff after repair, or even for general maintenance, a little lubrication can go a long way. Rub a pencil lead (graphite) along the zipper teeth, apply a small amount of bar soap, or use a wax crayon. This creates a smoother surface for the slider to glide, reducing friction and extending the life of your zipper.
Beyond the Basics: Troubleshooting Other Zipper Issues
While the pliers trick is fantastic for separated or off-track zippers, other zipper problems might require different approaches. Knowing when this method applies and when it doesn’t is crucial:
- Zipper Stuck: If the zipper is stuck but not separated, it’s often due to friction or a snagged piece of fabric. Try rubbing pencil graphite or wax along the teeth to lubricate them. If fabric is caught, gently pull the fabric away while wiggling the slider. Avoid forcing it.
- Missing Zipper Teeth: Unfortunately, missing teeth usually mean the entire zipper needs to be replaced. The pliers trick won’t work in this scenario as there’s no way to create an interlocking mechanism where teeth are absent.
- Completely Broken Slider: If the slider has cracked, shattered, or fallen off entirely, you will need a new slider. These can often be purchased separately and installed, but the process is more involved than a simple squeeze.
For the common issue of a loose or separating slider, however, this simple pliers method is your first, best, and often only required solution.
The Lasting Benefits of DIY Zipper Repair
Embracing simple DIY repairs like fixing a broken zipper offers a multitude of advantages that extend far beyond the immediate fix:
- Significant Cost Savings: Professional repairs can be costly, and buying a new item is even more so. This repair costs nothing but a few minutes of your time.
- Time Efficiency: Instead of making a trip to a tailor or a store, you can fix the problem on the spot, allowing you to quickly get back to using your item.
- Environmental Responsibility: By repairing instead of replacing, you actively reduce waste and your environmental footprint, contributing to a more sustainable lifestyle.
- Skill Development: Each successful repair builds confidence and develops practical skills that can be applied to other household problems.
- Sentimental Value: Sometimes, an item holds sentimental value. Being able to repair it yourself keeps those memories alive and extends its usable life.
- Empowerment: There’s a genuine sense of accomplishment and satisfaction that comes from fixing something yourself, rather than relying on others.
Maintaining Your Zippers for Longevity
Once you’ve successfully repaired your zipper, or even to prevent future issues, adopting a few simple maintenance habits can significantly extend the lifespan of all your zippers:
- Don’t Force It: If a zipper is stuck, don’t yank it. Investigate the cause (snag, stiffness) and address it gently.
- Lubricate Regularly: A light application of graphite (from a pencil), beeswax, or a specialized zipper lubricant can keep zippers running smoothly and prevent wear.
- Close Zippers Before Washing: This prevents the zipper teeth from snagging on other items in the laundry and reduces stress on the slider.
- Clean Zippers: Dirt, sand, and lint can accumulate in zipper teeth, causing friction. Periodically brush them clean, especially on items used outdoors.
- Mind the Weight: Avoid overpacking bags or clothing, as excessive strain can deform zippers over time.
Conclusion: Empowering You to Tackle Zipper Woes
It’s truly astonishing how a problem that once seemed destined for the trash can or an expensive repair can be resolved with such elegant simplicity. The ‘pliers trick’ for fixing broken or separated zippers is more than just a repair method; it’s a testament to the power of basic mechanics and resourceful thinking. This guide has detailed not only the step-by-step process but also the underlying reasons for zipper failures, the environmental and financial benefits of DIY repair, and crucial maintenance tips to ensure your zippers stay functional for years to come.
Next time you encounter a loose or separating zipper, remember this invaluable life hack. Grab your small pliers, apply a gentle squeeze, and watch as your item is restored. You’ll not only save time and money but also gain the satisfaction of giving your beloved belongings a second chance. Don’t let a minor zipper issue dictate the fate of your clothes or bags – empower yourself with this simple, effective repair!