
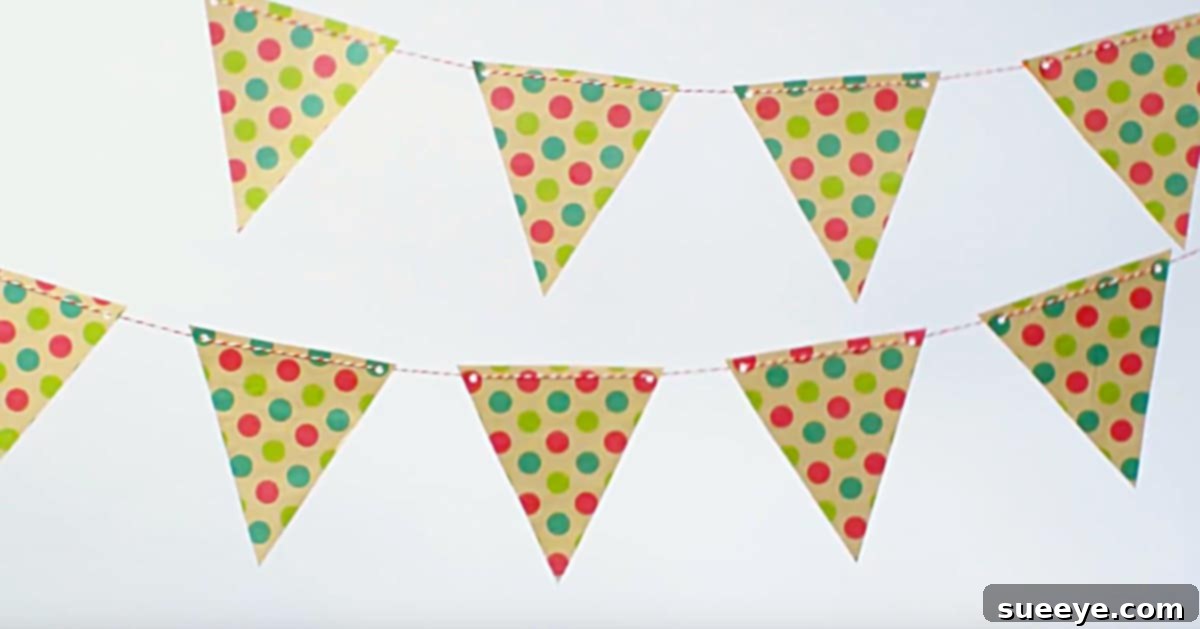
Transform Your Leftover Wrapping Paper into a Stunning DIY Flag Garland
Do you often find yourself with an abundance of beautiful yet unused wrapping paper after special occasions? That collection of festive designs and elegant patterns, tucked away in a closet, holds immense potential for creative repurposing. Instead of letting it gather dust or eventually tossing it, imagine transforming those leftover rolls into charming and personalized decorations. My own journey into the world of DIY led me to discover an incredibly simple yet impactful project: a DIY Flag Garland crafted entirely from old wrapping paper. This brilliant idea immediately struck me as the perfect solution for both decorative needs and sustainable living.
The inspiration for this particular craft ignited when I was brainstorming festive touches for my upcoming New Year’s Eve Party. I wanted something unique, handcrafted, and that truly reflected a spirit of celebration without adding to post-holiday waste. This flag garland project perfectly fit the bill, promising a fun, easy, and budget-friendly way to add vibrant flair to my home. The excitement to get started was undeniable, and I couldn’t wait to gather my materials and bring this vision to life. If you’re ready to turn those forgotten paper scraps into a stunning decorative statement, read on for a comprehensive guide to creating your own beautiful DIY Flag Garland.
Why Embrace the DIY Wrapping Paper Flag Garland?
Beyond its aesthetic appeal, crafting a flag garland from leftover wrapping paper offers a multitude of benefits that make it an ideal project for any crafter:
- Sustainability at Its Best: This project is a fantastic example of upcycling. By repurposing materials that would otherwise be discarded, you’re actively contributing to waste reduction and promoting eco-conscious living.
- Incredibly Budget-Friendly: Why spend money on new decorations when you have a treasure trove of supplies already at home? This DIY utilizes materials you’ve likely forgotten about, making it virtually free to create stunning decor.
- Unmatched Versatility: A flag garland isn’t limited to a single event. It can be tailored for any celebration imaginable—birthdays, anniversaries, baby showers, graduations, or major holidays like Christmas, Halloween, and, of course, New Year’s Eve. It’s also perfect for everyday home embellishment, adding a splash of color to any room.
- Endless Personalization: The choice of wrapping paper allows for limitless creativity. You can select patterns and colors that perfectly match your party theme, home decor, or personal style, ensuring your garland is truly unique.
- Accessible for All Skill Levels: Whether you’re a seasoned crafter or just starting, the steps for making this garland are straightforward and simple. It’s an excellent project to do with children, fostering creativity and fine motor skills (with appropriate supervision for cutting).
Gather Your Creative Toolkit: Materials You’ll Need
One of the best aspects of this DIY is that you likely possess most, if not all, of the necessary materials already. Take a moment to collect these items before you begin:
- Leftover Wrapping Paper: This is your primary material. Don’t be afraid to mix and match different patterns, colors, and even textures for added visual interest. Think about the overall aesthetic you want to achieve for your specific occasion.
- Sharp Scissors or a Craft Knife: For precise and clean cuts, which are essential for neat flag edges. (If using a craft knife, ensure you have a cutting mat underneath for safety and to protect your surfaces.)
- Pencil: Crucial for tracing your flag shapes onto the back of the wrapping paper.
- Ruler: A ruler will help you achieve straight lines and consistent flag dimensions, especially if you’re not using a pre-made template.
- Hole Punch: A standard single-hole punch is ideal for creating the openings where your string will pass through.
- Decorative Twine, Ribbon, or String: This will be the backbone of your garland. Baker’s twine, colorful yarn, thin satin ribbon, or even rustic jute twine can work wonderfully. Choose a material and color that complements your wrapping paper designs.
- Optional Embellishments: Consider having a glue stick or double-sided tape on hand for minor adjustments. Glitter, stickers, markers, or stamps can also be used to add extra sparkle or detail to your flags.
Crafting Your Garland: A Step-by-Step Guide
Now that you have all your materials, let’s dive into the fun part—creating your very own flag garland!
Step 1: Preparing Your Flags – Tracing and Cutting with Precision
The first step in bringing your garland to life involves shaping your flags. Begin by deciding on the desired size and shape for your individual flags. Traditional pennant-style triangles are popular, but you could also opt for swallowtail banners, simple rectangles, or even custom shapes like circles or hearts. To ensure uniformity and a professional finish, it’s highly recommended to create a reusable template. You can easily make one from a piece of cardstock or even a sturdy cereal box—simply draw your desired flag shape and cut it out.
Once your template is ready, turn your chosen wrapping paper over to its plain, unprinted side. Place your template on the back of the paper and carefully trace around its edges with your pencil. To be efficient and minimize waste, try to arrange your flag outlines as closely as possible on the paper, leaving just enough room for your scissors or craft knife. Consider the total length you want your garland to be and how closely you’d like your flags spaced; this will help you estimate the number of flags you need to trace and cut.
With all your flag shapes meticulously traced, it’s time to cut them out. For crisp, clean edges that will enhance the overall look of your garland, use sharp scissors or a craft knife. Take your time during this process; neat cuts make a significant difference in the final presentation. I started by tracing all my flag triangles on the back of the wrapping paper, carefully aligning them to make the most of my supplies.
Step 2: Preparing for Stringing – Punching Uniform Holes
With your collection of perfectly cut flags ready, the next essential step is to prepare them for stringing. This involves creating the openings through which your twine or ribbon will pass. Using your trusty hole punch, carefully make two holes near the top edge of each flag. It’s important to place these holes consistently—one in each of the top corners (or along the top edge if you’re using a rectangular shape).
To ensure all your flags hang evenly and look symmetrical, aim for uniform hole placement. You might find it helpful to lightly mark the exact spots with a pencil before punching, or use a ruler to measure a consistent distance from the top and side edges for each hole. Be mindful not to punch too close to the edge of the paper, as this could weaken the paper and cause it to tear, especially if your garland will be handled frequently or stored for future use. For particularly thin wrapping paper, a small piece of clear tape applied to the back of the paper before punching can provide extra reinforcement, though this is often unnecessary for standard paper. I meticulously punched two holes in the top of my cute little triangle flags, ensuring they were evenly spaced and neat.
Step 3: Bringing it All Together – Stringing Your Garland
Now for the most satisfying part: assembling your garland! Take your chosen decorative twine, ribbon, or string and cut a generous length. It’s always better to cut it longer than you think you’ll need, as you’ll want extra length for tying knots, ensuring proper flag spacing, and having ample material for hanging the garland securely. A good rule of thumb is to add at least a foot or two extra on each end beyond your desired garland length.
Begin lacing your individual flags onto the twine. There are a couple of popular methods for doing this, each offering a slightly different look and level of flag stability:
- The “Through Both Holes” Method: For this approach, thread the twine through the front of the first hole on a flag, then loop it across the back of the flag, and bring it out through the front of the second hole. This method keeps the flags firmly in position on the twine and often results in a neat, continuous look.
- The “Over and Under” Method: Alternatively, thread the twine through the front of the first hole, bring the twine over the top edge of the flag, and then thread it through the front of the second hole. This technique leaves a segment of the twine visible along the top edge of each flag, which can add a charming detail, especially if you’re using decorative twine.
Experiment with both methods to see which aesthetic you prefer. As you string each flag, gently slide it down the twine, leaving a small, consistent gap between each one. You can either allow your flags to slide freely along the twine for easy adjustment, or if you prefer them to stay fixed, tie a tiny knot on either side of each flag to secure its position. I carefully chose some lovely decorative twine that I had purchased from Michael’s Craft Store on sale and meticulously laced it through the top of the little triangle flags, watching my vibrant garland come to life with each addition.
Elevate Your Design: Creative Variations and Embellishments
The true magic of DIY lies in the ability to personalize and innovate. Once you’ve mastered the basic flag garland, consider these ideas to add extra flair and make your creation truly unique:
- Dynamic Mix & Match: Don’t limit yourself to one type of wrapping paper. Combine different patterns, textures, and color palettes to create a visually rich and engaging garland that reflects your unique style.
- Sparkle and Shine: Add a touch of glamour by applying glitter glue along the edges of your flags, or use glitter pens to draw intricate designs. Metallic markers can also create stunning accents.
- Layered Dimensions: Experiment with cutting flags in varying sizes and layering them. For instance, place a smaller, solid-colored flag on top of a larger, patterned one for a compelling 3D effect.
- Personalized Messages: Transform your garland into a message board! Use stencils, stickers, or neat handwriting to spell out names, celebratory phrases like “HAPPY BIRTHDAY,” “CONGRATS,” “WELCOME HOME,” or “HAPPY NEW YEAR” on individual flags.
- Beyond the Triangle: While triangles are classic, don’t shy away from other shapes. Cut out circles, stars, hearts, mini banners, or even letters for a highly themed garland.
- Textural Accents: Incorporate small scraps of fabric, felt, or even lace. Attach them to your paper flags with a dab of glue for added texture and visual interest.
- Reversible Designs: For a garland that looks fantastic from every angle, glue two pieces of wrapping paper back-to-back before cutting and punching holes. This creates a sturdy, double-sided flag.
- Natural Touches: For a rustic or seasonal theme, consider incorporating small dried leaves, pressed flowers, or tiny pinecones (attached with hot glue for security).
- Themed Garlands: Dedicate your garland to a specific holiday. Use spooky patterns for Halloween, cheerful reds and greens for Christmas, or soft pastels for an Easter celebration.
Showcase Your Craft: Inspiring Display Ideas
With your beautiful DIY Flag Garland complete, it’s time to proudly display your handmade masterpiece! Its versatility means it can enhance almost any space or occasion:
- The Ultimate Party Decor: Drape your garland across walls, above doorways, strung between furniture, or as a vibrant backdrop for your party table. It instantly transforms any space into a festive celebration, perfect for birthdays, graduations, or my delightful New Year’s Eve party!
- Charming Home Accent: Add a touch of whimsy and personality to everyday living. Hang it in a child’s bedroom or nursery, above a bookshelf, or across a window for a cozy and personalized touch.
- Mantlepiece Masterpiece: A garland is a classic way to adorn your fireplace mantle, adding a focal point, especially during seasonal decorating.
- Picture-Perfect Backdrop: Create an enchanting backdrop for photos at events, family gatherings, or even for social media posts.
- Window Wonderland: Brighten up any window by stringing your garland across the top, allowing the natural light to highlight its patterns and colors.
- Outdoor Festivities: If crafted from sturdy paper and on a calm, dry day, your garland can even add a festive touch to a patio, porch, or garden party space.
My DIY Flag Garland looked absolutely adorable strung across my living room and kitchen for my New Year’s Eve party. The shimmering designs of the repurposed wrapping paper caught the light, creating a truly festive ambiance that garnered many compliments from my guests. It was such a success, I’m seriously considering leaving it up all year long as a cheerful, sustainable reminder of the joy of handmade decor!
Embracing the Joy of Repurposing and DIY Creativity
This simple DIY Flag Garland project is far more than just a craft; it’s a vibrant testament to the immense joy and creative potential found in repurposing. It elegantly transforms what might be considered waste into something extraordinary and beautiful, proving that with a little imagination and effort, even the most mundane or forgotten items can be given a vibrant, meaningful second life.
The satisfaction derived from crafting something beautiful and functional with your own hands, especially from materials that would otherwise go unused, is deeply rewarding. It’s a mindful process that encourages appreciation for resources and fosters a sense of accomplishment.
So, the next time you find yourself with a pile of leftover wrapping paper after a celebration, resist the urge to immediately reach for the recycling bin. Instead, pause and consider the endless possibilities for transformation. A DIY Flag Garland is just one of many wonderful ways to embrace sustainable crafting, inject a unique personal touch into your surroundings, and revel in the therapeutic, creative process of making something truly one-of-a-kind. We hope this comprehensive guide has inspired you to unleash your inner crafter and start making your own stunning, eco-friendly flag garlands today!