
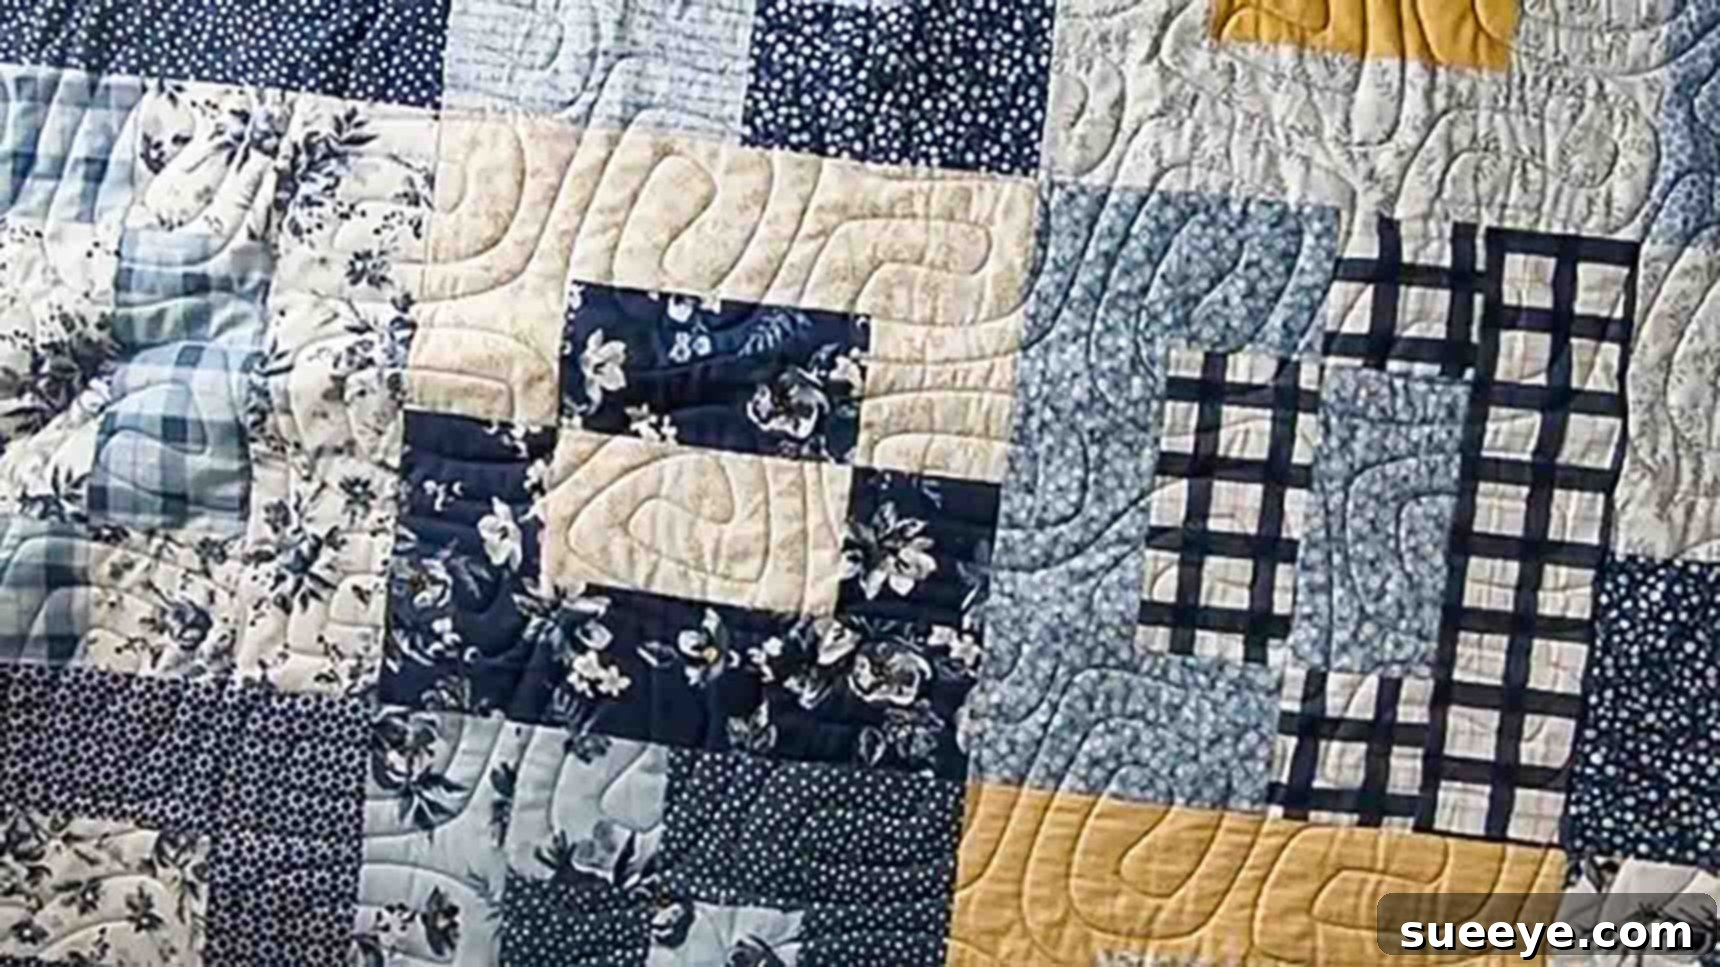
Master the Padlock Quilt Pattern: A Beginner-Friendly, No-Waste Fat Quarter Project
Embark on a delightful and rewarding quilting journey with the ingenious Padlock Quilt Pattern! Whether you’re a seasoned quilter looking for a quick and satisfying project or a complete beginner eager to dive into the world of fabric and stitches, this pattern is an absolute gem. Crafted with simplicity and efficiency in mind, the Padlock Quilt Pattern, beautifully demonstrated by Moonkin Stitchery on YouTube, is designed to make the most out of your cherished fat quarters. The best part? This isn’t just a fun project; it’s a truly no-waste quilting adventure, ensuring every precious inch of your fabric finds its purpose in a stunning finished quilt. Get ready to transform your favorite bold prints and vibrant solids into a unique masterpiece with confidence and ease.
The allure of the Padlock Quilt lies in its clever construction and eye-catching design, resembling interlocking padlock shapes that create a mesmerizing visual texture. This guide will walk you through every step, from preparing your fabrics to piecing together your quilt top, ensuring a smooth and enjoyable crafting experience. Say goodbye to guesswork and hello to a beautifully finished quilt that you’ll be proud to display or gift. Let’s gather our supplies and begin creating this charming quilt today!
Why Choose the Padlock Quilt Pattern?
The Padlock Quilt Pattern stands out for several compelling reasons, making it a fantastic choice for any quilter:
- Beginner-Friendly Design: The construction relies on simple geometric shapes and repetitive cutting, making it incredibly accessible for those new to quilting. The clear, step-by-step instructions ensure a frustration-free experience, allowing you to build confidence with each completed block.
- Unbeatable Fat Quarter Efficiency: This pattern is a dream come true for stash-busters! It’s specifically engineered to use an entire fat quarter without producing any scraps, truly living up to its “no-waste” promise. This means more fabric for your quilt and less for your scrap bin, maximizing the value of your fabric investment.
- Versatility in Fabric Choice: The strong graphic nature of the padlock blocks provides an excellent canvas for showcasing a wide range of fabrics. Those large, bold prints that are sometimes challenging to incorporate into smaller pieces will shine in this pattern. Experiment with contrasting colors, subtle blenders, or a collection of themed fabrics to create vastly different looks, from modern to traditional.
- Satisfyingly Quick Project: While the final quilt is impressive, the individual blocks come together relatively quickly. This makes it a great project for those who enjoy seeing fast progress and want to complete a significant quilt without feeling overwhelmed.
- Perfect for Gifts: A handmade quilt is a deeply personal and cherished gift. The Padlock Quilt, with its charming design and thoughtful construction, makes an ideal present for birthdays, holidays, housewarmings, or any special occasion.
Gather Your Essentials: Materials for a Throw-Size Quilt
Before we begin, ensure you have all the necessary materials on hand. The following list is specifically for a generous throw-size quilt, measuring approximately 64″ x 64″. Remember, precise measurements are key in quilting, so take your time to ensure accuracy.
Materials Needed:
- 16 pcs. fat quarters: These are pre-cut fabric pieces, typically 18″ x 22″. This pattern is designed to fully utilize these, so choose fabrics you love!
- 1/2 yard binding fabric: This fabric will frame your quilt, providing a clean and durable finish around the edges.
- 4 yards backing fabric: This forms the back of your quilt. You might need to piece two lengths together to achieve the desired width for a throw-size quilt.
- 72″ x 72″ batting: The batting is the soft, fluffy layer in the middle of your quilt, providing warmth and texture. A natural fiber like cotton or a blend is often recommended.
For those who prefer a printed guide, a free pattern download is often available:
- (click here for the free pattern, typically found on Moonkin Stitchery’s website)
Essential Quilting Tools:
Beyond the fabrics, having the right tools will make your quilting experience much smoother and more enjoyable:
- Rotary Cutter: A sharp rotary cutter (45mm or 60mm) is crucial for precise, straight cuts.
- Self-Healing Cutting Mat: Protects your work surface and extends the life of your rotary blade.
- Quilting Rulers: Clear acrylic rulers with distinct measurement markings are essential for accurate cutting and trimming. A long ruler (e.g., 6″x24″) and a square ruler (e.g., 4.5″x4.5″ or 8.5″x8.5″) will be very useful.
- Sewing Machine: A reliable sewing machine capable of sewing a consistent 1/4-inch seam allowance.
- Iron and Ironing Board: For pressing seams flat and ensuring crisp fabric.
- Thread: High-quality 100% cotton thread that matches or complements your fabrics.
- Fabric Clips or Pins: To hold fabric pieces together before sewing.
- Seam Ripper: Every quilter needs one for occasional corrections!
Precise Preparation: Cutting Instructions
Accuracy in cutting is paramount in quilting, as it directly impacts how well your blocks and quilt top will come together. Take your time with this step, ensuring each piece is precisely measured and cut. The beauty of this pattern is that each fat quarter will be entirely transformed into these specific pieces, leaving no usable scraps behind.
Subcut each fat quarter as follows:
- 2 – 4 1/2″ x 16 1/2″ rectangles: These longer rectangles form the main ‘body’ of the padlock shape.
- 2 – 4 1/2″ x 8 1/2″ rectangles: These pieces contribute to the sides of the padlock blocks.
- 4 – 4 1/2″ squares: These smaller squares often act as cornerstones or connecting elements, adding definition to the block.
Pro Tip for Efficiency: To speed up your cutting process, especially if you have multiple fat quarters of the same fabric or if you’re comfortable with handling layers, you can stack several fat quarters (usually 2-4 at a time, depending on your fabric thickness and rotary cutter sharpness). Ensure all edges are perfectly aligned before making your cuts to maintain accuracy across all layers simultaneously.
Step-by-Step Guide: Crafting Your Padlock Quilt
Now that your materials are prepped and precisely cut, it’s time to bring your padlock blocks to life. This pattern simplifies block construction into manageable steps, perfect for honing your piecing skills.
Step 1: Constructing the Individual Padlock Blocks
Begin by carefully pressing all your fabric pieces flat. A well-pressed fabric is easier to cut and sew accurately. Once your fat quarters are pressed out, you’ve already completed your precise cutting into the various rectangles and squares as detailed above. Now, it’s time to assemble these pieces into the distinct padlock block unit.
For each individual block, you will need to select pieces from two different prints or colors. This contrast is what defines the padlock shape. From one fabric print (let’s call it “Fabric A”), select:
- Two 4 1/2″ squares
- One 4 1/2″ x 8 1/2″ rectangle
- One 4 1/2″ x 16 1/2″ rectangle
Next, from a different, contrasting fabric print (let’s call it “Fabric B”), select pieces of the exact same measurements:
- Two 4 1/2″ squares
- One 4 1/2″ x 8 1/2″ rectangle
- One 4 1/2″ x 16 1/2″ rectangle
Carefully lay out these selected pieces on your design wall or a flat surface to visualize the block arrangement. Refer to the image below for guidance on how the strips and squares come together. You’ll notice that the two 4 1/2″ x 16 1/2″ rectangles (one from Fabric A, one from Fabric B) will form the core vertical elements. The shorter 4 1/2″ x 8 1/2″ rectangles and the 4 1/2″ squares will create the horizontal and corner elements, forming the distinctive padlock shape. The key is to arrange contrasting pieces adjacent to each other to make the design pop.
Once you are satisfied with your layout, begin sewing the pieces together with a precise 1/4″ seam allowance. It’s often helpful to sew smaller units together first (e.g., a square to a rectangle) and then join those units. Press your seams after each join to ensure flatness and accuracy. Some quilters prefer to press seams open, while others press to one side (usually towards the darker fabric) to “nest” seams later, which helps align points perfectly. Continue joining all the pieces until you have a complete padlock block.
Step 2: Assembling the Quilt Top
Once you have sewn all 16 of your padlock blocks, the real fun begins as you start to visualize your finished quilt! This step involves arranging your completed blocks and then stitching them together to form the quilt top.
Lay out all your finished blocks on a large flat surface, such as a design wall, the floor, or a bed. This allows you to audition different arrangements and ensure a balanced distribution of colors and patterns. The magic of the Padlock Quilt Pattern truly comes alive in this stage: you’ll rotate every other block 90 degrees. This simple rotation creates a dynamic, interlocking design across your entire quilt top, enhancing the visual flow and making the “padlock” motif even more pronounced. Play around with the rotations until you achieve a layout that is pleasing to your eye.
Once you’ve finalized your layout, begin sewing your blocks together into rows. For a 64″ x 64″ throw quilt with 16 blocks, you’ll likely create four rows, with four blocks in each row. When sewing blocks together, ensure your 1/4″ seam allowance is consistent, and try to “nest” your seams where they meet. This means pressing opposing seams in adjacent blocks in different directions, allowing them to interlock tightly for a precise join without bulk. Pin generously at these intersections.
After all your rows are complete and pressed, sew the rows together to form your final quilt top. Again, take your time to align all the seams and intersections, using pins to hold everything in place. Press the finished quilt top thoroughly, making sure it lies perfectly flat and square. Congratulations, your beautiful Padlock Quilt top is now complete!
Design & Fabric Selection Tips for Your Padlock Quilt
While the pattern itself is straightforward, your fabric choices can dramatically alter the final look of your Padlock Quilt. Here are some tips to help you select and combine fabrics for a truly stunning result:
- High Contrast for Definition: The padlock design is best highlighted with good contrast between the “locking” elements. Pair light fabrics with dark ones, or vibrant colors with neutrals, to make the shapes pop.
- Showcasing Large Prints: This pattern is ideal for fat quarters with large, intricate, or bold designs. Since the pieces are relatively large, these prints won’t get lost in tiny seams. Use a striking print for one part of the padlock and a coordinating solid or blender for the other.
- Color Palettes:
- Monochromatic: Use different shades of the same color for a subtle, elegant effect.
- Analogous: Select colors next to each other on the color wheel (e.g., blues and greens) for a harmonious look.
- Complementary: Pair opposite colors (e.g., blue and orange) for maximum visual impact and vibrancy.
- Rainbow: Create a lively, joyful quilt by incorporating a spectrum of colors.
- Theme and Season: Consider a theme! Use holiday fabrics for a festive quilt, baby prints for a nursery, or nature-inspired prints for a cozy, earthy feel.
- Auditioning Fabrics: Before you commit to cutting, lay out your fat quarters together to see how they interact. Take a photo, as sometimes the camera’s eye helps reveal unexpected combinations. Don’t be afraid to swap fabrics in and out until you find a palette you love.
Bringing It All Together: Finishing Your Quilt
Once your quilt top is assembled, you’re on the home stretch! The final steps involve layering, quilting, and binding, which transform your pieced top into a complete, functional quilt.
Basting Your Quilt Sandwich:
The “quilt sandwich” consists of three layers: your finished quilt top, the batting, and the backing fabric. Lay your backing fabric flat (right side down), then place the batting smoothly on top, followed by your quilt top (right side up). Ensure all layers are flat and free of wrinkles. Baste these layers together using one of these methods:
- Safety Pins: Use curved quilting pins spaced every few inches.
- Spray Basting: Use a temporary fabric adhesive to secure the layers.
- Thread Basting: Hand stitch long, loose basting stitches through all layers.
Basting is crucial for preventing shifting during the quilting process, which can lead to puckers and uneven results.
Quilting Your Layers:
This is where you stitch through all three layers to secure them together and add texture. You can choose from various quilting methods:
- Straight-Line Quilting: Using your walking foot, stitch straight lines across the quilt, either parallel to seams, diagonally, or in a grid pattern. This is an excellent option for beginners.
- Free-Motion Quilting: For more advanced quilters, this involves dropping your feed dogs and moving the quilt freely under the needle to create custom designs like swirls, stipples, or pebbles.
- Pantograph Quilting: Often done on a long-arm machine, this uses a continuous design over the entire quilt.
Consider the density of your quilting; more quilting will result in a flatter, denser quilt, while less quilting will make it softer and puffier.
Adding the Binding:
The binding is the final edge finish that encases the raw edges of your quilt. Cut your binding fabric into 2.5-inch strips, piece them together to form one long strip, and press in half lengthwise. Sew the binding to the front of your quilt, miter the corners, and then hand-stitch or machine-stitch it to the back for a clean, durable edge.
Don’t Forget a Label!
Consider adding a small fabric label to the back of your quilt. Include details like your name, the date, the recipient, and the quilt’s name. This adds a personal touch and creates a lasting memory for future generations.
Conclusion: Your No-Waste Padlock Quilt Awaits!
You’ve now learned how to create a beautiful and resourceful Padlock Quilt, maximizing every single inch of your fat quarter collection! This pattern is a testament to clever design, proving that stunning results don’t require complex techniques or excessive fabric waste. From precise cutting to thoughtful piecing, each step contributes to a quilt that is as satisfying to make as it is lovely to behold.
We extend our sincere gratitude to Moonkin Stitchery for sharing this wonderful and ingenious quilt pattern. Their clear instruction makes quilting accessible and enjoyable for everyone. We encourage you to watch their video tutorial for a visual guide that complements these written instructions perfectly.
Now it’s your turn to unleash your creativity! Gather your fat quarters, pick out your favorite designs, and start sewing. Whether it’s a cozy throw for your sofa, a thoughtful gift for a loved one, or a new addition to your handmade collection, your Padlock Quilt is sure to bring joy and warmth. Share your beautiful creations with the quilting community – we can’t wait to see what you make!