
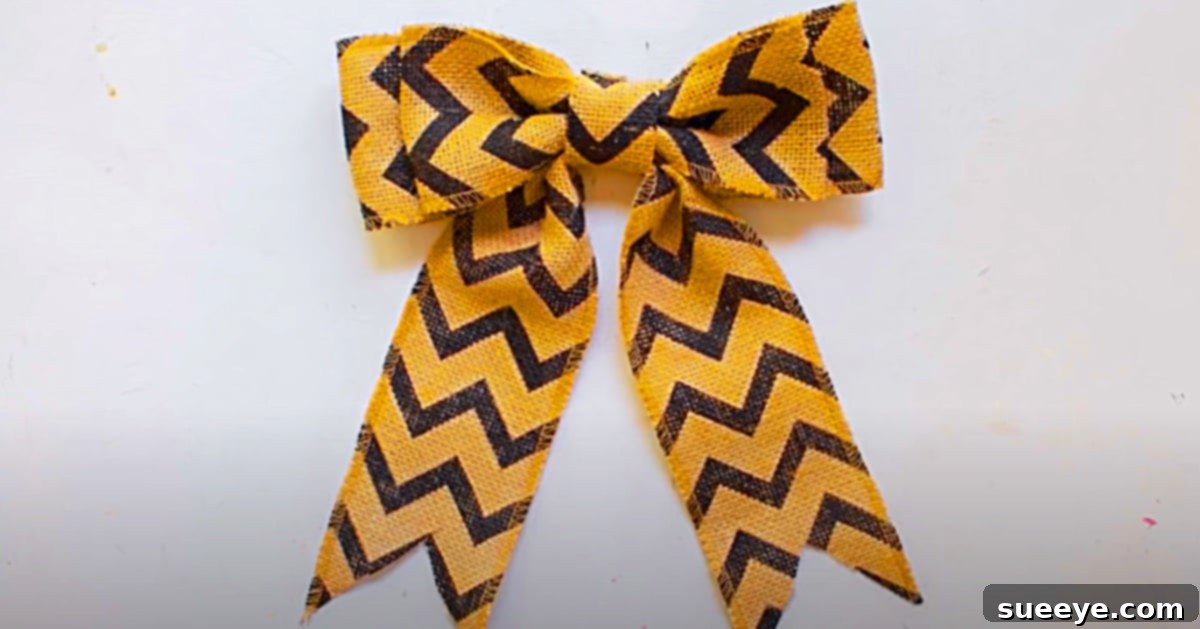
Master the Art of Burlap Bow Making: Your Ultimate DIY Guide
The holiday season is rapidly approaching, bringing with it the joyous traditions of gift-giving, festive decorations, and heartwarming gatherings. For many of us who love to add a personal touch to our celebrations, handmade crafts are an integral part of making these moments special. That’s why, upon discovering this incredible burlap bow video tutorial by Practically Functional on YouTube, I was absolutely thrilled. As an avid crafter, I’ve delved into countless projects, from intricate sewing to cozy quilting, yet the art of bow-making has always presented a peculiar challenge. Despite my creative prowess in other areas, crafting a perfectly symmetrical and voluminous bow seemed to be a skill that consistently eluded me.
This struggle often led me to consider purchasing pre-made bows, especially during peak seasons. I recall a recent visit to a popular craft store, Michael’s, where I overheard a conversation that truly highlighted the value of mastering this simple skill. A fellow shopper was requesting assistance from a staff member to make a bow, and to my surprise, she was quoted $8 for a single bow! While convenient, this price tag quickly adds up, especially when you need multiple bows for gifts, wreaths, or home decor. This experience solidified my determination: making my own bows is an essential skill I intend to fully master well before the holiday rush begins, saving both money and adding a unique, personal flair to everything I decorate.
Burlap bows, in particular, offer a distinct charm. Their rustic texture and natural aesthetic make them incredibly versatile, suitable for a wide range of styles from farmhouse chic to classic country, and perfect for various occasions beyond just the holidays, such as fall festivities, rustic weddings, or simply adding a touch of warmth to everyday home decor. This guide will walk you through everything you need to know, from gathering materials to mastering the simple steps, ensuring your handmade bows are not only beautiful but also a reflection of your creative spirit.
Why Choose Burlap for Your Bows? The Rustic Charm Explained
Before we dive into the how-to, let’s explore why burlap stands out as an excellent choice for crafting bows. Burlap, derived from jute fibers, possesses a unique set of characteristics that make it highly desirable for decorative purposes:
- Rustic Appeal: Its natural, coarse texture instantly evokes a sense of rustic elegance, adding warmth and earthiness to any setting. This makes it perfect for farmhouse, country, or vintage-themed decor.
- Durability: Burlap is a strong and resilient fabric. Burlap bows tend to hold their shape well, especially when made with wired burlap ribbon, ensuring your creations last throughout the season and beyond.
- Versatility: While often associated with fall and winter, burlap’s neutral tones make it incredibly adaptable. It can be dressed up with metallic accents for Christmas, paired with pastels for spring events, or used in its raw form for a purely natural look.
- Affordability: Compared to many other types of decorative ribbons, burlap ribbon is generally very cost-effective, allowing you to create numerous bows without breaking the bank.
- Texture Contrast: Its distinct texture provides a beautiful contrast when paired with smoother materials like silk, satin, or even glossy gift wrap, adding visual interest and depth to your designs.
Opting for burlap means choosing a material that is both aesthetically pleasing and practical, offering endless possibilities for creative expression.
The Joy of Handmade: More Than Just a Bow
Beyond the cost savings, there’s immense satisfaction in crafting something with your own hands. Making your own bows transforms a simple ribbon into a personalized statement. Each loop and fold becomes a testament to your creativity and care. This process isn’t just about the end product; it’s a therapeutic activity that allows you to unwind, focus, and engage in a fulfilling hobby. Imagine the joy of gifting a beautifully wrapped present topped with a bow you lovingly created, or adorning your home with decor that carries your unique touch. Handmade items resonate with a special kind of warmth and thoughtfulness that store-bought alternatives simply can’t replicate. It’s an opportunity to infuse your personality into your surroundings and share a piece of yourself with others.
Essential Materials for Effortless Burlap Bow Making
One of the best aspects of this project is how few materials you need to get started. Most of these items are readily available at any craft store, making this an accessible and affordable endeavor for crafters of all skill levels. To create beautiful burlap bows with ease, gather the following:
- Burlap Ribbon: The star of our project! Consider different widths (e.g., 2.5 inches for medium bows, 4 inches for larger statement bows) and whether you prefer wired or unwired. Wired burlap ribbon is highly recommended as it allows you to shape and “fluff” your bow with much greater control, making it easier to achieve a professional, voluminous look.
- Pipe Cleaners: These flexible fuzzy wires are invaluable for securely holding the loops of your bow together. They provide a strong, yet easily concealed, anchor point. You can choose pipe cleaners that blend with the burlap color or a contrasting color for a subtle design element.
- A Reliable Glue Gun: An essential tool for neatly securing the final wrap of your bow and ensuring everything stays in place. Always use caution when operating a glue gun, and ensure you have plenty of glue sticks on hand.
- Small Rubber Bands: These are incredibly useful for temporarily securing sections of your bow as you work, providing stability before the final, permanent attachments are made. They help maintain the shape of your loops while you adjust and refine.
- Sharp Scissors: A good pair of craft scissors will make clean, crisp cuts, which are crucial for professional-looking ribbon ends and loop edges. Avoid using dull scissors, as they can fray the burlap and make cutting difficult.
- (Optional) Ruler or Measuring Tape: While not strictly necessary, a ruler can help you achieve consistent loop lengths, especially if you’re making multiple bows and want them to be uniform in size.
Having all your materials prepped and ready before you begin will make the bow-making process smooth and enjoyable.
Step-by-Step Directions: Crafting Your Perfect Burlap Bow
This burlap bow video tutorial by Practically Functional on YouTube breaks down the process into incredibly manageable steps, allowing you to create a stunning bow in just minutes. Follow these detailed instructions to achieve a beautiful, professional-looking result every time:
Step 1: Preparing Your Ribbon Loops
Begin by cutting your sections of burlap ribbon. The video tutorial will guide you on the specific lengths and number of loops needed for your desired bow size. Generally, you’ll create several loops of equal length. For a standard medium-sized bow, you might aim for 4-6 loops on each side. Hold the ribbon in the center, creating a loop on one side, then twist the ribbon and create another loop on the opposite side. Continue this process, ensuring each loop is roughly the same size. The key here is consistency in your loop size for a balanced bow.
Step 2: Securing the Initial Folds
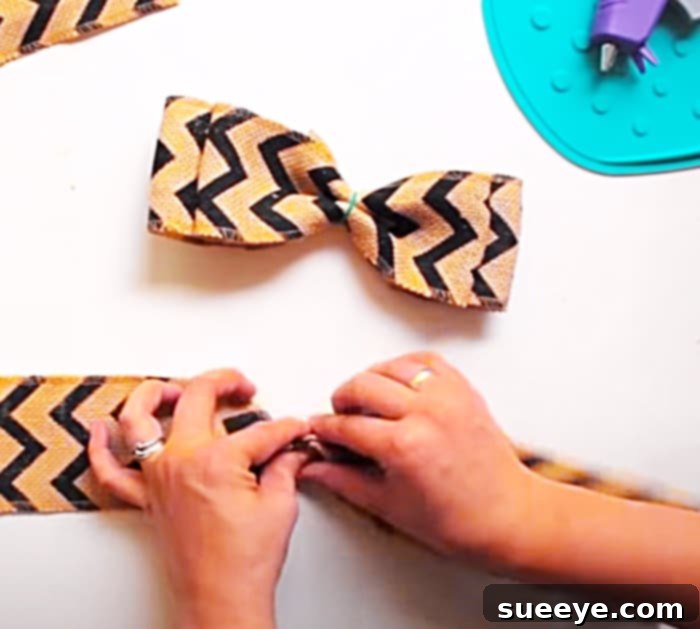
Once you have created all your desired loops, carefully gather them in the center. While still holding them firmly, take a small rubber band and wrap it tightly around the very center of your gathered loops. This rubber band acts as a temporary secure point, keeping your loops in place while you move on to the next steps. It’s crucial to ensure the rubber band is snug to prevent the loops from shifting.
Step 3: Creating and Attaching the Bow Tails
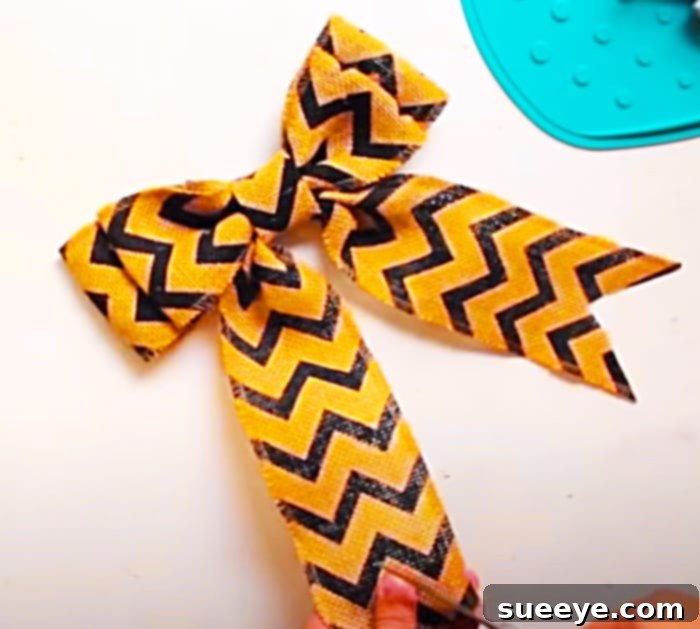
Next, you will craft the “flag tails” for the bottom of your bow. Cut two separate pieces of burlap ribbon to your desired length for the tails. You can create a classic “V” cut or a dovetail shape at the ends for a more finished look. Once cut, position these tails at the back of your looped section, directly underneath the rubber band. Take another small rubber band, or carefully adjust the existing one, to secure these tails firmly in place with the main body of the bow. Make sure they are centered and hanging evenly.
Step 4: The Finishing Center Wrap
To give your bow a polished and professional appearance, you’ll create a small finishing cover for the center. Cut a short strip of burlap ribbon, long enough to wrap around the center of your bow a couple of times. Apply a small dot of hot glue to one end of this strip, attach it to the back center of your bow, and then carefully wrap the strip tightly around the rubber-banded center. Secure the other end of the strip with another dab of hot glue, ensuring all raw edges and the rubber bands are completely hidden. This step adds a clean, tailored finish to your bow.
Step 5: Fluffing and Shaping Your Bow
This is where your bow truly comes to life! Gently pull and separate each loop, fluffing them out to create volume and dimension. If you used wired burlap ribbon, you can easily bend and shape the edges of the loops to achieve your desired fullness and structure. Adjust the tails to hang gracefully. Take your time with this step, as proper fluffing is key to transforming a flat collection of loops into a rich, three-dimensional bow.
Creative Applications and Styling Ideas for Your Burlap Bows
The beauty of this simple bow-making technique lies in its incredible versatility. Once you’ve mastered creating burlap bows, you’ll find countless ways to incorporate them into your home decor, gift wrapping, and special event styling. I personally discovered this when I decided to use them in some garland that I strung along my staircase. The bows immediately added a customized, tailored look to the entire Fall display, tying everything together beautifully. Here are even more ideas to inspire your creativity:
For Festive Gift Wrapping:
- Personalized Presents: Elevate any gift with a handmade burlap bow. It adds a thoughtful, rustic touch that shows extra effort and care.
- Gift Basket Embellishments: Perfect for adding a focal point to homemade gift baskets filled with preserves, baked goods, or craft supplies.
- Wine Bottle Decor: Tie a small burlap bow around the neck of a wine bottle for a charming hostess gift.
Enhancing Your Home Decor:
- Wreath Enhancements: Attach a large burlap bow to a plain wreath (grapevine, evergreen, or floral) for an instant upgrade, suitable for front doors or interior walls.
- Garland Accents: As I mentioned, scattering burlap bows throughout a garland on a mantelpiece, staircase, or doorway creates a cohesive and inviting look, especially for Fall or Christmas.
- Centerpiece Elements: Use smaller bows to adorn vases, candle holders, or hurricane lamps as part of a rustic table centerpiece.
- Curtain Tie-Backs: Create elegant tie-backs for curtains in a farmhouse or shabby-chic themed room.
- Pillow Embellishments: Sew or glue a burlap bow onto a plain throw pillow cover for added texture and charm.
- Christmas Tree Decor: Incorporate burlap bows as unique ornaments or as a tree topper, especially effective with a rustic or natural holiday theme.
Seasonal & Event Specific Ideas:
- Fall Decor: Pair burlap bows with mini pumpkins, gourds, or autumn leaves for a quintessential harvest display. They look fantastic on scarecrows or hay bales.
- Christmas & Winter: Combine burlap with red berry sprigs, pinecones, or jingle bells for a cozy, festive feel. They are ideal for outdoor decorations (ensure the burlap is treated for weather if left exposed).
- Rustic Weddings: Burlap bows are a staple for rustic-themed weddings. Use them on chair backs, aisle markers, pew ends, or even as part of floral arrangements.
- Baby Showers & Birthdays: For a rustic baby shower or a themed birthday party, burlap bows can adorn banners, treat bags, or even the back of high chairs.
Advanced Tips for Perfect Burlap Bows
To take your burlap bow-making skills to the next level, consider these pro tips:
- Wired vs. Unwired: Always opt for wired burlap ribbon if possible. The wire edges allow you to manipulate each loop, shaping it perfectly and ensuring your bow maintains its volume and form. Unwired burlap can be trickier to work with for a voluminous bow, though it can create a softer, more draped look.
- Consistency is Key: Strive for consistency in the size of your loops. Using a ruler or even a consistent finger span can help ensure all loops are uniform, leading to a more balanced and aesthetically pleasing bow.
- Fluffing Technique: Don’t underestimate the power of fluffing. Once your bow is assembled, gently pull each loop from the center, rotating them slightly. Work from the bottom layers upwards, creating fullness. The more you fluff, the more professional and substantial your bow will appear.
- Secure the Center Tightly: Whether using pipe cleaners or rubber bands, ensure the center of your bow is cinched as tightly as possible. A firm center prevents the loops from slipping and maintains the bow’s structure.
- Finishing the Tails: Experiment with different tail cuts. The classic “V” cut (dovetail) is popular, but a simple diagonal cut can also look elegant. For burlap, consider applying a thin line of fray-check liquid to the cut ends to prevent excessive fraying, though a little fraying can also add to the rustic charm.
- Layering Ribbons: For an extra luxurious bow, consider layering a narrower decorative ribbon (like lace, satin, or patterned fabric) on top of your burlap loops. This adds complexity and visual interest.
Troubleshooting Common Bow-Making Issues
Even with clear instructions, you might encounter a few hiccups. Here’s how to troubleshoot common problems:
- My Loops Look Uneven: This often happens when you don’t keep consistent tension or measurement. Go back and check your initial loop sizes. If using wired ribbon, you can gently reshape them. For unwired, you might need to redo the loops, paying closer attention to size.
- The Bow Looks Flat and Lifeless: The solution is almost always more fluffing! Separate each loop, gently pulling them upwards and outwards. Wired ribbon is your best friend here, as you can really shape each curve.
- The Center Isn’t Neat: Ensure your final wrapping strip is wide enough to cover all the mechanics (rubber bands, pipe cleaners) and that you’ve glued it tightly and securely at the back. Trim any excess ribbon close to the glue spot.
- Burlap is Fraying Excessively: Burlap naturally frays a bit, which adds to its charm. However, if it’s too much, ensure your scissors are sharp for clean cuts. You can also apply a fabric sealant or clear craft glue very sparingly to the cut edges to minimize fraying.
Embrace Your Inner Crafter: The Perfect Bow Awaits!
With this comprehensive guide and the fantastic video tutorial from Practically Functional, you now have all the tools and knowledge to conquer the art of burlap bow making. Gone are the days of paying exorbitant prices for pre-made bows or struggling with complex techniques. This method is quick, cost-effective, and yields beautiful results every time.
Imagine the compliments you’ll receive on your beautifully wrapped gifts, the warmth your handmade decorations will add to your home, and the sheer satisfaction of knowing you created them yourself. Burlap bows are not just simple decorations; they are expressions of creativity, thoughtfulness, and the joy of handmade living. So gather your materials, follow these easy steps, and start crafting. You’ll be amazed at how quickly you can transform a roll of burlap ribbon into stunning accents for any occasion. Don’t hesitate to experiment with different sizes and applications – your creative journey with burlap bows has just begun!
Share your creations and inspire others; the world of DIY crafting is all about sharing knowledge and spreading joy. Happy crafting!