
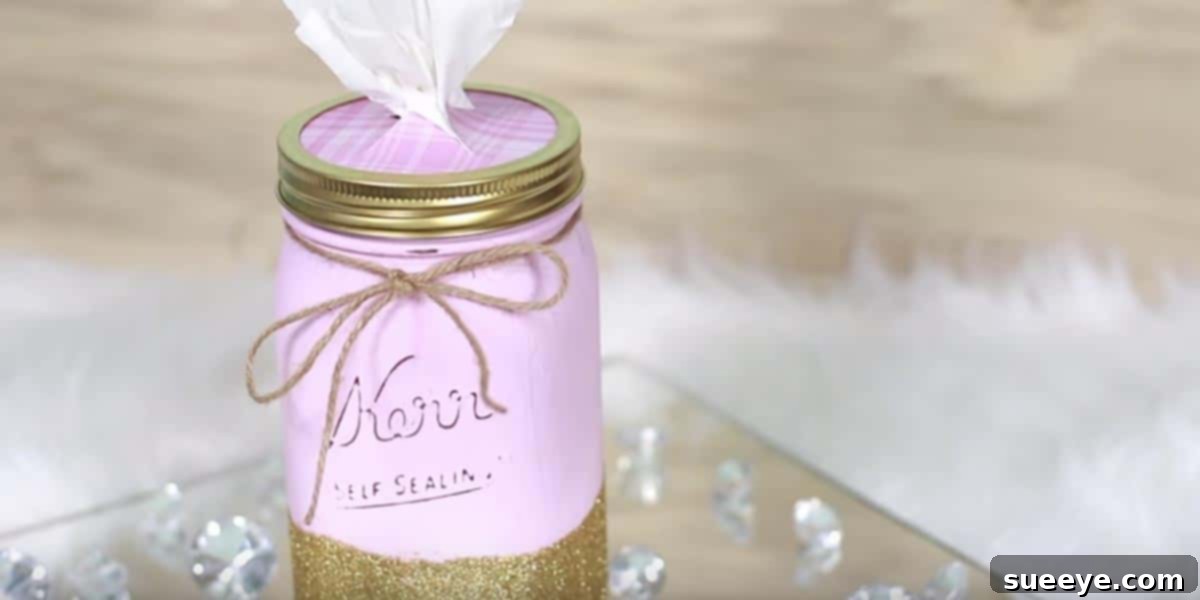
Elevate Your Home Decor: The Ultimate DIY Mason Jar Tissue Holder
Have you ever found yourself in the tissue aisle, struggling to pick out a box that wouldn’t clash with your carefully curated home decor? It’s a surprisingly common dilemma. Standard cardboard tissue boxes, while functional, rarely contribute to a room’s aesthetic. In fact, they often detract from it, sticking out like a sore thumb against your chosen color schemes and decorative accents. We invest time and effort into making our living spaces beautiful and inviting, so why should something as mundane as a tissue box undermine that effort?
Imagine a world where your tissue dispenser isn’t just a necessity, but a seamless and stylish part of your interior design. A world where you never again have to compromise on aesthetics for functionality. This isn’t a distant dream; it’s an achievable reality with a simple, creative, and incredibly satisfying DIY project: the Mason jar tissue holder. This ingenious hack transforms an ordinary household item into a personalized piece of decor, offering a charming and practical solution for every room in your home.
Gone are the days of aimlessly wandering the tissue aisle, hoping to stumble upon a pattern or color that vaguely matches. With a Mason jar tissue holder, you’re in complete control. You can customize it to perfectly align with your existing decor, or even create a striking new accent piece. And should your style evolve, adapting your tissue holder is as simple as a fresh coat of paint or a new decorative wrap. Let’s delve into why this DIY project is a game-changer for home aesthetics and how you can easily create one yourself.
Why Choose a Mason Jar for Your Tissue Dispenser?
The humble Mason jar has become a beloved staple in the DIY community, and for good reason. Its versatility, durability, and classic charm make it the perfect candidate for a multitude of projects, including our stylish tissue holder. But beyond its inherent appeal, there are several compelling reasons to choose a Mason jar over other alternatives:
- Unmatched Customization: Mason jars are a blank canvas. Paint them, tint them, wrap them, distress them – the possibilities for personalization are truly endless. This allows you to create a tissue holder that is uniquely yours and perfectly complements any decor style, from rustic farmhouse to modern minimalist.
- Superior Durability: Unlike flimsy cardboard boxes that can tear, get soggy, or collapse, a glass Mason jar offers robust protection for your tissues. It’s a reusable solution that will stand the test of time, reducing waste and offering long-term functionality.
- Aesthetic Appeal: Mason jars possess an inherent charm. Whether clear, painted, or embellished, they add a touch of handcrafted elegance that factory-produced tissue boxes simply can’t replicate.
- Eco-Friendly Repurposing: Give an old jar a new lease on life! Repurposing Mason jars contributes to a more sustainable lifestyle by reducing waste and promoting the use of existing resources.
- Cost-Effective: Mason jars are generally affordable, and if you’re like many craft enthusiasts, you might even have a few spare ones lying around. This makes the DIY tissue holder an incredibly budget-friendly decor upgrade.
The Perfect Fit: Choosing Your Tissues
One of the brilliant aspects of this particular DIY project is the synergy with specific tissue products. While many standard tissues can be adapted, certain brands offer a truly seamless experience. Products like “Perfect Fit” Kleenex brand tissues are specifically designed with a cylindrical shape, making them, quite literally, the perfect fit for a standard Mason jar.
These cylindrical tissue refills slide effortlessly into the jar, ensuring a smooth dispensing experience every time. The convenience of these pre-shaped tissues means less fuss and more functionality. While “Perfect Fit” Kleenex are widely recognized for this application, other brands may also offer similar cylindrical or compact tissue options that would work beautifully. It’s worth exploring your local grocery or drug store for these specialized refills.
However, don’t despair if you can’t find these exact tissues! You can still use standard square or rectangular tissue packs. A common workaround involves carefully removing the tissues from their original packaging and either folding them in half or gently rolling them to fit snugly within the Mason jar. While it requires a tiny bit more effort initially, the end result is still a beautifully functional and stylish tissue dispenser.
Crafting Your Custom Mason Jar Tissue Holder: A Step-by-Step Guide
Ready to transform your ordinary Mason jar into an extraordinary tissue holder? Here’s a detailed guide to help you create a piece that perfectly matches your personal style and home decor. The beauty of this project lies in its flexibility, allowing you to choose the complexity and materials that suit you best.
Materials You’ll Need:
- One clean Mason jar (pint or quart size, regular or wide mouth – choose based on tissue size and desired aesthetic)
- Cylindrical tissue refills (e.g., “Perfect Fit” Kleenex) OR standard tissue box (for manual folding/rolling)
- The Mason jar’s metal lid (ring and flat insert)
- For Decoration (choose based on your desired style):
- Spray paint or acrylic craft paint (in your preferred color)
- Paintbrushes or sponge applicators
- Mod Podge (for decoupage or sealing)
- Scrapbook paper, fabric scraps, lace, ribbon, twine
- Hot glue gun and glue sticks OR strong craft glue
- Embellishments (buttons, charms, beads, artificial flowers)
- Optional: Sandpaper (for distressing), stencil, clear sealant spray
- Sharp craft knife or utility knife
- Marker
Step 1: Prepare Your Mason Jar
Thoroughly wash and dry your Mason jar to remove any dust, labels, or residue. A clean surface ensures better adhesion for paint or decorations. If you plan to paint, ensure the jar is completely dry before proceeding.
Step 2: Decorate Your Jar (The Creative Part!)
This is where your personality shines! Here are a few popular decorating techniques:
- Painting:
- Solid Color: For a clean look, apply 2-3 thin coats of spray paint or acrylic paint. If using acrylic, you might want to paint the inside for a durable finish. Let each coat dry completely.
- Distressed Look: Paint your jar a base color. Once dry, apply a contrasting top coat. After the top coat dries, lightly sand certain areas (edges, raised lettering) with fine-grit sandpaper to reveal the base color underneath, creating a charming, aged effect.
- Ombre Effect: Use multiple shades of the same color or complementary colors, blending them vertically for a gradient effect.
- Stenciling: Use stencils and contrasting paint to add patterns or motifs.
- Decoupage: Cut out desired shapes from scrapbook paper, fabric, or even napkins. Apply a layer of Mod Podge to the jar, place your cutouts, and then apply another layer of Mod Podge over them to seal and protect.
- Wrapping: Wrap the jar with fabric, lace, or twine, securing with hot glue or craft glue. This creates texture and adds a rustic or elegant touch.
- Embellishments: Once your base decoration is dry, add ribbons, buttons, charms, or other small decorative elements with glue.
Allow your decorated jar to dry completely, following the cure times recommended by your paint or adhesive manufacturer. For added durability, especially if painting the exterior, consider applying a clear sealant spray.
Step 3: Prepare the Lid for Dispensing
This is a critical step for functionality. You’ll need to create an opening in the flat metal insert of the Mason jar lid:
- Place the flat metal lid insert on a protected surface.
- Using a marker, carefully trace the outline of a tissue from your cylindrical refill (or draw a small oval/rectangle about 1-1.5 inches long and 0.5 inches wide).
- Carefully use a sharp craft knife or utility knife to cut along the traced line. If cutting an oval/rectangle, you can start by piercing the center and slowly widening the cut. If you want a simpler opening, you can cut an “X” shape in the center, which will allow the tissues to pull through. Be extremely cautious when handling sharp tools.
- Smooth any rough edges with sandpaper or a file if necessary.
Alternatively, you can purchase pre-made Mason jar lid inserts specifically designed for tissue dispensing, which can save time and effort in this step.
Step 4: Load Your Tissues
- For Cylindrical Tissues: Simply remove them from their packaging and slide the entire stack into your decorated Mason jar. Pull the first tissue through the opening in the lid.
- For Standard Tissues: Carefully remove a stack of tissues from their original box. Gently fold or roll them to fit neatly inside the Mason jar. The goal is to create a stack where each tissue can be easily pulled without tearing the next. You might need to experiment a bit to find the best folding method. Place the first tissue through the lid opening.
Step 5: Assemble Your Tissue Holder
Place the prepared lid insert (with the tissue opening) onto the top of the Mason jar, ensuring the first tissue is pulled through. Secure it with the outer metal screw band of the Mason jar lid. Your beautiful, custom Mason jar tissue holder is now complete and ready to adorn any room!
Creative Design Ideas for Every Room
The true joy of this DIY project lies in its endless customization possibilities. Here are some thematic ideas to spark your creativity and inspire your next craft session:
- Farmhouse Chic: Paint the jar white, cream, or a soft gray. Distress it lightly with sandpaper. Wrap the neck with twine or a strip of burlap, perhaps adding a small faux flower or a rustic button.
- Modern Minimalist: Opt for a sleek, solid color like matte black, crisp white, or a deep navy. Keep embellishments to a minimum, focusing on clean lines and a smooth finish.
- Bohemian Rhapsody: Use a warm, earthy tone for the paint, or leave the glass clear. Decorate with macrame, colorful yarn, small tassels, or intricate patterns drawn with a paint pen.
- Coastal Calm: Paint in shades of seafoam green, sandy beige, or ocean blue. Add a layer of sand or small seashells inside (around the tissue bundle) or glue them to the exterior. A piece of driftwood or netting can complete the look.
- Vibrant Kids’ Room: Use bright, cheerful colors. Decoupage with cartoon characters, geometric shapes, or their favorite animal cutouts. You could even use glow-in-the-dark paint for a fun nighttime effect!
- Elegant Bathroom Spa: Choose soft pastel colors like lavender, mint green, or sky blue. Incorporate delicate lace, subtle glitter, or a few drops of essential oil (on a cotton ball placed at the bottom, away from tissues) for a sensory experience.
- Seasonal & Holiday Themes:
- Autumn: Warm oranges, reds, and browns; decorate with fall leaves (decoupaged), cinnamon sticks, or small pumpkins.
- Winter/Christmas: Silvers, golds, deep reds, and greens; add glitter, miniature ornaments, or a festive ribbon.
- Spring: Pastel floral patterns, light greens, and yellows; adorn with faux flowers or butterfly cutouts.
Maintenance and Refilling Your Stylish Dispenser
One of the practical advantages of the Mason jar tissue holder is its ease of maintenance and refilling. Unlike some decorative covers that can be cumbersome, a Mason jar is designed for repeated use:
- Refilling: Simply unscrew the lid, remove the empty tissue core (if applicable), and drop in a new stack of cylindrical tissues or your carefully folded standard tissues. Screw the lid back on, and you’re good to go.
- Cleaning: The glass jar itself is easy to wipe clean with a damp cloth. If you’ve used durable paints or sealants, you can even gently wash the exterior if needed. Avoid submerging decorated jars in water, especially if they have paper or fabric elements, unless they are fully sealed.
- Changing Decor: Should you decide to redecorate a room, your Mason jar tissue holder can easily be updated. Paint over the old design, remove fabric wraps, or add new embellishments to match your fresh aesthetic.
Why This DIY Project is a Must-Try
Beyond the immediate benefit of a beautiful tissue dispenser, this DIY project offers a rewarding experience on multiple levels:
- Creative Expression: It’s a fantastic outlet for your creativity, allowing you to design something truly unique.
- Practical Utility: You create a functional item that serves a real purpose in your daily life.
- Sense of Accomplishment: There’s immense satisfaction in looking at something you’ve made with your own hands that also enhances your home.
- Thoughtful Gift Idea: A handmade Mason jar tissue holder makes a wonderful, personalized gift for housewarmings, birthdays, or holidays.
- Spark Conversation: Guests will undoubtedly notice and admire your stylish new tissue holder, often prompting questions about where you found it – a perfect opportunity to share your DIY triumph!
Conclusion: Embrace Style and Functionality
The days of tolerating unsightly cardboard tissue boxes are officially over. With a simple Mason jar and a dash of creativity, you can transform a mundane necessity into a charming and functional piece of home decor. This DIY Mason jar tissue holder project not only adds a touch of personalized style to any room but also offers a durable, cost-effective, and eco-friendly alternative to conventional dispensers.
Whether you’re aiming for a rustic farmhouse vibe, a sleek modern look, or a whimsical design for a child’s room, the Mason jar provides the perfect canvas. By following our guide and letting your imagination lead the way, you can easily craft a tissue dispenser that you’ll love looking at and using every day. So, grab a Mason jar, gather your supplies, and embark on a rewarding journey to elevate your home decor!
Don’t forget to share your amazing creations with us – we’d love to see how you’ve personalized your Mason jar tissue holders!