
Mastering Perfectly Tender Braised Beef Short Ribs: Your Ultimate Guide
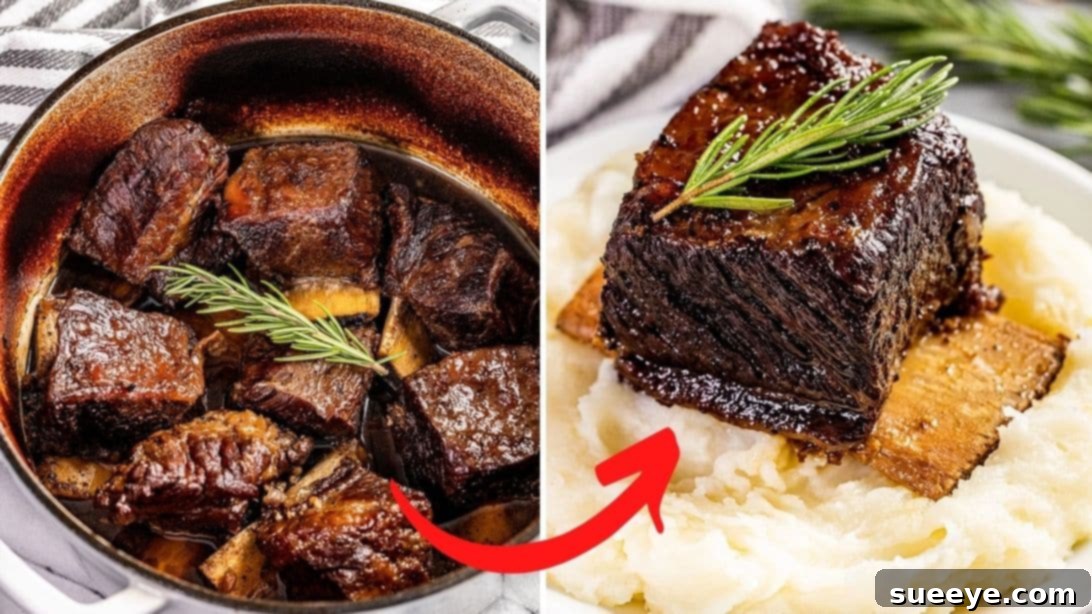
There are few dishes as universally comforting and impressive as perfectly braised beef short ribs. Imagine succulent, fall-off-the-bone meat, rich with deep savory flavors, nestled in a velvety sauce. This isn’t just a meal; it’s an experience that transforms an ordinary dinner into a memorable feast. Whether you’re aiming to wow your family, impress dinner guests, or simply treat yourself to an exquisite culinary delight, braised short ribs are the answer. And the best part? Achieving this culinary masterpiece is simpler than you might think, especially with a clear, straightforward guide.
Inspired by the fantastic work of culinary creators like The Stay At Home Chef, this comprehensive guide will walk you through preparing braised beef short ribs using three popular methods: the classic oven, the convenient slow cooker, and the speedy Instant Pot. Each method yields incredibly tender results, allowing you to choose the technique that best fits your schedule and kitchen setup. We’ll delve into the nuances of ingredient selection, the importance of each step, and offer expert tips to ensure your short ribs are nothing short of spectacular. Prepare to elevate your home cooking and discover how easy it is to create an unforgettable meal.
Why Braised Beef Short Ribs Are a Culinary Gem
Braised short ribs stand out as a beloved comfort food for numerous reasons. Derived from the chuck section of the cow, short ribs are known for their rich marbling and connective tissue, which, when cooked low and slow, break down to create incredibly tender meat and a luscious, gelatinous sauce. The braising process, which involves searing the meat, then simmering it in liquid, is a time-honored technique that extracts maximum flavor and transforms tougher cuts into fork-tender delights.
This dish is not only delicious but also wonderfully versatile. It pairs beautifully with a variety of side dishes, from creamy mashed potatoes and polenta to vibrant roasted vegetables, making it suitable for any occasion. Furthermore, braised dishes often taste even better the next day, as the flavors have more time to meld and deepen, making it an excellent choice for meal prepping or entertaining.
Crafting the Perfect Flavor Profile: Understanding Your Ingredients
The secret to exceptional braised short ribs lies in high-quality ingredients and a thoughtful combination of flavors. Each component plays a vital role in building the dish’s complexity and depth.
- Bone-in Short Ribs (approx. 4 pounds): The star of our show. Bone-in ribs impart more flavor and moisture to the meat and sauce. Look for well-marbled ribs, ideally cut into uniform pieces for even cooking.
- Salt and Black Pepper (½ tsp each): Essential for seasoning the meat directly, enhancing its natural savory notes and creating a flavorful crust during searing.
- Extra Virgin Olive Oil (3 tbsp): Used for searing the short ribs, which locks in juices and develops a rich, browned exterior crucial for deep flavor.
- White Onion, diced (½ cup): An aromatic base, providing a foundational sweetness and savory depth to the braising liquid.
- Garlic, minced (2-3 cloves): Another critical aromatic that adds pungent, savory notes, complementing the onion and meat.
- Beef Broth (1 cup): The primary braising liquid, infusing the ribs with rich, beefy flavor and ensuring tenderness. Opt for a good quality, low-sodium broth to control seasoning.
- Red Wine (1 cup, optional): A highly recommended addition that adds acidity, depth, and complex fruity notes, helping to tenderize the meat and enrich the sauce. A dry red wine like Cabernet Sauvignon or Merlot works wonderfully.
- Worcestershire Sauce (¼ cup): A powerful flavor enhancer, contributing umami, tang, and a hint of spice, rounding out the savory profile of the sauce.
- Fresh Rosemary (1 sprig): An aromatic herb that lends a woody, piney fragrance and flavor, pairing exquisitely with beef.
Essential Preparation Steps for All Methods
Regardless of your chosen cooking method, a few initial steps are crucial for developing maximum flavor and achieving that coveted tender texture.
- Prepare the Short Ribs: Begin by patting your bone-in short ribs thoroughly dry with paper towels. This step is vital for achieving a good sear. Season all sides generously with salt and black pepper. Don’t be shy; this is your primary opportunity to season the meat itself.
- Searing for Flavor: Heat the olive oil in a heavy-bottomed pot (or a skillet if using a slow cooker/Instant Pot) over high heat until shimmering. Carefully place the seasoned short ribs in the hot oil, ensuring not to overcrowd the pot. Sear for approximately 1-2 minutes per side until each piece is beautifully golden brown. This browning process, known as the Maillard reaction, creates incredible depth of flavor that cannot be replicated later. Remove the seared ribs from the pot and set them aside.
- Building the Aromatic Base: Using the same pot (with any rendered fat and flavorful browned bits), add the diced white onion. Sauté for 3 to 5 minutes until it softens and becomes translucent. This step extracts the onion’s sweetness.
- Infusing Garlic: Add the minced garlic to the softened onions and sauté for just 1 more minute until fragrant. Be careful not to burn the garlic, as it can turn bitter.
- Deglazing and Developing the Sauce: Pour in the beef broth, red wine (if using), and Worcestershire sauce. Scrape the bottom of the pot with a wooden spoon to release any browned bits (fond) stuck to the bottom. These bits are packed with flavor and will dissolve into your braising liquid, enriching the sauce. Let the liquid simmer gently for a few minutes.
Detailed Directions: Choose Your Adventure
1. Classic Oven Braised Short Ribs
The oven method is a timeless technique that provides consistent, gentle heat, resulting in incredibly tender and flavorful short ribs with a rich, developed sauce. This method is perfect when you have a few hours to dedicate to the cooking process, allowing the aromas to fill your kitchen.
After completing the essential preparation steps (searing and building the aromatic base):
- Return Ribs to Pot: Carefully place the seared short ribs back into the pot with the braising liquid, ensuring the bone side is down. This helps protect the meat from sticking to the bottom and allows for even cooking.
- Add Rosemary: Lay a fresh sprig of rosemary on top of the short ribs. The herb will slowly infuse its wonderful aroma into the dish as it cooks.
- Cover and Braise: Securely cover the pot with a tight-fitting lid. Transfer the pot to a preheated oven at 350°F (175°C).
- Cook to Perfection: Allow the short ribs to braise for approximately 2.5 to 3 hours. The cooking time may vary slightly depending on the size and thickness of your ribs. The goal is for the meat to be incredibly tender, easily pierced with a fork, and practically falling off the bone.
- Rest and Serve: Once tender, remove the pot from the oven. For best results, let the ribs rest in the hot liquid for 10-15 minutes before serving. This allows the juices to redistribute, ensuring maximum moisture. Skim any excess fat from the surface of the sauce if desired, then serve the short ribs bathed in their exquisite sauce.
2. Convenient Slow Cooker Short Ribs
For those days when you want a delicious meal with minimal hands-on time, the slow cooker is your best friend. This method is ideal for busy schedules, allowing you to set it in the morning and come home to a house filled with the inviting aroma of dinner. While searing is highly recommended for flavor, the “set it and forget it” nature of the slow cooker makes it incredibly appealing.
After searing the short ribs in olive oil in a separate skillet (or directly in your slow cooker if it has a sear function) and sautéing your aromatics:
- Transfer to Slow Cooker: Carefully transfer the seared short ribs into the slow cooker pot.
- Season and Add Liquid: If you didn’t build the aromatic base in a separate pot, you can season the ribs with a pinch of garlic powder and onion powder to taste directly in the slow cooker for an extra layer of flavor. Pour in the beef broth, red wine (if using), and Worcestershire sauce. Ensure the liquid comes about halfway up the sides of the ribs.
- Add Rosemary: Place a fresh rosemary sprig on top of the ribs.
- Cook Low and Slow: Cover the slow cooker with its lid and cook on the “Low” setting for 8 hours, or until the meat is incredibly fork-tender and easily pulls away from the bone. Cooking on low heat for a longer duration ensures the most tender results.
- Serve: Once cooked, remove the rosemary sprig. You can skim any excess fat from the sauce. Serve directly from the slow cooker, or transfer the ribs and sauce to a serving platter.
3. Speedy Instant Pot Electric Pressure Cooker Short Ribs
For a truly impressive meal in a fraction of the time, the Instant Pot is unmatched. Pressure cooking significantly reduces the time needed for braising, delivering fall-off-the-bone tenderness in under an hour without compromising flavor. This method is perfect for weeknights or when you crave gourmet flavors without the long wait.
- Sear in the Pot: Use the “Sauté” feature on your electric pressure cooker. Add olive oil and sear the seasoned short ribs on all sides until golden brown. Remove the ribs and set aside.
- Sauté Aromatics: In the same pot, add the diced onion and sauté until tender. Stir in the minced garlic and sauté for 1 more minute until fragrant. Deglaze the pot with a splash of broth or wine, scraping up any browned bits from the bottom.
- Add Liquid and Ribs: Pour in the beef broth, red wine (if using), and Worcestershire sauce. Return the seared short ribs to the pot.
- Add Rosemary: Place a fresh rosemary sprig on top of the ribs.
- Pressure Cook: Secure the lid on the Instant Pot and ensure the sealing valve is in the “Sealing” position. Select the “Manual” or “Pressure Cook” setting and set the cooking time for 50 minutes on high pressure.
- Natural Release: Once the cooking cycle is complete, allow for a natural pressure release for 10-15 minutes. This is crucial for tenderizing the meat and preventing it from becoming tough. After 10-15 minutes, you can carefully turn the sealing valve to the “Venting” position to quick release any remaining pressure.
- Serve: Open the lid, remove the rosemary sprig, and gently take out the tender short ribs. Skim any excess fat from the sauce. You can thicken the sauce further by using the “Sauté” function and simmering for a few minutes, or by mixing a cornstarch slurry (1 tbsp cornstarch mixed with 1 tbsp cold water) into the simmering sauce until it reaches your desired consistency.
Tips for the Perfect Braised Short Ribs Every Time
- Don’t Skip the Sear: Searing is not just for aesthetics; it’s fundamental for flavor. It creates a rich crust through the Maillard reaction, which adds unparalleled depth to the final dish.
- Deglaze Thoroughly: The browned bits at the bottom of the pot after searing and sautéing are flavor powerhouses. Use a wooden spoon and the braising liquid to scrape them up and incorporate them into your sauce.
- Patience is Key for Tenderness: Especially with the oven and slow cooker methods, don’t rush the cooking process. Low and slow is the secret to breaking down connective tissue and achieving that melt-in-your-mouth texture.
- Taste and Adjust Seasoning: Always taste your braising liquid and final sauce. You may need to add more salt, pepper, or a splash of red wine vinegar/lemon juice to brighten the flavors at the end.
- Skim the Fat: If your sauce is too greasy, you can easily skim off excess fat from the surface once the ribs are done cooking. For an even easier approach, chill the entire dish overnight; the fat will solidify on top, making it simple to remove before reheating.
- Thicken the Sauce (Optional): If you prefer a thicker sauce, remove the ribs, then bring the braising liquid to a simmer. You can reduce it by half, or whisk in a cornstarch slurry (1 tablespoon cornstarch mixed with 1 tablespoon cold water) and simmer until thickened.
Serving Suggestions to Complete Your Meal
Braised beef short ribs are a substantial dish that pairs wonderfully with sides that can soak up the rich sauce. Here are some classic and delicious accompaniments:
- Creamy Mashed Potatoes: The ultimate classic pairing, providing a soft, rich bed for the ribs and sauce.
- Polenta or Grits: A rustic and creamy alternative to mashed potatoes, offering a slightly different texture and flavor profile.
- Risotto: A luxurious choice, especially a simple Parmesan or mushroom risotto, to complement the richness of the beef.
- Egg Noodles or Pasta: Toss the tender meat and sauce with wide egg noodles or a hearty pasta like pappardelle for a comforting pasta dish.
- Roasted Root Vegetables: Carrots, parsnips, or potatoes roasted alongside provide earthy sweetness and a textural contrast.
- Sautéed Greens: A simple side of sautéed spinach, kale, or green beans can add a fresh, slightly bitter counterpoint to the rich meat.
Storage and Reheating
Braised short ribs are a fantastic dish for leftovers, often tasting even better the next day as the flavors deepen. Store any remaining short ribs and sauce in an airtight container in the refrigerator for up to 3-4 days. To reheat, gently warm on the stovetop over low heat, or in the oven at 300°F (150°C) until heated through. You may need to add a splash of beef broth or water to thin the sauce if it has become too thick.
Conclusion: An Unforgettable Culinary Journey Awaits
There you have it – a comprehensive guide to preparing exquisite braised beef short ribs, adaptable to your preferred cooking method. Whether you choose the traditional oven, the convenient slow cooker, or the efficient Instant Pot, you’re now equipped with all the knowledge to create a dish that’s sure to impress and satisfy. The rich aroma, the tender texture, and the deeply flavorful sauce of braised short ribs make it a true culinary gem.
So, gather your ingredients, follow these steps, and prepare to embark on an unforgettable culinary journey. Your family and friends will undoubtedly be impressed by this classic comfort food, and you’ll revel in the satisfaction of mastering a truly exceptional dish. Many thanks to The Stay At Home Chef for the inspiring recipe that launched this delicious adventure. Don’t forget to explore her other amazing content for more culinary inspiration!