
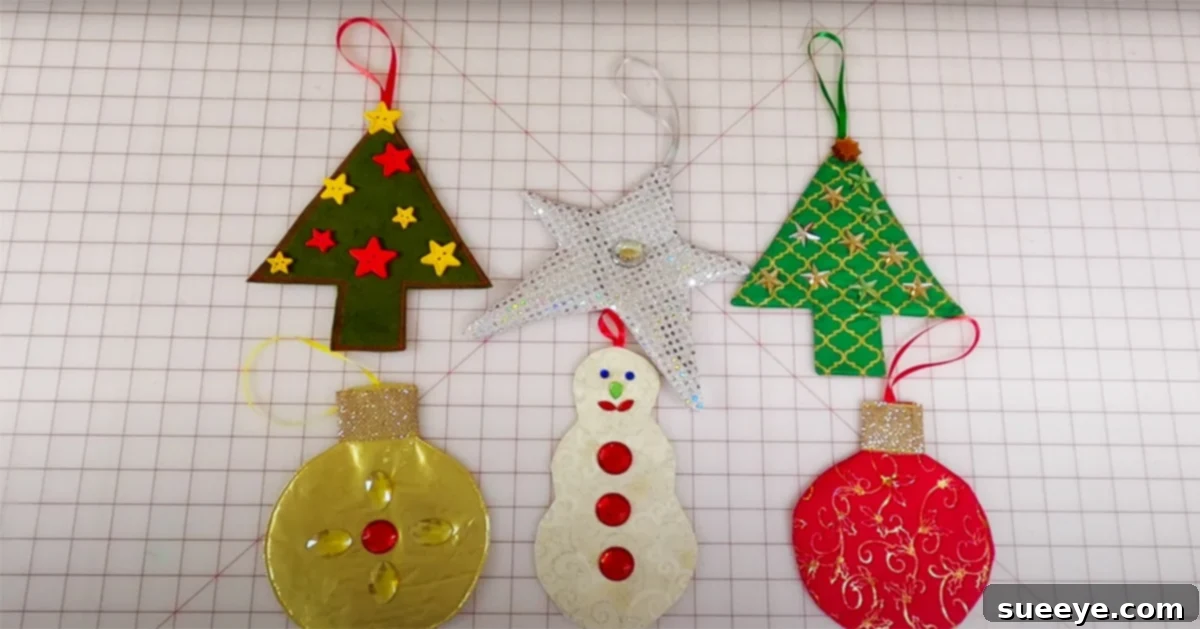
The festive season is synonymous with warmth, joy, and the sparkle of cherished traditions. Among these, decorating the Christmas tree stands out as a beloved ritual, transforming our homes into havens of holiday cheer. While store-bought ornaments offer convenience, there’s an undeniable magic that comes with adorning your tree with handmade creations. This year, why not add a unique, tactile charm to your decor with DIY fabric ornaments? Not only are they delightfully simple to craft, but they also bring a personalized touch that mass-produced decorations simply can’t replicate.
Embarking on a fabric ornament project is a fantastic way to infuse your holiday celebrations with creativity and sentiment. These charming pieces are not just decorations; they are tiny canvases for your imagination, offering a wonderful opportunity for family bonding and creating lasting memories. Whether you’re a seasoned seamstress or just beginning your sewing journey, this craft is incredibly forgiving and rewarding. And the best part? You can start stitching them up right now, long before the sleigh bells start jingling!
We’re thrilled to share an incredibly easy-to-follow guide for crafting your own fabric Christmas ornaments, inspired by the fantastic tutorial from The Sewing Room Channel on YouTube. This comprehensive video breaks down the process, making it accessible for everyone. From whimsical Christmas trees to adorable snowmen and classic stars, the tutorial covers a variety of shapes, ensuring your tree will be bursting with unique character. These simple projects echo the joy of childhood crafts, bringing back fond memories of creating festive decorations, perhaps even using felt paper in grade school.
What makes these fabric ornaments truly special is their ability to add a different texture to your Christmas tree. Gone are the days of only shiny, traditional baubles; these fabric creations introduce a soft, cozy, and inviting element. They are not only perfect for your own home decor but also make incredibly thoughtful and charming small gifts for friends, family, teachers, or neighbors during the holidays. A handmade gift carries a piece of your heart, making it far more precious than anything bought from a store.
Why Choose DIY Fabric Ornaments This Christmas?
The allure of handmade decorations goes beyond mere aesthetics. Opting for DIY fabric ornaments offers a multitude of benefits:
- Personalized Touch: Express your unique style and creativity. Choose fabrics that match your home decor or reflect a specific theme.
- Sentimental Value: Each ornament can hold a special memory, perhaps made during a family craft session or commemorating a significant year. They often become cherished heirlooms passed down through generations.
- Family Bonding Activity: Crafting together is an excellent way to spend quality time with children and loved ones. It fosters teamwork, creativity, and provides a break from screens.
- Cost-Effective Decor: Often, you can use fabric scraps from other projects, making this an economical way to decorate for the holidays.
- Unique Gifting Opportunity: Handmade gifts are treasured. Presenting a beautifully crafted fabric ornament shows immense care and thought.
- Sustainable Choice: Reusing fabric remnants helps reduce waste, making your holiday decor a little greener.
- Soft and Safe: Unlike fragile glass ornaments, fabric ones are less likely to break, making them ideal for homes with pets or young children.
Essential Supplies for Your Fabric Ornaments
One of the beauties of this craft is that it doesn’t require an extensive list of tools or materials. Most items you might already have on hand, or they are readily available at any craft store. Here’s what you’ll need to get started on your festive fabric ornament journey:
- Circle Templates: Essential for creating a uniform and pleasing shape, particularly if you’re making spherical ornaments. You can also create other templates for specific shapes.
- Paper, Cardstock, or Cardboard: For drawing and cutting out your ornament patterns. Cardstock or thin cardboard from old boxes is ideal for sturdy, reusable templates.
- Fabric: This is where your creativity truly shines! Seasonal fabrics (think festive prints, plaids, or metallics), costume fabrics for a touch of glamour, or any type of fabric scraps you have (cotton, flannel, felt) will work beautifully. Consider different textures and colors to add depth to your tree.
- Interfacing: A crucial element for giving your fabric ornaments structure and stability, especially with lighter fabrics. Choose a fusible lightweight interfacing for ease of use.
- Ruler: For precise measurements, especially when drafting your patterns or cutting fabric strips.
- Fabric Rotary Cutter & Mat: While optional, a rotary cutter makes cutting fabric quick and incredibly accurate, especially for straight lines.
- Scissors: A good pair of fabric scissors is indispensable for clean cuts.
- 1/8″ – 1/4″ Wide Ribbon: For creating hanging loops for your finished ornaments. Choose colors that complement your fabric.
- Jewels, Buttons, Beads, Glitter, Embroidery Floss: The fun part! Gather an assortment of decorative embellishments to personalize each ornament and make them truly sparkle.
- Fiberfill/Stuffing: For giving your ornaments a plump, three-dimensional look.
- Basic Sewing Machine (Optional, Hand Sewing is Fine): For stitching the fabric pieces together. A machine will be faster, but hand sewing is perfectly feasible for these small projects.
- Sewing Needle & Thread: Matching thread for your fabric, and a hand-sewing needle for closing openings or attaching embellishments.
Step-by-Step Directions for Crafting Your Fabric Ornaments
While The Sewing Room Channel tutorial provides excellent visual guidance for specific ornament designs, we’ll walk you through a generalized process to give you a clear understanding of the steps involved. This will allow you to adapt the techniques to a variety of shapes and styles, making your crafting possibilities endless.
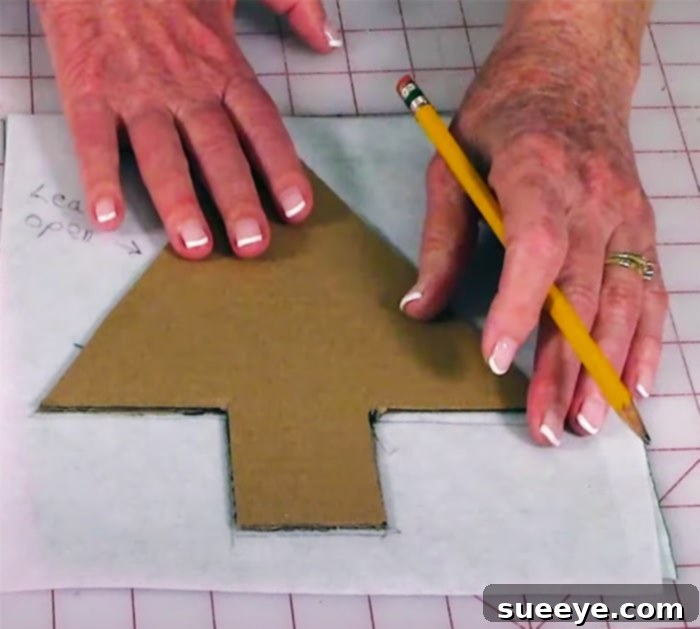
1. Designing Your Ornament Templates
The first step is to decide on the shapes of your ornaments. The Sewing Room Channel tutorial demonstrates a Christmas tree, which is a fantastic starting point. For a Christmas tree ornament, you might draw a rectangle, for instance, 7 inches wide by 8 inches high. Then, mark the center top (3 1/2 inches from either side) and about 2 inches up from the bottom center. These points help guide the outline of your tree shape. Alternatively, you can search online for free ornament templates (stars, hearts, bells, simple circles, snowmen) or even freehand your own unique designs directly onto cardstock. Ensure your templates are sturdy enough to trace around repeatedly.
2. Preparing Your Fabric and Interfacing
Once your templates are ready, it’s time to prepare your fabric. Choose your festive fabrics and press them smooth. Lay your fabric flat, typically with the right sides facing together if you’re cutting two pieces simultaneously. Then, place your chosen template on top of the fabric. Trace around the template using a fabric marker or tailor’s chalk. If you’re using interfacing, cut one piece for each fabric piece using the same template. Fuse the interfacing to the wrong side of one of your fabric pieces according to the manufacturer’s instructions. This step is vital for giving your fabric ornament body and preventing it from looking flimsy.
3. Cutting Your Fabric Pieces
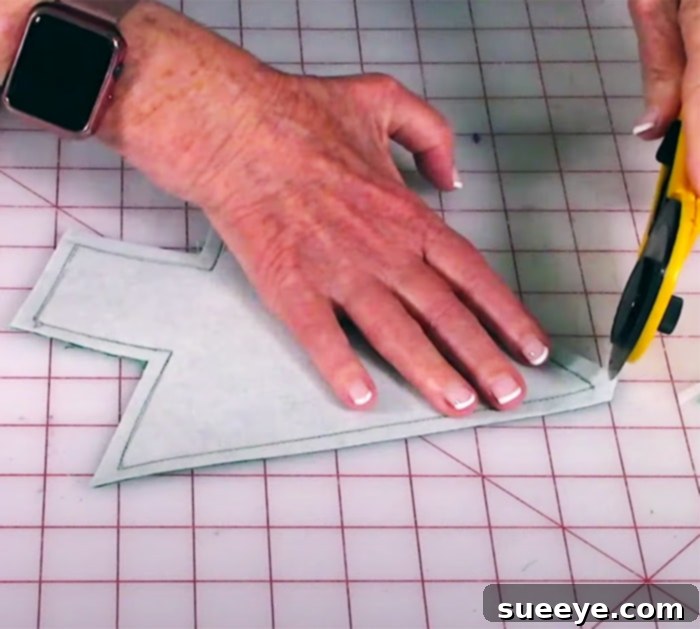
Carefully cut out your fabric pieces along the traced lines. Precision here will lead to a neater finished ornament. If you’re using a rotary cutter, ensure you have a self-healing mat underneath and take care with curves. For intricate shapes, sharp fabric scissors are your best friend. Remember, you’ll need two identical fabric pieces for each ornament (front and back).
4. The Sewing Process: Stitching and Shaping
Now, place your two fabric pieces right sides together, ensuring all edges align perfectly. If you’ve fused interfacing, place the interfaced piece on the bottom. Pin the fabric pieces securely around the edges to prevent shifting while sewing. Using your sewing machine (or hand-sewing with a backstitch for durability), stitch around the perimeter of your ornament shape, leaving a seam allowance of about 1/4 inch. It is crucial to leave a small opening (about 1-2 inches) along one edge. This opening will be used for turning the ornament right side out and for stuffing. For curved shapes, make small notches in the seam allowance around the curves, being careful not to cut through the stitching. For points, trim the corners close to the stitching. This helps the ornament lay flat and smooth once turned.
5. Turning, Stuffing, and Closing
Once stitched, carefully turn your fabric ornament right side out through the opening you left. Use a pointy tool (like a chopstick, knitting needle, or turning tool) to gently push out all the seams and corners so your shape is well-defined. Press the ornament with an iron to smooth out any wrinkles and crisp up the edges. Now, it’s time to stuff! Take small pieces of fiberfill and gradually stuff your ornament, ensuring it’s evenly filled and firm, but not overstuffed to the point of distorting the shape. Once satisfied with the plumpness, carefully hand-stitch the opening closed using a ladder stitch (also known as an invisible stitch or slip stitch). This technique creates a nearly invisible seam, giving your ornament a professional finish.
6. Adding the Hanging Loop
Cut a piece of ribbon about 6-8 inches long. Fold it in half to form a loop. Hand-stitch the raw ends of the ribbon securely to the top of your ornament. Make sure it’s firmly attached, as this loop will bear the weight of the ornament when it hangs on the tree. You can also tuck the ends of the ribbon into the opening before you stitch it closed, for an even more seamless look.
7. The Art of Decoration and Personalization
This is arguably the most exciting part, especially when crafting with children! Unleash your creativity and personalize each ornament.
- Buttons and Beads: Sew on vintage buttons, tiny jingle bells, colorful beads, or sequins to add sparkle and texture.
- Embroidery: Use embroidery floss to add simple stitches, initials, dates, or small designs like snowflakes, stars, or holly leaves. Even a simple running stitch along the edge can add charm.
- Fabric Paint or Glitter: Use fabric-safe paints to add intricate details, or apply fabric glue and sprinkle with glitter for a truly festive shine.
- Ribbons and Bows: Tie small bows from contrasting ribbons and attach them to your ornament.
- Charms: Small metal charms can be sewn on for an elegant touch.
The possibilities are truly endless, allowing each ornament to tell its own unique story.
The Enduring Charm of Handmade Holiday Decorations
Overall, these adorable fabric ornaments offer a wonderful alternative to traditional, often impersonal, shiny baubles. They bring a distinct warmth and softness to your Christmas tree, creating a cozy and inviting atmosphere. The tactile nature of fabric, combined with your personal touch, ensures that your tree won’t just look festive, but it will feel rich with character and history. Plus, the playful and creative freedom this craft offers makes it an enjoyable activity for all ages.
Imagine your tree sparkling not just with lights, but with the memories woven into each fabric stitch, the laughter shared during decoration, and the joy of creating something beautiful with your own hands. These ornaments are more than just seasonal decor; they are heirlooms in the making, destined to be cherished for years to come and perhaps even passed down through generations, each telling a story of holidays past.
Gifting Your Handmade Treasures
Beyond adorning your own home, these DIY fabric ornaments make truly heartfelt and memorable gifts. Consider creating a set for a newlywed couple’s first Christmas, a teacher who has made a difference, a special friend, or even as small tokens of appreciation for colleagues and neighbors. Tie a personalized tag with the year and your message to each ornament. Package them in small, charming boxes or simple fabric pouches for an extra touch of elegance. A handmade gift speaks volumes about your care and thoughtfulness, making it far more impactful than a store-bought item.
Crafting with Family: A Cherished Tradition
One of the most profound benefits of undertaking projects like DIY fabric ornaments is the opportunity for family engagement. In an increasingly digital world, hands-on activities provide a much-needed outlet for creativity, fine motor skill development, and meaningful interaction. Gather your children, grandchildren, or even friends, and turn your crafting session into a delightful holiday tradition. Assign different roles – one person cuts, another stuffs, and everyone gets to decorate! This shared experience not only results in beautiful ornaments but also in invaluable memories that will be recalled with fondness year after year.
Care and Storage Tips for Your Fabric Ornaments
To ensure your fabric ornaments last for many Christmases to come, a little care goes a long way. When the holiday season concludes, gently remove them from the tree. If any ornaments need a light cleaning, spot clean with a damp cloth and mild soap, then air dry completely. Store them carefully in airtight containers or boxes, perhaps with tissue paper between layers, to protect them from dust, moisture, and potential crushing. Proper storage will help maintain their shape, color, and integrity, allowing them to bring joy for decades.
Conclusion: Sew Your Way to a Magical Christmas
The journey of creating DIY fabric ornaments is more than just a craft project; it’s an invitation to infuse your holiday season with personal meaning, warmth, and enduring beauty. With just a few basic supplies and the excellent guidance from The Sewing Room Channel, you can transform simple pieces of fabric into charming heirlooms that will grace your Christmas tree for years to come. So, gather your materials, perhaps put on some festive music, and start stitching your way to a truly magical, handmade Christmas. The joy of creating, the memories forged, and the unique beauty of your personalized ornaments will undoubtedly make this holiday season your most special yet.