
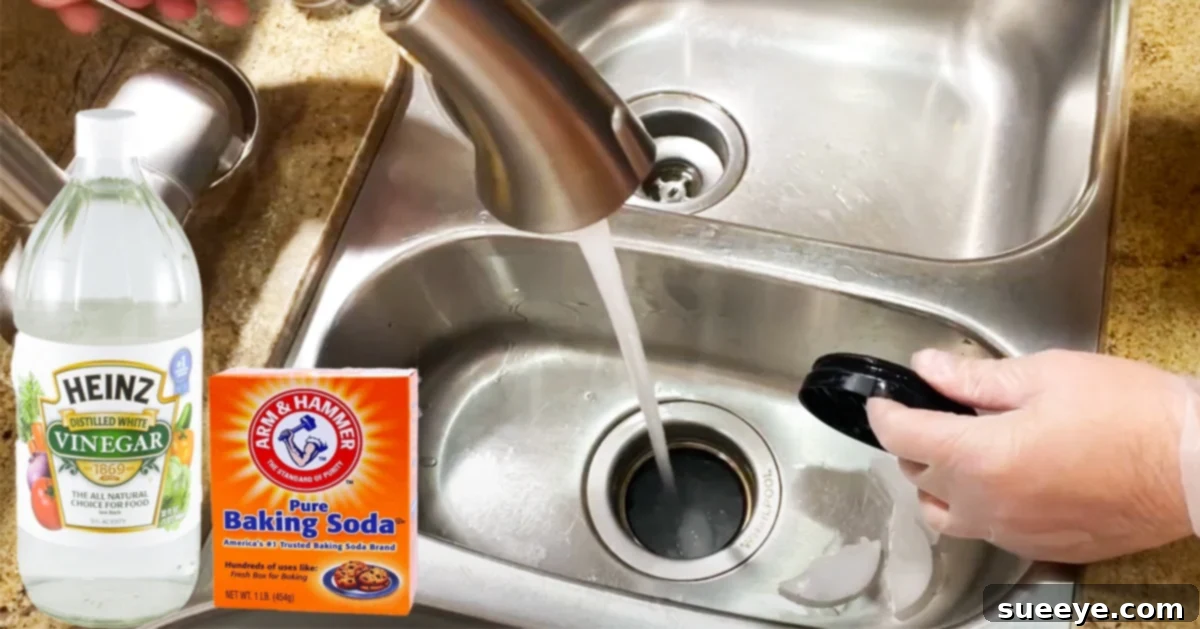
There are few things as unwelcome in a home as a persistent, foul odor, especially one that permeates the heart of your living space: the kitchen. You’ve cleaned the countertops, taken out the trash, and even scrubbed the floors, yet that lingering, unpleasant smell persists. Often, the culprit is hiding in plain sight, or rather, just out of sight – nestled deep within your kitchen sink’s garbage disposal unit. This indispensable kitchen appliance, designed to make our lives easier by grinding food waste, can unfortunately become a breeding ground for bacteria and decaying food particles, leading to notorious kitchen odors.
The very nature of a garbage disposal makes it susceptible to developing a stench. Every day, it grinds down a variety of food scraps – from coffee grounds and vegetable peels to fruit rinds and small bits of meat. While water flushes most of this waste away, tiny fragments invariably cling to the grinding chamber, the blades, and the splash guard. Over time, these unseen residues decompose, ferment, and harbor bacteria, releasing volatile organic compounds that manifest as that distinct, funky smell. Many assume that simply running water through the disposal is enough to keep it clean, but this often isn’t the case. Water alone can’t dislodge stubbornly stuck food particles or eliminate the bacterial film that forms on the internal surfaces. Fortunately, banishing these offensive odors is simpler than you might think, often requiring only a few common household ingredients and a few minutes of your time. This guide will walk you through an effective, two-step process to revitalize your garbage disposal, inspired by practical tips such as those demonstrated by Mike Klimek on YouTube.
Why Your Garbage Disposal Develops Unpleasant Odors
Understanding the root cause of the smell is the first step towards effective cleaning and prevention. Your garbage disposal is a moist, dark environment – an ideal breeding ground for bacteria. When food particles are introduced, they provide a rich source of nutrients for these microbes. While the disposal grinds most solids into small pieces, some inevitably get lodged in crevices, under the splash guard, or on the grinding components themselves. Here’s a closer look at the key factors contributing to that notorious smell:
- Food Particle Buildup: This is the primary culprit. Bits of fibrous vegetables, starchy pasta, fruit peels, and even small amounts of grease can cling to the disposal’s internal surfaces. Over time, these particles decompose, creating a distinct, putrid odor.
- Bacterial Growth: Decaying food creates a perfect environment for bacteria and mold to thrive. As these microorganisms break down the organic matter, they release gases that smell foul.
- Grease and Oil Residue: Pouring grease or oil down the drain, even in small amounts, is a common mistake. Grease doesn’t just rinse away; it solidifies and sticks to the inside of your pipes and disposal unit, trapping food particles and exacerbating odor problems.
- Splash Guard Contamination: The rubber splash guard, which prevents food from splashing back up, is often overlooked. Food particles and grime accumulate on both its top and underside, creating a visible and smelly source of contamination.
- Infrequent or Improper Use: If the disposal isn’t used regularly or isn’t flushed with enough cold water after each use, food particles are more likely to sit and decay. Cold water helps solidify grease and food, making it easier for the blades to grind and flush away.
Ignoring these odors isn’t just unpleasant; it can also lead to more severe issues like clogs and pest infestations if left unaddressed. Regular maintenance is key to keeping your kitchen smelling fresh and your disposal functioning efficiently.
Natural Cleaning Supplies and Their Benefits
The beauty of this cleaning method lies in its simplicity and reliance on natural, readily available household items. You won’t need harsh chemicals or specialized equipment, just three humble heroes:
- Ice: Not just for chilling drinks, ice serves as a fantastic mechanical abrasive for your disposal. As the disposal grinds the ice, the hard, frozen cubes scrape against the inner walls and blades. This action helps dislodge stubborn food particles, mineral deposits, and even minor grease buildup that regular flushing might miss. It also has the added benefit of helping to “sharpen” the grinding elements, improving their efficiency.
- Baking Soda (Sodium Bicarbonate): A powerhouse in natural cleaning, baking soda is an excellent deodorizer and a mild abrasive. Its alkaline nature helps neutralize acidic odors, while its fine granular texture provides a gentle scrubbing action without damaging your disposal. It also works to absorb lingering smells rather than just masking them.
- Vinegar (Acetic Acid): White vinegar is another versatile household staple, renowned for its cleaning and disinfecting properties. Its acidity allows it to cut through grease, dissolve mineral deposits, and kill bacteria and mold. When combined with baking soda, it creates a powerful fizzing reaction, generating carbonic acid that acts as a natural scrubbing agent, lifting and dislodging grime from the disposal’s surfaces.
Together, these three ingredients offer a comprehensive cleaning solution: ice for mechanical scrubbing, baking soda for deodorizing and mild abrasion, and vinegar for cutting grease, disinfecting, and enhancing the scrubbing action when paired with baking soda. This natural approach ensures effective cleaning without introducing harmful chemicals into your drain system or the environment.
Step-by-Step Directions for a Fresh Disposal
Achieving a sparkling clean and odor-free garbage disposal is a simple two-step process. Before you begin, always prioritize safety: ensure the disposal is off, and never put your hand into the unit. If possible, unplug the unit for an extra layer of safety, especially when reaching into the drain.
Step 1: The Ice Treatment (Mechanical Cleanse)
This initial step focuses on mechanically dislodging stubborn food residues and scrubbing the internal components of your disposal.
- Remove the Splash Guard: Begin by carefully pulling out the rubber splash guard (or rubber retainer) from the drain opening. This component is often overlooked but can harbor significant grime. Removing it allows for better access and ensures the ice can freely enter the grinding chamber. Take a moment to inspect and wipe down the splash guard itself – you might be surprised by the amount of gunk accumulated on its underside.
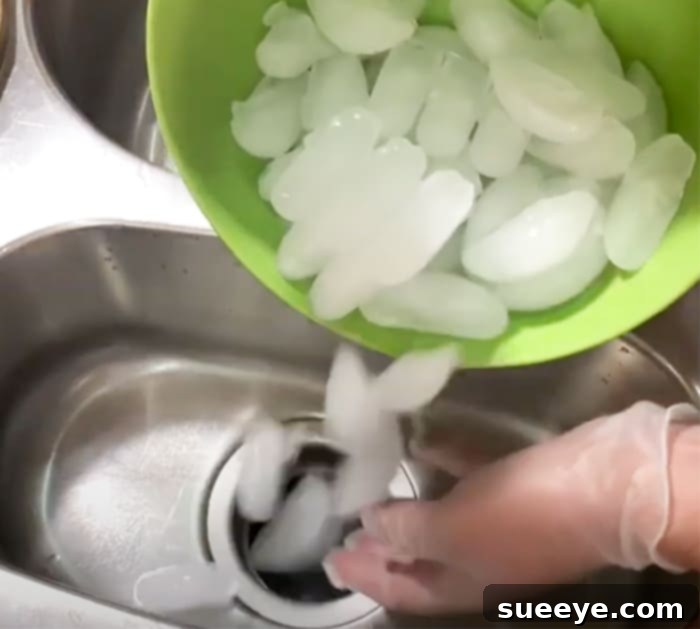
- Fill with Ice: Fill the drain opening generously with ice cubes. You can use standard ice from your freezer, or for an extra boost of freshness, consider freezing vinegar or lemon juice into ice cubes beforehand. The quantity should be enough to fill the opening and allow the disposal to grind them effectively, usually about 1-2 cups.
- Reinsert Splash Guard (Optional, but recommended): Once the ice is in, you can place the rubber splash guard back onto the drain. While optional, this helps to contain any stray ice chips or splashes when the disposal is turned on.
- Grind the Ice: Turn on your faucet, letting cold water run into the drain. While the cold water is running, flip the switch to activate your garbage disposal. You’ll hear the ice being vigorously ground down. Allow the disposal to run for about 30-60 seconds, or until you no longer hear the distinct crunching sound of the ice. The cold water helps to solidify any remaining grease, making it easier for the ice to scrape it away. The abrasive action of the ice against the grinding components will scrub away lodged food particles and general buildup.
- Flush Thoroughly: After the ice has been completely ground, continue running the cold water for another 15-30 seconds to ensure all the dislodged debris and melted ice are thoroughly flushed down the drain and out of your plumbing system.
Step 2: The Baking Soda & Vinegar Power Duo (Chemical & Foaming Cleanse)
This step utilizes the natural chemical reaction between baking soda and vinegar to deep clean, deodorize, and kill bacteria.
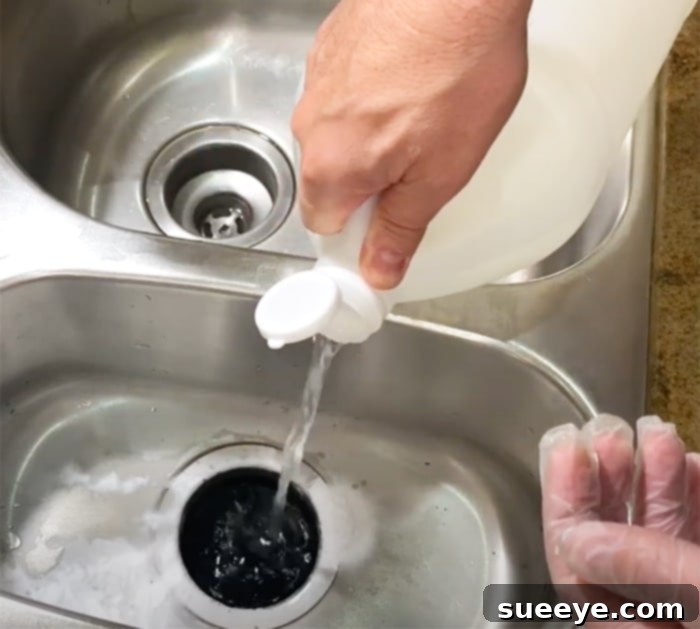
- Add Baking Soda: After flushing out the ice, turn off the water. Liberally sprinkle about half a cup of baking soda directly down the drain opening. Ensure it goes into the disposal chamber. The baking soda will immediately begin to absorb any remaining odors.
- Pour in Vinegar: Slowly pour one cup of white vinegar down the drain, directly over the baking soda. As the vinegar comes into contact with the baking soda, you’ll immediately hear a vigorous fizzing and foaming sound. This effervescent reaction is key; it creates carbonic acid, which acts as a gentle scrubbing agent, loosening grime, dissolving grease, and lifting stubborn particles from the disposal’s walls and blades.
- Let it Sit: Allow the baking soda and vinegar mixture to work its magic for at least 10 to 15 minutes. For particularly stubborn odors or heavy buildup, you can let it sit for up to 30 minutes. The longer it sits, the more time the ingredients have to neutralize odors and break down residues.
- Rinse Thoroughly: After the waiting period, turn on your hot water faucet and let it run down the drain for 30 to 60 seconds. The hot water will help to thoroughly rinse away the cleaning mixture, along with any dislodged grime and remaining odors. The heat also helps to melt and flush away any residual grease that might have been loosened.
For a visual demonstration and additional insights, you can always refer back to Mike Klimek’s comprehensive tutorial on YouTube, which offers full instructions and details.
Preventative Measures for Long-Lasting Freshness
While the two-step cleaning process is highly effective, consistent prevention is key to keeping your garbage disposal odor-free and extending its lifespan. Adopt these simple habits:
- Use Cold Water When Grinding: Always run cold water before, during, and after using your garbage disposal. Cold water helps solidify grease and fat, allowing the disposal blades to chop it more effectively rather than letting it smear onto the pipes and internal surfaces.
- Flush Thoroughly: After grinding, continue running cold water for at least 15-30 seconds to ensure all food particles are completely flushed out of the disposal and drain pipes.
- Avoid Problematic Foods: Some food items are notorious for causing clogs and odors. Try to avoid putting large quantities of the following down your disposal:
- Grease, Oil, and Fat: These solidify in pipes and cause blockages and odors.
- Fibrous Vegetables: Celery stalks, asparagus, corn husks, onion skins, and artichokes can tangle around the grinding elements.
- Starchy Foods: Pasta, rice, and potato peels can expand and create a thick paste that sticks to surfaces.
- Coffee Grounds: They don’t dissolve and can accumulate, forming a sludgy blockage.
- Fruit Pits and Bones: Too hard for most residential disposals and can damage the motor or blades.
- Grind Citrus Peels: Occasionally, toss a few citrus peels (lemon, lime, orange) into the disposal while running cold water. The natural oils in the citrus help to clean and deodorize the unit, leaving behind a fresh scent.
- Regular Deep Cleaning: Aim to perform the ice, baking soda, and vinegar cleaning routine once a month, or more frequently if you notice recurring odors.
- Clean the Splash Guard: Regularly lift and clean both sides of the rubber splash guard to remove any accumulated grime and food residue.
The Benefits of a Well-Maintained Disposal
Beyond simply eliminating unpleasant smells, regularly cleaning and maintaining your garbage disposal offers several significant advantages:
- Fresh and Inviting Kitchen: The most immediate and noticeable benefit is a kitchen free from foul odors, making your cooking and dining experiences far more pleasant.
- Prevents Clogs and Backups: By regularly removing food buildup and grease, you drastically reduce the risk of frustrating and potentially costly clogs in your plumbing system.
- Extends Appliance Lifespan: A clean disposal operates more efficiently and experiences less strain on its motor and grinding components, thereby prolonging its operational life.
- Improved Hygiene: Eliminating bacteria and decaying food particles contributes to a more hygienic kitchen environment, reducing potential sources of germs.
- Efficient Operation: A clean disposal grinds food waste more effectively, ensuring it performs its primary function optimally.
Conclusion
In conclusion, the fight against stubborn kitchen odors often leads us directly to the garbage disposal. This essential appliance, while incredibly convenient, requires a little tender loving care to remain a fresh and functional part of your kitchen. The simple, two-step method involving ice for mechanical scrubbing and the powerful combination of baking soda and vinegar for a deep chemical cleanse is not only remarkably effective but also relies on safe, natural ingredients you likely already have on hand. It’s an effortless process to detoxify food particles, neutralize lingering smells, and restore a sense of freshness to your home.
Many of us, myself included, often fall into the trap of assuming that the daily washing of dishes is sufficient to keep the disposal clean. However, as this guide highlights, the unique environment within the disposal—dark, moist, and constantly processing organic matter—inevitably leads to buildup and the proliferation of odor-causing bacteria. By dedicating just a few minutes each month to this natural cleaning routine, coupled with smart preventative measures, you can prevent those nasty sewage smells from taking over your kitchen. Embrace these easy steps, and enjoy a cleaner, fresher, and more hygienic kitchen environment year-round.