
How to Effectively Eliminate Smelly Sink Drain Odors in 15 Minutes
A persistently smelly kitchen or bathroom sink can be one of the most frustrating household nuisances. Even after diligent surface cleaning, that unpleasant odor often lingers, leaving your space feeling less than fresh. The truth is, the problem rarely lies on the surface. Instead, the culprit is usually hidden deeper within your sink drain pipe, specifically in the section above the P-trap, where grime, grease, and food particles accumulate out of sight. Pouring bleach or other liquid cleaning solutions down the drain might offer a temporary illusion of cleanliness, but it often fails to tackle the hardened dirt and tenacious buildups clinging to the inner walls of the pipe. To truly banish these foul drain smells, a more direct and thorough approach is required: a manual deep clean that targets the source of the odor.
This ingenious and highly effective drain cleaning hack, brilliantly demonstrated in a video tutorial by HouseSmartsTV on YouTube, offers a quick and super effective solution. It works wonders in refreshing your sink drain and making it smell fresh in as little as 15 minutes, making it the perfect DIY project for anyone short on time but keen on a clean, odor-free home.
Understanding the Source of Persistent Drain Odors
Before diving into the solution, it’s crucial to understand why your sink drain develops such offensive odors. Over time, a variety of substances flow down our drains, leading to an insidious buildup of grime. Common culprits include:
- Food Particles: Especially prevalent in kitchen sinks, tiny bits of food cling to pipe walls, decomposing and releasing foul gases.
- Grease and Oils: When fats cool, they solidify and stick to the drain, acting as a magnet for other debris and creating a stubborn, greasy film.
- Soap Scum: A combination of soap residue, minerals from hard water, and body oils can form a sticky film in bathroom drains, trapping hair and other debris.
- Hair: A major contributor to blockages and odors in bathroom sinks and showers, hair traps soap scum and creates a breeding ground for bacteria.
- Bacteria and Mold: These microorganisms thrive in the dark, damp environment of a drain, feeding on organic matter and producing sulfurous gases that manifest as “rotten egg” or musty smells.
The P-trap, the U-shaped bend in your drain pipe, is designed to hold a small amount of water to prevent sewer gases from entering your home. While effective against sewer gases, it does little to stop the accumulation of debris in the vertical and horizontal sections of the pipe *before* the P-trap. This is where the majority of odor-causing buildup occurs, out of reach of casual rinsing or even liquid drain cleaners, which often just flow over the hardened grime without fully dislodging it. This is precisely why a physical, targeted scrub is essential.
Essential Materials for Your Drain Cleaning Project
The beauty of this effective drain cleaning method lies in its simplicity and the readily available materials it requires. You likely already have these items in your home:
- All-purpose cleaner: Choose a reputable cleaner that’s safe for your plumbing system. Enzymatic cleaners are excellent for breaking down organic matter, while strong degreasers work well on grease buildup. Even a standard household multi-surface cleaner can be effective.
- A hole-cleaning brush (or a flexible drain brush): This is the hero of our story. Look for a brush with a long, flexible handle and firm bristles that can reach deep into the drain and effectively scrub the interior walls. A brush specifically designed for drains or even a sturdy bottle brush can work.
How to Deep Clean a Smelly Sink Drain: Step-by-Step Guide
Step 1: Prepare Your Workspace and Gather Tools
Before you begin, ensure you have all your materials within reach. Clear away any dishes, sponges, or personal items from around the sink area to give yourself ample space to work. If you have sensitive skin, consider wearing gloves to protect your hands from the cleaning solution and any grime that may splash out during the process. Ensure good ventilation in the room, especially if you’re using a stronger all-purpose cleaner.
Step 2: Apply Your Chosen All-Purpose Cleaner
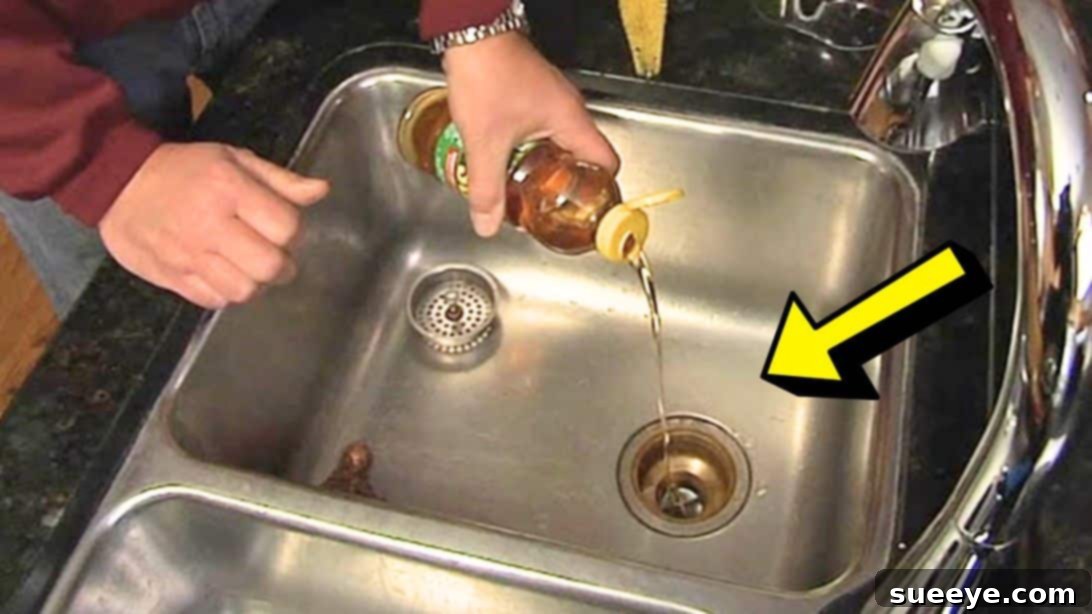
Begin by pouring a generous amount of your all-purpose cleaner directly down the drain. A quarter to half a cup should suffice, depending on the severity of the odor and buildup. The cleaner will start to soften the accumulated grime and grease, making it easier to dislodge. Allow the cleaner to sit in the drain for a few minutes (e.g., 5-10 minutes) to allow it to penetrate the stubborn deposits. This initial soak is crucial as it helps break down the hardened substances that have been stubbornly clinging to your drain walls, preparing them for the physical scrubbing stage.
Step 3: Begin the Scrubbing Process
Now, take your thin, flexible cleaning brush and carefully push it down the drain. Once the brush is inside, begin to scrub the drain walls thoroughly. Use a twisting or circular motion to ensure the bristles make contact with every inch of the pipe’s interior. You’ll likely feel resistance as you encounter hardened dirt and buildup. Don’t be afraid to apply gentle pressure to loosen up all the grime. For kitchen sinks with a garbage disposal, pay special attention to the area underneath the rubber gasket or splash guard; this often harbors significant gunk and food particles. Lift the gasket and scrub all around its underside and the opening of the disposal. Continue to work the brush up and down, making sure to clean and scrub every gap and part of the drain, going as deep as possible, ideally past the initial curve into the P-trap if your brush allows. The goal is to physically scrape away all the side wall accumulations.
Step 4: Rinse Thoroughly and Assess Results
Once you feel you’ve sufficiently scrubbed all accessible areas of the drain, remove the brush. Now, it’s time to give the drain a good rinse. Turn on your hot water tap and let a strong stream of hot water flow down the drain for several minutes. This will flush away all the loosened dirt, grime, and cleaning solution. Observe the water flow and listen for any gurgling sounds that might indicate remaining blockages. If the odor persists or you still see dislodged particles, repeat the scrubbing and rinsing process a few more times as needed until the water runs clear and the unpleasant smell is completely gone. You’ll be amazed at how quickly your drain transforms from a source of foul odors to a clean, fresh-smelling part of your home.
Beyond Cleaning: Preventing Future Drain Odors
While this deep cleaning method is incredibly effective for addressing existing odors, prevention is always key to maintaining a fresh-smelling home. Incorporating a few simple habits into your routine can significantly reduce the likelihood of future drain smells.
Regular Maintenance Habits
- Run Hot Water: After each use, especially in the kitchen, let hot water run down the drain for 15-30 seconds. This helps to flush away small food particles and grease before they have a chance to solidify and stick to the pipe walls.
- Use Drain Screens: Place drain screens over your sink openings to catch larger food scraps, hair, and other debris that could otherwise contribute to clogs and odors. Clean these screens regularly.
- Weekly Baking Soda and Vinegar Flush: For ongoing maintenance, not a deep clean replacement, pour half a cup of baking soda down the drain, followed by half a cup of white vinegar. Let it sit for 15-30 minutes (you’ll hear fizzing as it reacts), then flush with hot water. This can help neutralize mild odors and break down minor buildups. For more details on this and other methods, see our guide on 3 Ways To Deodorize A Smelly Kitchen Sink.
- Avoid Pouring Grease: Never pour cooking grease or oils down the drain. Allow them to cool and solidify, then scrape them into the trash. Liquid grease hardens in pipes, creating prime conditions for clogs and foul smells.
- Clean Your Garbage Disposal Regularly: If you have a disposal, periodically grind up citrus peels (lemons, limes, oranges) with cold water. The citrus not only imparts a fresh scent but also helps clean the grinding components. You can also use ice cubes and rock salt to help scour the blades.
Periodic Deep Cleans
Even with good preventative habits, some buildup is inevitable. Make it a point to perform this targeted drain brushing method every few months, or whenever you notice the faintest hint of a foul odor returning. Proactive cleaning will keep your drains free-flowing and your home smelling clean and inviting.
Why This Method Stands Out
In a world full of chemical drain cleaners and complex plumbing solutions, this simple brushing method for deep cleaning a smelly sink drain truly shines. Its advantages are clear:
- Unmatched Effectiveness: Unlike liquids that only skim the surface, manual scrubbing physically dislodges and removes the hardened grime responsible for persistent odors.
- Speed and Efficiency: As proven, you can achieve noticeable results in as little as 15 minutes, making it ideal for busy individuals.
- Cost-Effective: You only need an affordable all-purpose cleaner and a drain brush, saving you money on expensive chemical treatments or professional plumbing services.
- Safer for Plumbing: Reduces reliance on harsh chemical drain openers that can corrode pipes over time and harm the environment.
- Empowering DIY Solution: It’s a straightforward task that anyone can accomplish, giving you control over your home’s cleanliness and freshness.
*All image credit belongs to HouseSmartsTV via YouTube. Follow and subscribe to his channel for more insightful home improvement tips and tricks!
Say Goodbye to Sink Drain Odor in 15 Minutes!
Don’t let a smelly sink drain detract from the comfort and cleanliness of your home any longer. With just an all-purpose cleaner and a simple cleaning brush, you have the power to tackle those stubborn odors at their source. This quick, efficient, and highly effective method will leave your kitchen or bathroom sink smelling fresh and clean, restoring peace to your household. Give this ingenious hack a try today – you’ll be amazed at the rapid and lasting results!