
Create a Stunning DIY Fall Mason Jar Centerpiece: Your Guide to Cozy Autumn Decor
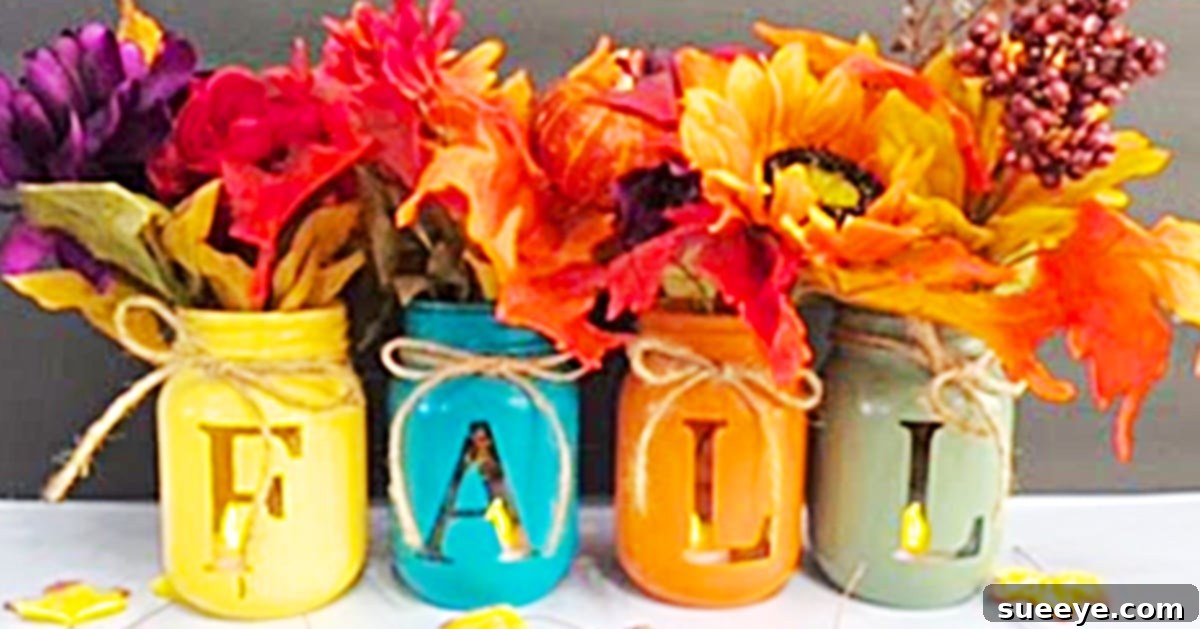
As the leaves begin to turn and a crispness fills the air, there’s a natural desire to infuse our homes with the warmth and beauty of the autumn season. Few things capture this essence quite like a thoughtfully crafted centerpiece, and when it comes to combining simplicity with stunning aesthetics, mason jar projects truly shine. Known for their versatility and charm, mason jars offer a perfect canvas for countless DIY creations, making them a go-to for crafters of all skill levels. This particular DIY Fall centerpiece, inspired by a delightful video tutorial from Scrapbooking With Me Crafts on YouTube, promises to be an effortlessly elegant addition to your fall dining table or any cozy corner of your home. What makes this project even more appealing is its incredible accessibility; the materials are not only affordable but often items you might already have on hand, transforming everyday objects into a beautiful seasonal display.
The beauty of this project lies in its ability to deliver maximum impact with minimal effort. You don’t need to be an experienced crafter to achieve a professional-looking result. The simple steps outlined in the tutorial guide you through transforming ordinary mason jars into personalized beacons of autumn spirit. Imagine the inviting glow and rustic charm these centerpieces will bring to your next family dinner or a quiet evening at home. Let’s delve into how you can easily create this captivating fall decoration, proving that stunning home decor doesn’t have to come with a hefty price tag or complicated instructions.
Why Choose a DIY Fall Mason Jar Centerpiece?
Opting for a handmade centerpiece, especially one using versatile mason jars, comes with a myriad of benefits that extend beyond mere decoration. Here’s why this project is an excellent choice for anyone looking to embrace the autumn spirit:
- Budget-Friendly Elegance: One of the most significant advantages is the cost-effectiveness. Mason jars are incredibly affordable, and the other materials like craft paint, faux leaves, and twine can often be sourced from dollar stores, craft supply sales, or even repurposed items you already own. This allows you to create high-end looking decor without breaking the bank.
- Uniquely Customizable: Unlike store-bought decorations, a DIY centerpiece offers endless possibilities for personalization. You can choose specific colors, words, and embellishments that perfectly match your home’s aesthetic or reflect your personal style, making your decor truly one-of-a-kind.
- Simple and Satisfying: This project is designed for ease. The steps are straightforward, making it a perfect craft for beginners or a relaxing activity for experienced crafters. The satisfaction of creating something beautiful with your own hands is an unparalleled reward.
- Versatile Decor: While perfect as a dining table centerpiece, these mason jar creations can adorn mantelpieces, entryway tables, kitchen islands, or even serve as charming accents on bookshelves. Their adaptability makes them a valuable addition to any room needing a touch of fall cheer.
- Eco-Conscious Crafting: Repurposing mason jars gives new life to items that might otherwise be discarded. This sustainable approach to decorating is not only good for the planet but also encourages creativity in finding new uses for everyday objects.
- Perfect for Gifting: A handmade fall centerpiece makes a thoughtful and personal gift for friends, family, or hosts during the autumn season. It’s a gift that carries a personal touch and brings warmth to any recipient’s home.
Gathering Your Essentials: Materials for Your Fall Mason Jar Masterpiece
Before diving into the creative process, ensure you have all your materials ready. The beauty of this project is that most items are readily available and affordable. Here’s a detailed list of what you’ll need, along with some helpful tips for selection:
- Mason Jars (4 count): Standard pint-sized or quart-sized mason jars work perfectly. You can often find these in bulk at grocery stores, hardware stores, or craft supply retailers. Consider cleaning them thoroughly and ensuring they are completely dry before you begin. For a varied look, you might even use jars of slightly different heights.
- Vinyl or Paper Letters: These are key to creating the distinct “FALL” lettering. You can purchase pre-cut adhesive letters from craft stores. Vinyl letters tend to give a crisper edge when painted over. If you can’t find specific letters, you can also use stencils or even carefully cut out paper letters with a craft knife and secure them with a temporary adhesive. Ensure the letters are large enough to be easily visible on your jars.
- Craft Paint (in Fall Colors): Acrylic craft paints are ideal for this project due to their quick drying time and easy cleanup. Choose a palette that evokes autumn – think rich burnt orange, warm mustard yellow, deep cranberry red, rustic olive green, or even a creamy ivory. Chalk paint can also offer a lovely matte finish. Experiment with different shades to create a harmonious set.
- Faux Fall Leaves and Flowers: This is where you bring the vibrant colors of autumn into your centerpiece. Look for a variety of artificial foliage and small flowers at craft stores, dollar stores, or even discount retailers. Consider elements like maple leaves, small berry sprigs, miniature pumpkins, or sunflowers. Choose items that are small enough to fit inside or be tastefully arranged around the top of your mason jars. Natural elements like small pinecones, acorns, or dried seed pods can also be incorporated for added texture.
- Jute Twine: This natural fiber twine adds a rustic, charming touch to your jars. A roll of standard jute twine is inexpensive and can be found in most craft or hardware stores. Alternatively, you could use thin burlap ribbon, raffia, or even a decorative fall-themed ribbon for a different look.
Step-by-Step Guide: Crafting Your Beautiful Fall Centerpiece
Now that you have all your materials assembled, let’s embark on the fun journey of transforming them into a captivating autumn display. Follow these detailed steps to create your stunning mason jar centerpiece, inspired by Scrapbooking With Me Crafts’ tutorial:
Step 1: Preparing Your Mason Jars and Applying Letters
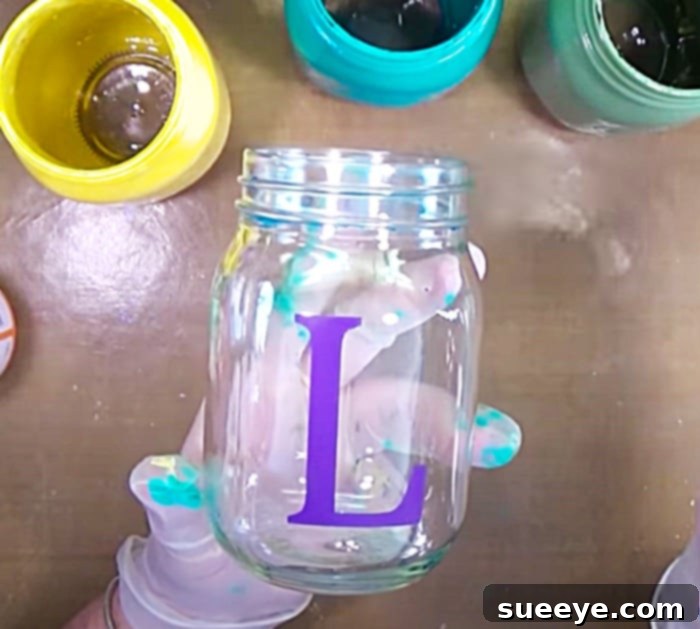
Begin by ensuring your mason jars are sparkling clean and completely dry. Any residue or moisture can affect paint adhesion. Once ready, carefully apply one stick-on letter to the smooth side of each jar. For example, if you’re spelling “FALL,” place an “F” on the first jar, an “A” on the second, and so on. Press the letters down firmly, paying extra attention to the edges, to ensure there are no air bubbles or gaps where paint could seep underneath. This precision is crucial for achieving crisp, clean letter outlines once the paint is removed.
Step 2: Painting Your Jars with Autumn Hues
With your letters securely in place, it’s time to add a splash of fall color! Using your chosen craft paints, carefully paint each mason jar. You can opt for a single color for all four jars for a cohesive look, or choose different complementary fall shades for each jar (e.g., orange, yellow, red, cream) to add visual interest. Apply the paint in thin, even coats to prevent drips and ensure a smooth finish. Depending on the paint’s opacity, you might need two or three coats for full coverage. Allow each coat to dry completely before applying the next. Once all coats are dry to the touch, and the paint is fully cured (check paint manufacturer’s recommendations for drying times, typically a few hours), it’s time for the magical reveal. Gently and slowly peel off the stick-on letters. You’ll be left with perfectly unpainted, clear letter outlines against your beautiful fall-colored jars, revealing the word “FALL” or your chosen message.
Step 3: Rustic Charm with Jute Twine
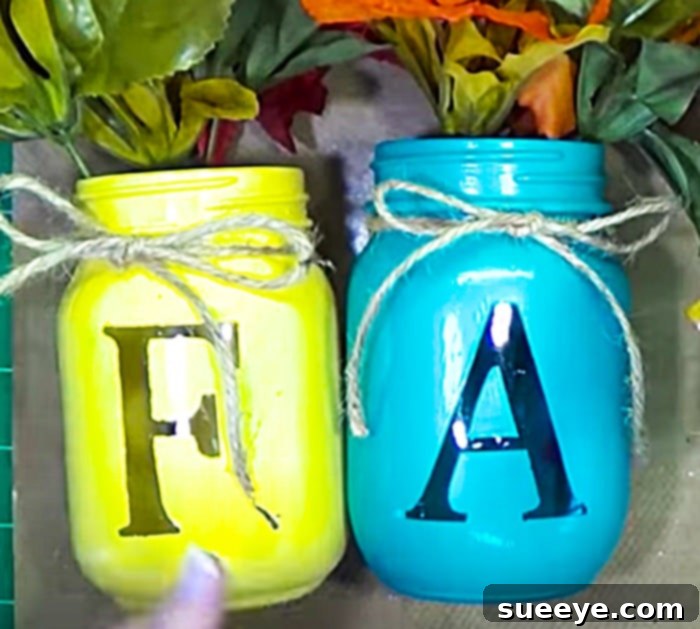
Now, let’s add a touch of rustic elegance with jute twine. Take a length of jute twine and begin wrapping it around the neck or upper portion of each jar. You can wrap it a few times for a subtle accent or create a thicker band for a more pronounced rustic look. Once you’re satisfied with the wrapping, tie a neat bow or a simple knot to secure the twine. Feel free to trim any excess twine for a clean finish. This step adds texture and depth, perfectly complementing the fall aesthetic.
Step 4: Adorning with Faux Fall Foliage
The final touch is to fill and adorn your beautifully decorated mason jars with faux fall leaves and flowers. Arrange your chosen elements artfully inside and around the mouth of each jar. You can vary the contents of each jar for visual interest – perhaps one with more leaves, another with berries, and a third with small blossoms. Aim for a balanced and organic look. If desired, you can use a small dab of hot glue to secure any elements that tend to shift, ensuring your arrangement stays perfect. This step truly brings the centerpiece to life, adding vibrant colors and natural textures that scream autumn.
Customizing Your Fall Mason Jar Centerpiece: Endless Possibilities
While the tutorial provides a fantastic foundation, the beauty of DIY lies in its adaptability. Don’t hesitate to infuse your unique style into this fall mason jar centerpiece. Here are some ideas for customization:
- Alternative Words and Phrases: Instead of “FALL,” consider spelling out “GIVE THANKS,” “AUTUMN,” “HARVEST,” or even a family initial. For a wider display, you could use more jars to spell out a longer phrase.
- Varied Color Palettes: Explore different fall color schemes. Instead of traditional reds and oranges, you might opt for a farmhouse-inspired palette of whites, grays, and subtle greens, or a more vibrant jewel-toned autumn display.
- Different Fillings: Beyond faux foliage, consider filling your jars with other autumnal elements. Battery-operated fairy lights or LED tea lights can create a magical glow, especially in the evenings. Small gourds, acorns, pinecones, cinnamon sticks, or even layers of coffee beans or candy corn can add unique textures and aromas.
- Additional Embellishments: Attach small decorative tags with fall sayings, tie on rustic bells, or incorporate burlap ribbons for extra charm. You can also experiment with distressing the paint on the jars after it dries for a shabby-chic look.
- Beyond the Centerpiece: These beautifully decorated mason jars aren’t just for your dining table. They can serve as charming vases for fresh flowers, holders for kitchen utensils, or unique gift containers.
Placement and Enjoyment: Where to Showcase Your Creation
Once your DIY Fall Mason Jar Centerpiece is complete, the exciting part is deciding where to display your handcrafted masterpiece. Its versatile design makes it suitable for various locations around your home:
- Dining Table: The most obvious and impactful spot. Arrange the four jars in a line down the center of your dining table to create a welcoming focal point for meals and gatherings.
- Mantelpiece: Adorn your fireplace mantel with these jars, perhaps flanking a larger fall-themed sign or a collection of pillar candles. The varying heights and textures will add visual interest.
- Entryway Console: Welcome guests with a festive display in your foyer. Placed on an entryway table, your centerpiece will set a warm, inviting tone from the moment visitors step inside.
- Kitchen Island or Countertop: Bring autumn cheer to the heart of your home. The jars can sit together or be spread out slightly, adding a pop of color and seasonal charm to your cooking space.
- Coffee Table: Enhance your living room’s coziness by placing the centerpiece on your coffee table. It’s a wonderful way to bring seasonal decor into your everyday lounging area.
- Gift Idea: If you’ve made extra, or know someone who appreciates handmade decor, these mason jar centerpieces make thoughtful and personalized gifts for Thanksgiving hosts, neighbors, or friends.
Remember to consider the lighting in your chosen space. Natural light will highlight the colors of the foliage, while evening lighting can create a warm, inviting ambiance, especially if you’ve added fairy lights or LED candles within the jars.
Final Thoughts on Your Autumn Crafting Journey
Creating this DIY Fall Mason Jar Centerpiece is more than just a craft project; it’s an opportunity to infuse your home with personal charm and celebrate the beauty of the autumn season. The simplicity of the steps, combined with the affordability of the materials, makes it an accessible and enjoyable endeavor for everyone. There’s immense satisfaction in transforming everyday items into something truly beautiful and unique, all while adding a personal touch to your seasonal decor.
This project, inspired by the creativity of Scrapbooking With Me Crafts, serves as a wonderful reminder that inspiring home decor doesn’t require a large budget or complex skills. It simply needs a bit of imagination and a willingness to create. So, gather your materials, embrace the fall spirit, and enjoy the process of crafting a centerpiece that will undoubtedly become a cherished part of your autumn home. Your dining table, mantel, or entryway will thank you for this delightful touch of handmade warmth.