
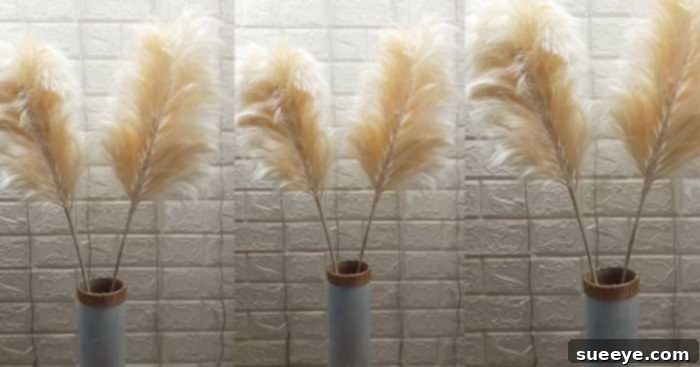
DIY Everlasting Pampas Grass Flowers from Satin Ribbon: A Step-by-Step Guide for Stunning Decor
Pampas grass has captivated the hearts of designers and homeowners alike, becoming an undisputed trendsetter in modern decor. Its fluffy, feathery plumes bring an ethereal, bohemian elegance to any space, from minimalist interiors to grand wedding venues. However, natural pampas grass comes with its own set of challenges: it sheds, it’s seasonal, and it can be quite fragile. What if you could capture that timeless beauty in an everlasting form, crafted with your own hands, for a fraction of the price? Enter the ingenious world of DIY faux pampas grass made from satin ribbon.
This comprehensive tutorial will guide you through creating stunning, feather-like flowers that perfectly mimic the coveted pampas grass. Inspired by the brilliant techniques shared by Alita Art on YouTube, you’ll learn how to transform simple satin ribbon into exquisite, durable decor pieces. These handmade creations are not only budget-friendly but also designed to last forever, maintaining their pristine beauty year after year, unlike their natural counterparts that may only last a few months. Whether you’re planning a rustic wedding, seeking to enhance your home’s aesthetic, or simply love a rewarding craft project, these DIY ribbon pampas grass flowers are the perfect addition. I’ve personally made several, and they complement my Coffee Filter Flowers beautifully, creating a charming, cohesive floral display.
Why Choose DIY Satin Ribbon Pampas Grass?
Opting for handmade pampas grass offers a multitude of benefits over purchasing natural or even some artificial alternatives. Here’s why this DIY project is a game-changer for your decor:
- Cost-Effective Elegance: Real pampas grass can be surprisingly expensive, especially for larger arrangements or multiple bunches. Crafting your own from satin ribbon significantly reduces the cost, allowing you to create abundant displays without breaking the bank.
- Everlasting Beauty: Say goodbye to shedding plumes, wilting stems, and the need for constant replacement. Your satin ribbon pampas grass will maintain its vibrant color and fluffy texture indefinitely, becoming a permanent fixture in your decor.
- Allergy-Friendly: For those sensitive to pollen or dust, natural dried flowers can be problematic. Faux pampas grass eliminates these concerns, allowing everyone to enjoy its beauty without discomfort.
- Customization at Your Fingertips: The creative possibilities are endless! Satin ribbon comes in an astonishing array of colors, textures, and widths. This means you can perfectly match your pampas grass to any color scheme or design aesthetic, from classic neutrals to bold, vibrant hues. You can also control the size and fluffiness of each plume.
- Durability and Low Maintenance: Once crafted, these flowers require virtually no upkeep. A gentle dusting is all that’s needed to keep them looking fresh and new. They are resilient and won’t be damaged by accidental bumps or drafts.
- Eco-Conscious Choice: By creating everlasting decor, you reduce waste associated with disposable flowers and support a more sustainable approach to home embellishment.
- The Joy of Creation: There’s immense satisfaction in making something beautiful with your own hands. This project is not only rewarding but also provides a sense of accomplishment as you watch your vision come to life.
Essential Materials for Your DIY Pampas Grass Project:
Before you embark on this creative journey, gather these simple yet crucial supplies. The quality of your materials can significantly impact the final look and durability of your faux pampas grass.
- Satin Ribbon: This is the star of our show! Opt for a good quality satin ribbon, ideally with a slightly stiffer weave. A width of 1 to 2 inches (2.5 to 5 cm) works well for creating realistic plumes. The wider the ribbon, the fuller your individual “feathers” will appear. Experiment with different colors to match your decor.
- Floral Wire (or Craft Wire): You’ll need wire for the stems of your pampas grass. Floral wire is ideal as it’s flexible yet sturdy enough to hold its shape. Choose a gauge that allows for easy bending but provides enough support for the finished flower – typically 18 to 22 gauge is suitable.
- Double-Sided Flower Tape (or Strong Double-Sided Craft Tape): This specialized tape is essential for attaching the ribbon strips to each other and later to the wire. Flower tape is often thin and very adhesive, making it perfect for this delicate work. Ensure it has strong, long-lasting adhesion.
- Sharp Scissors: Precision is key when cutting ribbon. A pair of sharp fabric scissors will ensure clean, straight cuts, which are vital for uniform “feather” pieces.
Optional additions that might be helpful include a ruler for accurate measurements, a cutting mat for protecting your surfaces, and pliers for bending thicker wire if you choose to use it.
Step-by-Step Directions: Crafting Your Faux Pampas Grass
Now that you have all your materials ready, let’s dive into the creative process. Follow these detailed steps to transform simple ribbon into magnificent pampas grass plumes.
Step One: Preparing Your Satin Ribbon Strips
Begin by cutting your satin ribbon into small, even strips. The length of these strips will determine the size of your individual pampas grass “feathers.” For a natural look, aim for strips between 4 to 8 inches (10 to 20 cm) long. Consistency in length is important for a uniform and polished appearance. Once cut, carefully attach these ribbon pieces to a long strip of your double-sided flower tape. Lay the ribbon strips side-by-side along the tape, ensuring they are closely placed without overlapping too much. The tape acts as a foundation, holding the ribbon strips together and preparing them for the next crucial step. Press firmly to ensure good adhesion, creating a continuous band of ribbon on the tape.
Image by Alita Art via YouTube video.
Step Two: The Art of Fraying – Creating the Feather Effect
This is where the magic happens! With your ribbon strips securely taped, it’s time to create the signature feathery texture. Satin ribbon is woven with distinct horizontal and vertical threads. Carefully begin pulling out the horizontal threads that run across the ribbon. You’ll notice that as you pull these threads, the vertical threads remain, naturally separating and creating a beautiful, fringe-like, and feathery effect. Work slowly and gently from one end of a ribbon strip to the other. The key here is patience and a delicate touch. Be extremely careful not to accidentally rip or pull out the vertical threads, as these form the structure of your individual pampas plume. Continue this process for all the ribbon strips attached to your tape. The more horizontal threads you meticulously remove, the softer and fuller your pampas grass “feathers” will appear.
Step Three: Attaching the Wire Stem to Your Plume
Once all your ribbon strips are beautifully frayed and resemble mini feathers, it’s time to give them a sturdy stem. Carefully peel off the protective backing from the exposed side of your double-sided tape. This will reveal the second adhesive surface. Now, take a piece of your floral wire, cut to your desired stem length (keeping in mind it will be wrapped), and gently place it along the center of the sticky tape, running parallel to the frayed ribbon strips. The tape should run along a portion of the wire. This initial placement is crucial for creating a secure base. Immediately begin wrapping the tape and the frayed ribbon onto itself, starting from one end. This initial wrap will secure the wire firmly within the ribbon structure.
Step Four: Building the Pampas Grass Body and Volume
Continue the wrapping process from Step Three. Tightly roll the entire length of the tape, with the attached frayed ribbon and the wire, onto itself. As you roll, ensure that the ribbon layers are evenly distributed, forming a cylindrical shape around the wire. This repeated wrapping creates the body and volume of your pampas grass plume. You can wrap it multiple times to achieve different levels of thickness and fullness. The more you wrap, the denser and more substantial your individual “feather” will be. Repeat this entire process – from cutting and fraying to taping and wrapping – until you have a desired number of individual, wire-stemmed pampas grass plumes. Having a variety of sizes and thicknesses will add to the natural beauty of your final arrangement.
Image by Alita Art via YouTube video.
Step Five: Assembling Your Pampas Bouquet
Once you’ve crafted many individual pampas grass “leaves” or plumes, it’s time to assemble them into a cohesive and impactful bouquet. Take a longer, sturdier piece of floral wire – this will serve as the main stem for your entire pampas grass stalk. Begin attaching your smaller, individual pampas plumes to this main stem. You can use additional floral tape, thin craft wire, or even a bit of hot glue to secure them. Attach them in clusters or spiral them around the main stem, varying their heights and angles to create a natural, voluminous look. Think about how real pampas grass grows – with smaller plumes branching off a central stalk. Continue adding and bundling your smaller pieces together until you achieve your desired fullness and shape for the overall pampas stalk.
Step Six: Shaping and Finishing Touches
Your pampas grass stalk is almost complete! The final step involves shaping and refining its appearance. You have a couple of options here: you can either keep the aggregated ribbon as one large, dense piece, which creates a very compact and sculptural look, or you can gently fan out the individual frayed ribbon pieces to enhance their feather-like quality. To achieve the classic pampas grass feather shape, use your fingers to carefully separate and fluff out the individual strands. You can gently comb through them with a fine-toothed comb to maximize the feathery texture. This step adds volume and creates a soft, airy aesthetic. Adjust the “feathers” until you are happy with the overall shape and fullness of your everlasting pampas grass.
Creative Ways to Display Your Handmade Pampas Grass
Now that you’ve created your beautiful, everlasting pampas grass, it’s time to showcase it! Its versatile beauty makes it perfect for a myriad of decor styles and occasions.
- Elegant Vase Arrangements: Place a large bunch in a tall floor vase for a dramatic statement in your living room or entryway. For smaller spaces, a few stems in a decorative table vase can add a touch of modern bohemian charm.
- Wedding Wonderland: Faux pampas grass is a dream for wedding decor. Use it in bouquets, centerpieces, aisle markers, arch decorations, or even as backdrop elements. Its timeless appeal ensures your wedding photos will look stunning for years to come.
- Boho Home Accents: Integrate your handmade pampas grass into a bohemian-inspired home. Arrange it on shelves, mantelpieces, or bedside tables alongside macrame, woven textures, and natural wood elements.
- Mix and Match Floral Displays: Don’t limit yourself! Combine your satin ribbon pampas grass with other artificial flowers, dried botanicals, or even the DIY coffee filter flowers mentioned earlier, to create unique and textured floral arrangements.
- Seasonal Decor: Easily adapt your pampas grass for different seasons. Pair it with autumn leaves for fall, or silver and white accents for winter. Its neutral base makes it highly adaptable.
- Wall Hangings & Garlands: Incorporate smaller plumes into macrame wall hangings, dreamcatchers, or create stunning garlands for doorways or staircases.
Tips for Success and a Flawless Finish
To ensure your DIY pampas grass project goes smoothly and yields the best results, consider these helpful tips:
- Patience is a Virtue: The fraying step requires a delicate touch and patience. Don’t rush it; a slow and steady approach will prevent broken vertical threads and ensure a beautiful, fluffy outcome.
- Experiment with Ribbon: Don’t be afraid to try different widths, textures, and even types of satin ribbon. Thicker ribbon will produce larger, fuller plumes, while narrower ribbon creates a more delicate look. Ribbons with a slightly stiffer weave tend to fray more uniformly.
- Vary Your Plume Sizes: For a more natural and dynamic arrangement, create individual plumes of varying lengths and thicknesses. This adds depth and visual interest to your finished bouquet.
- Secure Wrapping: Ensure the double-sided tape and subsequent layers are wrapped tightly around the wire. This guarantees the durability and longevity of your pampas grass stems.
- Good Lighting: Work in a well-lit area to clearly see the ribbon’s weave, making the fraying process much easier.
- Clean Cuts: Always use sharp scissors for precise cuts. Ragged edges can make the fraying process more difficult and result in a less refined look.
- Protect Your Workspace: While not a messy project, having a clean surface helps keep your ribbon pristine.
Variations and Customization Ideas
One of the greatest advantages of DIY projects is the freedom to customize. Here are some ideas to make your satin ribbon pampas grass truly unique:
- Color Play: Beyond classic neutrals, explore vibrant colors like dusty rose, deep emerald, or even ombre effects by using ribbons of varying shades. You could also lightly spray paint the finished plumes for a metallic or frosted look.
- Glitter and Glam: For special occasions like weddings or festive decor, lightly spray the tips of your pampas grass with glitter spray for a touch of sparkle.
- Mixed Materials: While satin ribbon is excellent, consider experimenting with other types of fabric ribbons that fray well, such as silk or even some organza for a more translucent effect.
- Scented Pampas: Lightly mist your finished pampas grass with a floral-scented room spray or essential oil blend to add an aromatic dimension to your decor.
- Different Wire Types: For very large or heavy pampas stalks, you might consider using thicker armature wire that can be shaped more rigidly, then wrapped in floral tape to blend.
- Add Embellishments: Once fully assembled, you can tie small decorative elements like beads, charms, or even tiny faux berries onto the stems for an extra touch of personalization.
Frequently Asked Questions About DIY Satin Ribbon Pampas Grass
How long do these handmade pampas grass flowers last?
One of the biggest advantages of this DIY project is its incredible longevity. Unlike natural pampas grass which can only last a few months before shedding and deteriorating, your satin ribbon pampas grass will last indefinitely. With proper care (primarily just dusting), these beautiful creations can remain a part of your decor for years, even decades, to come.
Can I use different types of ribbon or fabric?
Yes, you can certainly experiment! While satin ribbon is highly recommended due to its weave and ease of fraying into distinct strands, other types of fabric ribbon might also work. Look for ribbons with a visible horizontal and vertical weave that can be easily separated. Ribbons made from materials like silk, grosgrain, or even some organzas might offer interesting textures. Avoid ribbons with very tight weaves or those that are heavily starched, as they might be difficult to fray effectively. Always test a small piece first!
How do I clean my faux pampas grass?
Cleaning your satin ribbon pampas grass is very straightforward. The best method is gentle dusting. You can use a soft, dry cloth, a feather duster, or even a soft-bristled brush to gently remove any accumulated dust. For a deeper clean, you could carefully use a low-setting hairdryer on a cool air setting to blow away dust from a distance. Avoid getting them wet, as this could affect the ribbon’s texture and possibly the adhesive of the tape.
How long does it take to make one pampas stalk?
The time required can vary significantly depending on the size and fullness you desire, as well as your crafting speed. Making individual plumes, especially the fraying step, can be time-consuming, but also quite meditative. For a single full pampas stalk (composed of many individual plumes), you might spend anywhere from 2 to 4 hours, or even more if you’re making a very large arrangement. Breaking the project into stages (e.g., cutting all ribbon strips one day, fraying another, assembling another) can make it feel more manageable and enjoyable.
Conclusion: Your Everlasting Touch of Elegance
Crafting your own everlasting pampas grass from satin ribbon is more than just a DIY project; it’s an investment in sustainable, personalized decor. This tutorial, drawing inspiration from Alita Art’s meticulous guidance, empowers you to create stunning, on-trend floral pieces that will enhance any setting without the drawbacks of real pampas grass. From saving money and customizing colors to enjoying enduring beauty and the satisfaction of handmade art, the benefits are clear.
So, gather your materials, embrace your creativity, and embark on this rewarding journey. Imagine the endless possibilities for your home, your special events, or even as thoughtful, handcrafted gifts. With these detailed steps, you’re not just making flowers; you’re crafting timeless elegance that will be cherished forever. Happy crafting!