
Sew Your Own Ultimate Comfort: DIY Boxer Shorts for Lounging & Gifting
Are you searching for the perfect pair of shorts to unwind in on a lazy weekend, or perhaps a unique, heartfelt gift for someone special? Look no further! Creating your own comfortable boxer shorts is a wonderfully rewarding and surprisingly easy sewing project. Whether you’re a complete beginner to the world of sewing or looking for a quick and satisfying craft, these DIY boxer shorts are an absolute delight to make and even better to wear.
Imagine slipping into super soft, custom-fit shorts made exactly to your liking – choosing your favorite fabrics, patterns, and even adding unique embellishments. This isn’t just about making clothing; it’s about crafting personalized comfort and style. From chic loungewear to practical pajama bottoms, these versatile shorts quickly become a wardrobe staple. And trust us, once you start, you might just find yourself making several pairs, just like we did after watching Jo’s incredible tutorial!
Why Sew Your Own Boxer Shorts? The Advantages of Handmade Comfort
In a world of fast fashion, there’s something truly special about a handmade garment. Sewing your own boxer shorts offers a myriad of benefits beyond just having a new item of clothing. Firstly, **unparalleled comfort** is at your fingertips. You get to select the exact fabric composition, ensuring a soft, breathable, and irritation-free experience. Forget scratchy seams or ill-fitting waistbands; you control every detail to achieve peak comfort.
Secondly, **complete customization** allows your personality to shine through. The high street might offer limited designs, but your imagination is the only limit when you sew. Want playful prints for sleepwear? Elegant solids for sophisticated loungewear? Or a quirky mix-and-match design that no one else has? It’s all possible. This level of personalization transforms a simple pair of shorts into a unique expression of style.
Moreover, this project is incredibly **beginner-friendly**. Many aspiring sewers are intimidated by complex patterns and intricate techniques. Boxer shorts, with their relatively simple construction, are an ideal entry point, allowing you to learn fundamental sewing skills without feeling overwhelmed. You’ll gain confidence with your sewing machine, practice straight seams, and master elastic casings – all transferable skills for future projects.
Finally, these DIY boxer shorts make for **exceptional gifts**. Hand-stitched presents carry a thoughtfulness that store-bought items simply can’t match. Whether it’s for Valentine’s Day, birthdays, holidays, or just because, a pair of custom-made boxer shorts shows you went the extra mile. They’re a practical yet deeply personal gift, perfect for friends, family members, or anyone who appreciates comfort and a personal touch.
Getting Started: Essential Materials You’ll Need
Before you dive into the sewing, gathering your materials is key. The beauty of this project lies in its simplicity and minimal requirements. Most items are standard sewing supplies, making it an accessible craft for anyone. Here’s a basic list to get you started on your DIY boxer shorts journey:
- **Fabric:** Approximately 1 to 1.5 yards of a lightweight, breathable fabric. Cotton lawn, broadcloth, flannel, rayon challis, or even old bed sheets work wonderfully.
- **Elastic:** 1 to 1.5 inches wide, enough to go around your waist comfortably (or the waist of the recipient), plus a few extra inches for overlap.
- **Matching Thread:** Polyester or cotton thread that complements your chosen fabric.
- **Sewing Machine:** A basic sewing machine is all you need.
- **Fabric Scissors:** Sharp scissors dedicated to cutting fabric.
- **Pins or Fabric Clips:** For holding fabric pieces together.
- **Measuring Tape:** Essential for accurate measurements.
- **Boxer Shorts Pattern:** A simple pattern for boxer shorts or pajama bottoms. Online resources like Jo’s tutorial often provide printable patterns or instructions for drafting one.
- **Iron and Ironing Board:** For pressing seams, which makes a huge difference in the final look.
- **Fabric Marker/Chalk:** For marking your fabric according to the pattern.
Choosing the Perfect Fabric: Where Creativity Meets Comfort
The fabric choice is perhaps the most exciting part of making your own boxer shorts. It’s where you truly unleash your creativity and define the feel and look of your final product. For ultimate comfort, especially for loungewear or sleepwear, prioritize soft, breathable, and somewhat drapey fabrics. Cotton is always a popular choice – cotton lawn offers a crisp, lightweight feel, while flannel provides cozy warmth for cooler nights. Rayon challis drapes beautifully and feels wonderfully soft against the skin, offering a more luxurious feel.
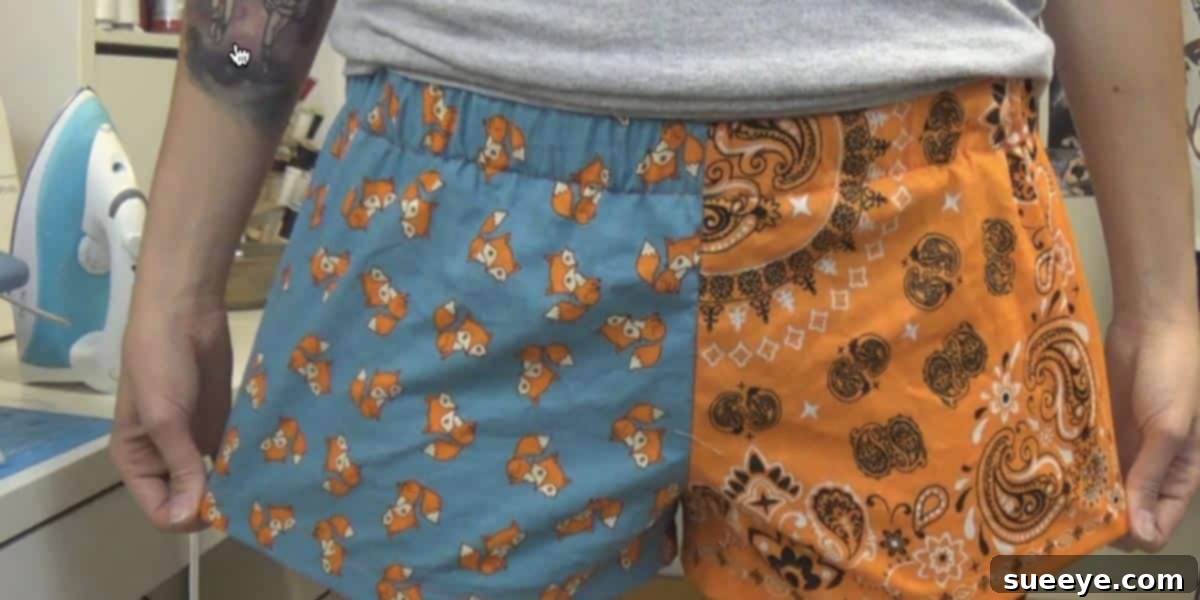
Beyond texture, consider patterns and colors. This is your chance to go wild! Playful polka dots, classic stripes, bold florals, subtle geometrics, or even novelty prints related to hobbies and interests can transform a simple pair of shorts into something truly special. One fantastic idea, demonstrated beautifully by Jo, is to use two different but coordinating fabrics. Perhaps a solid color for the main body and a contrasting print for the waistband casing or vice versa, creating a unique and visually appealing design element. This technique can elevate your boxers from basic to bespoke.
Personalize Your Look: Mixing and Matching Fabrics
Don’t be afraid to experiment with fabric combinations. A solid colored fabric paired with a vibrant patterned one can create a dynamic and stylish contrast. For example, a navy blue main fabric with a white anchor-print fabric for the waistband or pocket lining (if adding pockets) adds a custom touch. Think about the recipient’s personality or your own preferences. Are they minimalist? Opt for subtle textures and solid hues. Are they bold and adventurous? Bright colors and large prints will be perfect. The fabric sets the tone, so choose wisely and have fun with it!
Sizing and Fit: Ensuring Optimal Comfort
Comfort is paramount when it comes to boxer shorts, and achieving that perfect fit starts with accurate measurements. If you’re making them for yourself, simply measure your natural waist and hips. If you’re creating a gift, a little sneakiness might be required to get measurements without spoiling the surprise! You could discreetly measure a pair of their existing shorts that fit them well, or ask a close family member for help. Remember, when in doubt, it’s often better to go slightly larger as fabric can always be taken in, but rarely can it be let out.
Most boxer shorts patterns are designed with a relaxed fit, prioritizing ease of movement and comfort over a snug silhouette. Pay close attention to the pattern’s sizing chart, comparing it to your (or the recipient’s) measurements. A good pattern will guide you on how much ease (extra room) is built into the design. Don’t forget about the elastic waistband; it should be snug enough to stay up without digging into the skin. A good rule of thumb is to cut the elastic a few inches shorter than the actual waist measurement, then try it on to test for comfort before fully attaching it.
The Sewing Process: Easier Than You Think!
The actual sewing of boxer shorts is surprisingly straightforward, making it an excellent project for honing basic skills. While we won’t replicate a full step-by-step tutorial here (you’ll want to watch holycrappitsjo’s excellent guide for that!), here’s a general overview of the process:
- **Prepare Your Pattern and Fabric:** Print and cut out your pattern pieces. Wash and press your fabric to prevent shrinkage later. Lay out your fabric and cut your pieces precisely.
- **Sew the Main Seams:** Typically, you’ll start by sewing the front and back crotch seams, then joining the leg seams. Proper seam allowances and pressing each seam open or to one side are crucial for a professional finish.
- **Create the Elastic Casing:** This is where the elastic waistband will sit. You’ll usually fold down the top edge of the shorts, press, fold again, stitch, and then thread your elastic through the casing.
- **Hem the Legs:** Finish the raw edges of the leg openings by folding them up twice and stitching them in place.
- **Final Touches:** Secure the elastic ends, trim any loose threads, and give your new shorts a final press.
If she can make these, anybody can! It’s all about following the instructions carefully and taking your time. Each step builds upon the last, leading to a satisfying finished product.
Beyond the Basics: Customization Ideas for Your Boxer Shorts
Once you’ve mastered the basic boxer short, the possibilities for customization are endless. Don’t just stop at fabric choice – think about features that enhance comfort, style, and practicality:
- **Adjustable Lengths:** Easily modify the pattern to make longer pajama bottoms, capri-style shorts, or even full-length lounge pants. This simple adjustment transforms the basic boxer into a versatile sleepwear set.
- **Drawstrings:** For an extra secure and adjustable fit, especially in pajama pants, consider adding a drawstring to the waistband. This can be incorporated into the elastic casing or as a separate channel.
- **Pockets:** Add side seam pockets or even a single back patch pocket for functionality. This is a great way to introduce a slightly more advanced sewing technique and add utility.
- **Lace or Trim:** For a more delicate or feminine touch, add lace trim to the leg hems or a decorative ribbon to the waistband.
- **Embroidery or Appliqué:** Personalize your boxers with embroidered monograms, small motifs, or fun appliqué patches. This is particularly charming for gifts.
- **Faux Fly:** While these are pull-on shorts, adding a decorative faux fly can give them a more traditional boxer short appearance without the complexity of a working zipper.
The Perfect Handmade Gift: Thoughtful and Unique
As mentioned, these boxer shorts make truly wonderful gifts. Imagine the delight on someone’s face when they receive a gift that’s not only practical and comfortable but also handcrafted especially for them. They are ideal for so many occasions! Valentine’s Day, as suggested, is perfect for a cozy, loving gesture. But they’re equally suitable for birthdays, Christmas, Mother’s Day, Father’s Day, or even as a thoughtful “get well” gift. I personally loved making these for my friends, my daughter, and my nieces for Valentine’s Day. The effort of getting their measurements without giving away the surprise only added to the fun and the personal touch!
The beauty of gifting handmade items is the story behind them. It’s not just a pair of shorts; it’s hours of careful selection, cutting, and stitching, infused with your care and attention. This personal investment makes the gift exponentially more valuable and cherished than any store-bought alternative. They’re a cozy reminder of your affection, destined to be worn and loved for years.
Why You’ll Love Your DIY Boxer Shorts (and Everyone Else Will Too!)
Beyond the joy of the creative process, there are countless reasons why you’ll absolutely adore your handmade boxer shorts. Firstly, the **comfort factor** is unmatched. Forget the restriction of everyday clothes; these are designed for ultimate relaxation. Secondly, the **sense of accomplishment** is incredibly satisfying. Completing a sewing project, especially one that results in a wearable item, boosts confidence and provides a tangible reward for your efforts.
- **Unbeatable Comfort:** Tailored to your exact preferences, ensuring softness and freedom of movement.
- **Sustainable Fashion:** A great way to reduce textile waste by using up fabric scraps or repurposing materials.
- **Cost-Effective:** Often cheaper to make than buying high-quality, comfortable loungewear.
- **Unique Style:** Your creations will stand out from mass-produced items, reflecting your personal taste.
- **Therapeutic Hobby:** Sewing is a wonderful stress-reliever and a creative outlet.
So, if you’re ready to embrace comfort, creativity, and the joy of making something truly special, these DIY boxer shorts are calling your name. As holycrappitsjo brilliantly demonstrates in her step-by-step tutorial, this project is accessible to everyone. Don’t hesitate – grab your fabric, fire up your sewing machine, and prepare to fall in love with your new favorite loungewear!