
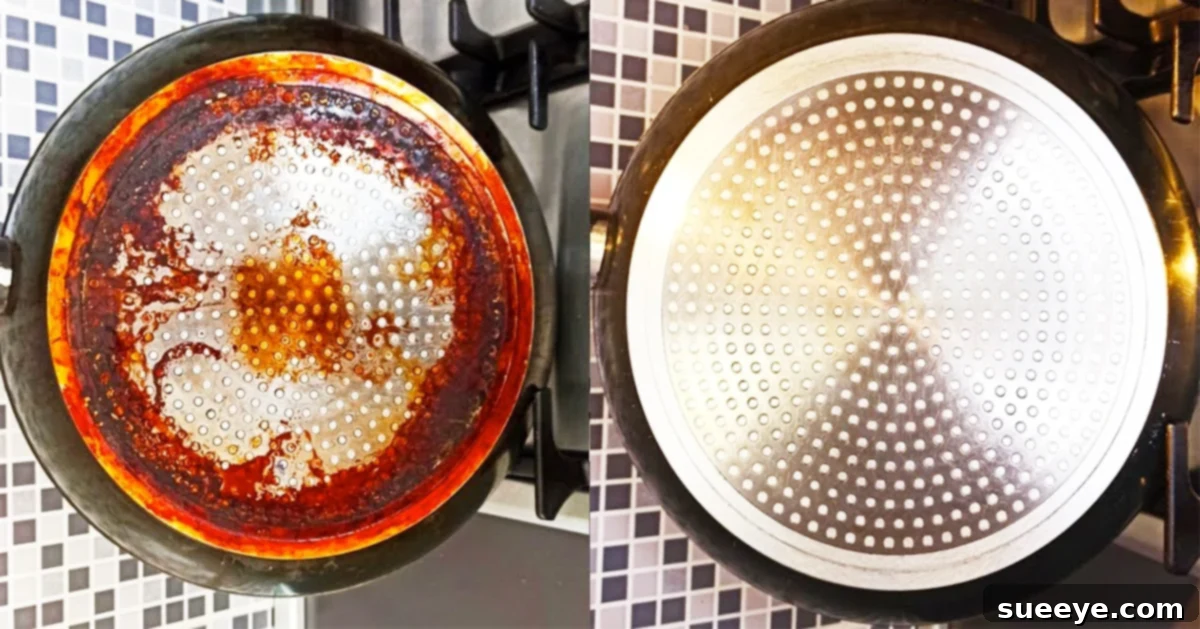
Effortlessly Remove Stubborn Grease Stains from Pots and Pans: The Ultimate Guide
For any home cook, the sight of beloved pots and pans marred by stubborn, baked-on grease stains can be incredibly frustrating. Despite our best efforts to maintain cookware, the relentless demands of daily cooking often lead to a gradual accumulation of grime that seems impossible to shift. That glossy new finish eventually gives way to a dull, blackened exterior, making even high-quality cookware look worn and unappealing. You might have tried countless scrubbing sessions, various abrasive cleaners, or even old wives’ tales, only to be met with disappointment and aching arms. The good news is, restoring your pots and pans to their pristine condition doesn’t have to be a stressful, Herculean task. As demonstrated by the insightful Gina Amon Channel on YouTube, a remarkably simple and effective method exists, requiring just a couple of common household supplies. This guide will walk you through the process, helping you reclaim the shine and cleanliness of your most used kitchen companions.
The Common Cookware Conundrum: Understanding Stubborn Grease Stains
Cooking is a passion for many, but the aftermath can sometimes be less enjoyable, especially when it involves tackling the seemingly permanent grease and carbon build-up on the undersides and exteriors of pots and pans. These unsightly stains aren’t just an aesthetic issue; they can sometimes affect cooking performance over time, though primarily, they detract from the overall joy of cooking in a clean kitchen. Why do these stains form and become so persistent? It’s often due to oil splatters, burnt food particles, and heat exposure that caramelizes and bakes these residues onto the metal surface, creating a tenacious bond. Traditional dish soap and sponges often prove inadequate against this type of hardened grime, leaving many to resign themselves to perpetually stained cookware. But what if there was a powerful solution that cuts through years of build-up with minimal effort? This method provides exactly that, leveraging the strength of a common kitchen cleaner to do the heavy lifting for you.
Essential Supplies for Cookware Restoration
Before you embark on your cookware cleaning journey, gather these simple yet powerful tools. Each plays a crucial role in safely and effectively removing even the most stubborn grease stains, ensuring your pots and pans emerge sparkling clean.
- Oven Cleaner (Heavy-Duty Degreaser): The star of this cleaning hack. Oven cleaner contains strong alkaline chemicals (like lye or caustic soda) that are specifically designed to break down baked-on grease and carbon deposits. Its powerful degreasing properties are what make it so effective for this purpose. Ensure you have a good quality oven cleaner, typically found in aerosol cans.
- Sponge with a Green Scouring Side: A dual-sided sponge is invaluable. The soft, absorbent side is good for general washing, but the green, abrasive scouring pad on the back is essential for scrubbing away loosened grime without being overly aggressive on most metal surfaces.
- Stainless Steel Scrubber (Optional, for extremely tough stains): For truly ancient, petrified grease build-up, a stainless steel sponge or scrubber can provide extra abrasive power. However, use this with caution, especially on non-stick coatings or highly polished surfaces, as it can scratch. It’s best suited for the very bottom of stainless steel or cast iron pans.
- Heavy-Duty Rubber Gloves: Absolutely non-negotiable! Oven cleaner is a highly corrosive chemical that can cause skin irritation or chemical burns. Always protect your hands thoroughly before handling the cleaner.
- Access to a Well-Ventilated Area: Due to the strong fumes emitted by oven cleaner, ensure you are working in a kitchen with good airflow, perhaps near an open window or with an exhaust fan running.
Step-by-Step Directions for Removing Baked-On Grease
Follow these detailed steps carefully to achieve impressive results. Remember to always prioritize safety when working with chemical cleaners.
Step 1: Prepare the Pan – Heat and Hydration
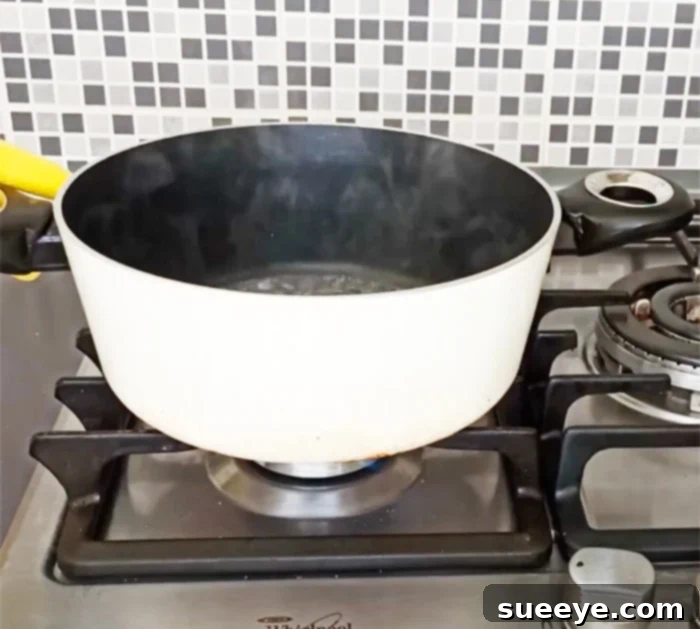
Begin by placing your dirty pot or pan on the stove. Add approximately half a cup of water inside the pan. Turn on the heat and bring the water to a rolling boil. Allow it to boil vigorously for about 2-3 minutes. This initial heating serves a critical purpose: it warms the entire pan, including the underside where the grease stains reside. The heat helps to gently loosen and soften the hardened, baked-on grease, making it more receptive to the powerful cleaning agents in the oven cleaner. Think of it as pre-conditioning the stains for optimal removal. Ensure the pan is sufficiently hot before proceeding to the next step, as this significantly boosts the cleaner’s efficacy.
Step 2: Apply the Oven Cleaner – The Degreasing Power
Once the pan is heated, carefully remove it from the stove. Exercise caution as the pan will be very hot. Immediately and safely dump out the hot water from the inside. Now, wearing your heavy-duty rubber gloves and ensuring good ventilation, take the oven cleaner and generously spray it directly onto all the stubborn grease stains on the exterior and bottom of the pot or pan. Aim for an even, thorough coating that completely covers the stained areas. The heat from the pan will react with the oven cleaner, initiating the breakdown process of the baked-on grease more rapidly. Once applied, place the pan in your sink (or a designated area, preferably a utility sink, to contain any drips) and let the oven cleaner sit and work its magic for approximately 5 minutes. During this crucial waiting period, the powerful chemicals in the oven cleaner are actively dissolving and emulsifying the grease.
Step 3: Scrub and Rinse – Revealing the Shine
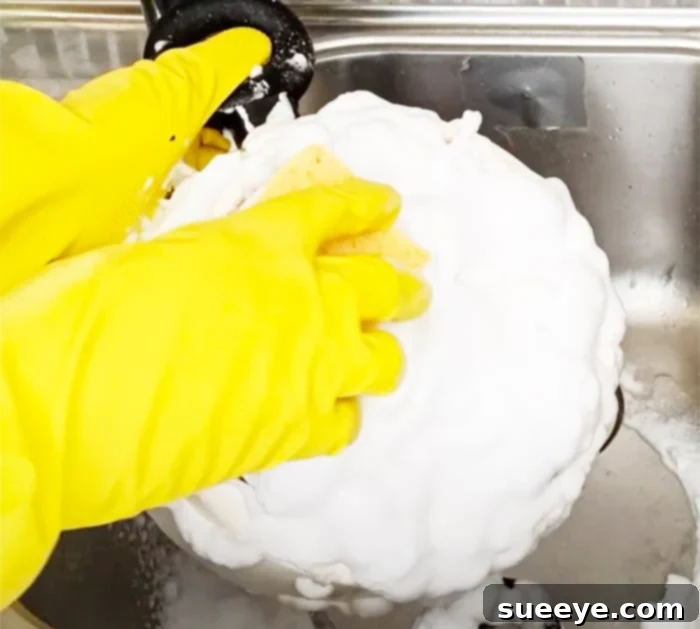
After the 5-minute waiting period, it’s time for the scrubbing. Using the green, coarse side of your sponge, begin to vigorously scrub the areas where you applied the oven cleaner. You will notice the grease and grime starting to lift away and dissolve with relative ease. The pre-heating and the chemical action of the oven cleaner will have softened even the most hardened residues, making them much easier to remove than with conventional scrubbing alone. For areas with particularly thick or old build-up, you might need to apply more pressure or switch to a stainless steel scrubber (use with caution, as mentioned, on specific cookware types). Scrub systematically, ensuring you cover all stained surfaces. Once you’ve scrubbed sufficiently, thoroughly rinse the pan under hot running water to wash away the cleaner and loosened grime. Inspect the pan. If stubborn stains persist, do not despair. It’s perfectly normal to have to repeat the entire process—heating, spraying, waiting, and scrubbing—a few times for exceptionally dirty cookware. Patience and repetition are key to achieving optimal results.
Step 4: Final Polish and Inspection
Once you are satisfied with the removal of the grease stains, give your pot or pan a final rinse with clean water and dry it thoroughly. You’ll likely be amazed at the transformation! Your cookware will look significantly cleaner, perhaps even resembling its original condition. Take a moment to inspect all surfaces, ensuring no residue of the oven cleaner remains. For full instructions and additional detailed insights, always refer back to the original demonstration by the Gina Amon Channel on YouTube.
Understanding the Science Behind Oven Cleaners
Why is oven cleaner so remarkably effective against baked-on grease, unlike regular dish soap? The answer lies in its chemical composition. Most oven cleaners contain strong alkaline ingredients, primarily sodium hydroxide (lye) or potassium hydroxide. These powerful bases react with the fatty acids in grease and oils through a process called saponification. Essentially, the alkali breaks down the complex grease molecules into simpler, water-soluble soap-like substances. This chemical reaction allows the hardened, sticky grease to be easily wiped or scrubbed away, rather than just smeared around as often happens with less potent cleaners. The heat from pre-warming the pan further accelerates this reaction, making the cleaner even more potent and efficient.
Important Safety Precautions When Using Oven Cleaner
While highly effective, oven cleaner is a powerful chemical that demands respect and careful handling. Adhering to these safety guidelines is paramount to prevent injury:
- Always Wear Gloves: As previously emphasized, heavy-duty rubber gloves are non-negotiable. Direct skin contact can cause severe irritation or chemical burns.
- Ensure Excellent Ventilation: The fumes from oven cleaner can be irritating to the respiratory system and eyes. Work in a well-ventilated area – open windows, turn on exhaust fans, or even work outdoors if possible.
- Protect Your Eyes: Consider wearing safety goggles to prevent accidental splashes from reaching your eyes, which could cause serious damage.
- Read the Manufacturer’s Instructions: Always refer to the specific instructions and warnings on your chosen oven cleaner product label. Different brands may have slightly different application guidelines or specific precautions.
- Avoid Contact with Sensitive Surfaces: Do not use oven cleaner on aluminum (unless specifically stated as safe for aluminum by the manufacturer), painted surfaces, non-stick coatings (unless you are only cleaning the exterior and are extremely careful), or other delicate materials. It can cause discoloration or damage.
- Keep Away from Children and Pets: Store oven cleaner securely out of reach of children and pets.
- Never Mix with Other Cleaners: Mixing oven cleaner with other cleaning products, especially those containing bleach or acids, can produce dangerous fumes.
- Rinse Thoroughly: After cleaning, ensure all residues of the oven cleaner are completely rinsed off the cookware before reuse.
Prolonging Cookware Life: Maintenance and Prevention
Once you’ve restored your pots and pans to their gleaming glory, the next step is to keep them that way. While this powerful cleaning method is excellent for tackling severe build-up, regular maintenance can prevent such extensive cleaning from being necessary in the future.
- Wipe Down After Every Use: Even a quick wipe with a damp cloth after cooking can remove fresh oil splatters and food residues before they have a chance to bake on.
- Use Appropriate Heat Settings: Cooking on excessively high heat can cause oils to burn and adhere more stubbornly to the pan’s exterior. Use medium heat where possible.
- Clean Spills Immediately: If food or oil spills over the sides of your pan during cooking, try to wipe it up carefully while the pan is still warm (but not scalding hot) to prevent it from baking on.
- Regular Deep Cleans (Less Intensive): Incorporate a less intensive deep clean into your routine, perhaps once a month, using a milder degreaser or a paste of baking soda and vinegar for lighter stains.
- Choose the Right Cookware for the Job: Certain cooking methods produce more splatter. Consider using splatter screens or adjusting your technique to minimize mess.
The Myth of the Silver Scrubbing Sponge and Cookware Integrity
A common concern, as alluded to in the original text, is the potential for abrasive tools like silver (stainless steel) scrubbing sponges to “remove the seal” of pots and pans. This concern is valid, but it largely depends on the type of cookware you’re cleaning. For instance, using a harsh stainless steel scrubber on a non-stick pan’s interior would indeed damage its delicate coating, rendering it useless. However, for the exterior of heavy-duty stainless steel or cast iron cookware, a stainless steel scrubber can be very effective and safe. These materials are designed to withstand significant scrubbing. The “seal” typically refers to protective coatings like non-stick layers (PTFE, ceramic, etc.) or anodized finishes. When cleaning the exterior and bottom of a pan, especially if it’s stainless steel, you are generally safe to use more abrasive tools like a green scouring pad or a stainless steel scrubber. Always be mindful of the material composition of your cookware. If it has any special coating on the exterior, stick to the less abrasive green sponge. The goal is to remove the grease, not to strip away the pan’s protective or functional layers.
Conclusion: Reclaim Your Kitchen with Gleaming Cookware
In conclusion, those seemingly permanent, stubborn grease stains on the bottom and exterior of your pots and pans are far from indestructible. With the right approach and a few simple supplies – specifically, a powerful oven cleaner and a good scrubbing sponge – you can effectively reverse years of build-up. This cleaning tip is incredibly useful because it addresses a universal challenge faced by home cooks everywhere, turning a dreaded chore into a satisfying act of cookware restoration. Beyond the aesthetic improvement, maintaining clean cookware contributes to a more hygienic cooking environment and can even extend the lifespan of your valuable kitchen tools. Don’t let unsightly stains diminish your cooking experience any longer. Embrace this simple yet potent method, prioritize safety, and marvel at how easily your pots and pans can be transformed. Say goodbye to stress and hello to sparkling clean cookware, ready for countless more delicious meals. Restore, maintain, and enjoy your beautiful kitchen once again!