
Mastering Zipper Installation: Your Ultimate Guide to Sewing Zippers with Confidence
Zippers are an indispensable component in countless sewing projects, transforming simple fabric pieces into functional and professionally finished items. From the most basic pillowcases and practical pouches to intricate garments like dresses, skirts, and jackets, a well-installed zipper elevates the entire design. Far from being a daunting or advanced task, learning how to sew a zipper is a fundamental skill that every sewing enthusiast, regardless of experience level, can master with ease. This comprehensive guide is designed to empower you with the knowledge and techniques needed for flawless zipper installation, ensuring your next creation is not only functional but also beautifully crafted.
We’ll delve into the various types of zippers available, outline the essential tools required, detail crucial preparation steps, and explore the most common sewing techniques. To further enhance your learning, we’ll introduce you to an invaluable video tutorial from Dana at MADE Everyday, demonstrating two incredibly simple methods that will revolutionize your approach to sewing zippers.
Why Zippers Are an Essential Skill in Your Sewing Toolkit
Beyond their primary function of opening and closing, zippers offer a multitude of benefits that make them a favorite among designers and home sewists alike:
- Unmatched Functionality: Zippers provide a secure, quick, and efficient way to close openings, making items easy to access while ensuring contents remain safely inside. Consider the practicality of a durable handbag, the comfort of a cozy jacket, or the snug fit of a custom-made garment.
- Professional and Polished Finish: A neatly installed zipper can drastically improve the overall appearance of any handmade item. It imparts a store-bought quality, making your projects look intentionally designed and expertly executed. This detail speaks volumes about your craftsmanship and attention to detail.
- Incredible Versatility: Zippers come in an astonishing array of styles, colors, and materials. This diversity allows them to serve various purposes, from providing a subtle, almost invisible closure on a delicate dress to acting as a bold, decorative element on a trendy bag. The creative possibilities are truly endless.
- Enhanced Durability: Modern zippers are engineered for longevity and designed to withstand repeated use and wear. Selecting the appropriate zipper type for your specific project is key to ensuring its structural integrity and adding lasting durability to your creations.
Understanding Different Types of Zippers for Your Projects
Before you even begin to sew a zipper, it’s crucial to understand the different types available on the market and, more importantly, which one is best suited for your specific project. Each zipper type possesses unique characteristics and is designed for particular applications, influencing both the aesthetics and functionality of your finished item.
Coil Zippers (Nylon/Polyester)
Coil zippers are arguably the most ubiquitous and versatile type. Their teeth are formed from a continuous coil of nylon or polyester filament, making them exceptionally flexible, lightweight, and often very durable. They are suitable for an incredibly wide range of applications, including general apparel like trousers, skirts, and dresses, as well as home decor items such as bedding and cushion covers, and various types of bags. Their inherent flexibility also makes them easy to work with, especially on curved seams where rigid zippers might pose a challenge.
Invisible Zippers
True to their name, invisible zippers are engineered to practically disappear into the seam once sewn. The unique design places the zipper teeth on the reverse side of the zipper tape, so that when installed, only a small pull tab is visible at the top. This results in an incredibly seamless and elegant finish, making them the preferred choice for formal wear, dresses, skirts, and any project where a discreet closure is paramount and should not detract from the fabric’s design. Installing an invisible zipper often requires a specialized invisible zipper foot on your sewing machine, which is designed to guide the coils perfectly into the seam for that truly “invisible” effect.
Metal Zippers
Recognized for their superior strength and inherent durability, metal zippers feature individual metal teeth (commonly brass, aluminum, or nickel) securely crimped onto the zipper tape. These zippers are generally heavier and more robust than their coil counterparts, making them ideal for heavy-duty items such. Examples include jeans, sturdy jackets, rugged outdoor gear, and luggage. Beyond their functional advantages, metal zippers also possess a distinctive aesthetic appeal that can be deliberately incorporated as a design feature, adding a touch of classic ruggedness or industrial chic to a project.
Separating Zippers
Distinct from most other zippers that remain joined at one end, separating zippers are designed to open completely at the bottom, allowing two pieces of fabric to detach entirely. This functionality makes them most commonly used in outerwear such as jackets, coats, and hoodies where the garment needs to open fully. Separating zippers are available in both coil and metal varieties, allowing you to choose based on the desired weight, strength, and aesthetic of your particular project.
Specialty Zippers (Waterproof, Decorative, Two-Way, etc.)
Beyond these primary types, the world of zippers offers various specialty options. You might encounter waterproof zippers, crucial for outdoor gear and rainwear; two-way zippers, which can be opened from both ends, ideal for bags, sleeping bags, or longer coats; or decorative zippers featuring larger, more ornate pulls or tapes, used to create a specific visual impact. Understanding these diverse options significantly expands your creative possibilities for an extensive array of sewing projects.
Essential Tools and Materials for Sewing Zippers
Having the correct tools readily available will make the process of zipper installation significantly smoother, more efficient, and ultimately more successful. Here’s a comprehensive checklist of what you’ll typically need to prepare:
- Sewing Machine: Your trusty sewing machine is, of course, the primary tool for almost any sewing endeavor, including zipper attachment.
- Zipper Foot: This is arguably the most crucial specialized tool for sewing zippers. A standard zipper foot allows you to stitch exceptionally close to the zipper teeth without snagging or distorting them. For invisible zippers, an invisible zipper foot is highly recommended as it features grooves that perfectly guide the zipper coils, ensuring a truly “invisible” and flawless finish. Some sewing machines also come equipped with an adjustable zipper foot, which can be moved to either side of the needle to accommodate various zipper types and sewing angles.
- Matching Thread: Always select a thread that matches your fabric or zipper tape as closely as possible. This meticulous matching contributes significantly to a professional and aesthetically pleasing final look, making your stitches blend seamlessly into the project.
- Your Project Fabric: The specific material you have chosen for your sewing project.
- The Zipper Itself: Ensure you have the correct type and length of zipper required for your particular project.
- Pins or Fabric Clips: These are indispensable for securely holding the zipper and fabric layers together in precise alignment before and during the actual sewing process.
- Fabric Scissors or Rotary Cutter: For clean, precise cutting of your fabric pieces.
- Iron and Ironing Board: Pressing seams before, during, and after zipper installation is an often-overlooked yet vital step for achieving crisp, clean edges and ensuring the zipper lies perfectly flat.
- Seam Ripper: Every sewist’s indispensable companion! Do not hesitate to use your seam ripper if you need to adjust or correct a stitch. It is always preferable to unpick and re-sew for a perfect finish than to leave an imperfect one.
- Measuring Tape or Ruler: For taking accurate measurements of your fabric and zipper placement.
- Fabric Marker or Chalk: To precisely mark placement lines, stitch lines, and other important guides directly onto your fabric.
Preparing Your Fabric and Zipper for Flawless Installation
Proper and meticulous preparation is absolutely key to achieving a flawless and frustration-free zipper installation. Investing a few extra minutes at this preliminary stage can save you significant time and potential headaches later on in your project.
- Pre-wash and Press Your Fabric: It is always a good practice to pre-wash your fabric if it is new. This prevents any potential shrinkage of your project after it has been completed. Once dry, thoroughly press your fabric to remove any wrinkles or creases, creating a perfectly smooth and stable working surface.
- Prepare the Seam Edges: Before installing the zipper, finish the raw edges of your seam allowance. This can be done using a serger, a zigzag stitch on your sewing machine, or another preferred method. Finishing the edges prevents fraying and contributes to a tidy, durable interior finish.
- Mark Zipper Placement Accurately: Using your fabric marker or tailor’s chalk, precisely mark where the zipper will start and end on your fabric. It is also helpful to mark the top stop, the bottom stop, and the exact center line of your seam. These markings will serve as crucial guides during the installation process.
- Baste the Zipper Opening: For the majority of zipper methods, you will first need to sew the seam where the zipper is to be placed. In the specific section where the zipper will sit, use a basting stitch (a long, temporary stitch that is easy to remove). This creates a solid, stable base for pinning the zipper and ensures that your seam allowances are perfectly aligned. This basting stitch will be removed once the zipper has been permanently sewn in place.
- Press the Seam Open: After basting the zipper opening, carefully press the basted seam open. This action creates a clear, flat guideline for positioning your zipper tape, making the subsequent steps much easier and more precise.
Mastering Core Zipper Sewing Techniques: An Overview
While there are numerous ways to sew a zipper, understanding the core principles behind the most common methods will empower you to confidently tackle nearly any project that requires a zipper. Dana from MADE Everyday, in her excellent video tutorial, brilliantly demonstrates two of these fundamental techniques, making them accessible and easy to grasp for sewists of all skill levels.
The Centered Zipper Method
The centered zipper is arguably the most straightforward and widely utilized method for zipper installation. In this technique, the zipper is strategically placed directly beneath the seam allowance, with an equal amount of fabric covering both sides of the zipper teeth. When completed, the two lines of stitching on either side of the zipper are symmetrical and run perfectly parallel, creating a remarkably clean, balanced, and understated look. This method is ideal for applications such as the center back of dresses, skirts, cushion covers, or any project where you desire a visible yet neat and balanced zipper closure.
The Lapped Zipper Method
The lapped zipper method provides a closure where one side of the fabric “laps over” or completely covers the zipper teeth, while the other side exposes only a single, clean line of stitching. This creates a slightly asymmetrical and often more elegant or traditional aesthetic compared to the centered zipper. Lapped zippers are frequently employed in the side seams of skirts and dresses, or on garments where a cleaner, less conspicuous zipper closure is desired, allowing the fabric to take center stage. Mastering this technique adds a touch of sophistication and refinement to your sewing projects.
The Invisible Zipper Method
As touched upon earlier, the invisible zipper creates a virtually seamless and truly unnoticeable finish. The technique involves carefully pressing the zipper coils open and then stitching incredibly close to these coils, typically using a specialized invisible zipper foot. Once sewn and the zipper is closed, the coils naturally roll back inside the seam, making the zipper tape and teeth effectively “invisible” from the right side of the fabric. This method is a particular favorite for elegant evening wear, delicate bridal gowns, and any project that demands a sleek, perfectly smooth, and utterly discreet closure.
While the precise step-by-step instructions for each method will vary slightly, the core principle remains consistent across all techniques: attaching the zipper securely, neatly, and with precision to your fabric. The keys to success lie in precise pinning or clipping, careful pressing at each stage, and executing slow, steady, and controlled stitching. Resist the urge to rush, especially when you are just beginning to learn or are trying a new technique.
Watch the Expert: Dana from MADE Everyday’s Zipper Tutorial
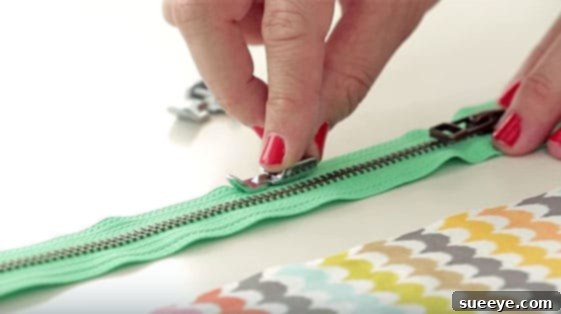
Are you ready to translate theory into practical skills? Dana from MADE Everyday offers an exceptional video tutorial that expertly simplifies the often-intimidating process of sewing zippers. She meticulously breaks down two common and highly effective methods into easy-to-follow, visual steps, making what might initially seem complex incredibly approachable for sewists of all levels. Whether you are a seasoned stitcher looking for new tricks or just embarking on your sewing journey, her clear instructions and detailed visual demonstrations are an invaluable resource.
The techniques she teaches are not only simple but also remarkably effective. You might find yourself wondering why you ever found zipper installation challenging in the first place! Many sewists discover new, more efficient, and professional ways of sewing after watching her clear guidance. We are confident that your zippers are going to look significantly cleaner, straighter, and far more professional on your next project, guaranteed!
Don’t delay – watch Dana’s tutorial below and prepare to revolutionize your zipper sewing skills. And remember, sharing these fantastic, confidence-boosting tricks with your friends and fellow sewists is a wonderful way to spread the joy of masterful sewing!
Top Tips for Perfect Zipper Installation Every Time
To ensure your zipper installations are consistently beautiful, durable, and functional, keep these expert tips in mind. They are invaluable for achieving professional results:
- Always Use the Correct Zipper Foot: This cannot be stressed enough. A specialized zipper foot is designed to allow your sewing machine needle to stitch precisely next to the zipper teeth without snagging or distorting them. This proximity is absolutely essential for a clean, professional finish. If you’re working with invisible zippers, investing in an invisible zipper foot is a genuine game-changer, as it perfectly guides the zipper coils into place.
- Press, Press, Press: The iron is your best friend in zipper installation. Pressing your seams open before installing the zipper, and again after basting it in place, is crucial. This creates crisp, flat edges and helps the zipper lie perfectly flat against your fabric, which is fundamental for a clean, unpuckered look.
- Baste Before You Sew (Permanently): Temporarily stitching the zipper in place with a long basting stitch (either by hand or machine) is a highly recommended step. This allows you to meticulously check its alignment, ensure the fabric lies flat, and make any necessary adjustments before committing to a permanent machine stitch. It’s an especially helpful technique for beginners to build confidence.
- Go Slow and Steady: There is no prize for the fastest zipper installation. Precision is paramount. Slow down your sewing machine, particularly when stitching near the zipper pull, the zipper stops, or when you encounter thicker layers of zipper tape. This deliberate approach will prevent crooked stitches, uneven results, and unsightly fabric puckering.
- Match Your Thread: Always use a thread that perfectly matches your fabric for the most seamless and professional look. If your fabric features multiple colors or a complex pattern, choose the most dominant or darkest color to help the stitches blend in and practically disappear.
- Practice on Scrap Fabric: Before you tackle your main project, take a few minutes to practice the chosen zipper method on a piece of scrap fabric that mimics your project material. This helps you get a feel for your machine settings, the zipper foot, and the specific technique you’re using, boosting your confidence before working on the actual garment.
- Don’t Fear the Seam Ripper: Consider your seam ripper a tool for achieving perfection, not a symbol of failure. If a stitch isn’t quite right, or the alignment is off, do not hesitate to unpick it and try again. The extra effort to correct an error is always worth it for a truly flawless finish.
- Understitch When Necessary: For certain zipper applications, particularly those involving fabric linings, incorporating understitching can be incredibly beneficial. Understitching helps the seam allowance and lining fabric roll to the inside, preventing them from getting caught in the zipper teeth and ensuring a neat, crisp edge that stays in place.
Inspiring Projects to Practice Your New Zipper Skills
Once you’ve gained confidence in sewing zippers, a whole new and exciting world of sewing projects opens up before you! Here are some fantastic and practical ideas to get you started, hone your newly acquired skills, and inspire your creativity:
- Pillow Covers: An excellent beginner-friendly project for practicing centered or lapped zippers on home decor items. They are generally straight seams and forgiving.
- Simple Pouches or Cosmetic Bags: Perfect for mastering a basic centered zipper, and you end up with a highly practical and often giftable item. They teach you to work with corners and sometimes lining fabric.
- Pencil Cases: Similar to pouches but often smaller, allowing for quicker practice sessions and a chance to experiment with different zipper lengths.
- Basic Skirts or Trousers: These garments are excellent for practicing both centered and lapped zippers, providing a natural progression into more complex garment construction.
- Tote Bags with Zippered Closures: Add a secure zipper to the top of a tote bag for added security for your belongings and a more polished, professional appearance.
- Zipped Wallets or Card Holders: Smaller projects that require precision in placement and stitching but offer immense satisfaction once completed.
- Zipped Hoodies or Jackets: A more advanced and rewarding challenge, especially when working with separating zippers and multiple fabric layers.
- Zipped Pillowcases: A step up from a basic pillow cover, a zipped pillowcase keeps the pillow snugly inside and offers a much cleaner, tidier look than envelope closures.
Conclusion: Unlock Your Sewing Potential with Perfectly Sewn Zippers
Learning how to sew a zipper is far more than just adding a simple closure to your fabric; it’s about imparting a professional touch, significantly enhancing the functionality, and broadly expanding your creative horizons within the world of sewing. With the right tools at your disposal, a clear and comprehensive understanding of the different zipper types, and careful, meticulous attention to preparation and technique, you will undoubtedly find yourself confidently installing zippers with precision and ease in no time.
Dana’s insightful tutorial from MADE Everyday serves as an excellent and highly recommended resource, expertly simplifying this essential sewing skill into easily digestible and manageable steps. Do not allow any past struggles or frustrations with zippers to deter you from mastering this valuable technique. Embrace the learning process, dedicate a little time to practice on a few scrap pieces of fabric, and very soon, you will find yourself confidently adding beautiful, perfectly sewn zippers to all your beloved sewing projects. Share your newfound skills and these valuable tips with your fellow sewists, and most importantly, happy stitching!