
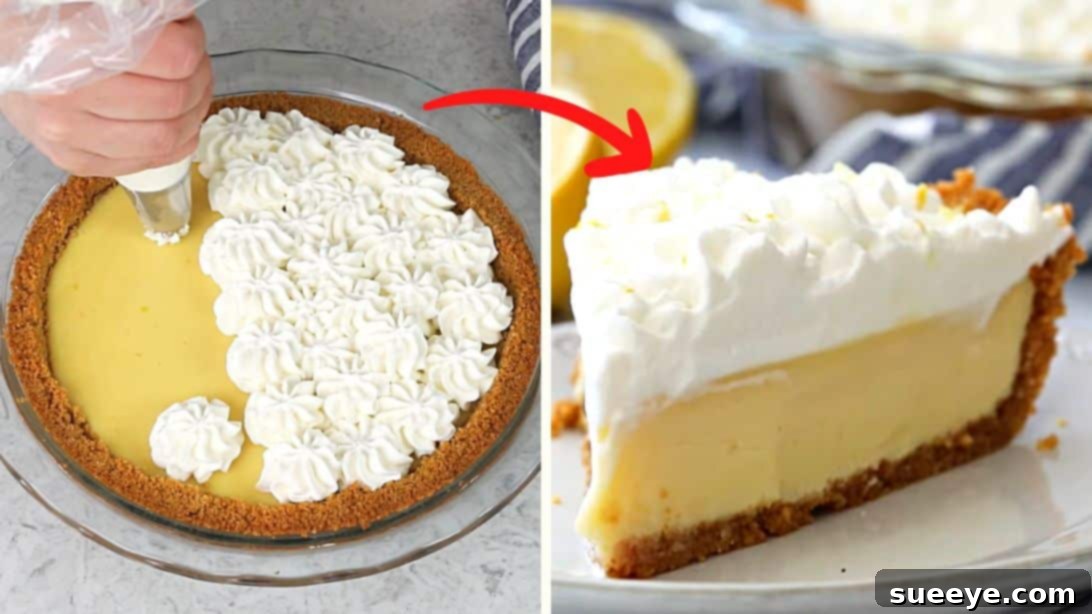
Deliciously Easy Homemade Lemon Pie: A Step-by-Step Guide
There’s nothing quite like the bright, refreshing taste of a homemade lemon pie. It’s a dessert that perfectly balances sweet and tart, offering a delightful culinary experience that can brighten any day. This particular recipe, inspired by the culinary experts at Sugar Spun Run, takes all the guesswork out of creating a show-stopping dessert. Whether you’re a seasoned baker or just starting your journey in the kitchen, you’ll find this recipe incredibly straightforward and rewarding.
Imagine a velvety smooth, intensely lemony filling nestled in a perfectly crisp graham cracker crust, all crowned with a cloud of homemade whipped cream. This isn’t just a dessert; it’s a celebration of citrus, designed to be a light and invigorating treat for your family and friends. Forget complicated techniques or a long list of obscure ingredients. This recipe prides itself on simplicity, utilizing readily available components to achieve an impressive result. It’s the ideal choice for a refreshing end to a meal, a delightful potluck contribution, or simply a sweet indulgence on a warm afternoon. Get ready to create a dessert that will have everyone asking for the recipe!
Why You’ll Love This Easy Lemon Pie Recipe
- Uncomplicated Perfection: This recipe streamlines the baking process without compromising on flavor or texture, making it accessible for bakers of all skill levels.
- Vibrant Citrus Flavor: The star of the show is the fresh lemon juice, providing an authentic and zesty taste that’s simply irresistible.
- Perfectly Balanced Sweetness: The sweetness of the condensed milk beautifully complements the lemon’s tartness, creating a harmonious flavor profile.
- Irresistible Texture: Enjoy the delightful contrast between the crunchy graham cracker crust, the silky-smooth filling, and the light, airy whipped cream.
- Crowd-Pleaser: Lemon pie is a universally loved dessert, making this a fantastic option for family gatherings, dinner parties, or any special occasion.
- Minimal Ingredients: You won’t need a pantry full of specialty items; the ingredient list is short and sweet, just like the pie itself.
Before we dive into the creation process, let’s gather our essential ingredients. Precision in measurement and quality of ingredients are key to achieving the best possible outcome for your homemade lemon pie.
Ingredients:
Each component of this lemon pie plays a crucial role in its overall deliciousness. From the buttery crust to the zesty filling and the airy topping, quality ingredients make all the difference. We’ve broken down the list by section to make your preparation even easier.
For the Irresistible Graham Cracker Crust:
The foundation of our lemon pie is a simple yet incredibly flavorful graham cracker crust. Its slight crunch and buttery notes perfectly complement the creamy filling.
- 1 and 1/2 cups of graham cracker crumbs: You can purchase pre-crushed crumbs or crush your own graham crackers for a fresher taste. Approximately 10-12 full graham cracker sheets yield 1 1/2 cups of crumbs.
- 2 tablespoons of granulated sugar: Adds just the right amount of sweetness to the crust, balancing the graham crackers.
- 1 tablespoon of brown sugar (firmly packed): Contributes a deeper, molasses-like flavor and helps create a more cohesive crust when baked. Ensure it’s firmly packed into the measuring spoon.
- 7 tablespoons of butter (melted): Unsalted butter is recommended to control the saltiness. The melted butter acts as a binder, holding the crumbs together to form a sturdy crust.
For the Silky-Smooth Lemon Filling:
This vibrant filling is the heart of the pie, delivering that signature tart and sweet lemon flavor that everyone adores.
- 2 (14 oz) cans of sweetened condensed milk: This magical ingredient provides the primary sweetness and creamy texture, reacting with the acidic lemon juice to thicken the filling beautifully without needing much additional cooking.
- 5 large egg yolks: Egg yolks contribute to the richness and help set the filling, giving it a smooth, custard-like consistency. Separate them carefully from the whites.
- 1 cup of lemon juice (freshly pressed): This is non-negotiable for the best flavor! Freshly squeezed lemon juice provides a bright, authentic tartness that bottled juice simply can’t match. You’ll likely need about 4-6 large lemons.
For the Fluffy Homemade Whipped Cream Topping:
A generous dollop of homemade whipped cream adds an elegant touch and a delightful contrast in texture and temperature to the chilled pie.
- 1 cup of heavy cream: Also known as heavy whipping cream, this must be very cold to whip properly into stiff peaks.
- 1/3 cup of powdered sugar: Also known as confectioners’ sugar, it sweetens the cream and helps stabilize it.
- 1/2 teaspoon of vanilla extract: A touch of vanilla enhances the flavor of the cream without overpowering the lemon.
Now that we have all our ingredients prepped and ready, let’s move on to the fun part: assembling and baking this delectable lemon pie. Follow these clear, step-by-step instructions for a perfect result every time.
Instructions:
Crafting this lemon pie is a straightforward process, broken down into easy-to-follow steps. Pay close attention to the details, especially regarding baking times and chilling, to ensure your pie turns out absolutely perfect.
Step 1: Prepare Your Oven
Before you begin mixing, always preheat your oven. This ensures an even baking temperature from the moment your pie goes in. Set your oven to 350°F (175°C). This temperature is ideal for baking the graham cracker crust to a golden crisp.
Step 2: Create the Graham Cracker Crust Mixture
In a medium-sized mixing bowl, combine the graham cracker crumbs, granulated sugar, and firmly packed brown sugar. Use a spoon or your hands to mix these dry ingredients thoroughly. Once combined, pour in the melted butter. Stir meticulously until all the crumbs are evenly moistened and resemble wet sand. It’s crucial that the butter is well distributed to ensure the crust holds together.
Step 3: Press and Pre-Bake the Crust
Take a 9 1/2-inch pie plate. Carefully transfer the crumb mixture into the plate. Using the bottom of a glass or your fingertips, press the mixture firmly and evenly into the bottom and up the sides of the pie plate. A tightly packed crust will prevent crumbling once baked. Place the pie plate into your preheated oven and bake for exactly 10 minutes. This pre-baking step helps to set the crust and makes it wonderfully crisp.
Step 4: Prepare the Zesty Lemon Filling
While your crust is pre-baking, seize the opportunity to prepare the luscious lemon filling. In a large mixing bowl, whisk together the two cans of sweetened condensed milk and the five large egg yolks until they are fully incorporated and smooth. Then, gradually pour in the freshly pressed lemon juice, whisking continuously. You’ll notice the mixture beginning to thicken almost immediately due to the reaction between the acidic lemon juice and the condensed milk. Continue whisking until the filling is homogenous and slightly creamy.
Step 5: Fill and Bake the Pie
Once the pie crust has finished its initial bake, carefully remove it from the oven. Gently pour the prepared lemon filling into the warm crust, spreading it evenly. Place the pie back into the preheated oven and bake for an additional 18 to 20 minutes. The pie is ready when the edges appear set and slightly golden, and the center is mostly set but still has a slight jiggle when gently shaken. Be careful not to overbake, as this can lead to a dry filling or cracks.
Step 6: Cool and Chill for Perfection
After baking, carefully remove the pie from the oven. Allow it to cool completely at room temperature for at least 30 minutes. This initial cooling prevents condensation when it goes into the fridge. Following this, transfer the pie to the refrigerator and chill for a minimum of 6 to 8 hours, or ideally, overnight. Proper chilling is essential for the filling to fully set and for the flavors to meld beautifully. Patience is key here for the ultimate slice!
Step 7: Prepare the Homemade Whipped Cream
Just before serving, prepare your fresh whipped cream. Ensure your heavy cream, bowl, and beaters are all very cold – this helps the cream whip up faster and achieve stiffer peaks. In a large, chilled mixing bowl, combine the cold heavy cream, powdered sugar, and vanilla extract. Start beating on low speed with an electric mixer to prevent splashing, then gradually increase the speed to high. Continue beating until the mixture forms firm, stiff peaks. Be careful not to over-whip, as it can turn granular or even into butter.
Step 8: Garnish and Serve
Once your pie is thoroughly chilled and the whipped cream is ready, it’s time for the grand finale. You can either pipe the whipped cream decoratively over the entire pie using a pastry bag with a star tip or simply dollop generous amounts onto each slice just before serving. A sprinkle of lemon zest or a thin lemon slice can add an extra visual appeal. Slice, serve, and savor every bright, creamy bite! Enjoy your magnificent homemade lemon pie!
Essential Tips for Lemon Pie Perfection
Achieving a perfect lemon pie is easier than you think, especially with a few expert tips. These insights will help you avoid common pitfalls and elevate your baking game, ensuring a consistently delightful dessert.
- Fresh Lemon Juice is Paramount: Do not compromise on this. Bottled lemon juice contains preservatives and lacks the vibrant, complex flavor that fresh lemons provide. You’ll taste the difference immediately.
- Cold Ingredients for Whipped Cream: For the best whipped cream, ensure your heavy cream, mixing bowl, and beaters are all thoroughly chilled. You can even place the bowl and beaters in the freezer for 10-15 minutes before use. This helps the fat globules in the cream emulsify properly, leading to a much faster and more stable whip.
- Don’t Overbake the Filling: An overbaked lemon pie filling can become tough, dry, or even crack. The key is to remove it from the oven when the edges are set and the center still has a slight wobble. It will continue to set as it cools and chills.
- Firmly Pack the Crust: A well-packed graham cracker crust is crucial for structural integrity. If it’s too loose, it will crumble when sliced. Use the bottom of a flat glass or a measuring cup to press the crumbs firmly and evenly into the pie plate.
- Patience with Chilling: The chilling time is not merely a suggestion; it’s a vital step. It allows the filling to fully set and solidify, ensuring clean slices and optimal flavor development. Rushing this step will result in a messy, unset pie.
Storage and Make-Ahead Options
This lemon pie is fantastic for making ahead, which means less stress on the day you plan to serve it!
- Storage: Leftover lemon pie should be stored in an airtight container in the refrigerator for up to 3-4 days. While the crust might soften slightly over time, the flavor remains delicious.
- Make-Ahead: You can bake the pie (without the whipped cream topping) up to 2 days in advance. Ensure it’s fully chilled overnight, then cover it loosely with plastic wrap before storing it in the fridge. Prepare and add the whipped cream just before serving for the freshest texture. Freezing is generally not recommended as the filling can weep upon thawing, affecting the texture.
Creative Serving Suggestions and Variations
While this lemon pie is perfect as is, you can certainly get creative with serving and slight variations to make it even more special.
- Garnishes: Beyond whipped cream and a lemon slice, consider a sprinkle of toasted coconut, fresh berries (raspberries or blueberries pair wonderfully), or even a light dusting of powdered sugar.
- Meringue Topping: For a more traditional lemon meringue pie feel, you could substitute the whipped cream with a torched meringue topping. Just be sure to apply it just before serving for the best texture.
- Individual Servings: Instead of a large pie, you can use mini pie tins or even small ramekins for individual lemon tarts. Adjust baking times accordingly.
- Different Crusts: While graham cracker is classic, you could experiment with a shortbread crust or even a simple vanilla wafer crust for a different flavor profile.
Frequently Asked Questions (FAQ)
Here are answers to some common questions you might have about making this delicious lemon pie:
- Can I use bottled lemon juice? While you technically *can*, for the absolute best flavor, freshly squeezed lemon juice is highly recommended. Bottled juice often lacks the vibrant acidity and fresh aroma that makes this pie truly shine.
- My crust crumbled when I sliced it. What went wrong? This usually means the crust wasn’t packed firmly enough into the pie plate before baking, or there wasn’t enough butter to bind the crumbs properly. Ensure you really press it down well!
- Why did my pie filling crack? Cracking can occur if the pie is overbaked or if it cools too quickly. Make sure to remove it from the oven when the center still has a slight jiggle, and allow it to cool gradually at room temperature before refrigerating.
- How do I prevent the crust from becoming soggy? Pre-baking the crust is the first line of defense. Also, ensuring the pie is fully chilled before slicing helps to prevent moisture migration from the filling into the crust.
- Can I make this pie gluten-free? Absolutely! Simply use gluten-free graham crackers for the crust. The rest of the ingredients are naturally gluten-free.
This homemade lemon pie is more than just a recipe; it’s an invitation to create a moment of joy and refreshment. Its simplicity in preparation belies the depth of flavor and texture it delivers. Whether you’re making it for a special occasion or simply to satisfy a craving for something bright and sweet, this pie is guaranteed to impress. So go ahead, gather your ingredients, follow these steps, and prepare to delight your taste buds with a truly unforgettable dessert. Happy baking!