
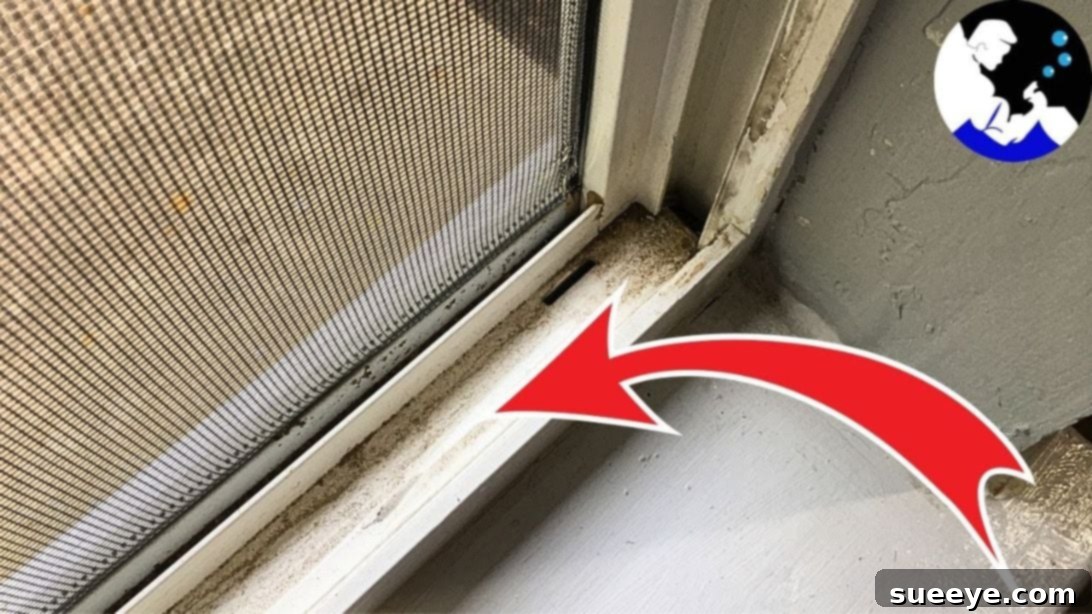
Window tracks are often overlooked during routine home cleaning, yet they play a crucial role in the functionality and energy efficiency of your windows. Over time, these narrow channels become magnets for an unsightly accumulation of dust, dirt, pet hair, pollen, and various outdoor debris. This buildup doesn’t just look unpleasant; it can severely impede your window’s operation, making it difficult to open and close, or even causing it to jam and get stuck entirely. Beyond the struggle of a sticky window, dirty tracks can also compromise your home’s insulation, leading to noticeable drafts and increased heat loss, ultimately impacting your energy bills.
Regular and thorough cleaning of your window tracks is a simple yet profoundly impactful maintenance task that yields numerous benefits. It ensures smooth, effortless window operation, extends the lifespan of your window mechanisms, and contributes to better indoor air quality by removing allergens. Moreover, a well-maintained window system helps seal your home more effectively against the elements, conserving energy and improving overall household efficiency. This comprehensive guide will walk you through an easy, highly effective method to get your window tracks sparkling clean, inspired by the practical and clear advice from Clean With Confidence on YouTube. Let’s transform your window cleaning routine and enhance your home environment!
Why Regular Window Track Cleaning is Essential for Every Home
Before diving into the step-by-step cleaning process, it’s worth understanding the profound impact clean window tracks have on your home. It’s more than just aesthetics; it’s about maintaining functionality, extending longevity, and achieving significant energy savings.
Enhanced Window Functionality and Ease of Use
The most immediate and noticeable benefit of clean tracks is undeniably improved window operation. When layers of debris build up, they create significant friction, making it a frustrating struggle to slide windows open or closed. This constant resistance not only makes daily use annoying but can also inflict damage on the delicate rollers or gliding mechanisms over time. A clean, obstruction-free track ensures your windows glide smoothly and effortlessly, providing easy access to fresh air, natural light, and making emergency egress possible without hindrance.
Improved Energy Efficiency and Lower Utility Bills
Dirty or obstructed tracks can prevent windows from closing completely, leaving tiny, often imperceptible gaps. These seemingly small openings can lead to significant drafts, allowing your home’s conditioned air (whether heated in winter or cooled in summer) to escape and outdoor air to seep in. This forces your heating, ventilation, and air conditioning (HVAC) system to work considerably harder to maintain your desired indoor temperature, directly translating to higher energy consumption and increased utility bills. Properly sealed windows, a condition facilitated by meticulously clean tracks, are vital for maintaining an energy-efficient and comfortable home throughout the year.
Extended Window Lifespan and Reduced Maintenance Costs
The constant grinding of abrasive dirt and debris against window frames, sashes, and intricate mechanisms can cause premature wear and tear. This abrasive action can scratch surfaces, corrode metal components, and place undue stress on all moving parts. Regular cleaning removes these damaging elements, preserving the structural integrity and smooth operation of your windows, thereby extending their overall lifespan. This proactive maintenance can save you significant money on costly repairs or complete window replacements down the line.
Better Indoor Air Quality for a Healthier Home
Window tracks are notorious collection points for a variety of airborne particles, including household dust, irritating pollen, pet dander, and even mold spores, especially in humid environments. These accumulated allergens and irritants can be easily stirred up and circulated into your home’s air, potentially triggering allergies, asthma, or other respiratory issues for occupants. By meticulously removing these accumulations, you contribute significantly to a healthier and more comfortable indoor environment for everyone in your household.
Enhanced Aesthetic Appeal and Property Value
Finally, let’s not overlook the visual impact! Grimy, dirt-filled window tracks detract significantly from the overall cleanliness and aesthetic appeal of your home, even if the glass panes themselves are spotless. Sparkling clean tracks complete the look of well-maintained windows, contributing to a brighter, more inviting, and visually pleasing living space. This attention to detail can also subtly enhance your home’s curb appeal and perceived value.
Gather Your Essential Cleaning Arsenal
Before you embark on your window track cleaning mission, ensure you have these essential tools and ingredients readily available. The good news is that most of these are common household items, making this a very accessible and budget-friendly DIY project.
- An old toothbrush: This humble tool is your secret weapon. Its small head and sturdy, compact bristles are absolutely perfect for reaching into tight corners, narrow grooves, and dislodging stubborn, packed-down grime that larger brushes simply cannot access.
- Vacuum cleaner, with a brush or crevice attachment: Essential for quickly and efficiently removing loose dust, dry dirt, and larger debris without spreading it further. The brush attachment helps agitate and pick up particles more effectively, while a crevice tool is ideal for deep, narrow tracks.
- Microfiber cloth or cleaning rag: Keep a few of these on hand. Microfiber cloths are highly absorbent, gentle on surfaces, and excellent at picking up dirt and grime, leaving surfaces streak-free. Old cotton rags also work well.
- All-purpose cleaner, DIY or store-bought: A good cleaning solution is crucial for breaking down greasy residue, dissolving sticky substances, and lifting embedded dirt. You can opt for a commercial product or easily mix your own eco-friendly solution.
- Bucket: A small bucket is incredibly useful for holding clean water to rinse your cleaning rag frequently, or for preparing your homemade DIY cleaning solution.
Craft Your Own Eco-Friendly All-Purpose Cleaner
For a cost-effective, non-toxic, and surprisingly effective cleaning solution, consider making your own all-purpose cleaner. It’s incredibly simple to mix and uses ingredients you likely already have in your pantry, making it a healthier choice for both your home and the environment.
- 1 cup of water: Forms the essential base of your cleaning solution.
- 1 cup of white vinegar: A natural powerhouse! White vinegar acts as a powerful degreaser, a mild disinfectant, and effectively cuts through grime, hard water stains, and mildew.
- A couple of drops of dish soap: Just a small amount of liquid dish soap helps break surface tension, allowing the solution to penetrate and lift dirt more effectively from the track surfaces.
Combine these three simple ingredients in a spray bottle, give it a gentle shake to mix them thoroughly, and you’re perfectly ready to tackle those dirty window tracks with confidence!
Step-by-Step Guide to Achieving Sparkling Window Tracks
Follow these detailed steps meticulously to thoroughly clean your window tracks and restore them to their pristine, smooth-gliding condition. Patience and attention to detail throughout this process will yield the most satisfying and lasting results.
Step 1: Initial Dry Cleaning and Thorough Debris Removal
The first crucial step involves tackling the dry, loose dirt and preparing the tracks for a deeper, wet clean. This pre-cleaning phase is vital, as it prevents you from simply turning dry dust into a muddy, hard-to-manage sludge later on.
- Fully Open Your Window for Maximum Access: Begin by opening the window all the way. This provides maximum access to the entire length and depth of the window tracks, allowing you to reach every nook, cranny, and channel more easily. For double-hung windows, you might need to open both the upper and lower sashes to gain complete access to all track levels. If possible and safe, temporarily remove the window screen to improve access and also clean the screen itself.
- Ensure Tracks Are Completely Dry: Before you start any scrubbing, it’s important to confirm that the window track is completely dry. Applying a brush or vacuum to wet dirt can create a muddy, caked-on mess that is significantly harder to clean. If there’s any visible moisture from condensation or rain, gently wipe it with a dry cloth or allow it to air dry thoroughly before proceeding.
- Loosen Stubborn, Packed-Down Dirt with a Toothbrush: Take your dedicated old toothbrush and begin to vigorously scrub the accumulated dust, dirt, and various debris. Focus intently on loosening up any packed-down grime or caked-on mud. Pay special attention to all the corners, tight crevices, and the deep, narrow grooves of the tracks, as these are the areas where dirt tends to accumulate most densely and become most stubborn. The small, angled head of the toothbrush is ideally designed for this precision work.
- Address Hard-to-Reach Areas and Gaps: If you encounter particularly small gaps or very tight spots that the toothbrush can’t adequately reach, don’t despair. Consider using alternative tools such as a stiff paint brush (with a narrow head), a thin spatula, a butter knife wrapped in a damp cloth, or even cotton swabs for these particularly stubborn or inaccessible areas. The goal is to agitate and dislodge as much dry debris as possible.
- Vacuum Away All Loose Debris: Once you’ve thoroughly loosened the dry dirt and debris, it’s time to remove it completely. Attach either the brush attachment or a crevice tool to your vacuum cleaner. This attachment is key as it helps to agitate further and efficiently suck up all the loose particles without scratching the window frame. Carefully vacuum along the entire length of the tracks, making sure to get deep into the corners, under the lip of the track, and any other areas where debris might be hiding. This step is absolutely vital for preventing the dry dirt from turning into a muddy, smeared paste when wet cleaners are subsequently applied.
Step 2: Deep Cleaning with Solution and Thorough Wiping
With the dry debris effectively removed, it’s now time to apply your chosen cleaning solution for a thorough wet clean, specifically targeting embedded dirt, greasy residue, and any lingering grime.
- Generously Spray Your Cleaning Solution: Apply your all-purpose cleaner (either your effective DIY mix or a trusted store-bought product) generously and directly onto the entire length of the window tracks. Don’t be shy; ensure the solution coats all surfaces of the track. Allow the cleaner to sit and penetrate for a few minutes (typically 3-5 minutes is sufficient). This crucial dwell time allows the solution to work its magic, effectively softening and breaking down sticky residues, caked-on dirt, and greasy films.
- Vigorously Scrub with a Toothbrush (Again!): Once the cleaner has had adequate time to soak and loosen the grime, use your old toothbrush to scrub the tracks thoroughly once more. This time, you’ll be actively working the cleaning solution into the remaining dirt, effectively lifting it from the track surfaces. Apply firm but controlled pressure, ensuring you scrub all the sides, bottom, and any intricate grooves of the tracks. You will likely observe the cleaning solution turning murky as it dissolves and encapsulates the embedded dirt and grime.
- Wipe Away Dissolved Dirt with a Damp Cloth: Take a damp (not soaking wet) microfiber cloth or a clean cleaning rag and firmly wipe away the dissolved dirt and excess cleaner. Start from one end of the track and work your way methodically to the other, folding the cloth frequently to expose a clean section as it becomes soiled. The superior properties of a microfiber cloth are excellent for picking up grime and leaving a cleaner, residue-free surface.
- Rinse and Repeat for Stubborn Areas and Maximum Cleanliness: For heavily soiled tracks, you will undoubtedly need to rinse your rag frequently. Keep a small bucket of clean water nearby specifically for this purpose. Rinse your rag thoroughly in the clean water, wring it out well to remove excess moisture, and then continue wiping. If some areas remain particularly grimy or show persistent stains, do not hesitate to re-spray with your all-purpose cleaner, allow it to sit again, scrub thoroughly with the toothbrush, and then wipe. Repeat this targeted process as many times as necessary until the tracks are visibly spotless, free of all dirt, grime, and cleaning solution residue.
- Final Polish (Optional but Recommended): Once all tracks are completely clean and free of visible dirt, you can use a fresh, dry microfiber cloth to give them a final wipe. This helps to ensure no moisture or lingering streaks are left behind, which prevents new dust from sticking immediately and leaves a polished, pristine finish.
Continue this meticulous process for all accessible window tracks, systematically moving up and down the window frame or to other windows as needed until every part is sparkling clean. Your windows will not only look significantly better but will also operate with a smoothness and ease you might have forgotten they possessed!
Pro Tips for Maintaining Clean Window Tracks Between Deep Cleans
Keeping your window tracks clean doesn’t have to be a monumental, once-a-year task. Incorporating a few simple habits into your regular cleaning routine can significantly reduce the frequency and intensity of deep cleaning required, making the overall process much easier.
- Regular Quick Dusting: A quick pass with a vacuum brush attachment or a dry, soft cloth every few weeks can make a world of difference. This proactive dusting prevents minor dust and debris from settling and compacting into major grime.
- Utilize a Duster or Compressed Air: For very quick touch-ups and to dislodge loose dust from hard-to-reach areas, a crevice tool on a handheld vacuum or even a can of compressed air can be surprisingly effective. These tools can blast away particles before they become embedded.
- Clean Your Window Screens Regularly: While screens effectively keep bugs out, they also act as filters, collecting a significant amount of dust, pollen, and airborne dirt. Much of this debris can eventually fall into your window tracks. Cleaning your screens periodically (e.g., by hosing them down or wiping them) will minimize this transfer.
- Address Spills Promptly: If anything accidentally spills into the tracks – whether it’s a drink, food crumbs, or other liquids – clean it immediately. Allowing spills to dry and harden will make them much more difficult to remove later on.
- Seasonal Deep Cleans: Aim for a thorough deep clean of your window tracks at least twice a year, ideally in the spring to remove winter’s accumulation and in the fall to prepare for colder weather. These seasonal cleans will help maintain optimal functionality and appearance.
Troubleshooting Common Window Track Problems
Even with diligent cleaning, you might encounter specific issues with your window tracks. Here’s how to address some common problems effectively:
Dealing with Mold or Mildew Growth
If you spot black or green fuzzy growth, it’s likely mold or mildew, especially prevalent in humid climates or areas with poor ventilation. After completing the initial dry cleaning step (Step 1), spray the affected areas with a solution of equal parts white vinegar and water, or use a specialized mold and mildew cleaner. Allow it to sit for 10-15 minutes to penetrate the growth, then scrub thoroughly with your toothbrush and wipe clean. Ensure the area dries completely afterward, perhaps by leaving the window open, to help prevent recurrence.
Addressing Stuck or Jammed Windows After Cleaning
If your window still feels stiff, difficult to move, or completely jammed even after a thorough cleaning, there might be deeper issues at play beyond simple dirt. Carefully inspect the tracks for any physical obstructions you might have missed, bent or damaged track sections, or compromised rollers/gliding mechanisms. Sometimes, applying a silicone-based lubricant (ensure it’s not oil-based, as oil attracts more dirt) very sparingly to the clean, dry tracks can help restore smooth operation. If problems persist, it might be time to consult a professional window technician.
Removing Persistent Stains and Heavy Grime
For very old, deeply embedded stains, or particularly heavy grime that your standard all-purpose cleaner struggles to remove, you might need a stronger approach. Try creating a paste made from baking soda and a small amount of water. Apply this paste directly to the stain, let it sit for 15-20 minutes, then scrub vigorously with your toothbrush and rinse thoroughly. For rust stains, a specialized rust remover product or a natural alternative like lemon juice mixed with salt can be effective, but always test any new cleaner in an inconspicuous area first to ensure it doesn’t damage the window frame material.
Reap the Rewards of Beautifully Clean Window Tracks
Cleaning window tracks might initially seem like a minor or easily postponable chore, but as this comprehensive guide illustrates, the benefits are far-reaching and impactful. From the immediate satisfaction of smoothly operating windows to the significant long-term advantages of enhanced energy efficiency, improved indoor air quality, and extended window lifespan, this simple maintenance task contributes significantly to the overall comfort, health, and value of your home.
By diligently following these easy-to-understand, step-by-step instructions and incorporating regular preventative measures, you can ensure your window tracks remain clean, functional, and aesthetically pleasing throughout the year. Remember, a little effort goes a long way in maintaining a beautiful, efficient, and healthy living space for you and your family. We extend our sincere gratitude to Clean With Confidence via YouTube for inspiring this practical guide and providing excellent visual examples of effective cleaning techniques. We highly encourage you to visit their channel for more insightful cleaning tips, helpful tutorials, and valuable home maintenance advice!