
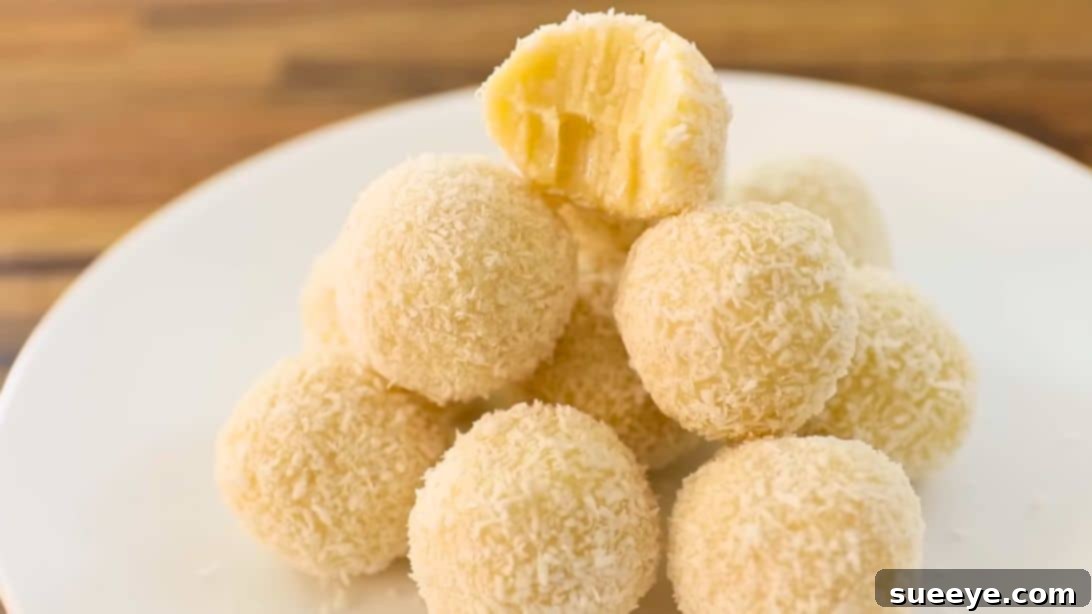
6-Ingredient Easy No-Bake White Chocolate Coconut Truffles: A Sweet & Simple Treat
Are you a devoted fan of both rich chocolate and tropical coconut? If so, prepare to be utterly captivated by this incredibly simple yet luxurious recipe for white chocolate coconut truffles. Inspired by the brilliant creation from The Cooking Foodie, these delightful confections require just six common ingredients and absolutely no baking. Each truffle offers a perfect symphony of flavors – a sweet, creamy, and buttery base beautifully complemented by the subtle nutty notes and textural chewiness of shredded coconut. What truly sets this recipe apart is its impeccable balance; the sweetness is never overwhelming, allowing the pure taste of white chocolate and coconut to shine through. These homemade truffles are surprisingly easy to make and guaranteed to impress, whether you’re serving them to guests or savoring them as a personal indulgence.
RELATED: 3-Ingredient No-Bake Oreo Balls
Why You’ll Love Making These Irresistible White Chocolate Truffles
Beyond their exquisite taste, these white chocolate coconut truffles boast several compelling advantages that make them a go-to recipe for any occasion. Their inherent simplicity means you don’t need to be an experienced baker to achieve professional-looking and tasting results. The “no-bake” aspect is a huge time-saver, especially during busy holidays or when you simply crave a quick dessert without heating up your kitchen. With just six readily available ingredients – white chocolate, heavy cream, vanilla extract, butter, shredded coconut, and a pinch of salt – most of what you need is likely already in your pantry. This recipe is not only perfect for satisfying a sweet tooth but also makes for an elegant homemade gift or a delightful addition to any party platter. Get ready to amaze your friends and family with these delicious, effortless treats, perfect for any sweet craving or special gathering.
Essential Ingredients for Your White Chocolate Coconut Truffles
Crafting these delectable truffles begins with gathering high-quality ingredients. While the list is short, the quality of each component significantly impacts the final flavor and texture. We recommend using a good brand of white chocolate for the best results, as it forms the creamy base of your truffles. Unsweetened shredded or desiccated coconut is key to ensuring the sweetness isn’t overpowering and allows the natural flavors to meld beautifully. Here’s what you’ll need to create these heavenly no-bake truffles:
- 8 oz (approx. 225g) of good quality white chocolate, finely chopped
- 1/4 cup of heavy cream (also known as whipping cream or double cream)
- 1/2 teaspoon of pure vanilla extract
- 1 1/2 tablespoons of unsalted butter
- 1/3 cup of unsweetened shredded or desiccated coconut, plus additional for coating
- A pinch of fine sea salt
Note on quantity: The original recipe mentioned “80 oz of white chocolate,” which is a likely typo for this amount of heavy cream. For a balanced and functional recipe, 8 oz (approximately 225g) of white chocolate is the correct and commonly used amount for such truffle recipes.
Equipment You’ll Need
One of the beauties of this no-bake truffle recipe is that it doesn’t require any specialized kitchen gadgets. Most of these items are probably already in your kitchen, making this a truly accessible dessert project. Having your tools ready before you start will ensure a smooth and enjoyable cooking experience, allowing you to focus on the fun of truffle making.
- Heatproof bowl (preferably glass or stainless steel)
- Small saucepan (for creating a double boiler setup)
- Spatula or heat-resistant spoon for stirring
- Sharp knife and cutting board (for chopping chocolate)
- Measuring cups and spoons
- Shallow dish or plate (for rolling truffles in coconut)
- Baking sheet lined with parchment paper or wax paper (for chilling and setting truffles)
- Airtight container (for optimal storage)
How to Make White Chocolate Coconut Truffles: A Detailed Step-by-Step Guide
Creating these exquisite white chocolate coconut truffles is a delightful process that focuses on precision in melting and sufficient chilling. Follow these detailed instructions carefully to ensure your homemade truffles are perfectly smooth, firm, and ready to be enjoyed.
Step 1: Prepare Your Chocolate Base with Precision
The first crucial step is to finely chop your white chocolate. This isn’t just about making it easier to melt; smaller, more uniform pieces will melt much more evenly and quickly, which helps prevent scorching or clumping. Once chopped, transfer all the white chocolate into a clean, dry, heatproof bowl. To this bowl, add your measured heavy cream and unsalted butter. It’s vital that the bowl is completely dry, as even a tiny drop of water can cause the white chocolate to “seize,” resulting in a gritty, unusable texture. This combination of ingredients will form the luxurious ganache, the creamy foundation of your truffles.
Step 2: Gently Melt the Ingredients Using a Double Boiler
To achieve a perfectly smooth ganache, we’ll use a double boiler method. Place your heatproof bowl containing the chocolate, cream, and butter over a small saucepan that has about one to two inches of simmering water in it. Ensure the bottom of the bowl does not touch the water; the steam from the simmering water is what will gently and indirectly heat your mixture. Stir the ingredients occasionally with a spatula or spoon. Continue to stir until the butter and white chocolate have completely melted and the mixture is perfectly smooth, glossy, and free of any lumps. This gentle, indirect heat is critical for preventing the delicate white chocolate from burning or seizing. Once fully melted, carefully remove the bowl from the heat source.
Step 3: Infuse with Aromatic Flavor and Delightful Texture
Now that your ganache base is smooth and warm, it’s time to add the signature flavors. Stir in the pure vanilla extract thoroughly. Vanilla adds a wonderful warmth and depth that complements the sweetness of the white chocolate beautifully. Next, incorporate the unsweetened shredded or desiccated coconut. Mix everything until the coconut is evenly distributed throughout the white chocolate mixture. The coconut not only imparts its tropical flavor but also introduces a lovely textural contrast, adding a delightful chewiness to the creamy ganache. Finally, stir in the pinch of fine sea salt; this small addition will brilliantly enhance all the sweet flavors, balancing the overall taste profile of your truffles.
Step 4: Chill the Mixture to the Perfect Consistency
Once your truffle mixture is thoroughly combined, cover the bowl tightly with plastic wrap to prevent a skin from forming and place it in the refrigerator. The chilling process is fundamental for allowing the ganache to firm up properly. You’ll need to refrigerate it for approximately 2 hours, or until the mixture becomes firm enough to handle comfortably and roll into stable balls. If the mixture is too soft, it will be sticky and challenging to shape, so resist the urge to rush this step. For those in a hurry, you can place the bowl in the freezer for about 30-45 minutes, but keep a close watch to ensure it doesn’t freeze solid, as this will make it too hard to work with.
Step 5: Shape, Coat, and Present Your Delicious Truffles
After the mixture has reached the ideal firmness, remove it from the fridge. Using a small spoon, a mini ice cream scoop, or simply your hands, scoop out uniform portions of the mixture. Gently roll each portion between your palms to form small, bite-sized balls. For a cleaner process and to prevent the mixture from sticking to your hands, you can lightly dust your hands with a little powdered sugar, cocoa powder, or wear food-safe gloves. Once shaped, immediately roll each truffle in additional shredded coconut that you’ve spread in a shallow dish. This final coating not only enhances the coconut flavor but also gives the truffles a beautiful, inviting appearance. Arrange your finished truffles on a serving platter or a parchment-lined tray. For the best taste and texture, allow them to sit at room temperature for about 10-15 minutes before serving if they’ve been heavily chilled. Serve and enjoy these exquisite homemade treats!
Tips for Perfect White Chocolate Coconut Truffles Every Time
Achieving perfectly smooth and delicious truffles is easy with a few insider tips. These suggestions will help you avoid common pitfalls and ensure your homemade treats turn out beautifully, consistently yielding gourmet results that will impress.
- Opt for Quality Ingredients: As mentioned, investing in good quality white chocolate (baking bars often work best) and pure vanilla extract can significantly elevate the flavor profile and overall experience of your truffles.
- Preventing Chocolate Seizing: The golden rule of melting chocolate: ensure no water or even a drop of steam gets into your chocolate mixture. Water is the enemy of melting chocolate and can cause it to seize, turning it grainy and unusable.
- Gentle Melting is Key: Always use a double boiler or microwave on very low power, stirring frequently, to melt chocolate. White chocolate is particularly delicate and high heat can cause it to burn, scorch, or seize easily.
- Don’t Rush the Chill: Proper chilling is absolutely essential. A sufficiently firm ganache is key for easy, mess-free rolling. If the mixture is still too soft, simply return it to the fridge for more time.
- Achieve Consistent Sizes: Use a small cookie scoop, a melon baller, or simply estimate with a spoon for uniform truffle sizes. This ensures they chill evenly and look professional.
- Wear Food-Safe Gloves: When rolling the truffles, wearing food-safe gloves can prevent the mixture from sticking to your hands and helps maintain the pristine appearance of the truffles.
- Consider Coconut Texture: If you prefer a finer texture for your coconut, you can lightly pulse the shredded coconut in a food processor before adding it to the mixture or using it for coating.
Creative Variations and Customizations
While these white chocolate coconut truffles are divine on their own, they also serve as a fantastic canvas for culinary creativity. Feel free to experiment with different coatings, flavorings, and additions to make them uniquely yours, tailoring them to your taste or the occasion.
- Alternative Coatings: Beyond shredded coconut, try rolling your truffles in unsweetened cocoa powder, finely chopped nuts (like toasted almonds, pistachios, or pecans), colorful sprinkles, powdered sugar, or even dip them halfway in melted dark chocolate for an elegant contrast.
- Bright Citrus Zest: Add a teaspoon of finely grated lemon, lime, or orange zest to the ganache along with the vanilla extract for a wonderfully bright and refreshing twist that cuts through the sweetness.
- Coffee Lover’s Kick: For a sophisticated flavor, stir in a teaspoon of instant espresso powder (dissolved in a tiny bit of hot water) to the ganache mixture.
- Liqueur Infusion (Adult Version): For a more grown-up treat, replace a small portion of the heavy cream (about 1-2 teaspoons) with a complementary liqueur such as coconut rum, amaretto, or Grand Marnier.
- Warm Spices: A pinch of ground cinnamon, cardamom, or nutmeg can add a comforting, exotic note to your truffles, perfect for autumnal or holiday settings.
- Mini Chocolate Chips: For an extra textural surprise and chocolate boost, fold in a tablespoon or two of mini white or dark chocolate chips into the chilled ganache just before rolling.
Serving Suggestions for Your Homemade Truffles
These elegant truffles are wonderfully versatile and perfect for a wide array of occasions. Due to their richness, serving them in small portions allows everyone to savor their delightful flavor without feeling overwhelmed. They are the quintessential accompaniment to a freshly brewed cup of coffee, an aromatic espresso, or a comforting mug of tea, making them an ideal afternoon pick-me-up or a perfect after-dinner dessert. Arrange them beautifully on a small platter for a sophisticated dessert course, or package them in decorative boxes tied with a ribbon for thoughtful, handmade gifts. They’re also a fantastic and impressive addition to holiday cookie platters, potlucks, baby showers, or any celebration where a touch of homemade elegance is appreciated.
Storage Tips for Freshness
To keep your white chocolate coconut truffles tasting their absolute best, proper storage is paramount. These delicate confections benefit from being kept cool and protected from air to maintain their shape, texture, and flavor over time.
- Refrigeration: Store your finished truffles in an airtight container in the refrigerator for up to 1-2 weeks. This helps maintain their firm shape and prevents them from becoming too soft or sticky, especially in warmer climates.
- Freezing for Longer Term: For extended storage, truffles can be frozen for up to 1-2 months. First, place them in a single layer on a parchment-lined baking sheet and freeze until solid. Once firm, transfer them to a freezer-safe airtight container or bag, separating layers with parchment paper. Thaw frozen truffles in the refrigerator for a few hours or overnight before serving.
- Optimal Serving Temperature: For the most luxurious texture and flavor, allow refrigerated truffles to sit at room temperature for about 10-15 minutes before serving. This brief period allows them to soften slightly, enhancing their creamy, melt-in-your-mouth consistency.
Frequently Asked Questions (FAQs) About Making Truffles
Here are answers to some common questions you might have while making these delicious white chocolate coconut truffles, helping you troubleshoot and succeed with your homemade treats.
- Q: Can I use white chocolate chips instead of chopped white chocolate bars?
A: While you can, white baking chocolate bars (often labeled “white baking chocolate” or “couverture”) usually have a higher cocoa butter content and melt more smoothly, resulting in a silkier, creamier ganache. Chips often contain stabilizers that can make them melt less uniformly or create a slightly waxier texture. - Q: My ganache is too soft to roll into balls. What should I do?
A: This simply means it needs more chilling time. Return it to the refrigerator for another 30-60 minutes, checking its firmness periodically. Patience is key! - Q: My ganache turned out grainy or lumpy. What went wrong?
A: This is typically due to the chocolate “seizing” (if water or steam got into the mixture) or overheating. Ensure your bowl is completely dry and always melt the chocolate slowly and gently over simmering, not boiling, water, or in very short bursts in the microwave. - Q: Can I make these white chocolate truffles vegan?
A: To make them vegan, you would need to use a high-quality vegan white chocolate, a plant-based heavy cream substitute (such as the thick part of full-fat coconut cream, chilled, or a vegan whipping cream), and a vegan butter alternative. The texture might vary slightly but can still be delicious. - Q: How many truffles does this recipe typically yield?
A: This recipe usually yields about 20-24 delightful bite-sized truffles, depending on how large and consistently you roll them.
Conclusion: Your New Favorite No-Bake Dessert Awaits
These 6-ingredient white chocolate coconut truffles are more than just a dessert; they are a testament to the fact that extraordinary flavors and gourmet treats can emerge from simple ingredients and minimal effort. They are sweet, creamy, wonderfully satisfying, and utterly addictive, offering a taste of luxurious indulgence without any fuss. Whether you’re looking for an easy, delightful treat for yourself, a thoughtful homemade gift to share, or a show-stopping addition to your next gathering, this recipe is guaranteed to be a hit with everyone who tries them. So, gather your ingredients, follow these straightforward steps, and prepare to delight your senses and those of your loved ones with these truly amazing no-bake truffles. Happy truffle making, and enjoy every bite of your new favorite sweet treat!
For more delightful truffle recipes to explore and expand your repertoire, check out these other fantastic options:
- White Chocolate Lemon Truffles Recipe
- Cream Cheese Chocolate Truffle Recipe
- Salted Caramel Whisky Chocolate Truffles Recipe