
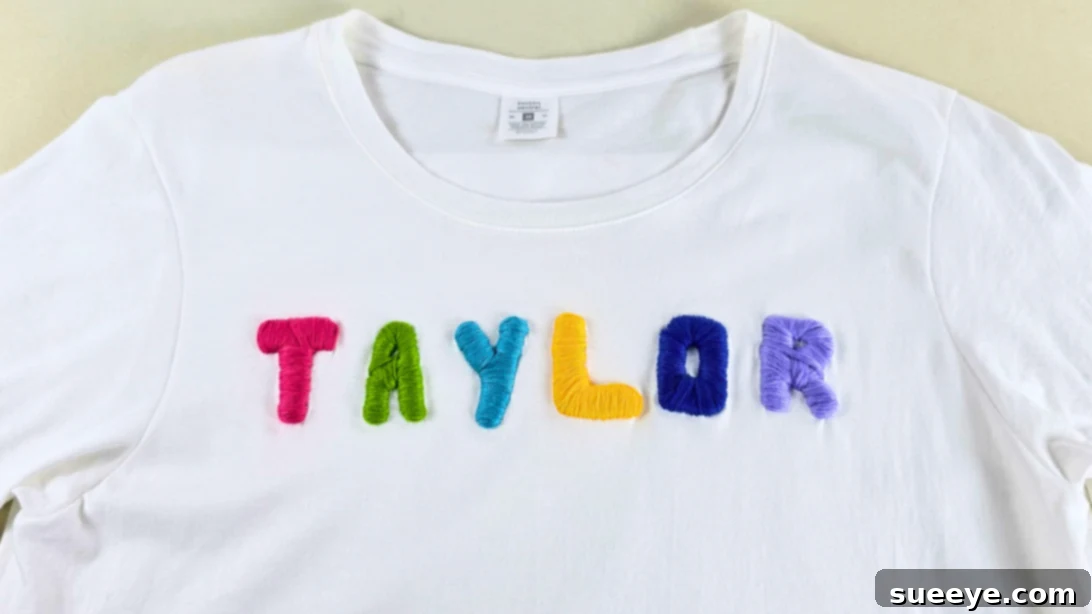
Embroidery has always been a captivating art form, offering endless possibilities for personal expression and creative design. As an enthusiast, I’ve delved into numerous techniques, styles, and motifs, finding joy in every stitch. While intricate floral patterns like the beautiful woven wheel stitch (which creates stunning, realistic roses with minimal effort) hold a special place in my heart, the desire to explore new, innovative methods that blend simplicity with striking results is constant. My journey led me to a remarkable discovery that transforms ordinary garments into personalized masterpieces: the hot glue embossed embroidery hack. This technique, surprisingly beginner-friendly, allows anyone to achieve a professional, raised embroidery effect with ease, proving that truly beautiful creations don’t always require years of practice.
RELATED: Easy Flower Embroidery on Jeans: A Stylish Denim Update
My passion for crafting extends beyond personal projects; I love incorporating my skills into thoughtful, handmade gifts for loved ones. There’s something uniquely special about gifting an item infused with time, care, and a personal touch. Recently, while sifting through my closet, I rediscovered a forgotten plain white t-shirt. Instantly, I envisioned it as the perfect blank canvas for a fresh embroidery project. Instead of my go-to floral designs, which have adorned many tote bags and denim jackets, I craved something distinctively modern, simple, yet utterly eye-catching. This quest for a fresh approach aligned perfectly with my discovery of the embossed embroidery hack, a technique that promises to redefine how beginners approach textile customization.
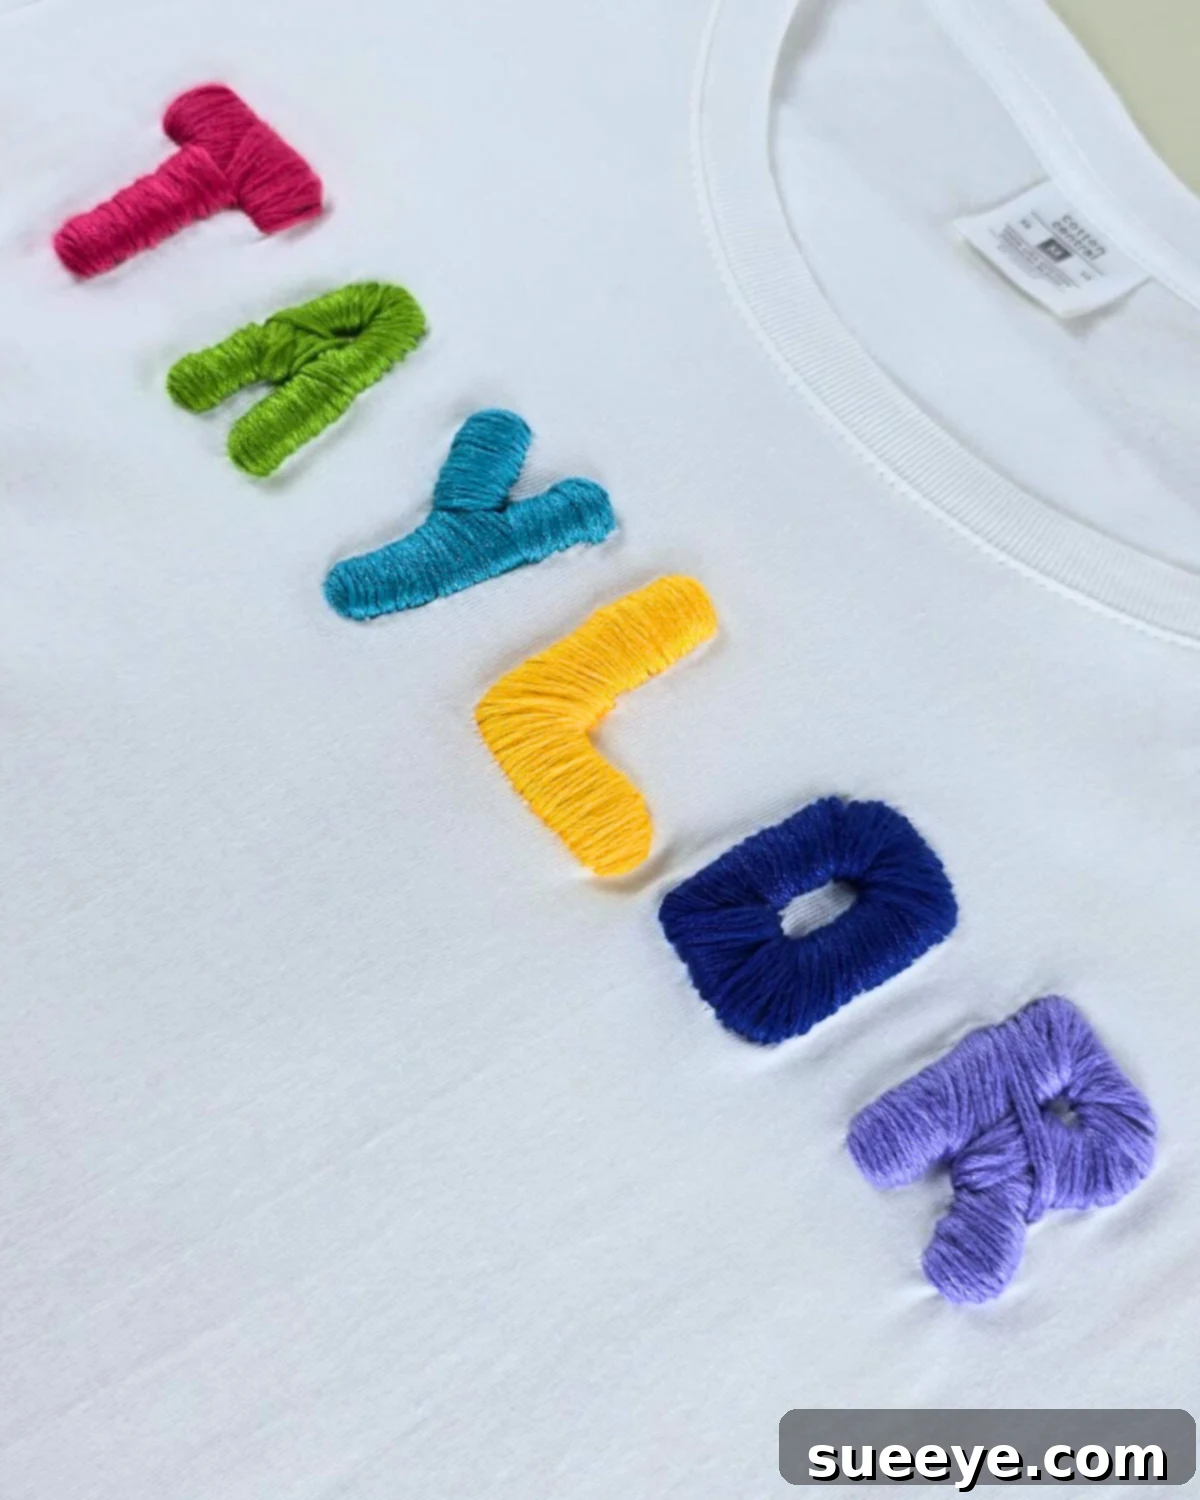
The ingenious “embossed embroidery hack” I encountered online proved to be the answer. This brilliant technique leverages the humble hot glue gun to create raised outlines for letters, shapes, or designs, mimicking the look and feel of traditional embossed stitching without the complex skill required. It’s truly a game-changer for anyone intimidated by freehand embroidery or seeking a foolproof method for precise results. The magic lies in its simplicity: once the hot glue forms your desired shape and dries, you simply follow its raised outline with your embroidery needle, weaving thread over the glue until the form is completely covered. The result is a beautifully textured, three-dimensional effect that feels professional and incredibly satisfying to create.
The versatility of this DIY embroidery idea is virtually limitless. From subtle initials and full names to playful patterns, meaningful phrases, or even simple geometric shapes, it offers a fantastic avenue for personalizing clothes and accessories. Imagine creating custom t-shirts for family gatherings, unique birthday gifts, thoughtful holiday presents, or even stylish matching shirts for a group event. For my project, I chose to embroider a name onto a t-shirt, transforming a basic garment into a cherished, handmade gift. This technique not only elevates the aesthetic appeal of a shirt but also imbues it with sentimental value, making it far more than just clothing. It’s an expression of care, creativity, and individuality. To see how effortlessly you can achieve this striking effect, continue reading for our detailed step-by-step guide and invaluable tips!
Essential Supplies for Personalized T-Shirt Name Embroidery
Gathering the right materials is the first step to a successful and enjoyable crafting experience. For this unique embossed embroidery project, you won’t need an extensive toolkit, making it even more accessible for beginners. Quality materials ensure a better finish and a more durable creation. Here’s a breakdown of what you’ll need, along with some tips for selection:
How to Embroider a Name on a Shirt: A Beginner’s Guide to Embossed Designs
Ready to transform a plain t-shirt into a custom, wearable piece of art? This step-by-step tutorial will guide you through the hot glue embossed embroidery hack, making the process straightforward and fun. Even if you’re new to embroidery, you’ll be amazed at the professional-looking results you can achieve.
-
Step 1: Prepare Your Design and Trace the Name

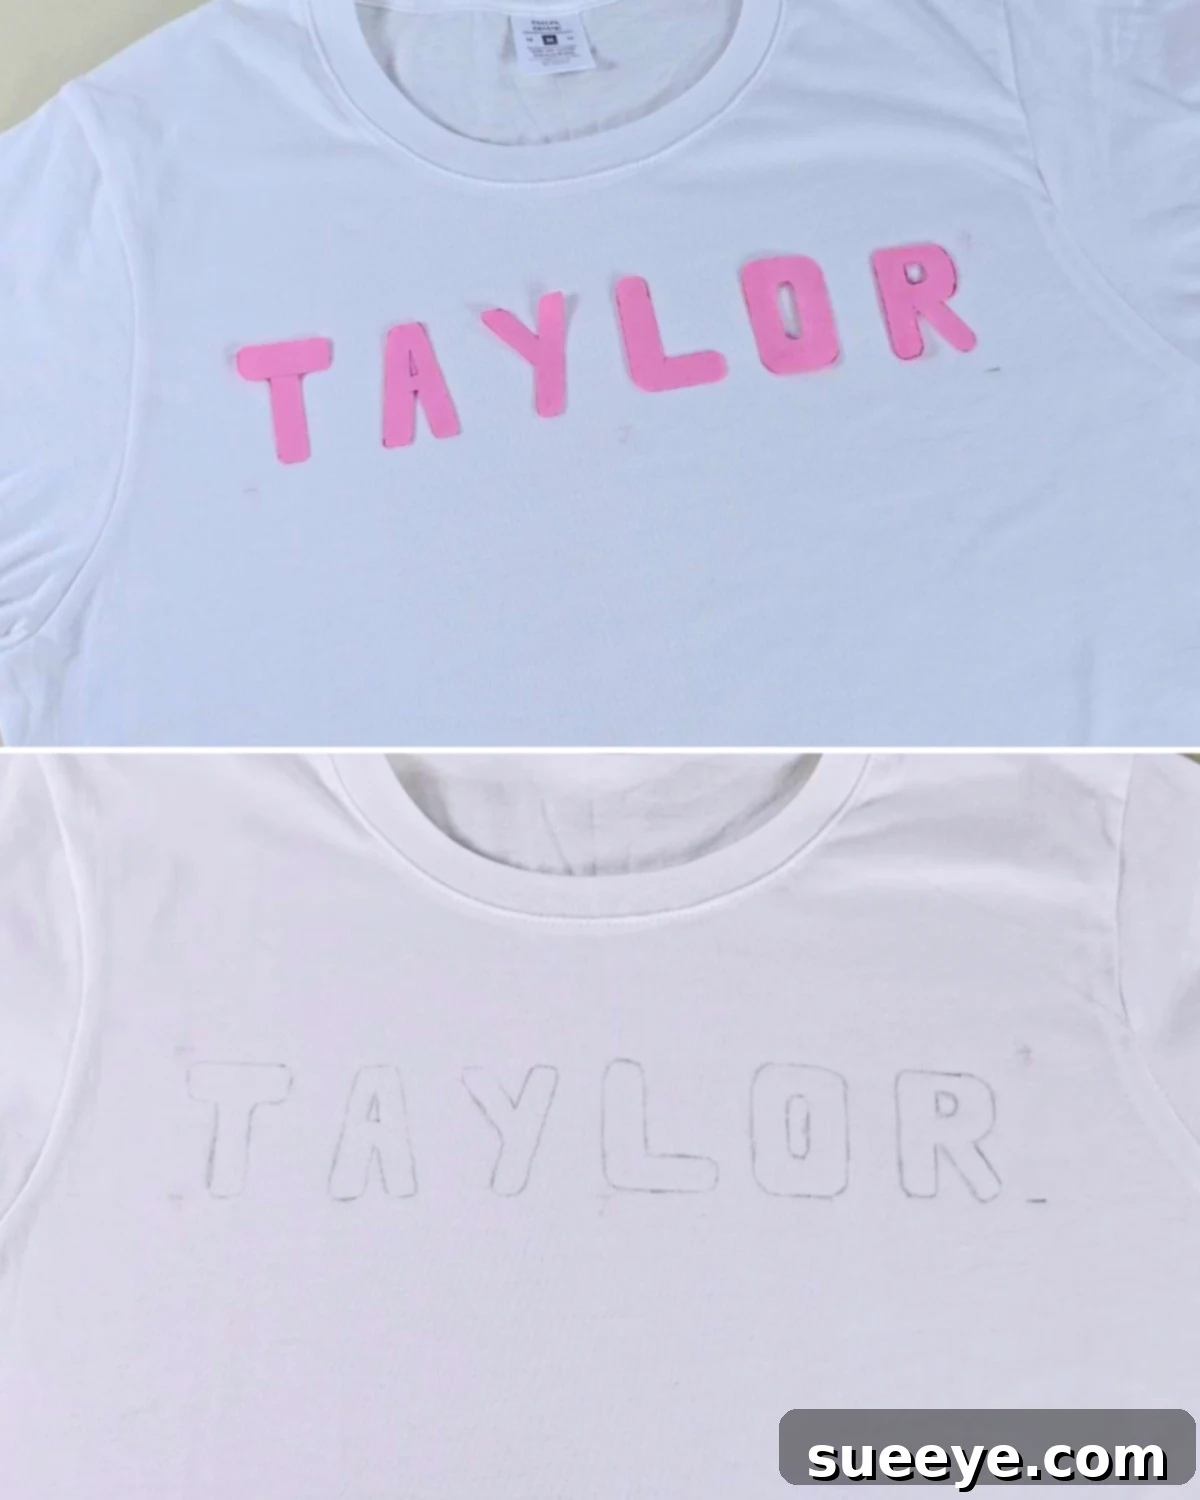
The foundation of a great embroidered piece begins with a clear design. Start by writing or printing the name you wish to embroider onto a piece of paper. Consider different fonts and sizes to find the perfect look for your t-shirt. Once you’re happy with the design, carefully cut out each letter to create individual stencils. Now, position these paper stencils onto your t-shirt in the desired arrangement. Using a fabric marker or tailor’s chalk, meticulously trace around the edges of each letter onto the t-shirt fabric. Ensure your tracing is neat and accurate, as this will be the guide for your hot glue application. For best results, place a piece of cardboard inside the shirt to prevent the marker from bleeding through to the back layer. -
Step 2: Create the Embossed Outline with Hot Glue
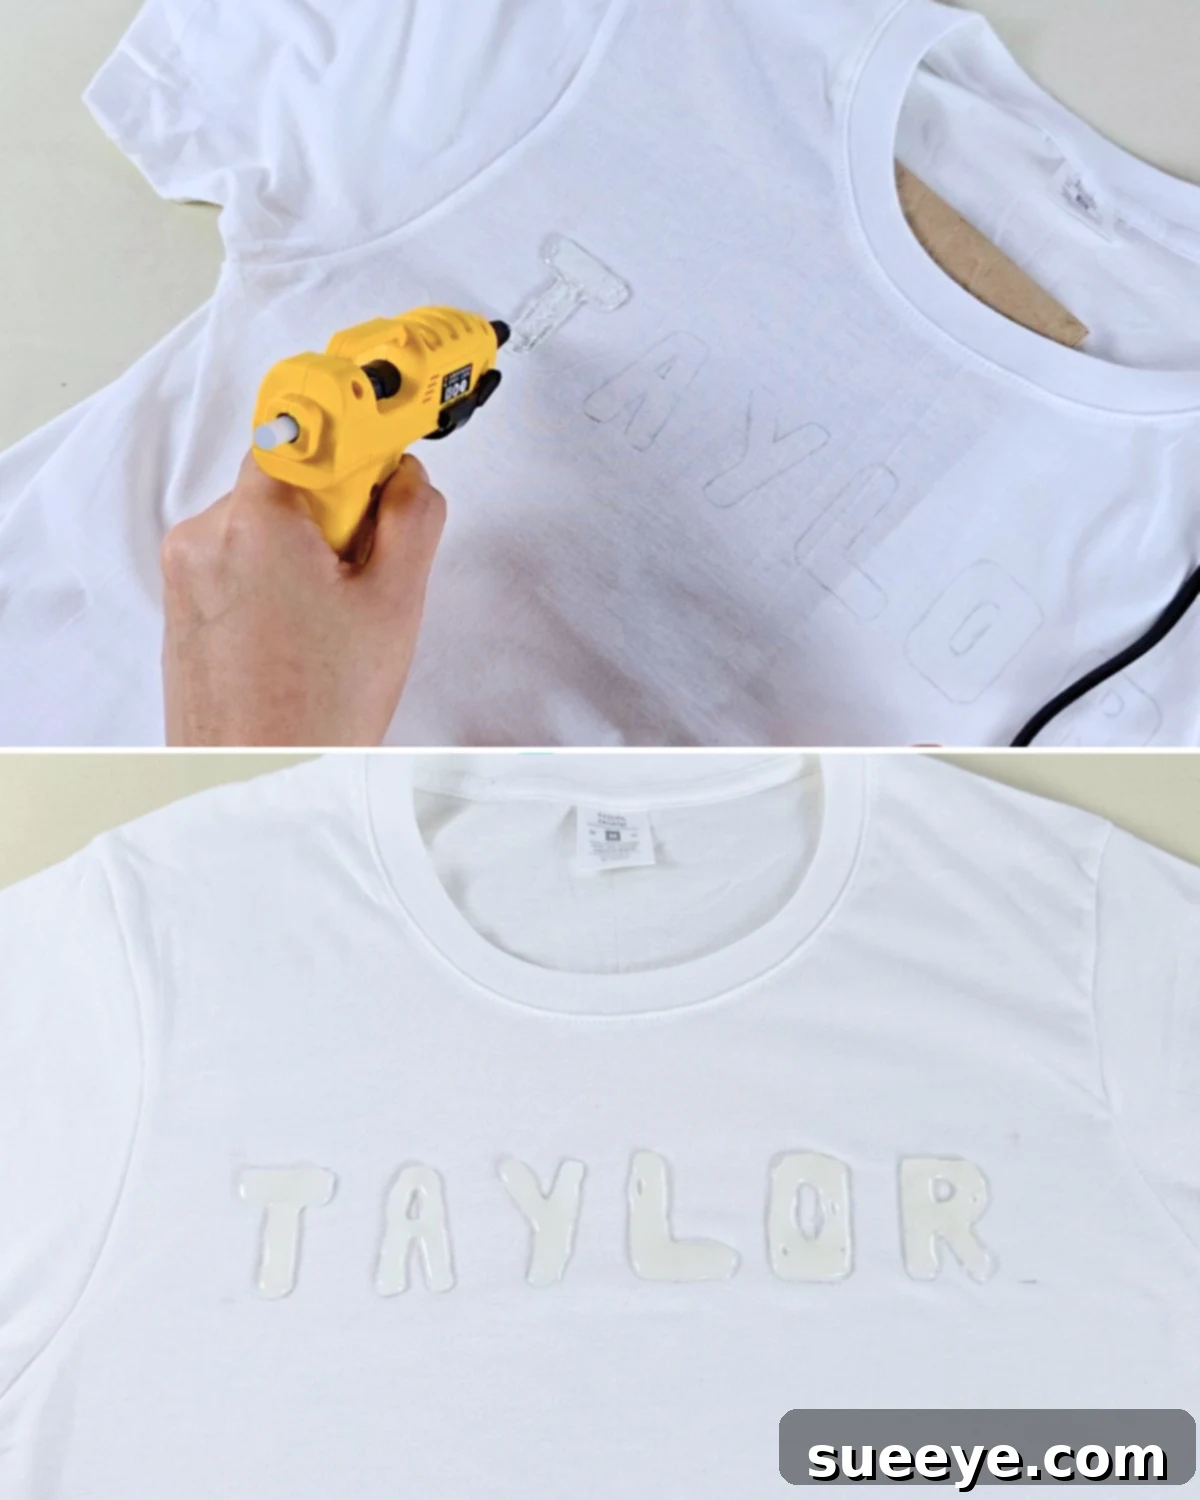
This is where the magic of the hack truly begins! With your hot glue gun, carefully and steadily trace over the fabric marker outlines you just created. Aim for a consistent line thickness that will give your embroidery a pleasing raised effect. Take your time, applying even pressure to the glue gun to avoid blobs or uneven lines. If you’re working with intricate letters or fine details, consider using a glue gun with a finer nozzle or practice on a scrap piece of fabric first. Once all the letters are outlined, set the t-shirt aside in a flat position and allow the hot glue to dry and harden completely. This is a crucial step; rushing it can lead to a messy embroidery process. The glue should be firm to the touch and fully adhered to the fabric before moving on. -
Step 3: Begin Embroidering Along the Raised Outline
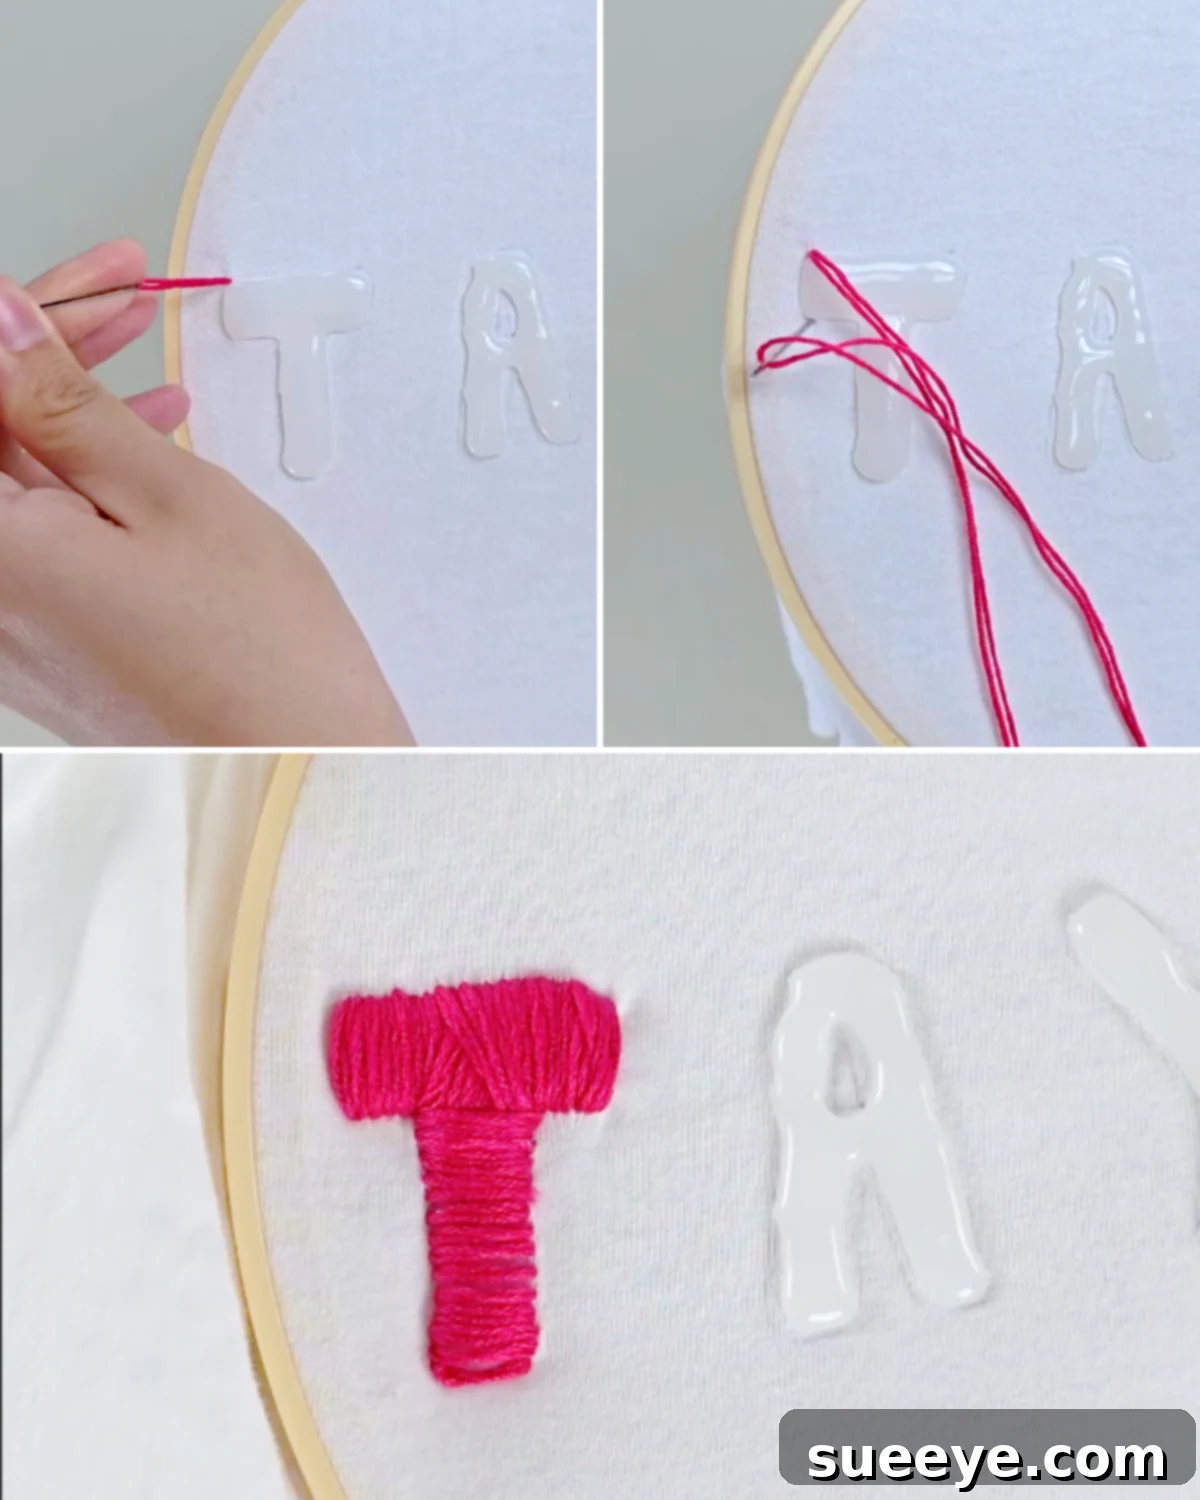
Now it’s time to bring your design to life with thread! Choose your embroidery thread color and thread your needle. Bring your needle up from the back of the fabric at your chosen starting point, right next to the hot glue outline. Then, insert the needle back down at the next stitching point, ensuring your stitch neatly covers a section of the glue. The hot glue acts as a tactile guide, making it incredibly easy to keep your stitches aligned and uniform. The most effective stitch for this technique is typically a satin stitch or a closely worked backstitch, as these methods provide dense coverage. Continue stitching along the entire outline of the letter, making sure each stitch lies close to the previous one, completely covering the hot glue. The goal is a smooth, continuous, and fully covered surface that highlights the raised texture beneath. Keep your thread tension consistent to prevent puckering or gaps. -
Step 4: Complete the Remaining Letters and Personalize
With your first letter complete, you’ve mastered the core technique! Now, repeat the same precise stitching process on all the remaining letters of the name. This step offers another fantastic opportunity for personalization. Feel free to choose a different thread color for each letter to create a vibrant, multi-colored design that truly pops. Alternatively, you might opt for a single, cohesive color scheme for a more elegant and minimalist look. Experiment with shades, or even use variegated thread for a unique effect. Once all letters are meticulously covered, secure your thread on the backside of the fabric with a knot. Take a moment to admire your handiwork – you’ve just created a stunning, personalized piece of apparel with a professional embossed finish!
Materials
- Plain T-Shirt (Cotton or cotton blend recommended for ease of embroidery)
- Embroidery Thread (DMC or similar quality, 6-strand floss for versatility or pearl cotton for bolder texture)
- Embroidery Needle (Sizes 7-9 are good for general use, choose one with an eye large enough for your thread)
- Scissors (Sharp embroidery scissors for clean cuts)
- Hot Glue Gun (A fine-tipped nozzle can be helpful for intricate designs)
- Hot Glue Sticks (Standard all-purpose glue sticks)
- Fabric Marker or Tailor’s Chalk (For tracing, ensuring it’s washable or disappears)
- Embroidery Hoop (Optional, but highly recommended for maintaining fabric tension)
- Cardboard (To place inside the t-shirt to prevent glue/marker bleed-through)

🌟 Pro Tips for Perfect Embossed Embroidery
Achieving flawless embossed embroidery is easier with a few expert tricks up your sleeve. Firstly, patience is paramount: always ensure the hot glue is completely dry and hardened before you even think about picking up your needle. Attempting to stitch over wet or tacky glue will lead to a messy, frustrating experience. Secondly, using an embroidery hoop is highly recommended; it keeps your fabric taut and stable, preventing puckering and ensuring your stitches lie flat and even. For a more pronounced and defined raised finish, opt for thicker embroidery threads like pearl cotton or use multiple strands of standard floss. This adds body and presence to your letters. If you’re working with delicate fabrics that might pull or distort, placing a thin stabilizer or even a piece of parchment paper underneath the embroidery area provides crucial support. Practice on a scrap piece of fabric first to get a feel for the glue gun pressure and stitching technique. Remember, consistent tension in your stitches is key for a neat, professional look, and always finish your threads securely on the back to ensure longevity.
Explore More Fan-Favorite DIY Crafts
Seasonal
Make the Cutest DIY Christmas Ornament With a Tuna Can
Seasonal
DIY Christmas Ornaments | Glitter Foam: Sparkle Your Tree
Crafts
Decorate Your Tree With Adorable 5 Minute Santa Gnome Ornaments
Seasonal
DIY Honeycomb Paper Christmas Tree Ornament: Simple & Sweet
Embroidery is more than just stitching; it’s a way to infuse personality, meaning, and artistry into everyday items. This hot glue embossed embroidery hack makes that journey accessible and enjoyable for everyone, regardless of their prior experience. By following these simple steps, you can create stunning, textured designs that look intricate but are surprisingly easy to achieve. Whether you’re making a bespoke gift for a loved one or simply adding a unique flair to your own wardrobe, this technique opens up a world of creative possibilities. So grab your t-shirt, your glue gun, and your threads, and start personalizing today!
*If you’ve enjoyed this craft tutorial and are eager for more creative inspiration, make sure to visit our official website, follow our engaging Facebook page for daily updates and community interaction, and subscribe to our vibrant YouTube channel for detailed video tutorials and endless DIY ideas!