
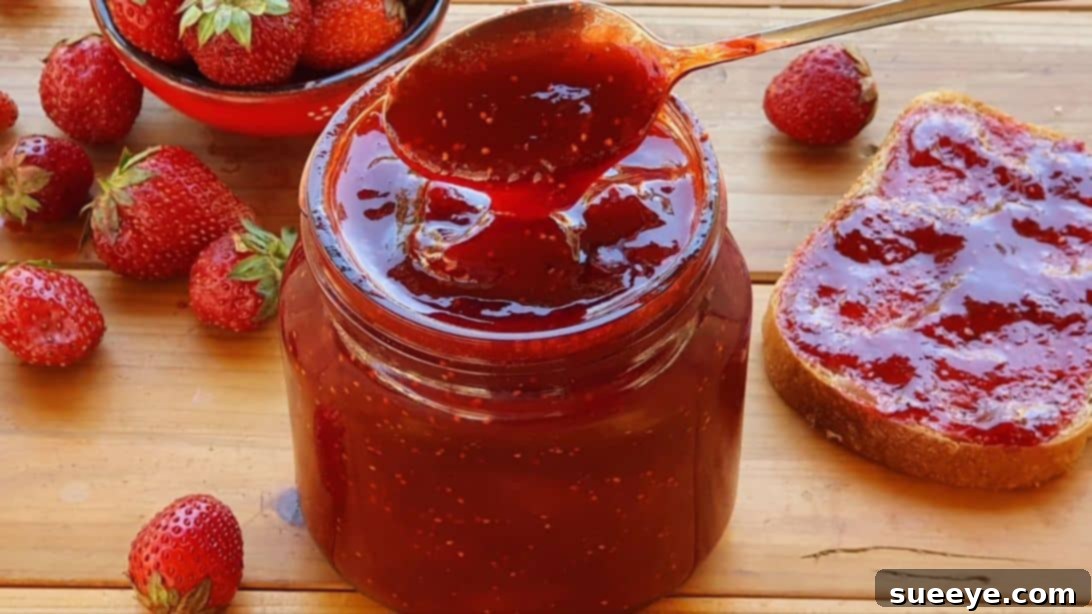
Mastering Homemade Strawberry Jam: A Simple 3-Ingredient Recipe for Perfection
Strawberries are undeniably one of the world’s most beloved fruits, cherished for their vibrant color, sweet-tart flavor, and delightful crunch. Whether enjoyed fresh, dipped in melted chocolate for an indulgent treat, or transformed into a luscious preserve, strawberries consistently deliver an exceptional culinary experience. For many, including myself, the allure of homemade strawberry jam is irresistible. There’s something truly special about spreading a rich, fruity concoction on toast, knowing it was crafted with fresh ingredients right in your own kitchen.
Today, we’re delving into an incredibly straightforward yet utterly fantastic recipe for strawberry jam, shared by the wonderful Little Strawberry Kitchen. What makes this recipe particularly appealing is its minimalist approach: it requires just three simple ingredients. You might wonder if such a short ingredient list can truly yield a spectacular jam, but I can confidently assure you that the results are nothing short of phenomenal. Prepare to create a spread that is bursting with authentic strawberry flavor, perfectly textured, and wonderfully satisfying.
Why Make Your Own Homemade Strawberry Jam?
While store-bought jams offer convenience, making your own at home provides a multitude of benefits:
- Unmatched Freshness and Flavor: Homemade jam uses fresh fruit, resulting in a taste that is far superior and more vibrant than commercial varieties. You control the quality of your ingredients.
- No Artificial Preservatives: You can rest assured that your jam is free from artificial colors, flavors, and unnecessary preservatives often found in store-bought options.
- Customizable Sweetness: Adjust the sugar content to your preference. Prefer it a little less sweet or more tart? You have the power to customize!
- Cost-Effective: When strawberries are in season, making jam can be a very economical way to preserve their bounty and enjoy them year-round.
- Rewarding Experience: There’s a deep sense of satisfaction that comes from creating something delicious from scratch. Plus, homemade jam makes a wonderful gift!
This 3-ingredient recipe simplifies the process without compromising on taste or quality, making it accessible even for novice jam makers. Let’s gather our essentials and get started!
Essential Ingredients for Your Jam
The beauty of this recipe lies in its simplicity. With just three core components, you’re on your way to a delightful jar of homemade strawberry jam.
- 2.2 lb (approximately 1 kg) of Fresh Strawberries: Choose ripe, firm strawberries with a bright red color. Avoid any that are bruised, moldy, or overly soft, as these can affect the jam’s flavor and setting ability. Peak season strawberries will yield the best flavor.
- 2 3/4 cups (approximately 550g) of Granulated Sugar: Sugar acts as a sweetener, a preservative, and plays a crucial role in the gelling process, binding with pectin to create the jam’s desired consistency.
- 1 Lemon: Fresh lemon juice provides acidity, which is vital for activating the natural pectin in the strawberries, helping the jam to set properly. It also brightens the overall flavor, balancing the sweetness of the sugar.
That’s it! No added pectin needed, as strawberries naturally contain enough when combined with sugar and acid from the lemon.
Step-by-Step Guide to Perfect Strawberry Jam
Follow these detailed instructions carefully to achieve a perfectly set and incredibly flavorful strawberry jam. Precision in preparation and cooking will ensure your success.
Step 1: Preparing Your Strawberries
Begin by selecting your fresh strawberries. Transfer them to a large bowl and fill it with cool water. Gently wash the strawberries thoroughly to remove any dirt, soil, or lingering pesticides. It’s important to wash them before hulling (removing the green tops) to prevent the fruit from absorbing too much water and becoming diluted. Once clean, drain the strawberries well using a colander. Next, carefully cut off the green top (hull) from each strawberry. You can use a small knife or a strawberry huller for this. This step ensures only the sweet, red fruit goes into your jam.
Step 2: Slicing and Dividing the Fruit
After hulling, take each strawberry and slice it into thin pieces. The thinner the slices, the more surface area for the sugar to penetrate and the more easily they will break down during cooking. Once all strawberries are sliced, divide them into two separate bowls. This division is key to achieving a jam with both a smooth base and delightful small fruit pieces, giving it a pleasing texture that isn’t entirely uniform but still spreadable.
Step 3: Creating the Strawberry Purée
Take one of the bowls containing the sliced strawberries and transfer its contents into a large, heavy-bottomed pot. This type of pot is ideal for jam making as it distributes heat evenly and minimizes scorching. Using an immersion blender, blend the strawberries directly in the pot until the mixture is smooth and entirely free of lumps. This creates a beautifully consistent purée that forms the foundational texture of your jam. If you don’t have an immersion blender, you can use a regular blender or food processor, transferring the strawberries in batches and then returning the purée to the pot. A potato masher can also work, though it might result in a slightly chunkier purée.
Step 4: Incorporating Sugar and Remaining Strawberries
To the smooth strawberry purée in the pot, add the full 2 3/4 cups of granulated sugar. Stir vigorously until the sugar is well incorporated into the purée. It’s important to mix thoroughly to ensure the sugar begins to dissolve evenly. Next, add the sliced strawberries from the second bowl to the pot. These slices will maintain some of their shape during cooking, contributing to the desirable chunky texture of your finished jam.
Step 5: Gentle Cooking to Dissolve Sugar
Place the pot over low heat. It’s crucial to start with low heat at this stage. Continuously stir the mixture. The goal here is to gently warm the strawberries and sugar, allowing the sugar crystals to completely dissolve without scorching the fruit. This process might take 5-10 minutes. You’ll notice the mixture becoming more liquid as the sugar melts. Continue stirring until you no longer feel any gritty sugar crystals when you rub a small amount between your fingers, and you start to see small bubbles forming around the edges of the pot.
Step 6: Boiling and Thickening the Jam
Once the sugar has fully dissolved, increase the heat to high. Bring the mixture to a rapid boil. This high heat is essential for activating the pectin and achieving the desired set. Keep stirring continuously to prevent the jam from sticking to the bottom and burning, especially as it thickens. You will notice foam forming on the surface; use a spoon to skim this foam off. Skimming improves the appearance and clarity of your finished jam. As it boils, the mixture will thicken, and its color will deepen to a rich, vibrant red. This stage can take anywhere from 10 to 20 minutes, depending on your stove and the moisture content of the strawberries.
Step 7: Adding the Brightness of Lemon Juice
While the jam is boiling and thickening, prepare your lemon. Slice one fresh lemon and squeeze its juice into a small bowl. Measure out 1 tablespoon of this fresh lemon juice. Once the jam has reached its desired thickness (as described in Step 6), carefully add the tablespoon of lemon juice to the pot. Stir it in until it is thoroughly combined with the strawberry mixture. The lemon juice is critical here; its acidity helps to properly activate the natural pectin in the strawberries, which is what allows the jam to set firmly. It also adds a bright, fresh counterpoint to the sweetness of the strawberries.
Step 8: Testing for Set and Storage
To determine if your jam is ready, perform the “cold plate test.” Before you begin cooking, place a small ceramic plate in the freezer. Once the jam appears thick and ready, spoon a small amount onto the chilled plate. Let it sit for about 30 seconds to cool slightly, then gently push it with your finger. If the jam wrinkles and doesn’t run smoothly back into place, it has reached its setting point and is ready. If it’s still too runny, continue boiling for a few more minutes and retest. Once your jam passes the test, turn off the heat. Let the jam cool in the pot for a short while, about 5-10 minutes, which helps the fruit distribute evenly throughout the jam. Ladle the hot jam into sterilized jars, leaving about a quarter-inch headspace. Seal tightly with lids. For long-term storage, process the jars in a boiling water bath canner according to standard canning guidelines, or simply store them in the refrigerator for immediate use for up to 3-4 weeks. Properly canned jam can last up to a year in a cool, dark pantry.
Tips for Achieving Perfect Homemade Strawberry Jam
- Use Ripe, In-Season Strawberries: The flavor of your jam heavily relies on the quality of your fruit. Choose strawberries at their peak ripeness for the best taste and natural pectin content.
- Sterilize Your Jars: This is crucial for food safety and shelf life, especially if you plan to store the jam for an extended period. Wash jars and lids in hot, soapy water, then sterilize them by boiling or baking according to standard canning practices.
- Don’t Rush the Dissolving Process: Starting on low heat to dissolve the sugar completely prevents a gritty texture in your finished jam.
- Continuous Stirring is Key: Especially during the high-heat boiling phase, stirring prevents scorching and ensures even cooking and thickening.
- Skim Off Foam: While not essential for taste, skimming the foam from the top results in a clearer, more appealing jam.
- Trust the Cold Plate Test: This is the most reliable method for checking if your jam has set. Don’t rely solely on visual cues.
- Consider Pectin Content: Strawberries are moderate in natural pectin. The lemon juice in this recipe ensures enough acidity for proper gelling.
Creative Variations and Serving Suggestions
While this 3-ingredient strawberry jam is fantastic on its own, here are a few ideas to get creative:
- Flavor Infusions: Add a vanilla bean pod to the jam while cooking, remove before jarring. A sprig of fresh basil or mint can also be added for an intriguing herbal note.
- Spice it Up: A pinch of cinnamon, a star anise pod, or a tiny amount of cracked black pepper can add warmth and depth to your jam.
- Berry Blends: Experiment by replacing a portion of the strawberries with other fruits like raspberries, rhubarb, or blueberries for unique flavor combinations.
- Serving Ideas: Enjoy your homemade strawberry jam on classic toast, croissants, or scones. Swirl it into plain yogurt or oatmeal. Use it as a filling for thumbprint cookies, tarts, or layered cakes. It also makes a fantastic glaze for roasted meats like pork or chicken, or even as a topping for ice cream and pancakes.
Storage and Shelf Life
Once your delicious strawberry jam is made, proper storage ensures you can enjoy its fresh taste for as long as possible. If you fill sterilized jars and seal them properly, then process them in a boiling water bath canner, your jam can be safely stored in a cool, dark pantry for up to one year. Always check the seal before consumption. If not canned, your homemade jam should be stored in the refrigerator and consumed within 3-4 weeks. Freezing jam in freezer-safe containers is another excellent option for extending its shelf life up to 6 months.
Conclusion: The Sweet Reward of Homemade Jam
Crafting your own batch of homemade strawberry jam is an incredibly rewarding experience that brings the vibrant taste of fresh fruit directly to your table. This particular recipe, courtesy of Little Strawberry Kitchen, stands out for its elegant simplicity and consistently perfect results. With just three basic ingredients – fresh strawberries, sugar, and a touch of lemon – you can create a spread that rivals any gourmet store-bought option, often surpassing it in terms of flavor and freshness.
So, gather your ingredients, follow these straightforward steps, and prepare to be amazed by the rich, sweet, and slightly tart perfection of your very own homemade strawberry jam. It’s more than just a recipe; it’s an invitation to savor the simple pleasures of home cooking and enjoy the delicious fruits of your labor.