
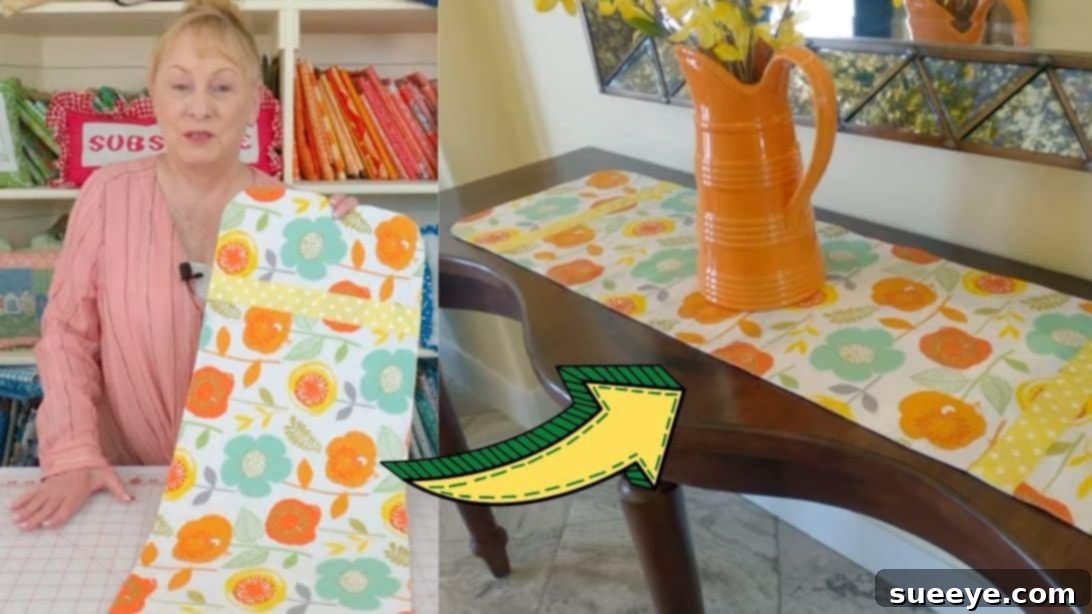
DIY Spring Table Runner: An Easy Sewing Tutorial for Beginners
As the vibrant hues of spring awaken the world around us, it’s the perfect time to infuse your home decor with a touch of seasonal charm. What better way to do this than with a stunning, handmade spring table runner? This project isn’t just about creating a beautiful centerpiece; it’s an enjoyable and rewarding venture, especially for those new to the world of sewing.
We’re thrilled to share an incredibly straightforward and delightful video tutorial from The Sewing Room Channel on YouTube. They expertly demonstrate just how effortless it is to craft such an elegant table runner. You’ll be amazed at what you can achieve with only two chosen fabrics and a handful of easy-to-follow steps. This sewing project is tailor-made for beginners, offering a fantastic opportunity to build confidence and hone fundamental sewing skills. If you’re eager to add a personalized touch to your spring celebrations or simply want to brighten your dining space, read on to discover how you can create your very own charming table runner.
Why Sew Your Own Table Runner?
Creating your own table runner offers numerous advantages over purchasing one. Firstly, it allows for unparalleled personalization. You can select fabrics that perfectly match your existing decor, complement a specific spring theme, or showcase your unique style. Secondly, it’s often more cost-effective. By choosing your materials, you can manage your budget while still producing a high-quality item. Lastly, and perhaps most importantly, there’s immense satisfaction in making something with your own hands. A handmade table runner carries a special story and a touch of your creativity, making it a truly unique piece for your home or a thoughtful gift for a loved one.
Essential Materials for Your Spring Table Runner
Before diving into the sewing process, ensure you have all your materials gathered. Having everything at hand will make the project smooth and enjoyable. Here’s what you’ll need:
- Main Fabric: This will be the dominant fabric, often chosen for its pattern or color that captures the essence of spring. Consider cottons or linen blends for their durability and ease of washing.
- Lining Fabric: This fabric provides structure and a clean finish to the underside of your table runner. It can be a coordinating solid or a subtle pattern that complements your main fabric.
- Fusible Interfacing: Essential for adding body, stability, and a professional crispness to your runner. Choose a medium-weight interfacing for best results.
- Ribbon Trim: A decorative element that adds a touch of elegance and visual interest. Select a ribbon that contrasts or harmonizes with your chosen fabrics.
- Marking Pen/Chalk: For accurately marking cutting lines and sewing guides on your fabric.
- Pins: To secure fabric layers together before sewing, ensuring everything stays perfectly aligned.
- Fabric Scissors: Sharp scissors are crucial for clean, precise cuts.
- Sewing Machine: Your trusty tool for stitching everything together quickly and efficiently.
- Iron and Ironing Board: Indispensable for pressing seams and applying interfacing, contributing significantly to a polished finish.
Detailed Directions: Crafting Your Beautiful Spring Table Runner
Follow these steps carefully, and you’ll soon have a gorgeous table runner ready to adorn your spring table.
Step 1: Preparing Your Fabrics and Applying Interfacing
The foundation of any great sewing project lies in precise fabric preparation. Start by pre-washing and ironing both your main and lining fabrics. This essential step prevents shrinkage after your runner is made and ensures a smooth, wrinkle-free surface to work with.
Cutting Your Fabrics:
Grab your main and lining fabrics. For a standard short table runner, cut each fabric to approximately 18 inches wide and 40 inches long. If you desire a longer table runner, suitable for extended dining tables, aim for 80 inches in length. The width of 18 inches provides a generous presence on most tables without being overly bulky. Precision in cutting is key here; use a rotary cutter and mat if you have them, otherwise, a ruler and fabric pen with sharp scissors will suffice.
Joining the Main and Lining Fabrics:
Lay your main fabric flat with its wrong side facing up. Place your lining fabric directly on top, also with its wrong side facing up, so that the wrong sides of both fabrics are touching. This method is often used for projects where the seam will be enclosed later. Carefully align all edges. Now, sew the fabrics together along one of their shorter sides. A standard 1/2-inch seam allowance is generally suitable for this project. Remember to backstitch at the beginning and end of your seam to secure the stitches.
Pressing and Trimming:
Once sewn, press the seam open using a warm iron. Pressing seams open helps to reduce bulk, ensuring a flatter and more professional finish. This step might seem minor, but it greatly impacts the final appearance of your runner. Next, inspect the longer edges of your joined fabric. If there are any “salvaged edges” (the tightly woven edges of the fabric as it comes off the bolt), cut these off. Salvaged edges can sometimes pucker or behave differently during sewing, so removing them ensures a consistent edge.
Applying Fusible Interfacing:
Now, it’s time to add the fusible interfacing. This material will give your table runner the necessary structure, body, and a crisp feel, preventing it from looking flimsy. Cut your fusible interfacing to the exact same dimensions as your combined main and lining fabrics. Lay either your main or lining fabric (whichever side you choose for the interfacing application) flat with its wrong side facing up. Position the fusible interfacing, adhesive side down, onto the fabric. Following the manufacturer’s instructions, use your iron to press and fuse the interfacing to the fabric. Work in sections, holding the iron in place for the recommended time to ensure a strong bond. A pressing cloth can be useful here to protect your iron and fabric.
Step 2: Adding Trim, Shaping Corners, and Finishing
This stage brings your table runner to life, adding decorative elements and giving it its final shape.
Attaching the Ribbon Trim:
Cut four pieces of your chosen ribbon trim, each approximately 18 inches wide (matching the width of your fabric). These ribbons will be sewn onto the shorter sides of your fabric, two on each side. Carefully position the ribbons along the edges, ensuring they are evenly spaced and aligned. Pin them in place, then sew them down. You can sew along both long edges of the ribbon for a secure attachment, or just the top edge if you prefer a slight decorative drape on the bottom.
Folding and Pinning:
Once the ribbons are secured, fold your entire fabric piece in half lengthwise, ensuring the right sides of the main and lining fabrics are facing each other. The goal is to enclose the raw edges and ribbons inside, so when you turn it right side out, you have a clean finish. Align all edges perfectly and pin them all around the perimeter. Pay extra attention to the corners and anywhere the ribbons are attached to ensure everything stays put while you sew.
Shaping the Corners:
To give your table runner a softer, more elegant look, you’ll curve the four corners. You can use a round object like a small plate, a ruler with a curved edge, or even a spool of thread as a template. Place your chosen template at each corner and use your marking pen to draw a smooth curve. Ensure the curves are even and symmetrical on all four corners. This step adds a professional touch and is easier to turn than sharp, pointed corners.
Sewing the Perimeter:
Now, take your pinned fabric to the sewing machine. Starting about 2-3 inches from a corner, begin sewing along the perimeter using a 1/2-inch seam allowance. Sew slowly and carefully around the curved corners, pivoting your fabric as needed to maintain a smooth curve. Continue sewing until you are about 4-6 inches away from your starting point, leaving a small gap unsewn on one of the straight sides. This opening is crucial for turning your table runner right side out. Remember to backstitch at the beginning and end of your seam for durability.
Trimming, Notching, and Turning:
Once you’ve sewn all around (leaving the gap), remove all the pins. To ensure smooth curves when turned, it’s important to trim your seam allowance. Clip the seam allowance around the curved corners without cutting into your stitches. Then, make small notches (V-shaped cuts) into the seam allowance of the curved sections. These notches will help the fabric lie flat and prevent bulk once turned. Finally, carefully reach into the unsewn gap and gently pull the entire table runner right side out. Use a point turner or a dull pencil to gently push out the curves and corners, achieving a crisp shape without damaging the fabric.
Closing the Gap and Final Pressing:
Once turned right side out and all corners are nicely shaped, give the entire runner a good press with your iron. Pay special attention to flattening all seams. Now, it’s time to close the opening you left. You have two options: For an invisible finish, hand-stitch the gap closed using a ladder stitch. This method creates a seamless look. Alternatively, for a quicker but visible finish, you can topstitch very close to the edge of the opening using your sewing machine, matching your thread color to your fabric. A final pressing will set everything in place and give your spring table runner a perfectly polished look.
Tips for Sewing Success
- Pre-wash Your Fabric: Always pre-wash and dry your fabric the same way you intend to wash the finished item. This prevents shrinkage and ensures colorfastness.
- Use Quality Thread: A good quality polyester all-purpose thread will be strong and durable.
- Test Your Stitch: Always test your stitch length and tension on a scrap piece of your project fabric before you begin.
- Press, Press, Press: Ironing at each step is not just recommended, it’s essential for professional-looking results.
- Take Your Time: Rushing can lead to mistakes. Enjoy the process and work at a comfortable pace.
- Sharp Tools: Ensure your scissors are sharp and your sewing machine needle is new. Dull tools can snag fabric or lead to uneven stitches.
Customizing Your Table Runner: Beyond Spring
While this tutorial focuses on a delightful spring theme, the basic techniques you’ve learned are incredibly versatile. You can easily adapt this project for any season or occasion. For autumn, choose rich earth tones, plaids, or fabrics with fall leaf motifs. Winter might call for deep reds, greens, metallics, or snowflake patterns. For special occasions like birthdays or holidays, select fabrics that reflect the festive mood. Consider adding embellishments like appliqué, embroidery, tassels, or different types of trim to further personalize your creations. The possibilities are endless, allowing you to create a unique table runner for every event.
Final Thoughts: Your Handmade Masterpiece
Congratulations! You’ve successfully created a beautiful, handmade spring table runner. This simple yet elegant project demonstrates that even beginners can achieve stunning results with just a few basic sewing skills. Your new table runner will not only enhance your home’s aesthetic but also serve as a proud testament to your creativity and effort.
We extend a huge thank you to The Sewing Room Channel via YouTube for inspiring this wonderful project and providing all the visual guidance. If you enjoyed this sewing tutorial and are looking for more fantastic DIY ideas, we highly recommend visiting their channel and subscribing. You’ll find a wealth of amazing video tutorials that will continue to spark your passion for sewing!