
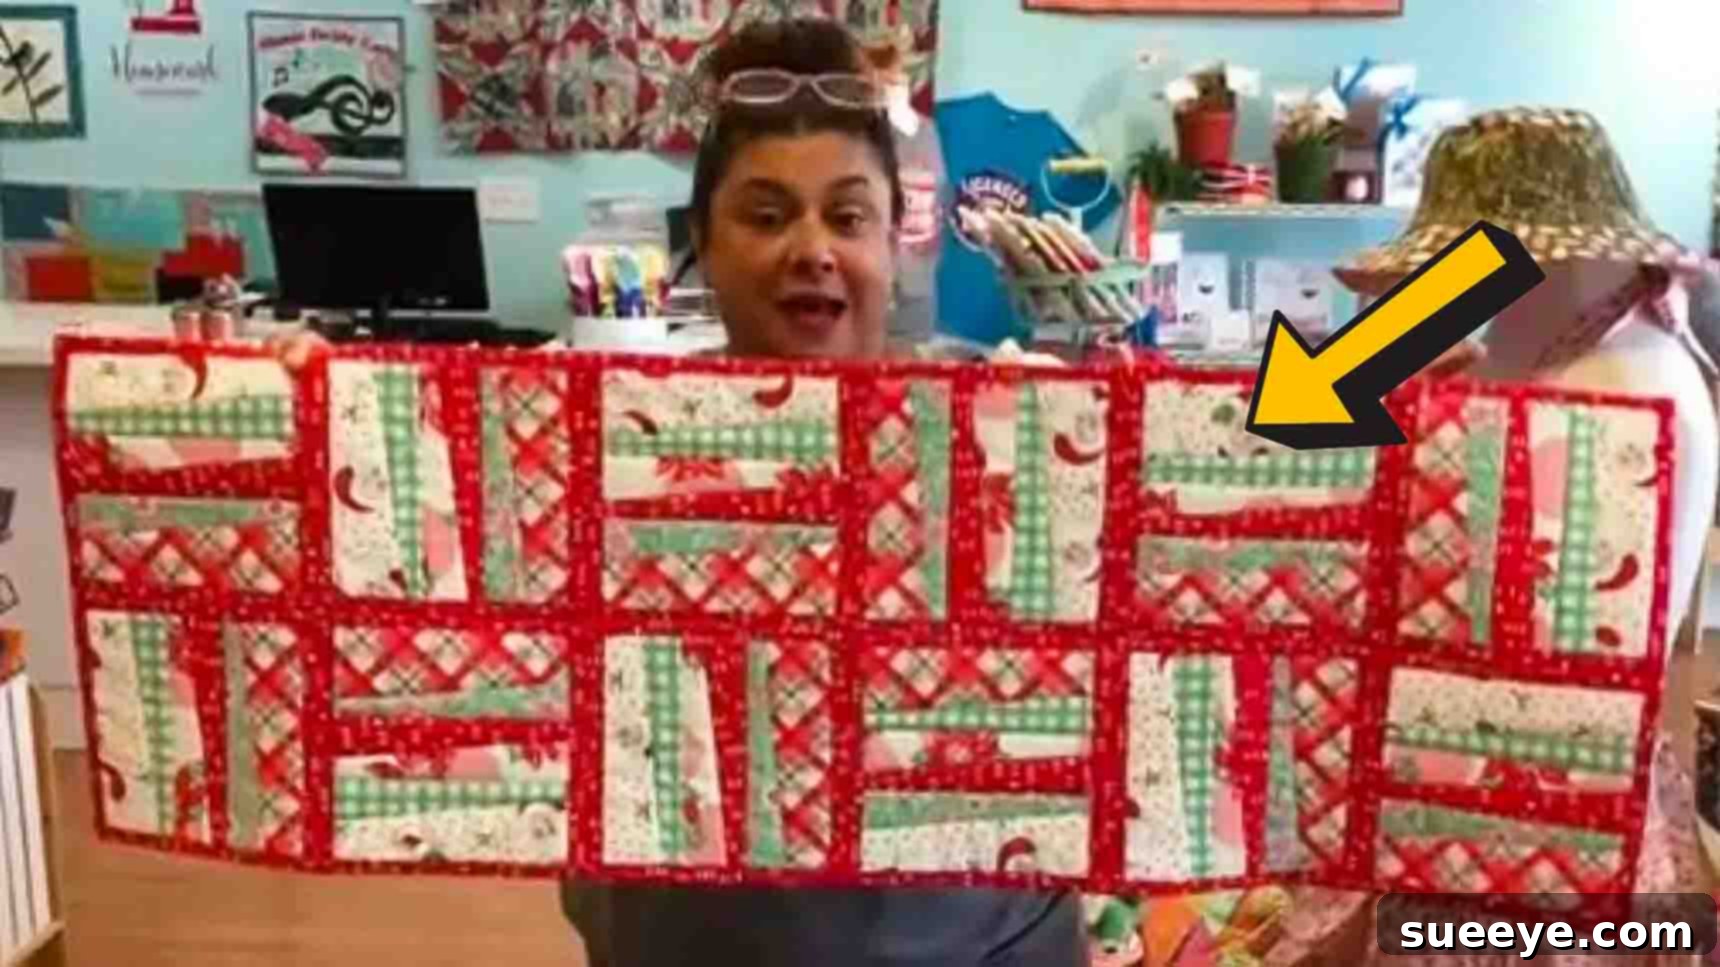
Master the Quilt-As-You-Go Technique: The Easiest Way to Create Stunning Quilts
Welcome to the wonderful world of quilt-as-you-go (QAYG) projects! If you’re looking for a quilting method that’s not only incredibly efficient but also genuinely enjoyable, you’ve come to the right place. This particular technique, inspired by the fantastic tutorial from Not Your Mama’s Quilt Store on YouTube, stands out as my absolute favorite. I’ve explored numerous variations of the QAYG method over the years, but this specific approach consistently proves to be the most straightforward and rewarding. It allows you to transform a pile of fabric into a beautiful, finished quilt in a surprisingly short amount of time – often less than a day for smaller projects! It’s quick, remarkably easy, and delivers an immense sense of accomplishment. Whether you’re a seasoned quilter or just starting your journey, this guide will walk you through the step-by-step instructions to master this beloved technique and create your own stunning quilt with ease.
Why Choose the Quilt-As-You-Go Method?
The Quilt-As-You-Go technique offers distinct advantages over traditional quilting methods, making it incredibly popular, especially for those who find managing large, bulky quilt sandwiches challenging. Instead of piecing your entire quilt top, then layering it with batting and backing before quilting all at once, QAYG involves quilting individual blocks or sections that are later joined together. This innovative approach breaks down a large project into manageable, smaller segments, making the quilting process more accessible and less intimidating. It’s perfect for using up fabric scraps, creating unique designs, and is particularly forgiving for beginners. The beauty of this method lies in its flexibility and efficiency, allowing quilters to see progress quickly and stay motivated throughout the creative process.
Essential Materials for Your Quilt-As-You-Go Project
Before diving into the fun of sewing, gathering your materials is the crucial first step. Quality supplies will not only make your quilting experience smoother but also ensure a beautiful, long-lasting finished product. Here’s what you’ll need for this easy quilt-as-you-go project:
- Different Patterned Fabric: This is where your creativity truly shines! Select a variety of fabrics in complementary patterns and colors that speak to your personal style. Cotton fabrics are generally recommended for quilting due to their ease of handling and durability. Consider using fat quarters, fabric scraps, or yardage – the choice is yours. Ensure your fabrics are pre-washed and pressed to prevent shrinking or color bleeding after your quilt is complete.
- Binding Fabric: This fabric will frame your quilt, giving it a neat, professional finish. Choose a color or pattern that complements your main quilt fabrics. You’ll need enough fabric to create strips that will encircle the entire perimeter of your finished quilt.
- Batting: The middle layer of your quilt, providing warmth, loft, and that characteristic quilted texture. Batting comes in various materials (cotton, polyester, bamboo, blends) and lofts (thicknesses). For this project, a medium-loft cotton or cotton-blend batting is often ideal, as it’s easy to work with and provides a lovely drape.
- Sashing Strip Fabric: These strips will visually separate and join your quilted blocks, adding structure and design to your quilt. Select a fabric for your sashing that either contrasts with your patterned fabrics to make them pop or blends in for a more subtle, cohesive look.
- Background Fabric: This fabric will serve as the foundation for your individual quilt blocks, providing a consistent base on which your patterned fabrics are sewn. A solid color or a subtle print works wonderfully as a background, allowing your decorative fabrics to take center stage.
- Tools: While not listed in the original materials, essential quilting tools include a sewing machine, rotary cutter, cutting mat, quilting ruler, fabric scissors, pins or wonder clips, an iron and ironing board, and a good quality sewing thread that matches or blends with your fabrics.
- For precise cutting instructions and exact dimensions for all your fabric pieces, including the specific measurements for your batting and background fabric, be sure to reference the free pattern provided by Not Your Mama’s Quilt Store. You can find the pattern details by clicking here.
Step-by-Step Directions: Crafting Your Easy Quilt-As-You-Go Masterpiece
Now that you have all your materials ready, let’s dive into the practical steps of creating your quilt. This method simplifies the process, making it enjoyable and efficient from start to finish.
Step 1: Constructing Individual Quilt Blocks with Batting
This initial step focuses on creating your individual quilted blocks, complete with their own layer of batting. The key here is precision and understanding how each fabric piece integrates with the batting to form a neat, finished block.
- Prepare Your Foundation: Begin by cutting your background fabric to the specified size according to the free pattern. Next, cut your batting slightly smaller than your background fabric. This intentional difference is crucial; having the batting slightly smaller will help reduce bulk in your seams later, creating flatter, more professional-looking joins between blocks. (Refer to the free pattern for exact dimensions.)
- First Fabric Placement: Take your first two patterned quilt pieces. Place them right sides together, aligning their edges perfectly. Now, carefully position these two pieces on top of your batting, ensuring they are centered and secure. Use pins or quilting clips to hold them firmly in place to prevent shifting while sewing.
- The First Seam: Head to your sewing machine. Start sewing a little bit in from the edge of the batting, using a consistent quarter-inch seam allowance. This small offset ensures that your initial seam will be fully enclosed within the batting, giving a clean finish. Continue sewing until you are just before the opposite edge of the batting. This partial seam is a hallmark of this QAYG method, allowing for seamless integration.
- Adding Subsequent Pieces: After sewing your first seam, open up your fabric pieces. Take your next patterned fabric strip or piece and place it right sides together with the last fabric piece you just attached, aligning its edge. Pin it securely to the batting, covering the previous seam. Repeat the sewing process: start a little bit in from the batting’s edge with a quarter-inch seam, and stop just before the batting’s opposite edge. Continuously add your quilt pieces using this exact process until you have formed a complete block of your desired size, fully covering the batting foundation.
- Trimming and Squaring Up: Once your block is fully assembled and quilted to the batting, it’s time to trim it. Carefully square up your block using a rotary cutter and a square quilting ruler. This ensures all your blocks are uniform in size and shape, which is essential for accurate assembly in the next step. Repeat these precise steps until you have created enough individual quilted blocks for your desired quilt size.
Step 2: Assembling Your Quilted Blocks with Sashing
With all your individual blocks complete, the next exciting phase is to join them together and create the beautiful sashing that defines this particular quilt-as-you-go method. This step brings your quilt top to life, row by row.
- Preparing to Join Blocks: Once you have successfully completed and trimmed all your individual quilted blocks, lay two of them next to each other. Place these two blocks wrong sides together. This orientation is crucial because the seam allowance will be on the outside, which will then be folded to create your sashing.
- Sewing the Connecting Seam: With the blocks aligned wrong sides together, sew a seam directly along the edge of the batting. This seam will run all the way across the length of the blocks, securely joining them. Maintain a consistent seam allowance, ensuring your stitching is neat and straight.
- Pressing for Flatness: After sewing the seam, take your joined blocks to the ironing board. Press the pieces open carefully. Proper pressing is vital in quilting; it helps to set your stitches, flatten the seams, and ensures your quilt lays beautifully without distortion.
- Creating the Sashing: Now, you will create the distinctive sashing. Take the excess fabric that lies between the two joined blocks (this is your seam allowance from the previous step). Fold this excess fabric inwards, towards the center of the seam. Do the same with the corresponding excess fabric from the other block. You should now have two folded edges meeting in the center, forming a clean sashing strip. This technique ingeniously uses the seam allowance to create the sashing, eliminating the need for separate sashing strips to be sewn on later.
- Topstitching the Sashing: To secure your newly formed sashing and add a decorative touch, topstitch right along the edge of the folded fabric on both sides of the sashing. Use a thread color that matches your sashing fabric for a seamless look, or a contrasting thread for an added design element. This topstitching not only holds the sashing in place but also adds stability and a finished appearance to your quilt.
- Assembling Rows and the Quilt Top: Repeat the joining, pressing, folding, and topstitching process for all your blocks to create complete rows. Once you have a full row of joined and sashed blocks, create additional rows following the same method. Finally, use the same technique to join your finished rows together, meticulously aligning them, sewing along the batting edge, pressing, folding, and topstitching the connecting sashing. Continue until your entire quilt top is assembled, forming a cohesive and beautifully sashed quilt.
Step 3: Finishing Your Quilt with Binding
Once your quilt top is fully assembled and all your rows are joined, the final step to complete your project is adding the binding. This not only protects the raw edges of your quilt but also gives it a polished, professional look.
- Prepare Your Binding Strips: Cut your chosen binding fabric into strips. The common width for binding strips is 2.5 inches, but you can adjust this based on your preference. Piece these strips together end-to-end (often at a 45-degree angle for less bulk) to create one continuous strip long enough to go around the entire perimeter of your quilt. Press the long binding strip in half lengthwise, wrong sides together.
- Attach the Binding: Starting along one edge of your quilt, align the raw edges of your folded binding strip with the raw edge of your quilt. Begin sewing with a quarter-inch seam allowance, leaving a small tail of binding unsewn at the start. When you reach a corner, stop a quarter-inch from the edge, backstitch, remove your quilt, and miter the corner before continuing to the next side. Repeat for all four sides.
- Finish the Binding: Once you’ve sewn the binding to all four sides, join the beginning and end tails of your binding strip to create a continuous loop. Then, fold the binding over to the back of the quilt, neatly encasing the raw edges. You can hand-stitch the binding to the back of the quilt for an invisible finish or machine-stitch it for speed and durability. Take your time with this step, as it significantly impacts the final look of your quilt.
Tips for a Flawless Quilt-As-You-Go Project
To ensure your quilt-as-you-go project turns out beautifully and with minimal frustration, keep these valuable tips in mind:
- Practice Makes Perfect: If you’re new to quilting or this specific QAYG method, consider making a smaller project first, like a placemat or a hot pad. This allows you to get comfortable with the technique without the pressure of a large quilt.
- Accuracy is Key: In quilting, precision in cutting and sewing is paramount. Use a sharp rotary cutter, a good quality cutting mat, and accurate rulers. Take your time to measure and cut precisely, as even small inaccuracies can compound and affect the final alignment of your blocks.
- Press, Don’t Iron: When working with fabric, especially during pressing seams open or folding for sashing, use a pressing motion rather than an ironing motion (gliding the iron back and forth). Pressing involves lifting and placing the iron, which prevents stretching and distorting your fabric.
- Invest in Good Thread: A strong, good-quality cotton or polyester thread will make a significant difference in the durability and appearance of your stitches. Match your thread color to blend with your fabrics for a seamless look, or choose a contrasting color for added visual interest in your topstitching.
- Don’t Rush the Process: Quilting is a journey, not a race. Enjoy each step of the process. Taking your time will result in fewer mistakes and a higher quality finish.
- Experiment with Fabric Combinations: Don’t be afraid to play with different fabric patterns, textures, and color schemes. The quilt-as-you-go method is an excellent way to showcase unique fabric combinations and can be a fantastic stash-buster project.
- Refer to the Video: The original YouTube tutorial from Not Your Mama’s Quilt Store offers invaluable visual guidance. Watching the steps in action can clarify any uncertainties and provide additional insights.
Embrace the Easy Quilt-As-You-Go Method!
The quilt-as-you-go method, particularly this easy and efficient variation, truly revolutionizes the quilting experience. It breaks down what can often feel like a monumental task into enjoyable, manageable steps, allowing you to create stunning, professionally finished quilts without the overwhelm. The satisfaction of seeing your fabric pieces come together, block by block, then row by row, is incredibly rewarding. Whether you’re aiming for a cozy throw for your couch, a personalized gift, or a decorative wall hanging, this technique offers the flexibility and simplicity to bring your vision to life.
By following these detailed instructions and utilizing the excellent resources provided by Not Your Mama’s Quilt Store, you’re well on your way to mastering a quilting technique that is not only practical but also immensely fun. So, gather your beautiful fabrics, fire up your sewing machine, and embark on your next quilting adventure. You’ll be amazed at how quickly you can create a cherished heirloom using this wonderfully easy quilt-as-you-go method. Happy quilting!