
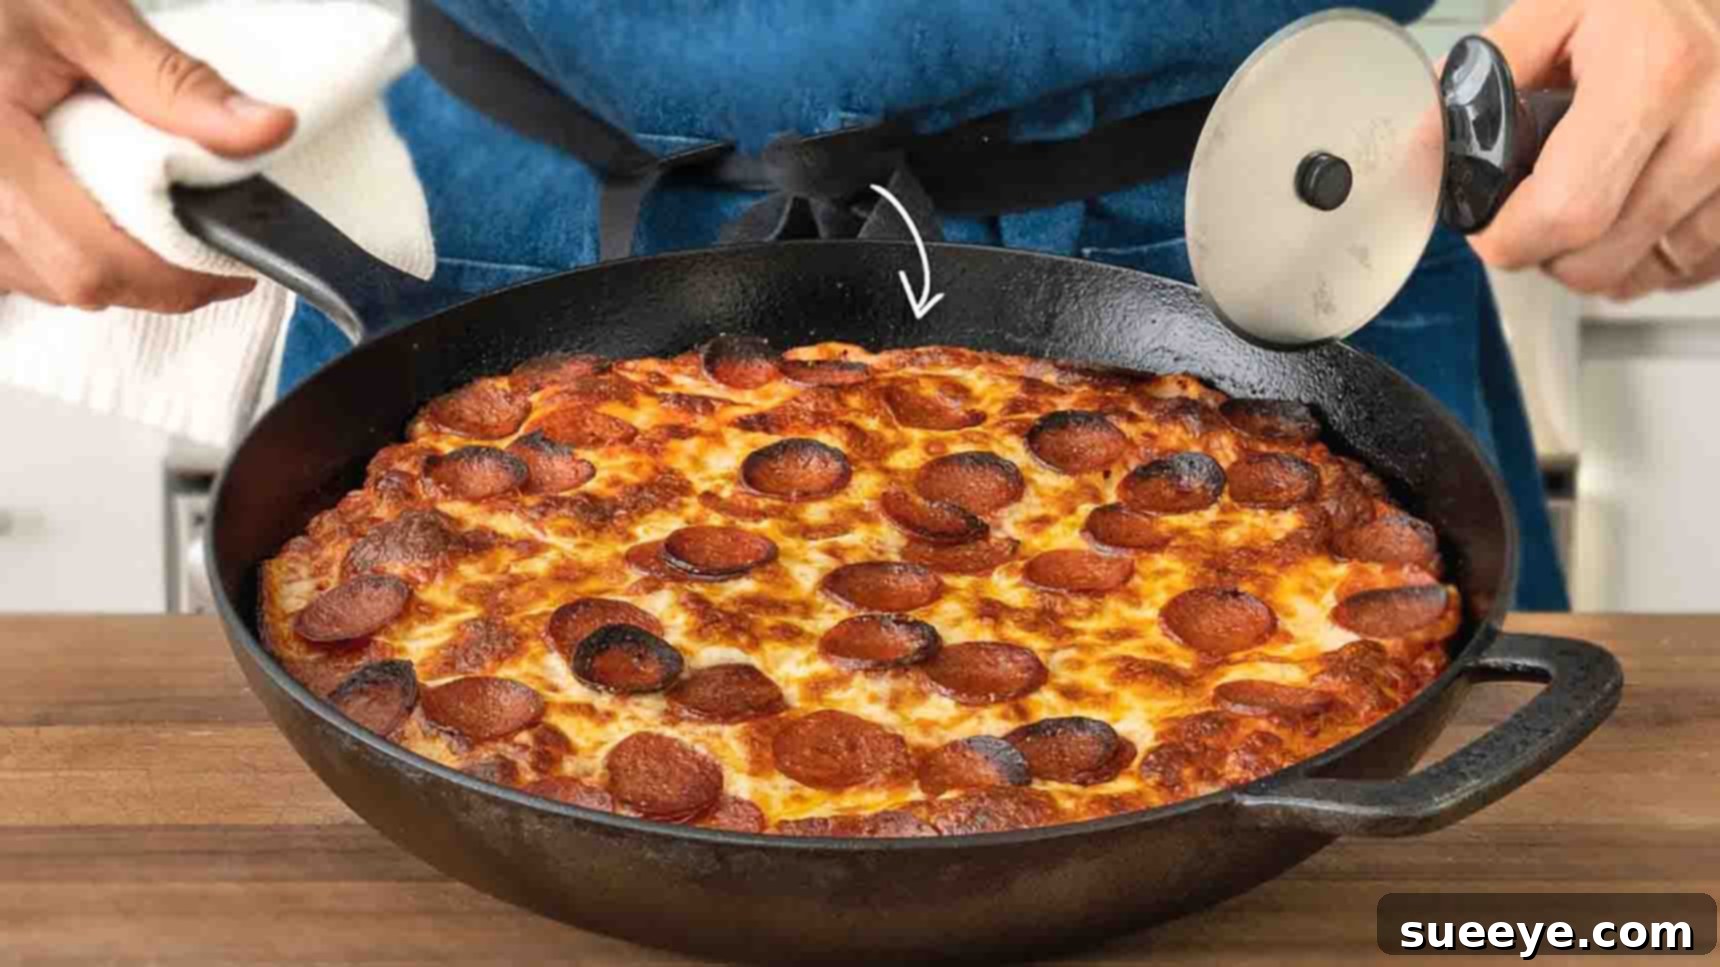
Master the 1-Hour Pan Pizza: Brian Lagerstrom’s Ultimate Recipe for Quick & Crispy Homemade Deliciousness
Are you a devoted pizza enthusiast craving that perfect golden, crispy crust and rich, flavorful toppings without the wait? Look no further! This incredible 1-hour pan pizza recipe, inspired by the culinary genius Brian Lagerstrom on YouTube, is a game-changer for anyone who loves homemade pizza. Forget about long delivery times or the hassle of complex, multi-day dough preparations. With this streamlined method, you can achieve a mouth-watering, restaurant-quality pan pizza right in your own kitchen in about an hour from start to finish. It’s quick, incredibly easy, and undeniably delicious, making it an ideal choice for busy weeknights, spontaneous gatherings, or simply satisfying a sudden pizza craving. Get ready to impress your family and friends with a pizza that boasts a perfectly crisp exterior, a delightfully chewy interior, and a burst of flavor in every bite. This comprehensive guide will walk you through every step, ensuring your pan pizza success!
Why This 1-Hour Pan Pizza Recipe Stands Out
What makes Brian Lagerstrom’s pan pizza recipe so exceptional and accessible? It boils down to a few key elements that simplify the process without compromising on taste or texture:
- Speed & Efficiency: Utilizing instant yeast and clever dough handling techniques, this recipe significantly cuts down on traditional proofing times, allowing you to enjoy fresh pizza in a fraction of the usual time.
- Crispy Perfection: The use of a cast-iron pan and a high-temperature oven is crucial. The cast iron pan’s superior heat retention creates an unbelievably crispy, golden-brown crust that’s often difficult to achieve with standard pizza stones or baking sheets.
- Simple Yet Flavorful Sauce: The homemade sauce, rich with crushed tomatoes and aromatic spices, can be whipped up quickly and adds a depth of flavor that elevates the entire pizza.
- Minimal Effort, Maximum Reward: Despite its speed, this recipe yields a pizza that tastes like it took hours of dedicated effort. It’s perfect for both novice bakers and experienced home cooks seeking a reliable and delicious pan pizza solution.
Ingredients for Your Perfect 1-Hour Pan Pizza
Gathering your ingredients is the first step towards crafting this incredible pan pizza. High-quality components are key to achieving the best flavor and texture. Here’s a detailed list of everything you’ll need for the dough, sauce, and toppings.
For the Pizza Dough:
- 8 oz Beer: Warmed to 90-95°F (32-35°C). The warmth activates the yeast, while the beer itself adds a subtle depth of flavor and helps create a tender crumb. Any light-colored beer works well.
- 3 & 1/3 tsp Instant Yeast: Essential for a quick rise, instant yeast can be added directly to your dry ingredients without prior proofing.
- 1 & 1/4 tbsp Granulated Sugar: Feeds the yeast, helping it become active and contributing to the crust’s browning.
- 1 & 1/4 tbsp Olive Oil: Adds richness, tenderness, and helps create a crispy crust.
- 1 & 1/2 tsp Salt: Crucial for flavor and also controls yeast activity, strengthening the gluten structure.
- 2 & 1/4 cup Bread Flour: Higher in protein than all-purpose flour, bread flour develops stronger gluten, resulting in a chewier, more structured crust that can withstand the pan pizza’s generous toppings.
For the Flavorful Pizza Sauce:
This quick and vibrant sauce balances sweetness, acidity, and aromatic herbs perfectly.
- 28 oz Can Crushed Tomatoes: The base of your sauce, providing a rich, authentic tomato flavor.
- 7 tbsp Tomato Paste: Concentrates the tomato flavor, adding body and depth to the sauce.
- 1 & 2/3 tbsp Granulated Sugar: Balances the acidity of the tomatoes and enhances overall flavor.
- 2 tsp Salt: Essential for seasoning the sauce and bringing out the other flavors.
- 1 tsp Onion Powder: Provides a sweet, savory onion essence without the texture of fresh onion.
- 1 tsp Garlic Powder: Delivers a robust garlic flavor evenly throughout the sauce.
- 1 tsp Dried Oregano: A classic pizza herb, offering an earthy and slightly peppery note.
- 1 tsp Dried Basil: Another quintessential pizza herb, providing a sweet, aromatic dimension.
- Pinch of Chili Flakes: Optional, but adds a subtle warmth and a touch of heat, enhancing the complexity of the sauce.
For the Classic Pizza Toppings:
- 1/2 lb Full-Fat Mozzarella (Shredded): Full-fat mozzarella melts beautifully, creating that desirable gooey, stretchy texture. Shredding it yourself from a block often yields better results than pre-shredded varieties, which can contain anti-caking agents.
- Pepperoni: A timeless pizza topping that crisps up wonderfully in the oven, releasing savory, spicy oils.
Step-by-Step Directions for Your 1-Hour Pan Pizza
Follow these detailed instructions to create your pan pizza masterpiece. Precision in these steps will ensure optimal results.
Step 1: Prepare the Dough
Begin by preparing the dough, which is surprisingly quick thanks to instant yeast and strategic resting periods.
- In a medium-sized mixing bowl, combine the warmed beer (ensure it’s not too hot, as it can kill the yeast), instant yeast, granulated sugar, olive oil, and salt. Stir these ingredients thoroughly until they are well combined and the sugar and salt have dissolved.
- Next, add the bread flour to the wet mixture. Stir everything vigorously with a sturdy spoon or spatula until a shaggy dough forms.
- Once the dough comes together, transfer it to a lightly floured surface and knead it for about 5-7 minutes. The goal is to develop the gluten, making the dough smooth and elastic. It should feel less sticky and more manageable.
- Return the kneaded dough to the bowl, cover it with a lid or plastic wrap, and allow it to ferment for an initial 15 minutes. This brief rest period allows the yeast to begin its work and the gluten to relax.
- After 15 minutes, uncover the dough. Perform a “stretch and fold” by gently pulling a portion of the dough from the edge, stretching it upwards, and folding it over the center. Rotate the bowl slightly and repeat this action three more times, effectively folding the dough over itself from four different directions. This process helps build structure and strength in the dough.
- Finish by gently shaping the dough into a tight ball, tucking the seams underneath.
- Re-cover the bowl and let the dough ferment for another 15 minutes. During this time, the dough will become more pliable and slightly increase in volume.
- While the dough rests, grab your cast-iron pan (a 10-inch pan is ideal). Spray the bottom and sides generously with cooking oil. The generous amount of oil is crucial for achieving that signature crispy crust and preventing sticking.
- Carefully place your dough into the oiled cast-iron pan with the seam-side facing upwards.
- Using your fingertips, gently push the dough outwards towards the edges of the pan. Don’t force it too much; if it resists, let it rest for a minute or two, then continue pushing. The goal is to fill the pan evenly.
- Cover the pan with a lid (or aluminum foil if you don’t have a lid) and let the dough rest for a final 10 minutes. This last rest allows the dough to relax fully into the pan and begin its final proof.
- At this point, it’s critical to preheat your oven to a scorching 550°F (287°C). A high oven temperature is essential for quickly cooking the crust and achieving that perfect crispiness.
Step 2: Assemble, Bake, and Serve
With the dough ready and the oven preheating, it’s time to add your delicious toppings and bake your pizza to perfection.
- While the dough is resting in the pan, prepare your sauce. In a blender, combine the crushed tomatoes, tomato paste, granulated sugar, salt, onion powder, garlic powder, dried oregano, dried basil, and a pinch of chili flakes (if using). Blend everything together for about 30 seconds, or until the herbs are finely broken down and the sauce is smooth and well combined. Taste and adjust seasonings if necessary.
- Once the dough in the pan has rested, spoon 4 to 5 generous spoonfuls of your freshly blended pizza sauce evenly over the dough. Avoid over-saucing, as this can make the crust soggy.
- Next, sprinkle the shredded full-fat mozzarella cheese generously over the sauce, spreading it right to the edges of the crust. The cheese acts as a barrier, protecting the crust from the sauce’s moisture.
- Finally, arrange the pepperoni slices artfully on top of the cheese.
- Let the assembled pizza rest in the pan for an additional 10 to 15 minutes. This final rest allows the flavors to meld and the dough to slightly warm up before hitting the high heat of the oven, contributing to a better bake.
- Carefully transfer the pan pizza into your preheated 550°F oven. Bake for 16 to 18 minutes. The exact baking time may vary depending on your oven, so keep an eye on it. The pizza is ready when the crust is deeply golden brown, the cheese is bubbly and melted, and the pepperoni is slightly crispy at the edges.
- Once baked, carefully remove the pan from the oven. Let the pizza cool in the pan for a few minutes before transferring it to a cutting board. This allows the cheese to set slightly and the crust to become even crispier.
- Slice, serve immediately, and enjoy your incredibly delicious, homemade 1-hour pan pizza!
Tips for Success with Your Pan Pizza
To ensure your 1-hour pan pizza turns out perfectly every time, keep these expert tips in mind:
- Accurate Temperature Control: The temperature of your beer for the dough is crucial. Too hot, and it kills the yeast; too cold, and it won’t activate properly. Aim for 90-95°F.
- Don’t Skimp on the Oil: The generous amount of olive oil in the cast iron pan is not just for preventing sticking; it’s key to developing that incredible crispy, fried-like crust.
- High Oven Temperature is Key: A screaming hot oven (550°F) cooks the pizza quickly and efficiently, preventing a soggy crust and promoting rapid browning and bubbling.
- Work with Relaxed Dough: If the dough springs back too much when you’re trying to push it to the edges of the pan, let it rest for a few extra minutes. Gluten needs time to relax.
- Don’t Overload Toppings: While tempting, too many toppings can make your pizza soggy and prevent the crust from cooking through properly. Stick to the suggested amounts for best results.
- Monitor Baking Closely: Ovens vary. Keep an eye on your pizza, especially during the last few minutes, to achieve your desired level of crispiness and browning.
Delicious Variations and Toppings
While pepperoni is a classic, this versatile pan pizza recipe can be adapted to suit any taste. Here are some ideas for variations:
- Cheese Blends: Experiment with a mix of mozzarella, provolone, a touch of parmesan, or even some smoked gouda for different flavor profiles.
- Vegetarian Delight: Top with sliced bell peppers, onions, mushrooms, black olives, or even some fresh spinach (add after baking if using fresh).
- Meat Lovers: Add cooked Italian sausage, crumbled bacon, or pre-cooked chicken. Remember to precook any raw meat toppings.
- Spicy Kick: Increase the chili flakes in the sauce or add sliced jalapeños for extra heat.
- Gourmet Twist: After baking, drizzle with a little balsamic glaze, sprinkle with fresh basil leaves, or add dollops of ricotta cheese.
Storage and Reheating Tips
If you happen to have leftovers (a rare occurrence with this delicious pizza!), here’s how to store and reheat them to maintain their quality:
- Storage: Allow the pizza to cool completely before storing. Wrap individual slices tightly in plastic wrap or aluminum foil, or place them in an airtight container. Store in the refrigerator for up to 3-4 days.
- Reheating for Crispiness:
- Oven/Toaster Oven: The best method for a crispy crust. Preheat your oven or toaster oven to 350°F (175°C). Place slices directly on the rack or on a baking sheet. Heat for 8-12 minutes, or until the cheese is bubbly and the crust is crisp.
- Skillet: For a wonderfully crispy bottom, place slices in a dry, non-stick skillet over medium heat. Cover the skillet to help melt the cheese. Heat for 3-5 minutes, then remove the lid and heat for another 1-2 minutes to crisp the bottom.
- Microwave (Not Recommended for Crispness): While quick, microwaving will result in a soft, often chewy crust. If using, heat for 30-60 seconds, or until warmed through.
Frequently Asked Questions about 1-Hour Pan Pizza
Can I make the pizza dough ahead of time?
While this recipe is designed for speed, you can certainly prepare the dough a day in advance. After the second 15-minute fermentation and shaping into a ball, lightly oil the dough ball, place it in an airtight container, and refrigerate it overnight. On pizza day, let the dough come to room temperature for about 30-60 minutes before proceeding with placing it in the oiled pan and stretching.
What if I don’t have a cast iron pan?
While a cast iron pan is highly recommended for its superior heat retention and crispy crust results, you can use a heavy-bottomed, oven-safe stainless steel skillet or even a regular round cake pan (9-10 inches) for a similar effect. Ensure it’s well-oiled. The crust might not be *as* crispy, but it will still be delicious.
Can I use all-purpose flour instead of bread flour?
Yes, you can, but the texture will be slightly different. Bread flour’s higher protein content gives the crust more chewiness and structure. All-purpose flour will result in a slightly softer crust. If using all-purpose flour, you might need a tiny bit less liquid, as it absorbs less.
Is the beer flavor noticeable in the dough?
The beer flavor is very subtle, especially when using a light beer. It mostly contributes to the yeast activity and adds a nuanced depth to the crust rather than a distinct beer taste. The alcohol bakes out during cooking.
How do I get a super crispy bottom crust?
The keys are a well-oiled cast iron pan, a very hot oven (550°F), and ensuring your oven is fully preheated for at least 30 minutes before baking. Also, allow the pizza to rest in the pan for 10-15 minutes after assembly before baking; this helps the pan heat up and transfers heat more efficiently to the dough.
Conclusion: Your New Favorite Homemade Pizza
Congratulations! You’ve just discovered the secret to making an absolutely phenomenal 1-hour pan pizza, thanks to Brian Lagerstrom’s brilliant method. This recipe proves that you don’t need extensive culinary experience or endless hours to create a pizza that rivals your favorite pizzeria. With its perfectly crispy, golden crust, rich and zesty sauce, and customizable toppings, this pan pizza is guaranteed to become a regular fixture in your home cooking repertoire. So, roll up your sleeves, gather your ingredients, and get ready to experience the joy and satisfaction of baking your very own, incredibly delicious, and remarkably quick pan pizza. Enjoy every single bite!