
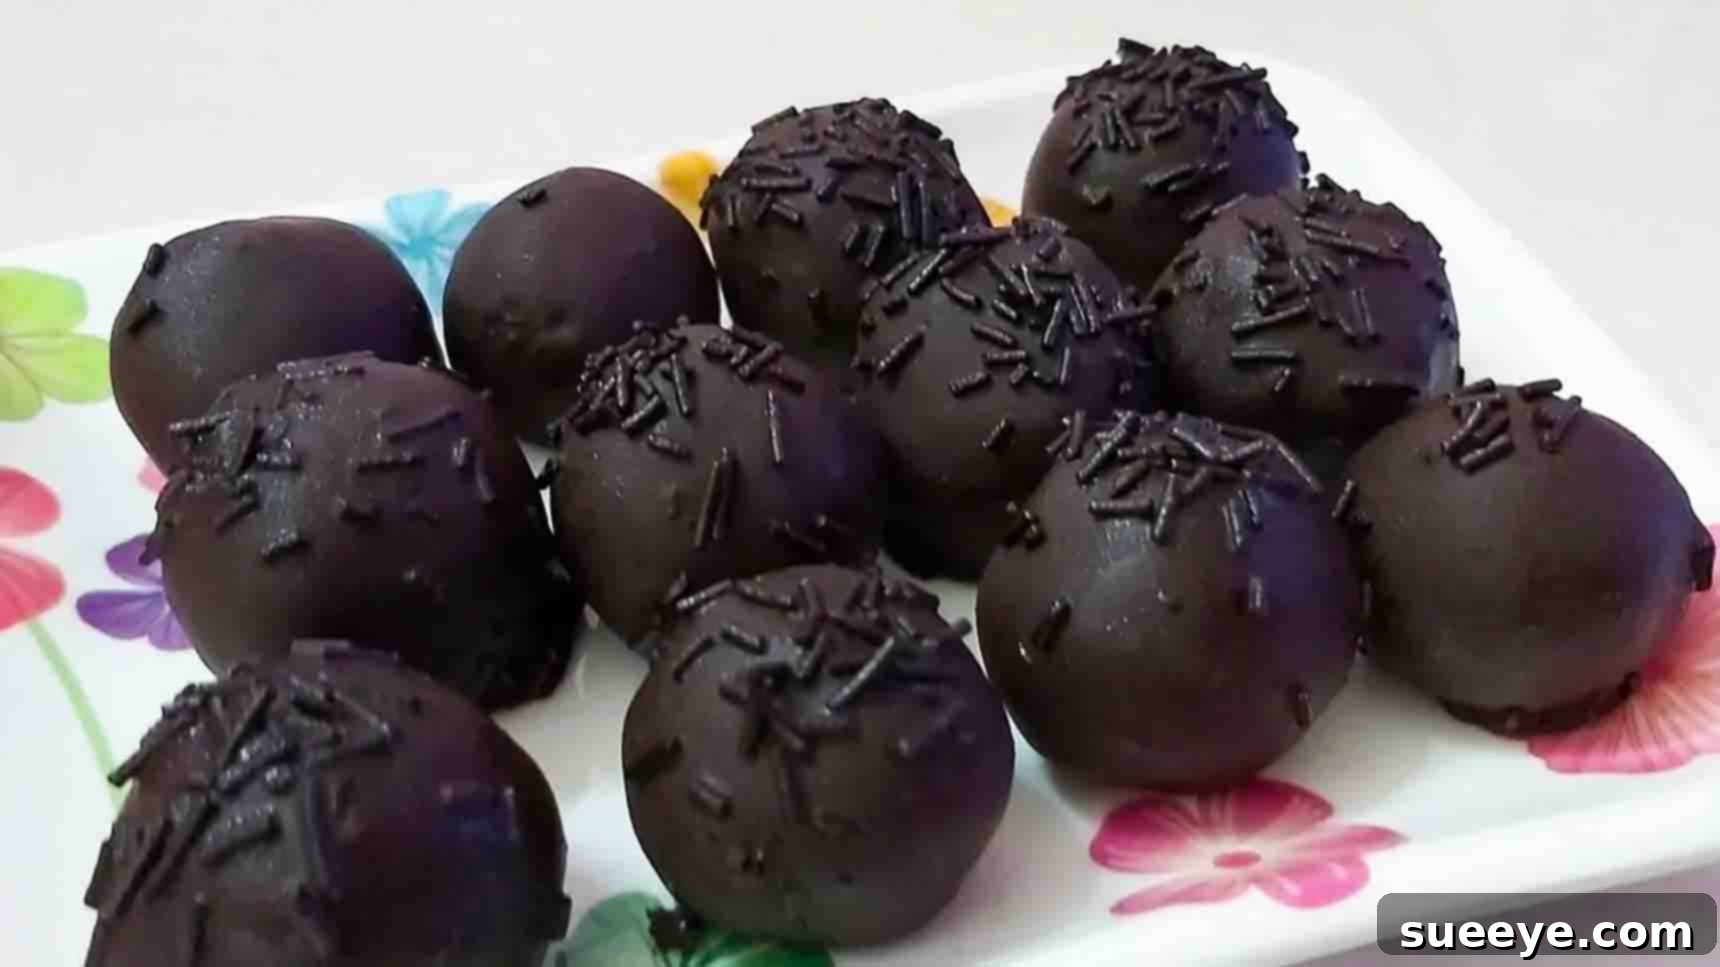
Easy No-Bake Oreo Balls: The Ultimate Simple Chocolate Treat
Are you searching for an incredibly simple, delightfully delicious, and universally loved dessert that requires absolutely no baking? Look no further! This fantastic recipe for Oreo balls from RR TASTY KITCHEN on YouTube is a true gem. It’s a guaranteed crowd-pleaser, perfect for unexpected guests, a quick treat for the kids, or an impressive addition to any party platter. Made with minimal ingredients and even less effort, these chocolate-covered Oreo truffles are not just easy to prepare; they’re irresistibly tasty, boasting a rich, fudgy center enveloped in a crisp chocolate shell. Get ready to embark on a sweet adventure that promises maximum flavor with minimum fuss!
The beauty of no-bake desserts lies in their simplicity and the joy they bring without the need to turn on an oven. This Oreo balls recipe perfectly embodies that spirit. Combining the iconic taste of Oreo biscuits with a touch of chocolatey magic, it transforms humble cookies into decadent, bite-sized delights. Whether you’re a seasoned baker or a complete novice in the kitchen, you’ll find this recipe incredibly straightforward and rewarding. So, gather your ingredients, and let’s dive into making these divine treats that are sure to put a smile on everyone’s face!
Why You’ll Love This No-Bake Oreo Balls Recipe
There are countless reasons why this particular Oreo balls recipe stands out and quickly becomes a favorite in any household. Its appeal extends beyond just its delicious taste:
- Effortlessly Simple: With just a few basic ingredients and straightforward steps, anyone can master this recipe. No complex techniques or extensive kitchen experience required.
- No Baking Required: Perfect for hot summer days, busy schedules, or when you simply don’t want to use your oven. This recipe keeps your kitchen cool and your prep time short.
- Kid-Friendly Fun: The process of crushing Oreos and rolling the dough into balls is an excellent activity for kids. It’s a fun way to get them involved in the kitchen and enjoy the fruits of their labor.
- Budget-Friendly: Oreo cookies and a few pantry staples are all you need, making this an economical dessert option that doesn’t skimp on flavor.
- Versatile for Any Occasion: From casual family desserts to elegant party treats, holiday gifts, or school bake sales, Oreo balls fit perfectly into any setting.
- Customizable: While this recipe is fantastic as is, it also provides a wonderful base for countless variations. You can experiment with different Oreo flavors, chocolate coatings, and toppings to suit any preference.
- Deliciously Decadent: Despite its simplicity, the combination of crushed Oreos, a rich binder, and a smooth chocolate coating creates a profoundly satisfying and indulgent experience.
Essential Ingredients for Your Oreo Balls
One of the most appealing aspects of this recipe is its incredibly short and sweet ingredient list. You likely have most of these items in your pantry already! For a batch of these delectable no-bake treats, you will need:
- 15 pcs. Oreo Biscuits: The star of our show! These iconic chocolate sandwich cookies provide the base flavor and texture. Any variety of Oreo works, so feel free to experiment with classic, double-stuffed, or even flavored versions like mint or golden. The key is to use the entire cookie, including the cream filling, as this contributes to the richness and binds the mixture.
- 3 tbsp Chocolate Syrup: This liquid gold adds moisture, sweetness, and an extra layer of chocolatey goodness to our Oreo base. It helps bind the crushed cookies together, creating a dough-like consistency that’s perfect for rolling.
- 3 – 4 tbsp Milk: Milk acts as an additional binder and helps achieve the perfect pliable dough. Start with 3 tablespoons and add the fourth if your mixture feels too dry. The goal is a dough that holds its shape without being overly sticky or crumbly.
- 100g Dark Compound Chocolate: This will form the delicious, crisp outer shell of your Oreo balls. Dark compound chocolate is excellent for melting and coating as it sets beautifully without tempering. You can substitute with semi-sweet, milk, or even white chocolate compound, depending on your preference.
- Chocolate Sprinkles: These are for decoration, adding a festive touch and a slight textural contrast. Feel free to get creative with other toppings like finely chopped nuts, shredded coconut, edible glitter, or even a drizzle of contrasting white chocolate.
These simple ingredients come together to create a truly magical dessert that tastes far more complex than it is to make!
Equipment You’ll Need
To make the process of creating your Oreo balls even smoother, having the right tools at hand is beneficial. Fortunately, you won’t need any specialized equipment for this recipe:
- Food Processor: This is highly recommended for efficiently crushing the Oreo biscuits into a fine crumb. If you don’t have one, a sturdy Ziploc bag and a rolling pin will work just as well, albeit with a bit more manual effort.
- Large Mixing Bowl: Essential for combining your crushed Oreos with the liquid ingredients.
- Rubber Spatula or Wooden Spoon: For mixing the ingredients thoroughly until a dough forms.
- Small Microwave-Safe Bowl or Double Boiler: For melting your compound chocolate. A double boiler offers more control, but a microwave works perfectly with careful, short intervals.
- Baking Sheet or Tray: To place your formed Oreo balls for chilling and coating.
- Parchment Paper or Wax Paper: To line your baking sheet, preventing the Oreo balls from sticking and making cleanup a breeze.
- Fork or Dipping Tools: For easily dipping the Oreo balls into the melted chocolate without getting your fingers messy.
Step-by-Step Directions to Heavenly Oreo Balls
Now that you have all your ingredients and equipment ready, let’s get started on creating these irresistible no-bake treats. Follow these detailed steps for perfect Oreo balls every time:
Step 1: Crushing, Mixing, and Forming the Balls
The foundation of our Oreo balls begins with transforming the classic cookies into a pliable dough. This step is crucial for achieving the right texture and ensuring your balls hold their shape.
- Crush the Oreo Biscuits: Take all 15 Oreo biscuits and add them to your food processor. Pulse the processor until the biscuits are finely crushed, resembling fine crumbs. It’s important to ensure there are no large chunks left, as this will result in a smoother, more uniform dough. If you don’t have a food processor, place the Oreos in a sturdy Ziploc bag, seal it, and crush them with a rolling pin or the bottom of a heavy glass until fine.
- Prepare the Dough Mixture: Transfer the finely crushed Oreo crumbs into a large mixing bowl. Now, add 3 tablespoons of chocolate syrup and 3 tablespoons of milk. Begin mixing these ingredients together with a rubber spatula or your hands.
- Achieve the Right Consistency: Continue mixing thoroughly. The goal is to form a smooth, dough-like consistency that is firm enough to roll into balls but not overly sticky. If the mixture seems too dry and crumbly, add the remaining 1 tablespoon of milk, a tiny bit at a time, until the desired consistency is reached. It should feel like a thick, moldable cookie dough.
- Form the Oreo Balls: Once your dough is perfectly mixed, take small portions of the mixture. The size is up to you, but typically, about a tablespoon of dough per ball works well for bite-sized treats. Roll each portion between your palms to create smooth, compact ball shapes. Place the formed balls onto a baking sheet lined with parchment paper. Repeat this process until you have used up all the dough. You should yield approximately 15-20 balls, depending on their size.
Step 2: Chilling, Coating, and Finishing Touches
The next stage involves chilling the balls to firm them up, coating them in luscious chocolate, and adding those final decorative sprinkles.
- Initial Chill: Once all your Oreo balls are formed and placed on the lined baking sheet, transfer them to the refrigerator. Chill them for at least 15 minutes. This step is crucial as it helps the balls firm up, making them easier to handle and ensuring they maintain their shape when dipped into the warm melted chocolate. A firm ball is less likely to crumble or dissolve during coating.
- Prepare the Chocolate Coating: While the Oreo balls are chilling, prepare your dark compound chocolate. Roughly chop the 100g dark compound chocolate into smaller pieces. This helps it melt more evenly and quickly.
- Melt the Chocolate: Melt the chocolate using a double boiler method. Place the chopped chocolate in a heatproof bowl set over a saucepan of simmering water (ensure the bowl doesn’t touch the water). Stir occasionally until the chocolate is completely smooth and melted. Alternatively, you can melt the chocolate in the microwave in 30-second intervals, stirring well after each interval, until smooth. Be careful not to overheat it, as this can cause the chocolate to seize or burn.
- Coat the Oreo Balls: Once the chocolate is melted and smooth, remove the chilled Oreo balls from the refrigerator. One by one, drop each Oreo ball into the melted chocolate. Use a fork or a dipping tool to fully submerge the ball, then lift it out, allowing any excess chocolate to drip back into the bowl. Gently tap the fork against the side of the bowl to remove as much excess chocolate as possible for a thinner, even coat.
- Add Sprinkles and Final Chill: Carefully transfer the chocolate-coated Oreo ball back to the parchment-lined baking sheet. Immediately, while the chocolate is still wet, sprinkle generously with chocolate sprinkles. Repeat this coating and decorating process for all the remaining Oreo balls.
- Final Chill Before Serving: Once all the Oreo balls are coated and sprinkled, return the baking sheet to the refrigerator. Chill them for at least another 20 minutes, or until the chocolate coating has completely set and hardened. This ensures a firm, crisp exterior and keeps the truffles fresh.
Tips for Perfect Oreo Balls Every Time
While this recipe is incredibly forgiving, a few expert tips can elevate your Oreo balls from great to absolutely phenomenal:
- Don’t Over-Process Oreos: While you want fine crumbs, avoid turning them into a paste. A powdery consistency is ideal, allowing for better absorption of the liquid binders.
- Adjust Liquid Gradually: The amount of chocolate syrup and milk can vary slightly depending on the humidity and type of Oreo. Always add the liquid ingredients incrementally until your dough reaches the perfect consistency—moldable but not sticky or wet.
- Chill Thoroughly: Do not skip the chilling steps! The initial chill ensures the balls are firm enough to dip without falling apart. The final chill sets the chocolate coating perfectly, giving you that satisfying snap.
- Even Coating is Key: When dipping, ensure the chocolate is completely smooth. Use a fork to gently tap off excess chocolate. A thin, even layer looks best and prevents a thick, clumpy coating.
- Melt Chocolate Carefully: Whether using a double boiler or microwave, melt the chocolate slowly and gently. Overheating can cause compound chocolate to become thick and difficult to work with. If it thickens too much, add a tiny bit of vegetable oil or coconut oil (1/2 teaspoon at a time) to thin it slightly.
- Be Quick with Sprinkles: Once a ball is coated, add sprinkles immediately before the chocolate sets.
Creative Variations and Customizations
This basic recipe is a fantastic starting point, but the fun doesn’t stop there! Here are some ideas to customize your Oreo balls and make them uniquely yours:
- Different Oreo Flavors: Experiment with Mint Oreos for a refreshing twist, Golden Oreos for a vanilla base, or Peanut Butter Oreos for nutty goodness.
- Diverse Chocolate Coatings: Instead of dark chocolate, try white chocolate compound for a lighter look, milk chocolate for a sweeter profile, or even colored candy melts for themed events.
- Exciting Toppings:
- Chopped Nuts: Almonds, walnuts, or pecans add a lovely crunch.
- Shredded Coconut: Toasted or untoasted, for a tropical flavor.
- Crushed Candy: Peppermint candy canes for holidays, or crushed toffee bits for extra sweetness.
- Drizzles: After the main chocolate coating has set, drizzle contrasting melted chocolate (e.g., white chocolate over dark, or vice versa) for an elegant finish.
- Edible Glitter or Dust: For a truly glamorous treat.
- Adding Extracts: A few drops of peppermint, almond, or vanilla extract to the Oreo dough mixture can subtly enhance the flavor profile.
- Cream Cheese Base (Alternative Binder): While this recipe uses chocolate syrup and milk, many popular Oreo ball recipes use softened cream cheese as a binder. If you prefer that richer, tangier flavor, you can substitute the milk and chocolate syrup with 4-6 ounces of softened cream cheese, mixing it with the crushed Oreos until well combined, then proceed with rolling and coating. This variation results in an even creamier truffle.
Storage and Serving Suggestions
Proper storage ensures your delicious Oreo balls remain fresh and delightful for as long as possible.
- Storage: Store the finished Oreo balls in an airtight container in the refrigerator. They will stay fresh and delicious for up to 1-2 weeks.
- Freezing: For longer storage, Oreo balls freeze beautifully. Place them in a single layer on a parchment-lined tray until solid, then transfer them to a freezer-safe airtight container or bag. They can be frozen for up to 1-2 months. Thaw in the refrigerator for a few hours or at room temperature for about 30 minutes before serving.
- Serving:
- Serve chilled straight from the refrigerator for the best texture and taste.
- Arrange them elegantly on a dessert platter for parties and gatherings.
- Package them in small decorative boxes or bags as homemade gifts for friends, family, or teachers.
- They make a fantastic addition to holiday cookie exchanges or school lunchboxes for a special treat.
- Enjoy them with a cup of coffee, tea, or a glass of cold milk.
Frequently Asked Questions About Oreo Balls
Here are answers to some common questions you might have about making and enjoying your no-bake Oreo balls:
- Q: Can I use different types of cookies instead of Oreos?
- A: Absolutely! While Oreo balls are a classic, you can experiment with other sandwich cookies like Nutter Butters (peanut butter balls), chocolate chip cookies, or even graham crackers for a different flavor profile. Adjust the amount of liquid binder as needed.
- Q: Why are my Oreo balls sticky or too soft?
- A: This usually means there’s too much liquid in your mixture. Try adding a few more crushed Oreo crumbs (or another neutral crumb like graham cracker crumbs) to absorb the excess moisture. Ensure your hands are clean and slightly cool when rolling, and don’t skip the chilling steps!
- Q: My chocolate coating is too thick/thin. What can I do?
- A: If your chocolate is too thick, it might be slightly overheated or needs a thinner. You can add 1/2 to 1 teaspoon of neutral oil (like vegetable or coconut oil) to thin it out a bit. If it’s too thin, it might be too hot or you might need to add a bit more solid chocolate to slightly thicken it, then re-melt carefully.
- Q: How can I make these dairy-free?
- A: Many Oreo varieties are already accidentally vegan, so check the label. Use a dairy-free chocolate syrup, dairy-free milk (almond, soy, oat), and dairy-free compound chocolate for coating. Enjoy Life brand offers good dairy-free chocolate options.
- Q: Can I make these ahead of time?
- A: Yes, Oreo balls are an excellent make-ahead dessert! They actually taste even better after a day or two in the refrigerator, as the flavors meld. Just store them in an airtight container in the fridge.
Conclusion: Your New Go-To No-Bake Treat!
And there you have it – a comprehensive guide to crafting these utterly delightful, incredibly easy, and undeniably addictive No-Bake Oreo Balls! From the initial crunch of crushing those iconic biscuits to the final, satisfying snap of the chocolate coating, every step of this recipe is a joy. It’s proof that sometimes, the simplest ingredients can create the most profound culinary pleasures.
Whether you’re looking for a quick dessert fix, a fun project with the kids, or an elegant treat to share with loved ones, these Oreo balls deliver on all fronts. They are a testament to the magic of minimal effort yielding maximum reward. So, go ahead, give this recipe a try. We guarantee you’ll be making them again and again. Don’t forget to experiment with the variations to find your signature Oreo ball creation. Happy snacking!