
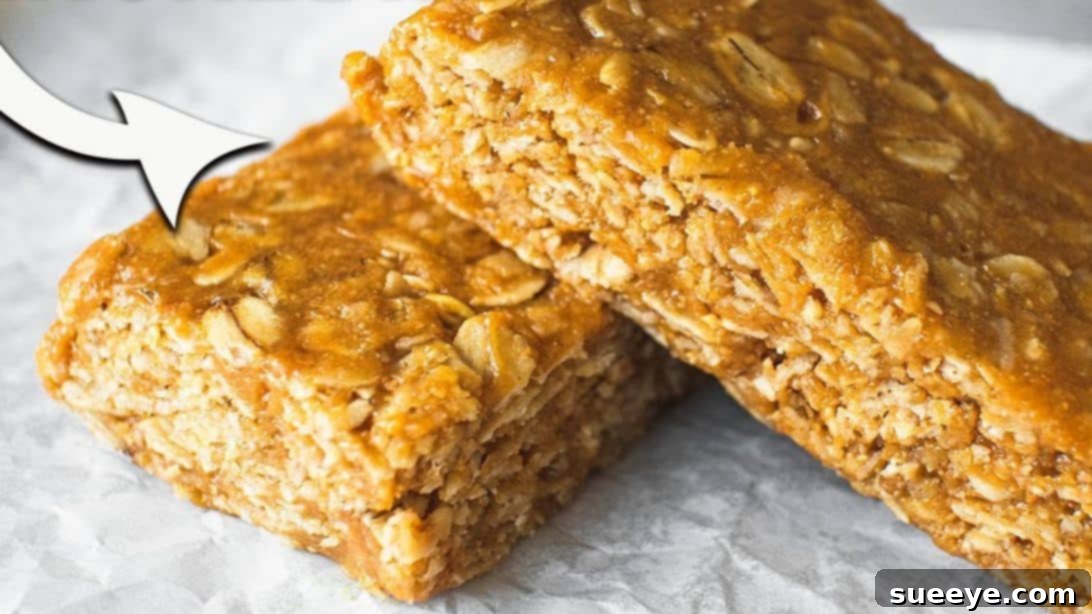
The Ultimate No-Bake 3-Ingredient Peanut Butter Oatmeal Bars Recipe: Your Go-To Healthy Snack!
In our fast-paced lives, finding a healthy, satisfying snack that’s quick to prepare can feel like a quest. Look no further! This incredible no-bake 3-ingredient oatmeal bars recipe, originally shared by Food Metrica, is a true game-changer. Whether you’re battling mid-afternoon cravings, need a boost after a workout, or seeking a convenient breakfast option, these homemade energy bars deliver exactly what you need.
Forget those overly processed, sugar-laden bars from the grocery store. With just a handful of natural ingredients and minimal effort, you can create a batch of wholesome, incredibly tasty treats that will keep you energized and satisfied. The beauty of this recipe lies in its simplicity and versatility. Not only are they far superior to their store-bought counterparts in terms of health and flavor, but they’re also endlessly customizable. Dive in to learn how to whip up these delicious, no-fuss bars that are bound to become a staple in your healthy eating routine.
Why Choose No-Bake Oatmeal Bars?
No-bake recipes are a busy person’s best friend, and these oatmeal bars exemplify convenience. The advantages are plentiful:
- Time-Saving: No preheating the oven, no waiting for them to bake. These bars come together in minutes.
- Effortless Preparation: With just three core ingredients, the process is straightforward and beginner-friendly, perfect for even the most novice home cooks.
- Energy Efficiency: Keep your kitchen cool, especially during warmer months, as no oven is required.
- Kid-Friendly: This recipe is simple enough for children to help with (under supervision), making it a fun family activity.
- Wholesome Goodness: You control every ingredient, ensuring your snacks are free from unwanted additives, excessive sugars, and artificial flavors often found in commercial bars.
The Power of Three Simple Ingredients
The magic of these bars comes from the synergy of just three core ingredients, each playing a crucial role in taste, texture, and nutrition. For the healthiest outcome, always opt for natural, high-quality options.
- 100% Natural Peanut Butter: The cornerstone of this recipe, providing richness, protein, and healthy fats. Opting for “100% natural” means avoiding added sugars, hydrogenated oils, and unnecessary preservatives. Read the label carefully – the only ingredients should be peanuts and possibly salt. You can choose creamy for a smoother bar or crunchy for added texture.
- Honey: This natural sweetener does double duty, adding delicious flavor and acting as a vital binding agent to hold the bars together. Its viscous texture, especially when warmed, perfectly combines with the peanut butter to coat the oats. For a vegan alternative, pure maple syrup can be used, though it might slightly alter the flavor and require minor adjustments to consistency.
- Old-Fashioned Oats: These rolled oats are the heart of the bars, offering a substantial chewiness and a fantastic source of dietary fiber, promoting digestive health and sustained energy release. Old-fashioned oats are preferred over instant oats (which can become mushy) or steel-cut oats (which are too hard for a no-bake recipe), as they retain their texture beautifully once set.
- Salt (Optional): A small pinch of salt (especially if your peanut butter is unsalted) is a flavor enhancer, balancing the sweetness of the honey and bringing out the nutty notes of the peanut butter.
Customization and Boosters: Unleash Your Creativity!
While delicious on their own, these bars are a fantastic canvas for additional flavors and nutritional boosts. Feel free to experiment with your favorite add-ins to create endless variations:
- Seeds for Omega-3s: Add a tablespoon or two of flaxseeds, chia seeds, or hemp hearts for an extra dose of omega-3 fatty acids, fiber, and protein.
- Nuts for Crunch & Protein: Enhance the texture and protein content with chopped peanuts, cashews, almonds, or walnuts.
- Dried Fruits for Sweetness & Vitamins: Mix in raisins, dried cranberries, chopped dried apricots, or even small pieces of dried banana for natural sweetness and additional vitamins.
- Chocolate Bliss: For a treat, fold in some mini chocolate chips or cocoa nibs. Dark chocolate works wonderfully for a less sweet option.
- Spices for Warmth: A dash of cinnamon, nutmeg, or a pumpkin pie spice blend can add a comforting warmth, especially during cooler months.
- Coconut Flavor: Shredded unsweetened coconut can add a tropical twist and pleasant texture.
- Protein Powder: For an extra protein punch, a scoop of unflavored or vanilla protein powder can be mixed in, though you might need to adjust the liquid slightly to maintain consistency.
Remember to keep the total volume of add-ins reasonable so the bars still bind together effectively. A good starting point is about 1/2 to 1 cup of total additions.
Ingredients:
- 1 cup of peanut butter (100% natural, smooth or crunchy)
- 3/4 cup of honey (or pure maple syrup for a vegan option)
- 1/2 teaspoon of salt (optional – add if your peanut butter is unsalted or if you prefer a sweet and salty balance)
- 3 cups of old-fashioned oats (rolled oats)
Step-by-Step Instructions for Perfect Oatmeal Bars:
Step 1: Gently Melt and Combine the Binders
In a microwavable medium-sized bowl, combine 1 cup of your preferred 100% natural peanut butter with 3/4 cup of honey. Heat this mixture in the microwave for approximately 1 minute. It’s crucial to stir the mixture thoroughly every 10-15 seconds with a silicone spatula to ensure even heating and prevent burning, especially the honey. Continue heating and stirring until the mixture is beautifully smooth, creamy, and well-incorporated. This warming process helps the honey and peanut butter combine effortlessly and become more fluid, making it easier to coat the oats.
Step 2: Enhance the Flavor with Salt
If you’re using unsalted peanut butter or simply enjoy a delightful sweet and salty contrast, add 1/2 teaspoon of salt to the warm peanut butter and honey mixture. Stir well until the salt is completely dissolved and evenly distributed. This small addition can significantly elevate the overall flavor profile of your bars.
Step 3: Combine with Oats
Pour the 3 cups of old-fashioned oats into a large mixing bowl. Then, pour the warm peanut butter and honey mixture directly over the oats. Using your silicone spatula, gently but thoroughly fold the oats into the sticky mixture. Continue mixing until every single oat flake is evenly coated. This step is key to ensuring your bars hold together perfectly and have a consistent texture.
Step 4: Press into the Pan
Line a 7″ by 11″ baking pan (or a similar sized dish, such as an 8×8 or 9×9 inch pan for thicker bars) with parchment paper, leaving an overhang on the sides for easy removal later. Transfer the entire oat mixture into the prepared pan. Using the back of your silicone spatula or a piece of parchment paper to cover the mixture, press the oats down very firmly and evenly across the pan. The more compressed the mixture, the better your bars will hold their shape. Use the flat of your hands to apply good, consistent pressure.
Step 5: Chill to Perfection
Place the pan containing the oatmeal and peanut butter mixture into the refrigerator. Allow it to cool and set completely for a minimum of 2 hours. For the best results and firmest bars, chilling it overnight is highly recommended. This crucial step allows the honey and peanut butter to solidify, binding the oats together firmly and preventing the bars from crumbling when sliced.
Step 6: Slice, Serve, and Savor!
Once fully chilled and set, remove the pan from the fridge. Use the parchment paper overhang to lift the entire block of oatmeal mixture out of the pan and place it onto a cutting board. Using a sharp knife, slice the mixture into your desired bar size. Enjoy these delicious, wholesome, and energizing no-bake oatmeal bars whenever hunger strikes!
Tips for Perfecting Your No-Bake Bars
- Ingredient Quality Matters: Using natural peanut butter without added sugars and good quality honey makes a noticeable difference in both taste and health benefits.
- Don’t Rush the Chill: Adequate chilling time is paramount. If you try to slice them too early, they might be too soft and fall apart. Patience truly pays off here.
- Even Pressure: Pressing the mixture firmly and evenly into the pan ensures uniform bars that hold together well. Uneven pressure can lead to crumbly spots.
- Sharp Knife for Clean Cuts: For neat, clean slices, use a sharp knife. You can also lightly warm the knife under hot water and wipe it dry between cuts to prevent sticking.
Storage for Freshness and Longevity
These no-bake oatmeal bars are incredibly convenient for meal prep and make excellent grab-and-go snacks. To maintain their freshness and texture:
- Refrigerator: Store the bars in an airtight container in the refrigerator for up to 1-2 weeks. Layer them with parchment paper if stacking to prevent sticking.
- Freezer: For longer storage, individually wrap the bars in plastic wrap or parchment paper, then place them in a freezer-safe bag or container. They can be frozen for up to 2-3 months. Thaw them at room temperature for a few minutes or enjoy them straight from the freezer for a colder, firmer treat.
Conclusion: Your New Favorite Healthy Snack Awaits!
These 3-ingredient no-bake peanut butter oatmeal bars are more than just a recipe; they’re a lifestyle hack. They offer a delightful combination of taste, convenience, and wholesome nutrition, making them an ideal choice for anyone seeking a healthier alternative to store-bought snacks. Perfect for busy mornings, post-workout fuel, or simply satisfying that sweet tooth without guilt, these bars are incredibly versatile and easy to make. So, go ahead, gather your ingredients, follow these simple steps, and prepare to fall in love with your new favorite go-to healthy treat. Enjoy the deliciousness, the energy, and the satisfaction of knowing exactly what goes into your body!