
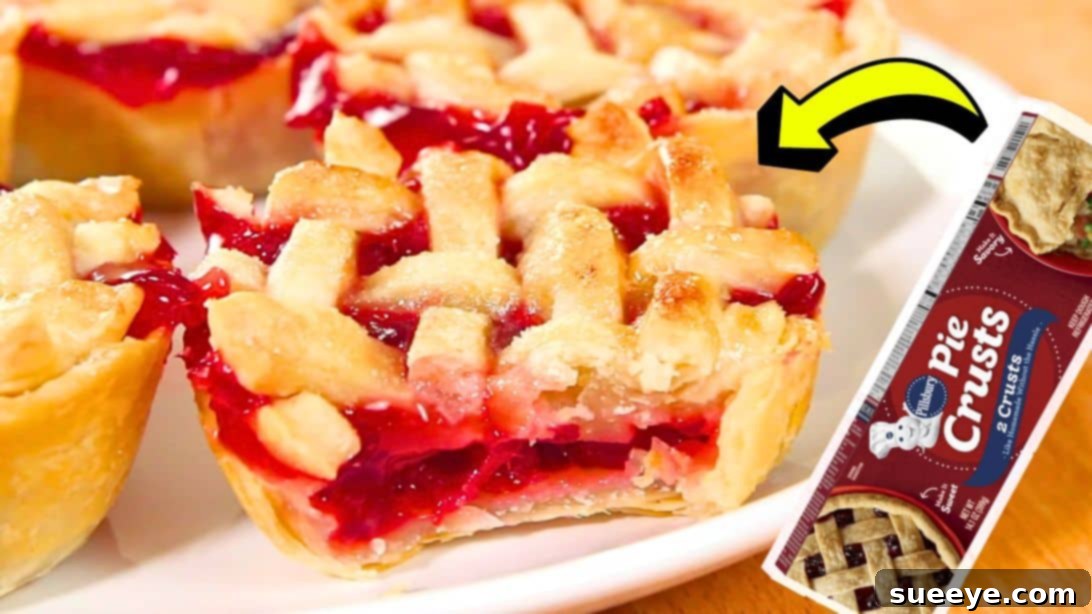
There’s something truly special about a homemade pie, especially when the weather turns crisp or you’re simply craving a comforting treat. While a full-sized pie is always a classic, mini versions offer an irresistible charm and convenience that’s hard to beat. These delectable mini cherry pies, inspired by the fantastic recipe from Chop Secrets on YouTube, are a prime example. They’re not just delicious; they’re perfectly portioned, incredibly cute, and surprisingly easy to make. Once you try these bite-sized wonders, you’ll find them not only incredibly satisfying but also wonderfully addicting.
Imagine a warm, flaky crust encasing a sweet, gooey cherry filling, all in a delightful package that fits right in your hand. Mini cherry pies are the ultimate crowd-pleaser, ideal for any gathering or as a delightful personal indulgence. Whether you’re a seasoned baker or just starting out, this recipe is designed to guide you through creating perfect individual pies every time. So, let’s dive into the world of miniature baking and discover how to craft these exceptional desserts that are sure to impress.
Why Mini Cherry Pies Are a Must-Try Dessert
Mini cherry pies offer a myriad of advantages that make them a superior choice for many occasions. Firstly, their individual serving size eliminates the need for slicing and struggling with messy pieces, making them incredibly convenient for guests to grab and enjoy. This also ensures perfect portion control, ideal for those mindful of their dessert intake.
Beyond convenience, mini pies boast an undeniable visual appeal. Arranged on a platter, their petite form factor is inherently charming and inviting, instantly elevating any dessert spread. They’re also wonderfully versatile; while this recipe focuses on classic cherry, the concept can be easily adapted to a variety of fruit fillings, allowing for endless customization to suit different tastes and seasons. Plus, the smaller baking time often means you can enjoy these treats sooner! Their portability makes them excellent for picnics, potlucks, or school lunch treats, bringing a touch of homemade warmth wherever they go. It’s this combination of ease, elegance, and irresistible flavor that makes mini cherry pies a truly beloved dessert.
Perfect for Any Occasion: Serving Suggestions
These mini cherry pies aren’t just for cold weather; they are a versatile treat that fits perfectly into a variety of events throughout the year. I often enjoy them as a simple afternoon snack with a cup of tea, but they truly shine when shared. They are a fantastic addition to holiday dessert tables, bringing a festive touch to occasions like Thanksgiving, Christmas, or even the Fourth of July with their vibrant red filling. For parties and special occasions, they offer an elegant alternative to a large cake, providing individual portions that are both hygienic and aesthetically pleasing. Imagine them at a bridal shower, a baby shower, or a birthday celebration, delighting guests with their charming presentation.
Furthermore, mini cherry pies are excellent for potlucks or bake sales, as they transport easily and are universally loved. You can also serve them with a scoop of vanilla ice cream or a dollop of fresh whipped cream for an extra indulgent experience. Their small size makes them an ideal treat for children’s parties or school events, where easy-to-handle desserts are always appreciated. No matter the event, these mini cherry pies are guaranteed to bring smiles and satisfy sweet cravings, making them a staple in any baker’s repertoire.
Ingredients for Mini Cherry Pies: Simple and Accessible
- Pie Crust: The foundation of your mini pies! You can opt for store-bought refrigerated pie crusts for ultimate convenience, which are readily available in most grocery stores and save a lot of time. Alternatively, if you enjoy baking from scratch, a homemade pie crust will offer an unparalleled flaky texture and rich, buttery flavor. Whichever you choose, ensure it’s chilled before use to make it easier to handle and achieve a tender crust.
- Cherry Pie Filling: This is where the vibrant flavor comes from. Canned cherry pie filling is a fantastic shortcut, providing a perfectly sweetened and thickened fruit mixture. Look for high-quality brands for the best taste. If you’re feeling ambitious, you can also make your own cherry pie filling from fresh or frozen cherries, adjusting the sweetness to your preference and perhaps adding a touch of almond extract for an extra layer of flavor.
- Egg Wash: A simple mixture of beaten egg (or egg yolk) and a splash of water or milk. This is brushed over the crust before baking to give your pies a beautiful golden-brown color and a lovely sheen. It also helps achieve that desirable crisp texture on top.
- Sugar: A sprinkle of granulated or coarse sugar on top of the pies before baking adds a sparkling finish and a delightful crunch, enhancing the overall appeal and taste.
How to Make Mini Cherry Pies: Step-by-Step Guide
Creating these delightful mini cherry pies is a straightforward process, made even easier with the right preparation and attention to detail. Follow these steps to achieve perfectly baked, irresistible treats:
Step 1: Preparing the Crust and Filling the Mini Pies
Begin by preparing your chosen pie crust. If using store-bought, simply unroll it onto a clean, floured surface. For homemade crust, roll it out evenly to about 1/8-inch thickness. Next, you’ll need to cut out round pieces of dough that are large enough to line the muffin cups. A large round cookie cutter (around 3-4 inches in diameter) works perfectly, or you can use the rim of a drinking glass for a similar effect. Gently re-roll any scraps to cut out additional rounds, ensuring you maximize your dough. Once your rounds are cut, lightly grease a standard muffin pan with nonstick cooking spray to prevent sticking. Carefully place one pie crust round into each cup of the muffin pan, gently pressing it down to conform to the shape of the cup and ensuring there are no air bubbles trapped underneath. The edges of the crust should extend slightly above the rim of the muffin cup, as this will be used to create your lattice top or other decorative elements.
Now, it’s time for the delicious filling! Spoon a generous amount of cherry pie filling into each crust-lined muffin cup. Be careful not to overfill, as the filling will bubble up during baking. Aim to fill each crust about two-thirds full. For the top, you can create a classic lattice design, as demonstrated in the video tutorial by Chop Secrets. To do this, cut thin strips from additional pie crust dough. Weave these strips over and under each other across the top of the filling, then gently press the ends of the strips to the edges of the bottom crust to seal. If a lattice seems too intricate, you can also simply place a full round of dough on top and cut a few slits for steam to escape, or use small decorative cutouts like stars or hearts for a festive touch.
Step 2: Egg Wash, Baking, and Serving
Once your mini pies are assembled, it’s time to prepare them for baking. In a small bowl, whisk together one egg with a tablespoon of water or milk to create your egg wash. Using a pastry brush, generously brush this egg wash over the top crust of each mini pie. This step is crucial for achieving that beautiful golden-brown color and a lovely sheen that makes your pies look professionally baked. After applying the egg wash, sprinkle a little granulated or coarse sugar over the tops. This adds a delightful sparkle and a slight crunch, enhancing both the appearance and texture.
Preheat your oven to 180°C (350°F). Once heated, carefully transfer the muffin pan containing your mini pies into the oven. Allow them to bake for approximately 15 to 20 minutes. Keep a close eye on them during the last few minutes of baking. You’ll know they’re ready when the top crusts are beautifully golden brown and the cherry filling is bubbly and hot. Baking times can vary slightly depending on your oven, so adjust as needed. Once baked to perfection, carefully remove the muffin pan from the oven. Let the mini pies cool in the pan for about 5-10 minutes before carefully transferring them to a wire rack to cool completely. Allowing them to cool on a rack prevents the bottoms from becoming soggy and helps them firm up. Serve warm or at room temperature, and prepare for rave reviews! These delightful mini cherry pies are now ready to be enjoyed.
Tips for Perfecting Your Mini Cherry Pies
Achieving bakery-quality mini cherry pies is easier than you think with a few simple tips:
- Keep Your Dough Cold: Whether homemade or store-bought, cold pie dough is easier to work with and results in a flakier crust. If your dough becomes too warm and sticky while handling, pop it back into the refrigerator for 10-15 minutes.
- Don’t Overfill: While tempting, overfilling the pies can lead to messy overflows in the oven and soggy bottoms. Fill each crust about two-thirds full to allow room for the filling to bubble without spilling.
- Prevent Sticking: Always grease your muffin pan thoroughly with nonstick cooking spray, even if it’s a nonstick pan. This ensures your mini pies release easily without tearing the delicate crust.
- Achieve a Golden Crust: Don’t skip the egg wash! It’s essential for that beautiful golden-brown color and appetizing sheen. For an extra crisp texture, a sprinkle of coarse sugar on top works wonders.
- Check for Doneness: Besides the golden-brown crust, look for the filling to be visibly bubbling through any lattice or vents. This indicates it’s heated through. If the crust browns too quickly, you can loosely tent the pan with aluminum foil.
- Cool Completely: While warm mini pies are delightful, allowing them to cool completely on a wire rack is crucial. This step allows the filling to set properly and the crust to fully crisp up, preventing a soggy texture.
- Storage: Store leftover mini pies at room temperature in an airtight container for up to 2-3 days, or refrigerate for up to a week. They can also be frozen for longer storage, then thawed and gently reheated.
Variations and Customizations for Your Mini Pies
While cherry pies are a timeless classic, the beauty of this mini pie recipe lies in its versatility. You can easily adapt it to suit different tastes, seasons, and dietary preferences:
- Fruit Filling Swaps: Experiment with other fruit pie fillings! Apple, blueberry, peach, mixed berry, or even a combination like strawberry-rhubarb make fantastic alternatives. Adjust baking time slightly if using a very juicy filling, or consider adding a tablespoon of cornstarch to thicken.
- Spice it Up: Enhance your cherry filling with a pinch of cinnamon, nutmeg, or a dash of almond extract (which pairs wonderfully with cherries). For apple pies, cloves and allspice add depth.
- Different Toppings: Beyond the lattice, try a full top crust with decorative cutouts (like stars or leaves) or simple slits for steam. A crumble topping made from flour, sugar, butter, and oats also provides a delightful texture contrast.
- Savory Mini Pies: Don’t limit yourself to sweet! Use a savory filling like chicken pot pie mixture, shepherd’s pie filling, or even mini quiches. These make excellent appetizers or light lunches.
- Gluten-Free Option: For those with dietary restrictions, readily available gluten-free pie crusts can be used. Ensure all other ingredients are also gluten-free.
- Serve with Extras: A warm mini cherry pie is divine on its own, but a scoop of vanilla bean ice cream, a dollop of fresh whipped cream, or a drizzle of caramel sauce can take it to the next level of indulgence.
With these variations, your mini pie adventures are only limited by your imagination!
*A special thank you to Chop Secrets via YouTube for the inspiring recipe and all the images used here. Their clear tutorials make baking accessible and enjoyable. If you loved creating these mini cherry pies, be sure to visit their channel and subscribe for more fantastic recipes and baking ideas!
Easy Mini Cherry Pie Recipe
This recipe ensures you’ll have delightful, perfectly sized pies ready to enjoy in no time. Happy baking!