
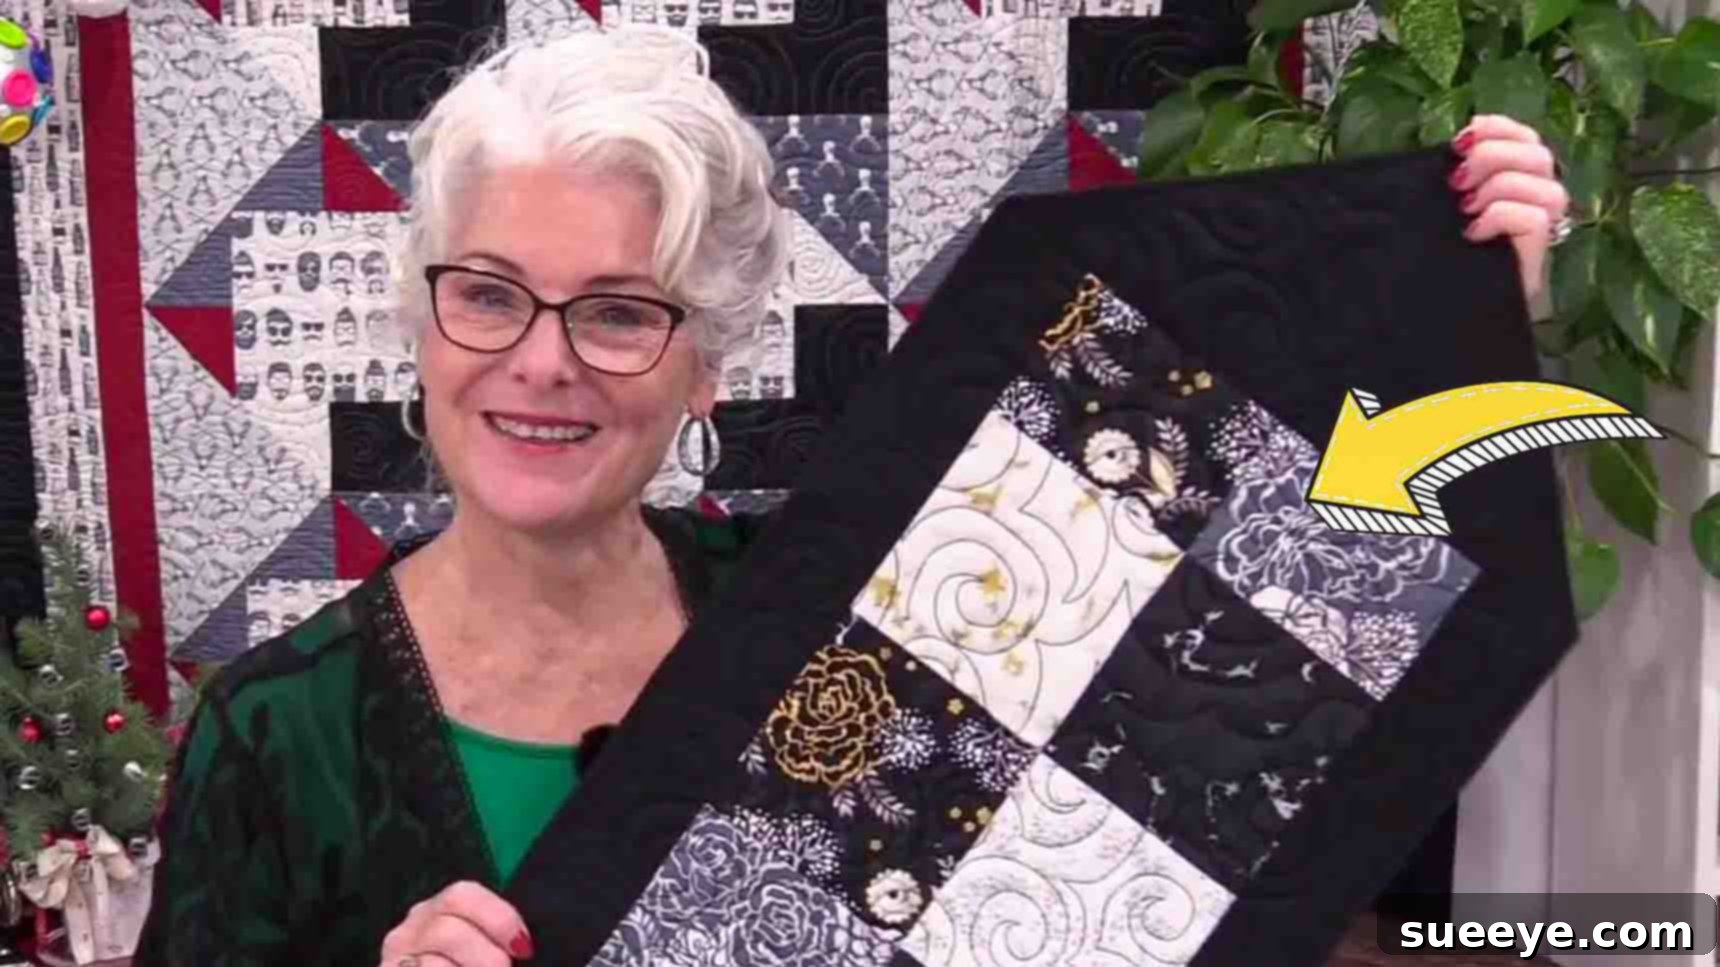
Craft a Stunning No-Hand-Sew Quilted Table Runner: The Perfect Beginner Project & Gift!
Are you eager to dive into the rewarding world of quilting but intimidated by complex patterns or the prospect of hours of intricate hand-stitching? We have fantastic news for you! This incredible quilted table runner tutorial, inspired by the brilliant creators at SewVeryEasy on YouTube, offers a delightful solution. It’s designed specifically for those who crave a beautiful, handmade project without needing to pick up a needle for elaborate hand stitches. This makes it an ideal choice for absolute beginners, busy crafters, or anyone looking for a quick, satisfying, and beautiful sewing endeavor. Imagine creating a personalized, stylish accent for your own home or a thoughtful, heartfelt gift for a loved one – all while mastering fundamental machine quilting techniques.
This comprehensive guide will walk you through every step of constructing a stunning, durable table runner that looks professionally made, yet is surprisingly simple to achieve. You’ll learn how to piece your fabric, incorporate batting, and finish your project using only your sewing machine. Get ready to unleash your creativity, discover the joy of machine-only quilting, and produce a finished item you’ll be proud to display or give!
Essential Materials for Your Quilted Table Runner
Before embarking on this exciting quilting journey, gathering all your materials is key to a smooth and enjoyable process. This project is incredibly forgiving and requires only a few essential items, many of which you might already have in your sewing stash. Here’s a detailed list of what you’ll need, along with some helpful tips for selection, ensuring you’re fully prepared for success:
- 14 Pieces of 5-inch Fabric Squares: These charming squares are the heart of your table runner’s design. You can opt for convenience by purchasing pre-cut charm packs, which often feature coordinated collections, simplifying your fabric selection. Alternatively, delve into your fabric scrap bin for a truly unique, scrappy, and eco-friendly look. Consider a thoughtful mix of complementary patterns, textures, and solid colors to add visual interest and depth to your design. For best results and ease of handling, ensure your chosen fabrics are 100% cotton quilting fabric, known for its durability and crispness.
- 18 ½ inches x 44 inches Background Fabric: This single piece of fabric will serve a dual purpose: it acts as the primary backing for your table runner and ingeniously frames your pieced squares, eliminating the need for separate binding. A standard quilting cotton width is typically 42-44 inches, so an 18 ½-inch cut from a yard of fabric will often provide the perfect dimensions. Select a fabric that beautifully complements your 5-inch squares without overshadowing their vibrant patterns. A solid color, a subtle tone-on-tone print, or a blender fabric often works wonderfully as a background, allowing your pieced blocks to truly shine.
- Quilting Batting (Approx. 18 ½ inches x 44 inches): Batting is the crucial middle layer that gives your table runner its plush, quilted feel, provides insulation, and adds structural integrity. You will need a piece of batting that closely matches the dimensions of your background fabric. Various types of batting are available, including cotton, polyester, bamboo, or blends. Cotton batting is a popular choice for its natural feel, breathability, and beautiful drape, while polyester can offer more loft and warmth. For a beginner-friendly project like this, a low-loft cotton or cotton-blend batting is usually the easiest to work with and provides a wonderfully soft finish.
- Sharp Fabric Scissors or Rotary Cutter and Mat: Precision is paramount in quilting, and accurate cuts are essential for seams that match up perfectly. While a good pair of sharp fabric scissors is indispensable for general trimming and snipping, a rotary cutter paired with a self-healing mat and a quilting ruler will significantly enhance your fabric cutting process. This combination ensures perfectly straight lines and precise sizing, especially when squaring up your fabric pieces.
- Temporary Fabric Adhesive Spray (Spray Baste): This is a game-changer for machine quilting, particularly for those who wish to avoid extensive hand basting. Spray basting allows you to temporarily adhere your fabric layers (quilt top, batting, and backing) together without the need for countless pins, creating a smooth, flat surface that is less prone to shifting during quilting. Look for a brand that is repositionable, non-toxic, and washes out cleanly without leaving residue. This method dramatically speeds up the preparation phase.
- Quilting Pins or Wonder Clips: Although spray baste significantly reduces the need for extensive pinning, a selection of quilting pins remains invaluable for holding fabric layers precisely in place during initial assembly, aligning critical seams, or temporarily securing edges. Wonder clips are also a fantastic alternative, especially for thicker layers or when dealing with multiple bulky seams, as they grip layers securely without puncturing the fabric.
- Sewing Machine with a Quarter-Inch Foot: A reliable sewing machine capable of a consistent straight stitch is your best friend for this project. While most machines will work, a quarter-inch presser foot (often included with modern machines or available separately) is highly recommended. It ensures consistent seam allowances, which are absolutely critical for accurate piecing and achieving a polished, professional-looking finished product.
- Matching Thread: Choose a high-quality polyester or 100% cotton thread that either matches your background fabric perfectly or blends subtly with your chosen squares. Good quality thread prevents breakage and contributes to the overall durability of your stitches.
- Iron and Ironing Board: The importance of pressing in quilting cannot be overstated. Pressing seams open or to one side after each stitching step is a fundamental technique. A hot iron will help flatten your seams, create crisp edges, remove wrinkles, and contribute significantly to the overall neatness, accuracy, and professional appearance of your table runner.
Step-by-Step Tutorial: Crafting Your No-Hand-Sew Quilted Table Runner
Follow these detailed instructions to create your beautiful quilted table runner. Remember to take your time with each step, paying careful attention to seam allowances and pressing techniques, as these small details contribute greatly to a professional-looking and durable finish. For visual learners and additional insights, don’t forget to refer back to the original SewVeryEasy video tutorial!
Step 1: Piecing the Table Runner Top and Attaching the Backing
1.1 Prepare Your Fabric Squares:
Begin by laying out your 14 five-inch fabric squares in the desired arrangement for your table runner top. A typical setup for this project involves creating a sequential pattern of seven pairs of squares, which will form the central length of your runner. Take time to experiment with different layouts until you discover a combination of colors and patterns that you absolutely love. The inherent beauty of this project lies in its adaptability – feel free to mix and match patterns, colors, and textures to achieve your unique aesthetic. This initial visual planning stage helps ensure a harmonious and pleasing final design.
1.2 Sew the Squares into Pairs:
Carefully select two adjacent squares from your chosen layout. Place these two squares right sides together, ensuring all raw edges are perfectly aligned. Using your sewing machine and maintaining a precise ¼-inch seam allowance (this is where your ¼-inch presser foot proves invaluable!), stitch along one edge to firmly join the squares. Repeat this precise process for all 14 squares, effectively creating seven individual, matched pairs. After sewing each pair, take a moment to press the seams. You can press them open to reduce bulk or press them consistently to one side, which helps the quilt top lie flatter. For this particular design, pressing seams open can be especially beneficial for minimizing bulk in subsequent stages where multiple layers come together.
1.3 Assemble the Runner Length:
Now that you have your seven sewn pairs, it’s time to begin joining them together to form the continuous, elongated length of your table runner. Take two of your pieced pairs and place them right sides together, taking extra care to meticulously match the seams where the individual squares meet. Use quilting pins to secure these intersections, preventing any shifting as you sew. Stitch them together using your consistent ¼-inch seam allowance. Continue this process, adding the remaining pairs in their planned sequence until all seven pairs are firmly joined, creating one long, cohesive, and beautiful strip of pieced fabric. As with the previous step, press all new seams as you go, ensuring the entire runner top remains smooth, flat, and free of unnecessary bulk.
1.4 Find and Mark the Centers:
With your pieced runner top now fully assembled and pressed, it’s time for a critical preparation step: accurately finding its center for attachment to the background fabric. First, fold your completed pieced runner top neatly in half lengthwise, ensuring the short ends are perfectly aligned. Gently finger press or use a warm iron to create a distinct crease at the exact center point. This crease will serve as your crucial center guide. Perform the identical action with your background fabric (the 18 ½-inch x 44-inch piece). Fold it precisely in half lengthwise and either finger press or iron a clear center crease. Accurate center marks are absolutely crucial for perfectly aligning your runner top and backing in the next stage, ensuring your finished runner is symmetrical and balanced.
1.5 Align Runner Top and Background Fabric:
Lay your prepared background fabric flat on a spacious work surface, with its right side facing upwards. Carefully place your pieced runner top directly over the background fabric, ensuring that the right side of the runner top is facing downwards (so the right sides of both fabrics are touching each other). Meticulously align the previously marked center creases of both fabrics. It is of utmost importance that these center marks match up precisely, creating a foundational alignment for your runner. Gently smooth out any wrinkles or bumps in both layers to ensure they lie perfectly flat against each other before proceeding.
1.6 Stitching the First Edge:
Once the fabrics are perfectly aligned at their centers and smoothed out, carefully carry your combined fabrics to your sewing machine. Starting precisely at the center mark you created, begin to stitch along one of the long edges, utilizing your consistent ¼-inch seam allowance. Continue stitching all the way to one end of the runner, making sure to stop precisely at the raw edge of the fabric. Briefly backstitch at both the very start and the very end of your seam to securely lock the stitches in place. This foundational seam will eventually form one of the finished long sides of your table runner.
1.7 Stitching the Second Edge:
Now, carefully rotate your project. Take the remaining unstitched long edge of your pieced runner top and bring it over, meticulously aligning it with the other raw long edge of the background fabric. Double-check that your center marks from both fabrics still align perfectly. Use quilting pins or wonder clips to secure this entire edge in place, preventing any shifting while you sew. Again, starting from the precisely matched center mark, stitch along this second long edge with a ¼-inch seam allowance, stopping exactly at the fabric edge. Remember to backstitch at the start and end of this seam for security. Once these two parallel seams are completed, you will have effectively formed a fabric “tube” where your beautiful pieced top is enclosed, and the background fabric forms the outer layer, leaving the two short ends open.
1.8 Pressing the Seams and Creating the Tube Structure:
With both long edges stitched, carefully take your fabric tube to your ironing board. Gently press both of the newly sewn long seams towards the background fabric. This technique means the seam allowances will lie flat against the backing material, significantly reducing bulk on the pieced top and creating a cleaner finish. This pressing step is critical for achieving a smooth, professional appearance and helps to define the sharp edges of your runner. Once these seams are thoroughly pressed, you will have solidified the tube structure, with the pieced runner top neatly enclosed inside, the background fabric forming the outer layer, and the two short ends remaining open for the next shaping steps.
1.9 Shaping the Pointy Ends:
To create the characteristic, elegant pointed ends of your table runner, take your fabric tube and carefully pick it up, focusing on the center seam where your pieced squares meet the background fabric. Now, fold the entire tube in half crosswise, making sure to perfectly align the two short, open ends. Ensure your previous long seams are precisely matched at this fold. Stitch a ¼-inch seam along just this short, folded edge. Repeat this exact process on the other short end of the tube. As you examine your work, you will notice that the diagonal “L” shaped seam, which was formed by the two long seams you just sewed, remains unstitched and open. This strategic open seam is absolutely key to cleanly forming the precise, sharp point in the next stage.
1.10 Finishing the Points:
Now, gently open up the folded end you just stitched. You will observe that the center seam you just created, combined with the intentionally unstitched “L” seam, will naturally want to form a perfect, crisp point. Carefully take these newly formed points to your ironing board and press them thoroughly flat. To further reduce bulk and ensure a super crisp point when the runner is finally turned right side out, snip off a small triangle from the very corner, cutting right up to the stitching line but being extremely careful *not* to cut through the stitches themselves. Once trimmed and pressed, you’ll notice that the seam in the very center of the point should match up perfectly with the center line you finger-pressed earlier. Pin both ends securely to hold their meticulously crafted shape.
Step 2: Incorporating the Batting and Preparing for Quilting
2.1 Prepare the Batting:
Lay your chosen piece of quilting batting flat and smoothly on a large, clean work surface. Take your partially assembled table runner (which is currently in its “tube” form, with the pointed ends already stitched and trimmed) and carefully place it on top of the batting. Precisely trace the entire outline of your table runner onto the batting using a fabric marker, chalk, or a pencil. Ensure you trace the exact shape, including the distinctive pointed ends. This meticulous tracing step guarantees that your batting will be the perfect size and custom shape, fitting snugly inside your runner without any excess.
2.2 Cut Out the Batting:
Once you have accurately traced the outline, gently remove the table runner from the batting. Using your sharp fabric scissors or a rotary cutter, meticulously cut out the traced batting shape. Strive to cut precisely along your marked lines to ensure a snug and exact fit. This custom-cut batting piece is crucial as it will fit perfectly inside your runner, preventing any unwanted bulk, unevenness, or shifting during the later quilting stages.
2.3 Insert and Baste the Batting:
Now, take your table runner and carefully turn it entirely inside out. This means the right side of your beautifully pieced top will be facing inwards, and the background fabric will be visible on the outside. Gently and carefully insert the precisely cut batting piece into the table runner. The batting should lay perfectly flat against the wrong side of your pieced fabric top, extending fully and smoothly into the pointed ends. Once the batting is correctly positioned and smoothed out inside, use your temporary fabric adhesive spray (spray baste) to secure it. Lift small sections of the batting and spray a light, even coat of adhesive onto the wrong side of your pieced fabric top, then gently smooth the batting back down. Work in small sections to ensure full, wrinkle-free coverage. This spray basting step is absolutely crucial for preventing the batting from shifting, bunching, or migrating during the subsequent quilting process.
2.4 Turn Right Side Out and Refine Points:
After the batting is securely spray basted in place, it’s time for the exciting moment of turning your table runner right side out. Carefully reach into one of the open ends and gently pull the fabric through until the right side of your pieced top is facing outwards and visible. As you meticulously turn it, pay special attention to the pointed ends you shaped earlier. Use a chopstick, a point turner, or even a blunt pencil to gently push out the corners from the inside, ensuring they are as crisp, sharp, and well-defined as possible. Avoid using anything too sharp that could potentially poke through or damage your fabric. Once turned, thoroughly smooth out any remaining wrinkles in both the fabric and the batting, ensuring the entire runner lies flat.
2.5 Final Pin Basting and Preparation for Quilting:
With your table runner now right side out and the batting securely affixed internally with spray baste, an additional layer of pin basting is highly recommended. This provides extra security and stability against any potential shifting of the layers during the active quilting process. Starting from the very center of your table runner, place quilting pins at regular intervals (approximately every 4-6 inches) across the entire surface. Ensure that each pin goes through all three layers (the pieced top, the batting, and the background fabric). Verify that the pins are evenly spaced and that all fabric layers are taut and smooth, without any puckers. Pay extra attention to securing the edges and the pointed ends. Once your table runner is thoroughly pin basted, your stunning no-hand-sew quilted table runner is officially prepared and ready for the creative quilting stage!
Step 3: Machine Quilting Your Table Runner
Now for the truly creative and rewarding part – the quilting itself! This is the stage where you add beautiful texture, dimension, and, most importantly, permanently secure all three layers of your table runner together (the top, batting, and backing). Since this is a “no-hand-sew” project, all quilting will be expertly executed on your sewing machine. Don’t be intimidated by the term “quilting”; there are many beginner-friendly machine quilting techniques that will yield stunning results:
3.1 Straight-Line Quilting:
This is arguably the easiest, most accessible, and highly effective method for beginners. You can quilt straight lines either horizontally, vertically, or diagonally across your table runner. If you have one, use a walking foot on your sewing machine, as it significantly helps feed all layers evenly through the machine, preventing puckering and shifting. You can stitch lines ¼-inch, ½-inch, or even 1-inch apart. A popular variation is “stitch-in-the-ditch,” where you stitch precisely along the seams of your pieced squares, or just slightly next to the ditch. Alternatively, you can create a simple grid pattern across the entire runner. Experiment with different spacing to discover what aesthetic you like best. Straight lines offer a clean, modern, and very professional aesthetic that complements almost any fabric choice.
3.2 Wavy or Meandering Lines:
If you’re feeling a bit more adventurous and want to add a softer, more organic touch, try free-motion quilting with a simple meandering or wavy line pattern. For this technique, you will typically need to drop your feed dogs (or engage a specific setting on your machine) and attach a free-motion quilting foot. This setup allows you to guide the fabric freely under the needle, creating fluid designs. While it takes a little practice to achieve consistently smooth results, simple meandering lines are incredibly forgiving and can add a lovely, natural texture to your runner. Begin with large, gentle curves to build your confidence and get a feel for guiding the fabric.
3.3 Echo Quilting:
This elegant technique involves stitching lines that “echo” or parallel the shape of your pieced squares or the outer perimeter of the table runner. For instance, you could stitch a line ¼-inch or ½-inch inside each individual square, creating a beautifully framed effect for each block. Similarly, you can echo the outer shape of the entire runner. This method adds significant definition to your pieced design and is quite simple to execute with the help of a walking foot, especially if you have a seam guide attachment.
No matter which machine quilting method you choose, always remember to remove pins as you approach them (never sew over a pin, as this can damage your needle or machine!). Maintain a consistent stitch length throughout your quilting, and don’t hesitate to take breaks if your shoulders, back, or eyes start to feel strained. The quilting process is where your table runner truly comes to life, adding structural integrity, rich texture, and enhanced beauty, making it a robust and wonderfully finished piece.
Care Instructions for Your Quilted Table Runner
To ensure your beautiful, handmade quilted table runner remains a cherished item and lasts for many years to come, proper care and maintenance are essential. Generally, machine-quilted items are quite durable and robust, but following a few simple guidelines will significantly help maintain their vibrant colors, crisp shapes, and overall beauty:
- Washing: For the best and gentlest care, machine wash your table runner on a delicate or gentle cycle. Always use cold water to help prevent color bleeding and fabric shrinkage. Opt for a mild detergent that is free of harsh dyes and strong perfumes, especially for the initial few washes, as some fabrics may release excess dye.
- Drying: After washing, you can either tumble dry your table runner on a very low heat setting or, preferably, lay it flat to air dry. Air drying is highly recommended as it helps to maintain the original shape of the runner and prevents excessive shrinkage or potential distortion of your meticulous quilting stitches. If you choose to tumble dry, remove the runner promptly while it is still slightly damp and then lay it flat to finish air drying.
- Pressing: If your table runner develops wrinkles or needs a refresh, you can press it with a warm iron. Use a setting appropriate for cotton fabrics. For added protection, especially if you have a variety of fabric types or darker colors, consider using a pressing cloth between the iron and your table runner to safeguard against scorching or uneven heat transfer.
- Storage: When your table runner is not in use, store it carefully to prevent unnecessary creases and to protect the integrity of the quilting. The best methods are to either store it flat (e.g., in a drawer or on a shelf) or gently rolled up. Avoid folding it repeatedly along the same lines, as this can weaken the fabric fibers and the batting over time, potentially causing permanent creases.
Customization Ideas for Your Unique Table Runner
While this tutorial provides an excellent and solid foundation for creating a lovely quilted table runner, never hesitate to personalize and adapt the design to truly make it your own! The beauty of handmade items lies in their unique character. Here are a few ideas to spark your creativity and inspire unique variations:
- Fabric Play and Themes: Expand beyond everyday fabrics! Experiment with themed prints for specific holidays (e.g., festive Christmas prints, warm autumnal motifs for Thanksgiving, or patriotic designs for national celebrations) or seasonal decor. Consider using luxurious batiks for a rich, textured appearance, or choose novelty prints for a fun, whimsical, and playful touch that reflects your personality.
- Size Variations: This design is incredibly versatile for size adjustments. You can easily alter the length of your runner by simply adding or subtracting pairs of 5-inch squares. For a wider runner, you could begin with larger initial squares (e.g., 6-inch or 7-inch squares) or consider adding an attractive border around the entire pieced top before you attach the backing fabric, which would give it a more expansive feel.
- Embellishments: Once your table runner is fully quilted, you have the option to add small, decorative embellishments for an extra touch of flair. This could include securely sewn decorative buttons, shimmering beads, or even delicate hand embroidery to specific squares or areas. Ensure any embellishments are firmly attached and are suitable for the washing method you plan to use for the runner.
- Fussy Cutting: If you have fabrics featuring specific motifs, images, or scenic elements, try “fussy cutting” your 5-inch squares. This technique involves precisely cutting around a particular design to center it perfectly within each block, creating a more intentional, intricate, and captivating look that draws the eye.
Conclusion: Your Beautiful Handmade Creation
Congratulations! You have successfully completed the journey of creating a stunning, quilted table runner, proving definitively that beautiful quilting is accessible to everyone, even without any hand-sewing. This project is not only a fantastic way to develop and refine your machine sewing and quilting skills but also culminates in a functional, durable, and highly decorative piece that will elegantly enhance any dining area, coffee table, or buffet. Whether you choose to keep this exquisite runner for your own home or present it as a thoughtful, heartfelt, and handcrafted gift to a loved one, this table runner stands as a proud testament to your creativity, dedication, and newfound crafting abilities. We sincerely hope you thoroughly enjoyed this rewarding journey into beginner-friendly, machine-only quilting and feel profoundly inspired to tackle many more exciting and creative projects in the future!