
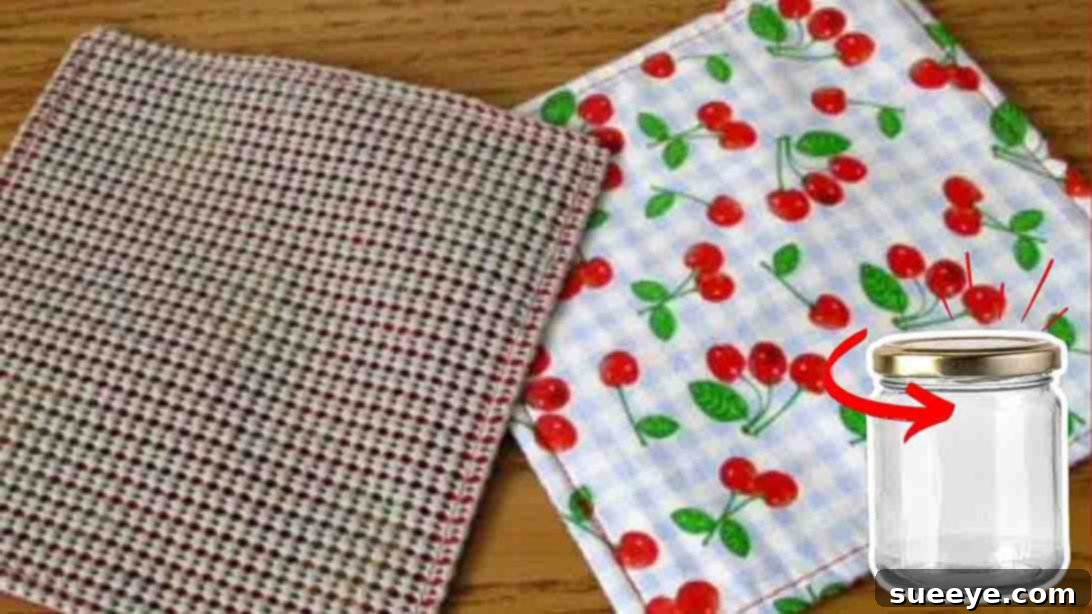
Are you frequently frustrated by those unyielding jar lids that just won’t budge? The universal struggle with stubborn jars is a common kitchen predicament, but what if we told you there’s a simple, elegant, and eco-friendly solution you can create right at home? Forget about awkward grips or hot water tricks; it’s time to introduce a handmade hero into your kitchen arsenal: the DIY fabric jar opener.
This ingenious project allows you to transform leftover fabric scraps into a remarkably useful tool, offering a superior grip that makes opening even the most resistant jars an absolute breeze. Not only will you solve a daily kitchen challenge, but you’ll also contribute to reducing textile waste, giving new life to materials that might otherwise be discarded. It’s a win-win for your hands and the planet!
In this comprehensive guide, inspired by the fantastic tutorial from Debs Days on YouTube, we’ll walk you through every step of creating your very own fabric jar opener. Debs Days is known for her clear, concise instructions, making even seemingly intricate projects accessible to all skill levels. Her method, which ingeniously combines scrap fabrics with rubber shelf liners, results in a durable and highly effective kitchen essential. Whether you’re a seasoned sewer or just picking up a needle and thread, this project promises to be quick, easy, and incredibly rewarding.
RELATED: How to Sew a Fabric Jar Opener in 8 Minutes
Beyond its practicality, crafting a fabric jar opener is a wonderfully satisfying endeavor. It’s an opportunity to unleash your creativity, choose fabrics that match your kitchen decor, or even personalize them as thoughtful gifts for friends and family. Imagine the joy of effortlessly twisting open a pickle jar or a tight jam lid with a charming, handmade tool. This tutorial provides all the insights you need to get started, ensuring you’ll soon have a collection of these handy openers ready for any jar that dares to resist.
Why Every Kitchen Needs a DIY Fabric Jar Opener
While store-bought jar openers exist, a homemade fabric version offers a unique blend of benefits that make it superior. Here’s why investing a little time into this DIY project is worth every stitch:
- Unmatched Grip and Protection: The combination of fabric and a rubber liner creates an excellent non-slip surface that grips jar lids firmly, preventing your hands from slipping and reducing strain. No more sore hands or dropped jars!
- Eco-Friendly Repurposing: This project is a champion of sustainability. By utilizing scrap fabrics, you’re diverting textiles from landfills and giving them a second purpose, making your kitchen more eco-conscious.
- Cost-Effective Solution: Why spend money on specialized gadgets when you can create a superior tool from materials you likely already have? This project is incredibly budget-friendly.
- Personalized Style: Unlike generic store-bought options, your DIY jar opener can be a true reflection of your personality. Choose vibrant patterns, elegant designs, or fabrics that complement your kitchen’s aesthetic.
- Perfect Handmade Gift: A set of handmade jar openers makes a thoughtful and practical gift for housewarmings, birthdays, or holiday presents. They show care and craftsmanship.
- Beginner-Friendly Project: With only a few simple steps, this is an ideal project for those new to sewing. It helps build confidence and introduces fundamental sewing techniques.
Materials You’ll Need
Gathering your materials is the first exciting step in any creative project. For this DIY fabric jar opener, you’ll find that most items are readily available, and many can be repurposed from your existing craft stash. Here’s a detailed look at what you’ll need:
- Regular Sewing Supplies: This typically includes a sewing machine (though it can be hand-sewn if you prefer, it will take longer), matching thread (good quality polyester thread for durability), fabric scissors, thread snips, pins or fabric clips, a ruler or measuring tape, and an iron for pressing seams.
- Fabrics: You’ll need two pieces of fabric for each jar opener. This is where your scrap fabric collection truly shines! Opt for durable, medium-weight fabrics like quilting cotton, denim, canvas, or even upcycled sturdy garments. The size can vary, but a square of approximately 6×6 inches (15×15 cm) is a good starting point, allowing for flexibility with different jar sizes. Choose fun prints or colors that bring joy to your kitchen.
- Rubber Shelf Liner: This is the secret ingredient for superior grip. Look for the non-adhesive, textured rubber shelf liner often found in kitchenware or hardware stores. It comes in rolls and is relatively inexpensive. Ensure it’s thick enough to provide good cushioning and grip but not so thick that it’s difficult to sew through.
- Teflon Sewing Machine Foot (or Painter’s Tape): Sewing directly onto rubber can cause it to stick to your standard presser foot. A Teflon (or walking) foot is ideal as its non-stick surface glides effortlessly over the rubber. If you don’t have one, a clever hack is to place a strip of painter’s tape on the bottom of your existing sewing machine foot to reduce friction. Alternatively, you can place a piece of tissue paper between the foot and the rubber, tearing it away after sewing.
- Magnet (Optional): For added convenience, you might consider embedding a small, strong magnet into one corner of your jar opener. This allows you to easily store it on your refrigerator or any magnetic surface, keeping it within reach whenever you need it.
Ensure all your fabrics are pre-washed and ironed to prevent shrinking and ensure a smooth, professional finish. Having everything prepared beforehand will make the sewing process much more enjoyable and efficient.
Step-by-Step Directions: Crafting Your Fabric Jar Opener
Now that you have all your materials ready, let’s dive into the simple yet effective steps to create your very own fabric jar opener. Follow these instructions carefully, and you’ll have a functional and charming kitchen tool in no time.
Step 1: Layering and Stitching Your Fabric Sandwich
This initial step involves creating a neat “sandwich” of your materials before stitching them together. Precision here will lead to a cleaner final product.
- Prepare Your Layers: Take one piece of your chosen fabric and place it right side up on your work surface. This will be the exterior of your jar opener.
- Add the Grip Layer: Next, place a piece of rubber shelf liner directly on top of the first fabric layer. Ensure the rubber liner is slightly smaller than your fabric pieces, or perfectly aligned, depending on your preferred finish. This rubber layer is critical for providing the non-slip grip.
- Complete the Sandwich: Finally, place the second piece of fabric on top, with its right side facing down. This means the two fabric pieces are right sides together, with the rubber liner sandwiched in between.
- Secure the Layers: Use fabric clips or pins to hold all three layers securely in place around the edges. This prevents shifting while you sew, which is especially important with the rubber layer.
- Stitch Around the Edges: Using your sewing machine and a 1/4-inch (approx. 0.6 cm) seam allowance, stitch carefully around all four sides of the square. Remember to use your Teflon foot or apply painter’s tape to your standard foot to prevent the rubber from sticking.
- Leave a Turning Gap: Critically, leave a small opening of about 2-3 inches (5-7.5 cm) unstitched along one side. This gap will be used to turn your project right side out later. Make sure to backstitch at the beginning and end of this gap to reinforce the stitching.
Step 2: Finishing Touches and Optional Magnet Insertion
This final step brings your jar opener to life, focusing on neatness, durability, and adding that optional magnetic convenience.
- Clip the Corners: Once you’ve finished sewing, carefully trim the corners of your stitched square. Cut diagonally across each corner, close to the seam line but without cutting through the stitches. This reduces bulk and ensures crisp, sharp corners when turned right side out.
- Turn Right Side Out: Gently push the fabric through the unstitched gap you left in Step 1. Use a turning tool or a blunt object (like a chopstick) to carefully push out all the corners so they are sharp and well-defined.
- Press the Gap: Using your fingers, carefully fold the raw edges of the opening inwards, aligning them with the sewn seam. Give this edge a good finger press, and if desired, use an iron on a low setting (avoiding direct contact with the rubber if it’s sensitive to heat) to create a neat crease.
- Insert the Optional Magnet: If you’ve decided to add a magnet for convenient storage, now is the time. Insert the magnet through the opening and gently maneuver it into one of the corners of the jar opener.
- Secure the Magnet (if applicable): With the magnet in place in the corner, use your sewing machine to stitch diagonally across that corner. This will create a small pocket, securely holding the magnet in position. Again, use your Teflon foot or painter’s tape to facilitate smooth sewing over the rubber.
- Topstitch for a Professional Finish: Finally, topstitch all the way around the entire perimeter of your jar opener. Stitch approximately 1/8 inch (approx. 0.3 cm) from the outer edge. This topstitching serves multiple purposes: it permanently closes the turning gap, provides extra durability, and gives your jar opener a neat, professional, and finished look. Ensure your stitches are even for the best aesthetic.
And there you have it! Your DIY fabric jar opener is now complete and ready to tackle any stubborn lid in your kitchen. This simple sewing project transforms scrap materials into an indispensable kitchen tool.
Customization and Creative Variations
While the basic square design is highly effective, the beauty of DIY lies in customization. Here are some ideas to make your jar openers even more unique and functional:
- Shape Variations: Don’t limit yourself to squares! Experiment with round, rectangular, or even custom-shaped jar openers to fit different jar sizes or simply for aesthetic appeal. For round openers, use a compass or a round object as a template.
- Decorative Embellishments: Add a touch of personality with embroidery, appliqué, or decorative stitching. Contrasting thread colors for topstitching can also make your design pop.
- Themed Sets: Create sets of jar openers for different seasons, holidays, or specific kitchen themes. Imagine a set with autumn leaves for Thanksgiving or festive patterns for Christmas.
- Different Sizes: Make a range of sizes – small ones for spice jars, medium for standard food jars, and larger ones for big pickle or canning jars.
- Add a Hanging Loop: Instead of a magnet, you could insert a small fabric loop into one of the corners before topstitching. This allows you to hang your jar opener on a hook for easy access.
- Mix and Match Fabrics: Use different fabrics for the top and bottom layers, or even piece together smaller scraps to create a patchwork effect.
Care and Maintenance for Your Fabric Jar Opener
To ensure your DIY fabric jar opener lasts for years to come, proper care is essential. Most fabric jar openers can be easily cleaned:
- Washing: If your jar opener gets dirty, simply toss it into your washing machine with your regular laundry. Use cold water and a gentle cycle to preserve the fabric and rubber.
- Drying: Air drying is recommended to extend the life of the rubber liner and prevent shrinkage. You can lay it flat or hang it to dry. Avoid high heat from a tumble dryer, as it could degrade the rubber over time.
- Durability: With quality materials and proper care, your handmade jar opener will stand up to countless uses, providing reliable grip every time you need it.
Beyond Jar Openers: More Uses for Scrap Fabric and Rubber Liners
This project is just the tip of the iceberg when it comes to repurposing scrap fabric and rubber shelf liners. Here are a few other creative ideas to inspire your next DIY:
- Coasters: Similar to the jar opener, layered fabric and rubber can make excellent non-slip coasters for drinks.
- Non-Slip Mats: Use larger pieces of fabric and rubber liner to create non-slip mats for cutting boards, pet bowls, or even car dashboards.
- Pot Holders (with Heat Resistance): While not directly from this tutorial, adding a layer of heat-resistant batting between fabric and rubber can create effective pot holders or trivets.
- Keychains or Bag Charms: Smaller fabric scraps can be sewn into miniature versions for decorative keychains, offering a small tactile grip.
- Drawer Organizers: The rubber liner can be used on its own or with fabric backing to line drawers, preventing items from sliding around.
Start Your Sewing Journey Today!
The DIY fabric jar opener is more than just a kitchen gadget; it’s a testament to the power of creative reuse and the satisfaction of making something useful with your own hands. It’s an accessible project for anyone, regardless of their sewing experience, offering practical benefits while being gentle on your wallet and the environment.
We extend our gratitude to Debs Days on YouTube for sharing such a brilliant and easy-to-follow tutorial that inspired this detailed guide. Her clear instructions empower countless individuals to tackle simple sewing projects with confidence.
So, gather your materials, fire up your sewing machine, and get ready to transform those overlooked fabric scraps into your new favorite kitchen companion. Say goodbye to the struggle of stubborn jar lids and hello to effortless opening, all thanks to your clever craftsmanship!
We encourage you to try this project and experience the joy of creating something truly valuable. Share your creations, experiment with different fabrics and designs, and most importantly, enjoy the process of making!