
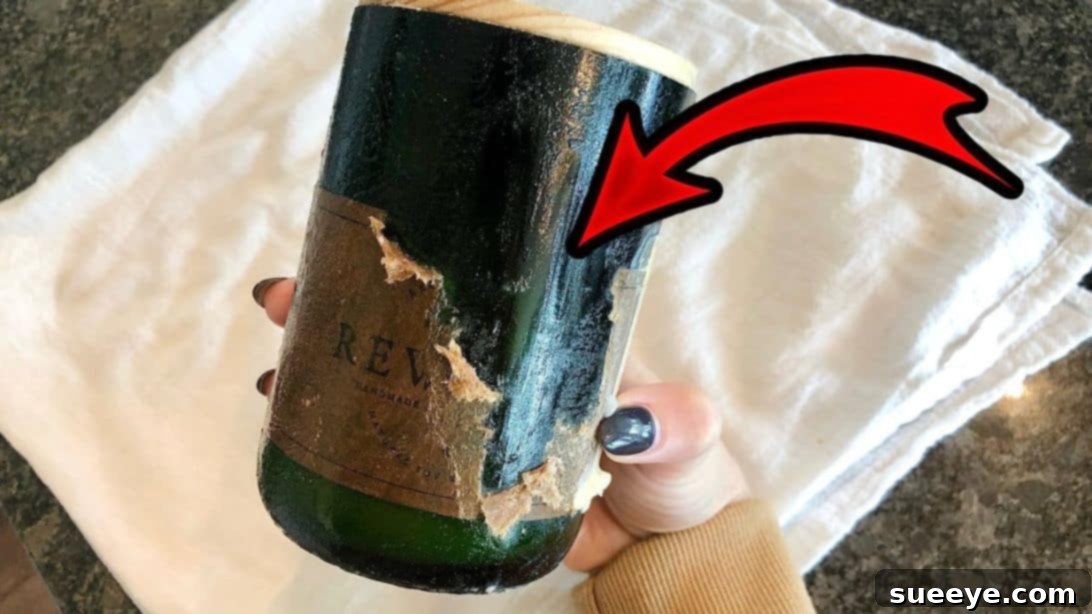
The Ultimate Guide: Say Goodbye to Stubborn Labels with This Simple DIY Method
Do you often find yourself frustrated by stubborn, sticky labels that cling stubbornly to your beautiful glass jars, refusing to budge? You’re certainly not alone. Many people have chipped fingernails and wasted precious time trying to scrape off adhesive residue, only to be left with a sticky mess or unsightly remnants. But what if we told you there’s a surprisingly simple, highly effective, and eco-friendly technique that can make removing sticky labels from jars a breeze? Say goodbye to frustration and hello to pristine, reusable glass with this ingenious method shared by Andrea Jean Cleaning on YouTube.
This comprehensive guide will walk you through a brilliant DIY solution that leverages common household ingredients – baking soda and oil – to tackle even the most tenacious label adhesives. Not only is this method incredibly effective, working in just a few minutes, but it’s also gentle on your jars and kind to the environment. Prepare to transform your old jam jars, pickle containers, and candle holders into versatile storage solutions or decorative pieces, completely free of any sticky past!
Why This DIY Label Removal Method is So Effective
The magic behind this simple hack lies in the combined power of two ordinary ingredients: oil and baking soda. Each plays a crucial role in breaking down and lifting away stubborn label adhesives:
- Oil: The Adhesive Dissolver. Most label adhesives are oil-soluble. When oil comes into contact with the sticky residue, it starts to break down the chemical bonds of the glue, essentially dissolving it. This allows the adhesive to lose its grip on the glass surface, making it much easier to remove.
- Baking Soda: The Gentle Abrasive. Baking soda acts as a mild abrasive. When mixed with oil, it creates a paste that gently scrubs away the loosened adhesive without scratching the glass. It also helps to absorb the dissolved glue, making the cleanup process far less messy and more efficient.
Together, these two ingredients form an unstoppable duo, tackling everything from paper labels to plastic stickers, leaving your jars sparkling clean and ready for their next life.
What You’ll Need: Simple Supplies for a Clean Finish
One of the best aspects of this label removal method is that it requires only a few inexpensive items you likely already have around your home. Gather these materials to get started on your journey to perfectly clean jars:
- Baking Soda: A staple in most kitchens, baking soda is key for its gentle abrasive properties.
- Oil (Any Type): The beauty of this method is its flexibility. You can use almost any oil you have on hand. Common choices include:
- Cooking Oil: Vegetable oil, canola oil, olive oil, sunflower oil.
- Baby Oil: Known for its gentleness and often readily available.
- Extra Virgin Coconut Oil: A fantastic natural option.
- Mineral Oil: Also works wonderfully.
The important thing is that it’s an oil that can penetrate and break down the adhesive.
- Goo Gone (Optional, for Extra Stubborn Cases): While the baking soda and oil mixture is incredibly potent, some exceptionally tough, older, or industrial-strength adhesives might benefit from a final touch-up with a commercial adhesive remover like Goo Gone. Keep it handy just in case.
- Scrubbing & Scraping Tools: You’ll need something to gently scrub or scrape off the softened label and adhesive. Choose from:
- SOS Pad or Steel Wool (fine grade): Excellent for scrubbing, but ensure it’s fine-grade to avoid scratching glass.
- Old Credit Card or Gift Card: A perfect, non-abrasive scraper that won’t damage the glass.
- Plastic Scraper Tool: Specifically designed for delicate scraping tasks.
- Sponge with an abrasive side: A common kitchen item that works well.
Avoid anything overly sharp or metallic that could scratch the glass surface.
- Gloves (Optional but Recommended): If you have sensitive skin or plan to process many jars, wearing gloves can protect your hands from the oil and any residual adhesive.
- Paper Towels or Cleaning Cloths: For wiping away the mixture and residue.
- Dish Soap and Warm Water: For the final wash to remove any oily film.
Step-by-Step Guide: Effortless Label Removal
Follow these simple steps to transform your sticky jars into spotless, reusable containers. This method is designed to be straightforward and effective, making label removal a task you’ll no longer dread.
Step 1: Initial Label Removal & Paste Preparation
Begin by manually peeling off as much of the label as you can with your hands. Don’t worry about the small bits or the super sticky leftover adhesive; that’s what our homemade solution is for! Once you’ve removed the easily detachable portions, it’s time to create your powerful label-removing paste.
To prepare the solution, simply mix together your chosen oil and baking soda in a small bowl. The key here is to achieve a paste-like consistency – think of something similar to toothpaste. Start with a small amount of baking soda and gradually add oil, stirring constantly, until you get the desired texture. The amount of paste you’ll need will depend on the size and number of labels you’re tackling, so it’s always best to start with a modest portion and add more as needed. A good starting ratio might be 1 part oil to 2 parts baking soda, adjusting as you mix. The goal is a thick, spreadable paste that won’t drip.
Step 2: Apply, Dwell, and Scrub Away Residue
With your paste ready, liberally apply it onto the leftover sticker and adhesive residue. Ensure the entire sticky area is thoroughly soaked and coated with a generous layer of the mixture. Don’t be shy; a good, thick coat will allow the oil to fully penetrate the adhesive.
Once applied, let the paste sit and work its magic for at least 10 minutes. For particularly stubborn labels or very old, dried-on glue, you might want to extend this waiting time to 30 minutes or even an hour. The longer the oil has to break down the adhesive, the easier it will be to remove. Periodically check on the label; you might even see the adhesive start to soften and darken.
After the dwelling time, it’s time to scrub! Grab your chosen tool – an SOS pad, a sturdy old credit card, or a plastic scraper. Gently but firmly start scrubbing or scraping the label off. You’ll notice the adhesive, now softened by the oil and aided by the baking soda’s abrasive action, begins to lift away surprisingly easily. Work in small sections, applying consistent pressure.
If you encounter any exceptionally stubborn spots that resist the baking soda and oil, this is where your optional Goo Gone can come in handy. Spray a small amount directly onto the remaining residue, let it sit for a minute or two (as per product instructions), and then continue to scrub or scrape. Always ensure good ventilation when using commercial products like Goo Gone.
Step 3: Clean Up and Final Rinse
Once all the label and adhesive residue has been removed, wipe away the excess paste and any remaining goo with a paper towel or an old cloth. You might notice a slight oily film on the jar. To get your jar sparkling clean, wash it thoroughly with warm water and dish soap. The dish soap will easily cut through any residual oil, leaving your glass jars pristine, odorless, and completely free of any stickiness. Rinse well and dry. Your jar is now ready for its next purpose!
Pro Tips for Maximum Success
While the core method is straightforward, a few additional tips can enhance your results and make the process even smoother:
- Pre-Soak in Hot Water: For some labels, especially those that are paper-based, a quick soak in hot, soapy water for 5-10 minutes before applying the paste can help loosen the label slightly, making the initial peeling easier and potentially reducing the amount of paste needed.
- Patience is Key: Don’t rush the dwelling time. The longer the oil has to penetrate and break down the adhesive, the less effort you’ll need for scrubbing. If a label is particularly stubborn, overnight soaking with the paste is an option.
- Warm the Adhesive (Carefully): For extremely tough adhesives, gently warming the label with a hairdryer on a low setting for 30-60 seconds before applying the paste can sometimes help soften the glue, making it more receptive to the oil. Be cautious not to overheat the glass.
- Work in a Well-Ventilated Area: Especially if you opt to use Goo Gone, ensure you’re working in an area with good air circulation.
- Test on an Inconspicuous Area: While this method is generally safe for glass, if you’re working on a particularly delicate or uniquely finished item, it’s always wise to test a small, hidden spot first.
Embrace Sustainability: The Benefits of Repurposing Glass Jars
Mastering the art of removing labels from glass jars isn’t just about cleanliness; it’s about embracing a more sustainable and resourceful lifestyle. By giving your glass jars a second life, you contribute to numerous positive impacts:
- Environmental Stewardship: Reducing waste is paramount. Reusing jars lessens demand for new manufacturing, which conserves energy, water, and raw materials, and reduces landfill waste.
- Cost Savings: Why buy new storage containers when you have perfectly good glass jars ready for repurposing? This simple habit saves money on kitchen organization, craft supplies, and even gift packaging.
- Enhanced Organization: Clean, uniform jars are perfect for organizing your pantry (spices, grains, pasta), bathroom (cotton balls, bath salts), craft room (beads, buttons), or garage (screws, nails). Their transparency allows for easy identification of contents.
- Aesthetic Appeal: Repurposed glass jars offer a charming, rustic aesthetic. They can be used as vases, candle holders, terrariums, or even personalized gift containers, adding a touch of handmade elegance to your home decor.
- Food Storage Safety: Glass is non-porous and doesn’t leach chemicals into food, making clean jars ideal for storing leftovers, homemade jams, or dry goods safely.
With this effective label removal hack, you’re not just cleaning a jar; you’re unlocking its full potential and making a positive choice for your home and the planet.
*A special thank you to Andrea Jean Cleaning via YouTube for sharing this brilliant and effective method, as well as for all images used here. If you found this trick helpful, we highly recommend visiting her channel for more ingenious cleaning hacks and subscribing to her content!
Conclusion: Reclaim Your Jars, Simplify Your Life
No longer do stubborn labels have to be the bane of your existence or prevent you from giving beautiful glass jars a second life. This simple yet incredibly powerful DIY method, utilizing common household ingredients like baking soda and oil, provides a foolproof solution to a common household problem. It’s a testament to how effective natural, non-toxic alternatives can be, often outperforming harsh chemical cleaners.
By following these easy steps, you can confidently tackle any sticky challenge, transforming cluttered cabinets into organized spaces and discarded items into cherished household assets. Embrace the satisfaction of seeing your glass jars emerge spotless, ready for anything you can imagine. Start repurposing today, and discover the joy of effortless label removal!