
Spooky & Delicious Jalapeño Popper Mummies: The Ultimate Halloween Appetizer
Are you ready to elevate your Halloween party menu this year with a truly unforgettable treat? Look no further than these incredibly fun and utterly delicious Jalapeño Popper Mummies! Inspired by the creative genius of Amanda’s Cookin’ & Crafts on YouTube, this recipe transforms a classic appetizer into a festive, spooky delight that will have all your guests buzzing.
These aren’t just any jalapeño poppers; they are the perfect blend of creamy, cheesy goodness with a satisfying kick, all cleverly wrapped in crescent roll “bandages” to resemble adorable, spooky mummies. They’re not only a feast for the taste buds but also a visual centerpiece that perfectly captures the spirit of Halloween. Whether you’re hosting a ghoulish gathering or simply looking for a fun family activity, these mummy poppers are guaranteed to be a hit with both kids and adults alike.
What makes this recipe even more appealing is its simplicity. You won’t need a pantry full of exotic ingredients; most items are likely already staples in your kitchen. With straightforward steps and minimal fuss, you can create a truly impressive appetizer that looks far more complicated than it actually is. Get ready to impress everyone with these delightfully eerie and undeniably tasty treats!
Why Jalapeño Popper Mummies Are Your Go-To Halloween Snack
When it comes to Halloween party planning, finding the perfect balance between spooky aesthetics and mouth-watering flavor can be a challenge. These Jalapeño Popper Mummies hit all the right notes, making them an indispensable addition to your festive spread. Here’s why they stand out:
- Irresistible Flavor Combination: Each bite offers a delightful contrast of textures and tastes – the crisp bite of a fresh jalapeño, a rich and creamy cheese filling, and the soft, flaky embrace of a golden crescent roll. The subtle hint of garlic and onion powder elevates the savory profile, creating a truly addictive snack.
- Perfectly Themed for Halloween: The mummy design is simply brilliant! It’s playful, creative, and instantly recognizable, making these poppers a fantastic conversation starter. They’re a wonderful way to infuse some extra holiday spirit into your food, without resorting to overly sweet or artificial-tasting treats.
- Easy to Prepare: Despite their intricate appearance, these mummy poppers are surprisingly easy to assemble. The use of store-bought crescent rolls significantly cuts down on prep time, allowing you to focus on the fun part – wrapping your mummies!
- Kid-Friendly & Adult-Approved: The visual appeal makes them a magnet for younger guests, while the savory, spicy kick ensures adults will keep coming back for more. You can easily adjust the spice level to cater to different preferences, making them versatile for any crowd.
- Customizable: While the classic recipe is fantastic, there’s plenty of room for personalization. Add a sprinkle of bacon bits to the filling, experiment with different cheeses, or even try a touch of heat with a dash of cayenne pepper.
- Budget-Friendly: Made with common, affordable ingredients, this recipe offers a high-impact dish without breaking the bank. It’s a cost-effective way to create a memorable party snack.
Say goodbye to boring party platters and hello to a platter full of these charming, spooky, and utterly delicious mummy treats. Your guests will be thrilled, and you’ll love how easy they are to make!
Essential Ingredients for Your Jalapeño Popper Mummies
Crafting these adorable mummy poppers requires a selection of readily available ingredients, each playing a crucial role in delivering that perfect balance of flavor and texture. Here’s a detailed look at what you’ll need to gather to bring your spooky snacks to life:
Gather Your Mummy-Making Supplies:
- 1 (8 oz) block Cream Cheese, softened: The cornerstone of our creamy filling. Softened cream cheese ensures a smooth, lump-free mixture that’s easy to work with and provides a luxurious richness.
- 8 oz Monterey Jack Cheese, shredded: This cheese melts beautifully and adds a mild, buttery flavor that complements the cream cheese and jalapeño perfectly. Its excellent melting properties create that desirable gooey center.
- ½ tsp Garlic Powder: A fundamental seasoning that adds a warm, savory depth to the cheese filling without overpowering the other flavors.
- ½ tsp Onion Powder: Similar to garlic powder, onion powder contributes another layer of aromatic savoriness, enhancing the overall taste profile.
- ¼ tsp Salt: Essential for balancing and amplifying all the flavors in the filling.
- ¼ tsp Black Pepper: Adds a subtle hint of warmth and pungency, rounding out the seasoning.
- 10 Jalapeños, sliced in half lengthwise, seeds removed: The star of the show! By slicing them in half and removing the seeds, we create the perfect vessel for our creamy filling and control the heat level. Remember to handle jalapeños with care.
- 12 oz Pillsbury Crescent Rolls: The secret to our mummy transformation. These convenient pre-made rolls are easy to work with, bake up golden and flaky, and provide the ideal “bandages” for our spooky snacks.
- 1 Egg, lightly beaten (for egg wash): Mixed with water, this egg wash provides a beautiful golden sheen to your baked mummies and helps the dough crisp up.
- 1 tbsp Water (for egg wash): Thins out the egg, making it easier to brush evenly over the crescent rolls.
- 40 small Candy Eyeballs or Sliced Olives: The magical finishing touch that brings your mummies to life! Candy eyeballs add a sweet, whimsical element, while sliced olives offer a more savory and slightly eerie look.
With these ingredients at hand, you’re all set to embark on a fun and flavorful culinary adventure. Each component plays a vital role in creating these deliciously spooky Halloween treats!
Step-by-Step Guide: Crafting Your Jalapeño Popper Mummies
Follow these simple steps to bring your Jalapeño Popper Mummies to life. The process is straightforward and guarantees a delicious outcome!
Step 1: Prepare Your Baking Environment
Begin by preheating your oven to 400°F (approximately 200°C). While the oven heats up, prepare a large baking sheet. Line it with aluminum foil for easy cleanup, then lightly grease the foil with olive oil or a nonstick cooking spray. This crucial step prevents your mummies from sticking and ensures they bake evenly to a golden crisp.
Step 2: Prepare the Jalapeños
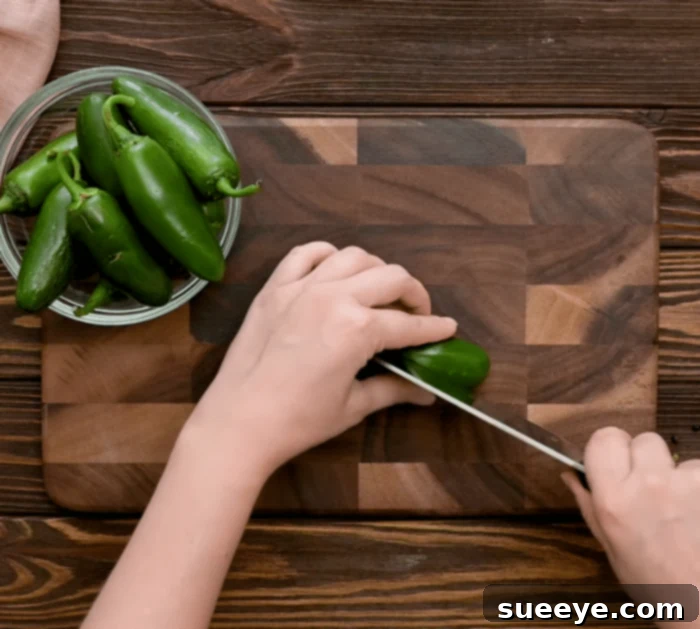
Carefully slice each of the 10 jalapeños lengthwise, creating two halves per pepper. Using a spoon or a small knife, thoroughly remove all the seeds from inside each half. For those who prefer less heat, also partially remove the white ribs (the internal membrane) as this is where most of the capsaicin resides. Handle jalapeños with gloves if you have sensitive skin, and remember to wash your hands thoroughly afterward, avoiding contact with your eyes.
Step 3: Create the Creamy Filling
In a large mixing bowl, combine the softened cream cheese, shredded Monterey Jack cheese, garlic powder, onion powder, salt, and black pepper. Stir these ingredients together until they are fully combined and the mixture is smooth and uniform. This creamy, cheesy blend will be the delicious heart of your mummy poppers. Once mixed, use a spoon to generously stuff each jalapeño half with this savory mixture.
Step 4: Craft the Mummy Wrappings
Unroll the Pillsbury crescent dough and lay it flat. Gently press together the perforations to form four continuous rectangles. Next, using a pizza cutter or a knife, slice each rectangle lengthwise into 10 thin strips. You’ll have a total of 40 strips. Take two strips of dough and carefully wrap them around each stuffed jalapeño half, mimicking the bandages of a mummy. Leave a small gap at the top where the “eyes” will be placed after baking. Don’t worry if the wrapping isn’t perfect; a slightly messy look only adds to the mummy’s charm!
Step 5: Bake to Golden Perfection
Arrange your newly wrapped jalapeño mummies on the prepared baking sheet, ensuring they are spaced out evenly. In a small bowl, whisk together the lightly beaten egg and one tablespoon of water to create an egg wash. Lightly brush the tops and sides of each mummy with this egg wash. This will help them achieve a beautiful golden-brown color and a slightly crispy texture. Place the baking sheet into your preheated oven.
Step 6: The Finishing Touch: Eyes and Serving
Allow the mummies to bake for approximately 12 minutes, or until the crescent dough is puffed, golden brown, and cooked through. Once removed from the oven, immediately and carefully press two small candy eyeballs or sliced olives into the gap you left on each mummy. The heat from the freshly baked dough will help the eyeballs adhere. Let them cool slightly on the baking sheet for a few minutes before serving. Serve these delightful Jalapeño Popper Mummies warm and watch them disappear! Enjoy your spooky and delicious creation!
Tips for Perfect Jalapeño Popper Mummies Every Time
To ensure your Jalapeño Popper Mummies are as perfect as they are spooky, consider these helpful tips:
- Spice Control: The heat of a jalapeño largely resides in its seeds and the white ribs. For milder poppers, be sure to remove all seeds and as much of the white membrane as possible. For those who enjoy a fiery kick, you can leave a few seeds or a bit of the ribs intact.
- Gloves Are Your Friends: When handling jalapeños, especially when seeding them, it’s highly recommended to wear food-safe gloves. The capsaicin (the compound responsible for the heat) can irritate skin and eyes. Avoid touching your face or eyes after handling peppers without gloves.
- Don’t Overstuff: While it might be tempting to load up the jalapeño halves with plenty of creamy filling, overstuffing can lead to the filling oozing out during baking. Fill them generously but leave a small margin to prevent spillage.
- Even Dough Strips: Try to make your crescent roll strips as uniform as possible. This ensures even baking and a more aesthetically pleasing “mummy” look. Don’t worry about perfection, though; a slightly ragged look adds to the charm!
- Sealing the Dough: When wrapping, gently press the ends of the crescent dough strips onto the jalapeño or onto other dough strips to secure them. This helps prevent them from unraveling during baking.
- The Egg Wash Advantage: Don’t skip the egg wash! It’s key to achieving that beautiful golden-brown color and a slightly crisp exterior, which enhances both the look and texture of your mummies.
- Placement of Eyeballs: For best adhesion, press the candy eyeballs onto the mummies immediately after they come out of the oven. The residual heat will slightly melt the candy, helping them stick securely. If using sliced olives, the same principle applies.
- Serving Temperature: These mummy poppers are best served warm, shortly after baking. The cheese filling is still gooey, and the crescent roll is at its flakiest.
- Make Ahead Options: You can prepare the jalapeño halves and the cream cheese filling a day in advance. Store them separately in airtight containers in the refrigerator. Assemble and bake just before your party for the freshest results.
Creative Variations & Customizations
While the classic Jalapeño Popper Mummy recipe is fantastic as is, there’s always room for a little creativity and customization. Here are some ideas to make these spooky snacks uniquely yours:
- Cheese Blends: Experiment with different cheese combinations. A mix of cream cheese with sharp cheddar, spicy pepper jack, or even a smoked gouda can add new dimensions of flavor.
- Add Some Protein: Elevate the filling with cooked and crumbled bacon bits, finely diced cooked chicken, or even a sprinkle of cooked sausage. Ensure any added meat is fully cooked before mixing into the cream cheese filling.
- Vegetarian Alternatives: For a milder pepper option that still looks great, consider using small bell peppers (like mini sweet peppers) or even deseeded mini cucumbers for a fresh, crunchy twist, though these won’t bake quite the same. You could also use a mixture of different colored bell peppers for a vibrant platter.
- Spice Level Adjustments: If jalapeños are too spicy, try poblano peppers for a milder flavor. If you want more heat, a pinch of cayenne pepper in the cream cheese mixture or a few dashes of hot sauce can do the trick.
- Dough Alternatives: While crescent rolls are perfect for convenience, puff pastry cut into strips can create a flakier, richer mummy wrapping. Just ensure you adjust baking times accordingly.
- Dipping Sauces: Serve your mummies with a side of ranch dressing, a sweet chili sauce, or even a spicy sriracha mayo to offer guests more flavor options.
- Ghoulish Garnishes: Enhance the Halloween theme with creative garnishes. A sprinkle of fresh parsley or chives can look like moss. Arrange them on a platter with plastic spiders or cobwebs for an extra spooky presentation.
- Shape Variations: Instead of mummies, you could form the dough into other Halloween shapes using small cookie cutters (like ghosts or pumpkins) and place a dollop of the cheese mixture on top, then bake.
Don’t be afraid to play around with these ideas. The goal is to have fun and create a Halloween treat that perfectly suits your taste and party theme!
Frequently Asked Questions About Jalapeño Popper Mummies
Can I prepare Jalapeño Popper Mummies ahead of time?
Yes, you can! You can prepare the jalapeño halves (seeded and cleaned) and the cream cheese filling up to 1-2 days in advance. Store them separately in airtight containers in the refrigerator. Assemble and bake the mummies just before your party for the freshest taste and best texture.
How do I store leftover Jalapeño Popper Mummies?
Leftover mummies can be stored in an airtight container in the refrigerator for up to 3-4 days. To reheat, place them on a baking sheet in a preheated oven at 350°F (175°C) for about 5-10 minutes, or until warmed through and the crescent dough is crisp again. Microwaving is not recommended as it can make the dough soggy.
Are these very spicy?
The spice level is adjustable. By removing all seeds and white ribs from the jalapeños, you significantly reduce the heat, making them palatable for most. If you prefer more spice, you can leave a few seeds or a bit of the ribs. For a milder version, you could even use mini bell peppers.
Can I use different types of peppers?
Absolutely! If you prefer a milder taste, consider using poblano peppers, which are larger and have less heat. For a completely non-spicy version, deseeded mini bell peppers or sweet peppers can work, though their texture will be softer when baked.
What if I can’t find candy eyeballs?
No problem! Sliced black olives make an excellent savory alternative for the mummy eyes. You can also use small dots of cream cheese or sour cream with a tiny piece of black olive or caper in the center. Get creative with what you have!
Can I make these gluten-free?
If you can find gluten-free crescent roll dough (some brands offer this), you can easily adapt this recipe to be gluten-free. All other ingredients are naturally gluten-free.
Get Ready to Impress with These Easy Jalapeño Popper Mummies!
As you can see, creating these delightful and spooky Jalapeño Popper Mummies is an enjoyable and straightforward process that promises big rewards in terms of flavor and festive appeal. This recipe is a testament to how simple ingredients, combined with a touch of creativity, can transform an ordinary appetizer into an extraordinary holiday treat. Whether you’re a seasoned cook or a kitchen novice, you’ll find immense satisfaction in crafting these adorable, savory snacks.
So, this Halloween, don’t just serve food; serve an experience! These mummy poppers are more than just an appetizer; they’re a conversation starter, a crowd-pleaser, and a delicious way to celebrate the spooky season. They embody the perfect balance of creamy, cheesy comfort with a zesty kick, all wrapped in a charming, spooky package that’s impossible to resist.
We encourage you to give this recipe a try and unleash your inner Halloween chef. Gather your ingredients, invite your friends and family, and get ready to enjoy the ultimate festive finger food. Your Halloween party will never be the same!
For more amazing recipes and craft ideas, be sure to visit Amanda’s Cookin’ & Crafts via YouTube – her channel is a treasure trove of inspiration for all your holiday needs. Happy Halloween, and happy cooking!