
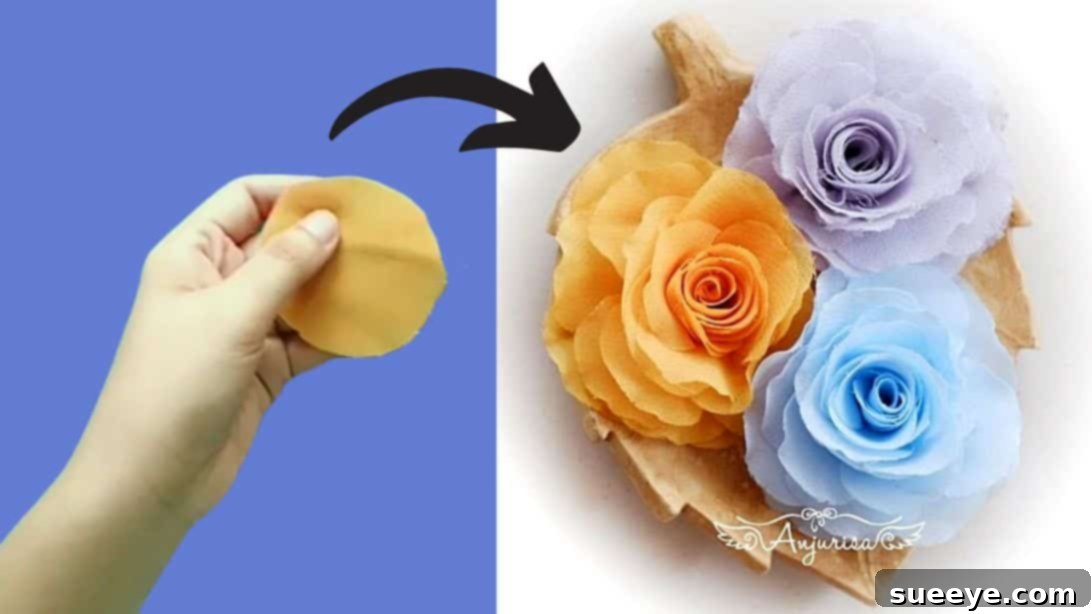
Master the Art of Fabric Flower Making: A Super Easy Chiffon DIY Tutorial
Are you looking for a creative and rewarding DIY project that adds a touch of elegance to almost anything? Look no further! This comprehensive guide will walk you through creating exquisite chiffon fabric flowers, a super easy craft perfect for beginners and seasoned crafters alike. Inspired by the brilliant tutorial from Anjurisa on YouTube, you’ll learn to transform simple fabric into stunning floral accessories. These versatile blooms can adorn your bags, dresses, hats, hair clips, or even enhance your home decor. Get ready to unleash your inner artist and craft beautiful, personalized embellishments that truly stand out.
Why Craft Your Own Fabric Flowers?
Handmade fabric flowers offer a myriad of benefits and creative opportunities. Beyond the simple joy of creation, they provide a unique way to personalize your belongings and express your individual style. Here’s why diving into fabric flower DIY is a fantastic idea:
- Personalization: Choose any fabric color or texture to match your specific style or project, creating truly custom pieces that store-bought items can’t replicate.
- Cost-Effective: With just a few basic materials, you can create a multitude of beautiful flowers, often for a fraction of the cost of purchasing pre-made embellishments.
- Versatility: These fabric flowers aren’t just for fashion! Use them to decorate gifts, enhance home decor, create unique jewelry, or even as charming additions to party favors and wedding decorations.
- Sustainable Crafting: Repurpose fabric scraps or old clothing, giving new life to materials and reducing waste.
- Therapeutic and Rewarding: Crafting is a wonderful way to relax, de-stress, and feel a sense of accomplishment once your beautiful creation is complete.
Materials and Tools for Your Chiffon Flowers
Before embarking on your fabric flower journey, gather the following essential materials and tools. Choosing the right supplies will ensure a smoother crafting process and beautiful results.
- Chiffon Fabric: Select a color that inspires you! Chiffon is ideal for its delicate, flowing nature and ability to be easily sealed with heat, preventing fraying. Consider lightweight silks or organza as alternatives for a similar effect.
- Fabric Scissors: Sharp scissors are crucial for clean, precise cuts through delicate chiffon, ensuring your petals have crisp edges.
- 2 1/2″ Round Pattern: This will serve as your template for consistent petal shapes. You can create one from thick paper or cardboard, or use a circular object of the appropriate size, such as a large coin or a small cookie cutter.
- Pins: Essential for securing your fabric layers while cutting, ensuring accuracy and preventing slippage.
- Glue Gun and Glue Sticks: A hot glue gun provides quick, strong bonds, making the assembly process efficient and secure. Ensure you have enough glue sticks on hand.
- Ruler: Useful for measuring and ensuring symmetry, especially when drawing your initial petal pattern.
- Candle or Lighter: This tool is used carefully to gently seal the edges of your chiffon petals, preventing fraying and giving them a natural, slightly curled look. **Safety first: always use with caution and in a well-ventilated area, away from flammable materials.**
Step-by-Step Guide to Crafting Your Chiffon Fabric Flower
Follow these detailed instructions to create your stunning chiffon fabric flower. Take your time with each step, and don’t be afraid to experiment!
Step 1: Designing Your Petal Pattern
The foundation of a beautiful flower lies in its petals. Begin by creating a sturdy pattern for your petals. On a piece of thick paper or thin cardboard, draw a simple flower shape. This pattern should feature four broad petals that are relatively close together, forming a somewhat rounded, four-leaf clover-like design. This initial shape will be further refined and manipulated to create the distinct plain and curly petals needed for your final flower. Using thick paper ensures the pattern is durable and easy to trace accurately multiple times.
Step 2: Precisely Cutting Your Chiffon Rounds
Now it’s time to cut your chiffon. Carefully fold your chosen chiffon fabric in half. Lay your 2 1/2-inch round pattern onto the folded fabric. Using your fabric scissors, cut around the pattern to create perfect circles. It’s important not to fold the fabric too many times, as chiffon can be slippery and difficult to cut accurately in multiple layers. Folding it just once or twice will give you enough layers for efficient cutting without sacrificing precision. Repeat this process to cut a sufficient number of round pieces; you will need several for each flower, typically around 10-12 circles to create a full bloom with both plain and curly petals.
Step 3: Shaping the Petals for Texture
Take several of your newly cut chiffon rounds. While holding them together, fold the stack of circles in half. With your fabric scissors, make a small cut from the top edge downwards, and another small cut from the bottom edge upwards, ensuring you do not cut all the way through the fold. These cuts should be relatively shallow. After making these initial cuts, slightly trim off the very tips of the folded fabric along the cut edges. Next, fold the stack of circles in half again, this time along the opposite direction, and repeat the same cutting and trimming process. This unique cutting technique, applied to the folded chiffon, is crucial for creating the base shape that will later allow some petals to naturally curl and others to remain relatively flat, adding depth and realism to your fabric flower.
Step 4: Sealing the Edges for Durability and Finish
Chiffon, by nature, tends to fray. To prevent this and give your petals a polished look, you will lightly burn the edges. Carefully take each individual petal and gently pass its edge near the flame of a candle or lighter. The heat will melt the delicate chiffon fibers, sealing the edge and giving it a slightly wavy, natural curl. It’s imperative to do this quickly and lightly; too much heat will scorch or burn the fabric. Always exercise extreme caution when working with open flames, ensuring you are in a well-ventilated area and away from any flammable materials. Repeat this process for all your cut petals.
Step 5: Crafting Distinct Petal Shapes
After sealing, it’s time to give your petals their final forms. Some petals will be designated as “curly” petals, adding volume and texture, while others will remain “plain” to form the structured core of the flower. To create the curly petals, gently twist the cutout fabric pieces. The unique cuts made in Step 3 will facilitate this twisting, allowing the chiffon to form graceful curls. You will need approximately six pieces that are twisted into curly petals and four pieces that remain relatively plain (though their edges will be sealed). This combination of shapes is essential for creating a realistic and full fabric flower.
Step 6: Assembling the Flower’s Central Core
Now, let’s build the heart of your flower. Take one of your plain petals and fold it in half. Apply a small dab of hot glue to the bottom corner of the folded petal. Take another plain petal, fold it in half, and attach its upper part to the glued corner of the first petal, ensuring a slight overlap. Continue this process with the remaining three plain petals, carefully folding and gluing them together in a circular fashion. Once all four plain petals are joined, roll this assembled unit tightly to form the compact, bud-like center of your flower. After rolling, trim a little bit from the very bottom of the rolled core to make it flat and stable. Finally, lightly burn the newly cut bottom edges to secure the layers and prevent any unraveling, ensuring your flower’s core is robust and beautifully finished.
Step 7: Building Out the Flower with Curly Petals
With your central core complete, it’s time to add the outer, more voluminous petals. Take one of your curly petals. Apply a small amount of hot glue to the bottom part of the petal. Carefully attach the assembled plain petal core to the middle of this curly petal, wrapping the curly petal around the base of the core. The goal is to encase the core snugly. Repeat this process with the remaining curly petals. As you attach each subsequent curly petal, make sure to rotate the flower slightly, staggering the petals. This rotation is key to creating a natural, full, and organic look, ensuring that your flower appears beautifully layered and multifaceted rather than flat or uniform. Continue adding petals until your flower achieves the desired fullness and shape, securing each with a dab of hot glue at the base.
Tips for Perfect Fabric Flowers Every Time
- Experiment with Fabric: While chiffon is excellent, try other lightweight fabrics like organza, satin, or even cotton for different textures and looks.
- Vary Petal Sizes: Cut some petals slightly larger or smaller to create more natural, layered flowers.
- Color Blending: Use different shades of chiffon for a single flower to create a subtle gradient effect.
- Safety with Flame: Always work in a well-ventilated area, keep a cup of water nearby, and use tweezers or pliers to hold small pieces of fabric to avoid burning your fingers.
- Practice Makes Perfect: Don’t get discouraged if your first few attempts aren’t flawless. Fabric flower making is an art that improves with practice.
- Less is More with Glue: Use small dabs of hot glue. Too much glue can seep through the delicate chiffon and become visible.
Creative Ways to Use Your Handmade Fabric Flowers
Once you’ve mastered the art of making these beautiful chiffon flowers, the possibilities for their use are endless! Here are some ideas to inspire your next project:
- Fashion Accessories:
- Attach them to hair clips, headbands, or barrettes for elegant hair adornments.
- Pin them to lapels as unique brooches for jackets, sweaters, or blouses.
- Embellish hats, fascinators, or even shoes for a personalized touch.
- Sew them onto dresses, skirts, or handbags to elevate their style.
- Home Decor:
- Create beautiful floral arrangements that never wilt by placing them in vases.
- Adorn throw pillows, curtains, or lampshades for a soft, romantic feel.
- Craft charming wreaths or garlands for seasonal decoration.
- Add them to picture frames or mirrors for an artistic accent.
- Gifts and Events:
- Use them as unique gift toppers for presents, adding an extra layer of thoughtfulness.
- Create elegant wedding favors or decorate reception tables.
- Design unique corsages or boutonnieres for special occasions.
- Craft Projects:
- Incorporate them into scrapbooking, card making, or mixed media art.
- Decorate journals, photo albums, or keepsake boxes.
Troubleshooting Common Fabric Flower Issues
Even with the clearest instructions, sometimes things don’t go as planned. Here are solutions to common problems you might encounter:
- Petals Fraying After Sealing: If edges still fray, you might not be applying enough heat, or your fabric might be a blend that doesn’t melt cleanly. Try using a slightly hotter flame (carefully!) or a fabric sealant alternative if open flame is an issue.
- Petals Not Curling Correctly: The chiffon type can impact curling. Thinner chiffons curl more easily. Ensure your initial cuts in Step 3 are precise, as they guide the natural curl. Practice twisting gently.
- Glue Showing Through Delicate Fabric: This is a common issue with translucent fabrics. Use a minimal amount of glue, applying it strategically to hidden areas at the base of the petals. If possible, use clear-drying fabric glue instead of hot glue for a less visible bond, though it takes longer to dry.
- Flower Appears Flat: This often happens if petals aren’t staggered enough or if there aren’t enough curly petals. Ensure you rotate the flower as you add each new layer in Step 7 and consider adding a few extra curly petals for more volume.
- Uneven Petal Shapes: This usually stems from inconsistent cutting in Step 2. Always use a sharp pair of fabric scissors and pin your fabric securely to prevent shifting while cutting.
Conclusion: Your Beautiful Handmade Chiffon Flower Awaits
Crafting your own chiffon fabric flowers is a delightful and accessible project that yields stunning results. With this detailed tutorial, you now have all the knowledge and tips to create beautiful, long-lasting floral embellishments. From selecting your fabric to the final assembly and sealing, each step is designed to guide you toward a perfect bloom. These versatile flowers offer endless possibilities for personalization and decoration, making them ideal for enhancing your wardrobe, beautifying your home, or adding a special touch to gifts. So, gather your materials, follow the steps, and let your creativity blossom. Don’t forget to share your amazing creations and inspire others to discover the joy of handmade fabric flowers!