
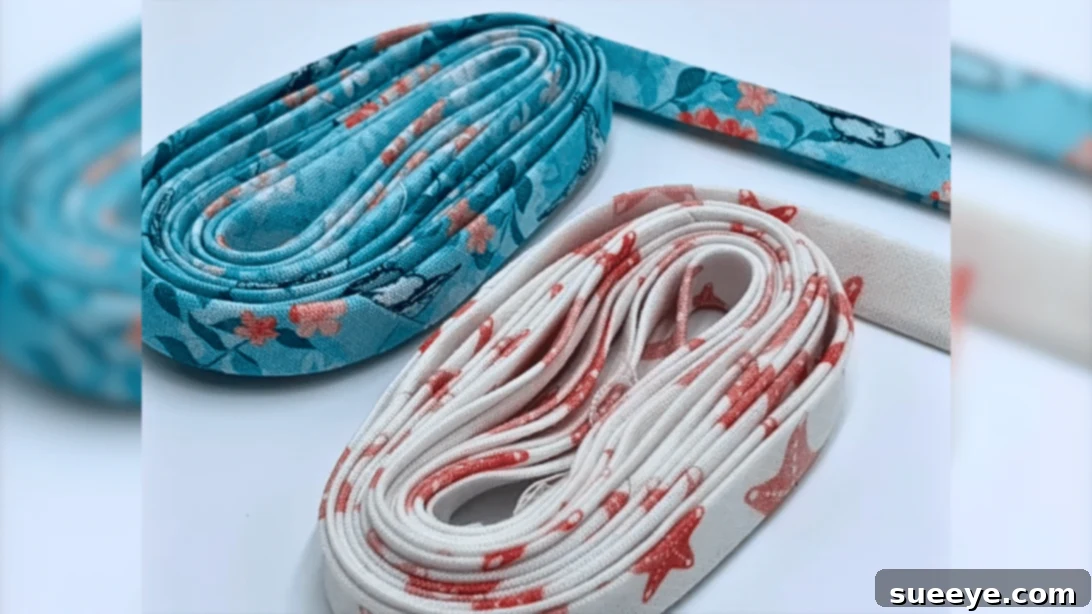
Embarking on the journey of sewing often uncovers a wealth of techniques that can transform simple projects into professional-looking masterpieces. For many beginners, one such pivotal discovery is learning how to create a continuous bias tape. This seemingly simple skill can revolutionize your approach to finishing edges, adding decorative details, and achieving a polished look in all your sewing endeavors. The moment you grasp this technique, it feels like unlocking a new level in your crafting abilities, opening up endless possibilities for fabric manipulation and design.
Bias tape, in its essence, is a strip of fabric cut on the bias (diagonally across the grain). This unique cutting method gives the fabric strip incredible flexibility and stretch, making it ideal for binding curved edges, creating neat garment finishes, or adding decorative flair. While pre-made bias tape is readily available in craft stores, mastering the art of making your own offers unparalleled advantages. You gain complete control over fabric choice, pattern, and color, ensuring perfect coordination with your projects. Imagine being able to create a custom bias tape from the very same fabric as your main project, or a contrasting fabric that perfectly complements your design vision. Furthermore, making your own continuous bias tape is incredibly economical, transforming even small fabric scraps into valuable embellishments. For instance, an 8-inch fabric square can yield an impressive 4.8 yards of bias tape, demonstrating the efficiency and value of this method.
RELATED: 6 Smart Sewing Tips & Tricks For Beginners
The beauty of this technique lies in its simplicity. You don’t need highly specialized skills or expensive tools to get started. All it requires is a bit of patience, a few basic sewing supplies, and a clear guide. This tutorial, inspired by the insightful video demonstration from Teresa DownUnder on YouTube, breaks down the process into easy-to-follow steps. It’s designed to empower even the most novice sewer to successfully create continuous bias tape. Prepare to be amazed at how straightforward and rewarding this process is. We are confident that you will find this tutorial as helpful and transformative as we did, elevating your sewing projects to a new level of professionalism and creativity.
Understanding Bias Tape: The Foundation of Flawless Finishes
Before diving into the creation process, let’s understand why bias tape is such a crucial component in the world of sewing. Bias tape is a narrow strip of fabric, typically ranging from ½ inch to 2 inches in width, that is cut on the fabric’s bias. The bias refers to the diagonal grain of the fabric, which runs at a 45-degree angle to both the warp (lengthwise) and weft (crosswise) grains. Fabric cut on the bias possesses a significant amount of stretch and drape compared to fabric cut along the straight or cross grains. This inherent flexibility is what makes bias tape indispensable for certain sewing applications.
Its primary uses include:
- Binding Edges: Bias tape is perfect for neatly encasing raw edges on necklines, armholes, quilts, placemats, and other projects. Its ability to stretch allows it to conform smoothly around curves without puckering or distorting the fabric.
- Decorative Trim: Beyond functionality, bias tape can be used as a decorative element. It can be topstitched onto surfaces, used to create piping, or added as a contrasting border to enhance the visual appeal of a garment or home decor item.
- Drawstrings and Loops: Wider bias tapes can be folded and stitched to create sturdy drawstrings for bags, pajama pants, or loops for buttons.
- Interfacing and Stabilizing: In some tailoring applications, a strip of bias-cut fabric can be used as a lightweight interfacing to stabilize curved edges while maintaining flexibility.
The traditional method of making bias tape involves cutting individual strips of fabric on the bias and then stitching them together end-to-end. While effective, this can be time-consuming and often results in many small seams, especially when a long length of tape is required. This is where the continuous bias tape method truly shines, offering a seamless and efficient alternative.
Why Opt for Continuous Bias Tape? Efficiency Meets Elegance
The continuous bias tape method is a game-changer for anyone who frequently uses bias tape in their projects. Instead of cutting numerous short strips and laboriously joining them, this technique allows you to transform a single square of fabric into one exceptionally long, continuous strip of bias tape with minimal seams. The advantages are numerous and compelling:
- Reduced Seams: The most significant benefit is the drastic reduction in the number of seams. A traditional method for a long piece of bias tape might involve dozens of joins. The continuous method reduces these to just one or two, resulting in a much smoother, cleaner, and professional finish, especially important for visible edges or delicate fabrics.
- Time-Saving: While the initial setup for the continuous method might seem slightly more complex than cutting a single strip, once you master it, it’s significantly faster for producing large quantities of bias tape. This is particularly valuable for quilting projects, large garments, or batch crafting.
- Fabric Economy: This technique makes excellent use of fabric, minimizing waste. Even irregular scraps can often be squared up and used effectively, allowing you to maximize your fabric stash and create custom tape without needing to purchase additional materials.
- Perfect Match: You can create bias tape from the exact fabric used in your main project, ensuring a flawless color and pattern match that is often impossible to achieve with store-bought options. This elevates the overall coherence and quality of your finished items.
- Custom Widths: You have complete control over the width of your bias tape. Whether you need a very narrow binding for delicate curves or a wider one for a bold decorative statement, the continuous method allows for precise customization to suit any project requirement.
Ultimately, learning the continuous bias tape technique empowers you with greater creative freedom, enhances the quality of your finished projects, and makes your sewing process more efficient and enjoyable. It’s a skill that pays dividends in every stitch.
Materials for Continuous Bias Tape: Your Essential Toolkit
Gathering the right tools before you begin ensures a smooth and enjoyable crafting experience. For making continuous bias tape, you’ll need a collection of standard sewing supplies that you likely already have in your craft space:
- Fabric: Choose a woven fabric for your bias tape. Quilting cottons are excellent for beginners due to their stable nature and ease of handling. Consider the final project when selecting your fabric; a lightweight cotton works well for garments, while a slightly heavier fabric might be suitable for home decor items.
- Marking pen or pencil: A fabric-safe marking tool is crucial for drawing precise lines on your fabric. Options include tailor’s chalk, washable fabric markers, or a disappearing ink pen. Ensure it’s clearly visible on your chosen fabric color.
- Ruler: A clear quilting ruler with distinct measurement markings, preferably at least 18 inches long, will be invaluable for accurate cutting and drawing straight lines.
- Scissors or rotary cutter and a cutting mat: For precise, clean cuts, a rotary cutter and self-healing mat are highly recommended. If using scissors, ensure they are sharp fabric shears.
- Needle and thread: A general-purpose sewing machine needle (e.g., universal 80/12) and an all-purpose polyester thread that matches or complements your fabric will be needed for stitching the initial fabric joins.
- Fabric pins: Essential for holding fabric layers together securely before stitching, ensuring accuracy. Fine glass-head pins are often preferred as they are easy to see and don’t snag fabric easily.
- Iron, for pressing: A well-functioning iron and an ironing board are non-negotiable. Pressing at each stage is critical for crisp folds, flat seams, and professional results. Steam can be particularly helpful.
- Sewing machine: Any standard sewing machine in good working order will suffice for stitching the fabric pieces together. Ensure it’s threaded correctly and tension is set appropriately for your fabric.
Having these materials ready will streamline your workflow and help you achieve the best possible continuous bias tape.
How to Make a Continuous Bias Tape: A Step-by-Step Guide
The process of creating a continuous bias tape might seem intricate at first glance, but by following these detailed steps, you’ll find it to be a logical and highly rewarding technique. Precision in cutting and pressing is key to a successful outcome.
Step 1: Preparing Your Fabric Square for Diagonal Cutting
Begin by selecting your desired fabric. For a generous yield of bias tape, start with a square piece of fabric. An 18×18-inch square is an excellent size for beginners, offering enough length for various projects without being too unwieldy. Lay your fabric flat and ensure it’s squared up perfectly. Take your fabric and fold it in half diagonally, bringing one corner to meet the opposite corner. Carefully match the edges precisely and press this diagonal fold firmly with a hot iron. This creates a crisp crease that will serve as your cutting guide. Unfold the fabric, then use your scissors or rotary cutter and ruler to cut carefully along this newly formed crease. You will now have two identical triangles. Lay these two triangles on top of each other with their right sides facing, positioning them so that their shortest sides align. This alignment is critical for creating a seamless join and is often visually demonstrated in video tutorials like the one by Teresa DownUnder.
Step 2: Joining and Marking for Continuous Strips
With the two triangles aligned right sides together, stitch them with a precise ¼ inch seam allowance. Use your sewing machine to create a strong, consistent seam. Once stitched, press the seam open flatly. This reduces bulk and ensures a smoother final bias tape. Now, flip the fabric to the wrong side. Using your marking pen or pencil and a ruler, draw parallel lines across the fabric. These lines must be 1¾ inches apart. This specific width (1¾ inches) will eventually fold down into a standard double-fold bias tape of a certain width (often around ½ inch or 12-13mm, depending on final folds and seam allowance). Ensure your lines are clear and extend across the entire fabric piece. After drawing all your lines, carefully trim off any excess fabric from the edges, making sure to maintain the integrity of your drawn lines. The next crucial step is to fold the fabric again, this time bringing the diagonal edges together. Align these edges precisely, ensuring that the right sides of the fabric are still facing each other and, most importantly, align the drawn lines so that they create a continuous spiral pattern. Pin generously along this seam to hold it securely.
Step 3: Stitching the Tube and Forming the Bias Tape
With your fabric folded and pinned, you will now stitch the diagonal edges together. Again, maintain a consistent ¼ inch seam allowance. This seam will effectively create a fabric “tube” with the drawn lines spiraling around it. After stitching, press this seam open carefully to minimize bulk. You now have a fabric tube with continuous parallel lines marked on its surface. Starting from one end, begin cutting along these drawn lines. As you cut, you’ll notice the fabric naturally unfurling into one very long, continuous strip. Take your time to cut precisely along each line. Once you have your long bias strip, it’s time to form the actual bias tape. Fold the entire strip in half lengthwise with the wrong sides facing each other, and press firmly. This initial fold establishes the center crease of your tape. Unfold the strip, and then fold both raw edges inward towards that central crease you just made, pressing nicely as you go. This creates a double-fold. Finally, fold the strip in half once more, encasing the raw edges within the folds, and press again flatly. This last press creates your finished, double-fold continuous bias tape, ready for all your sewing projects!
Tips for Perfect Bias Tape Every Time
Achieving consistently beautiful continuous bias tape is a skill that improves with practice. Here are some expert tips to help you perfect your technique and troubleshoot common issues:
- Use a Fresh Blade: If using a rotary cutter, ensure your blade is sharp. A dull blade can drag and distort fabric, leading to uneven strips.
- Test Your Fabric: Different fabrics behave differently. If working with a new fabric type, consider doing a small test square first to see how it cuts and presses. Slippery fabrics like rayon or silk might require more pins and careful handling.
- Press, Press, Press: We cannot overstate the importance of pressing at every stage. Crisp folds and flat seams are the secrets to professional-looking bias tape. Use plenty of steam if your fabric allows, and let the fabric cool before handling to set the press.
- Consistent Seam Allowance: A precise ¼ inch seam allowance in the initial joining steps is crucial. An uneven seam can throw off the alignment of your continuous strip.
- Bias Tape Maker Tool: While not essential for creating the continuous strip itself, a bias tape maker tool is incredibly helpful for the final folding steps. This small gadget feeds the fabric strip through, automatically folding the edges inwards, making the final pressing much easier and more consistent. They come in various sizes to match your desired final bias tape width.
- Mind Your Grain: Always double-check that you are cutting on the true bias (45-degree angle). This is what gives bias tape its stretch.
- Storage: Once made, wind your bias tape onto an empty spool or cardboard piece to keep it neat and prevent tangling until you’re ready to use it.
Creative Uses for Your Homemade Bias Tape: Unleash Your Creativity
Now that you’ve mastered the art of making continuous bias tape, the possibilities for incorporating it into your sewing projects are virtually endless. Move beyond just functional binding and explore its full creative potential:
- Garment Finishes: Use bias tape to beautifully finish necklines, armholes, and hems on blouses, dresses, and skirts. Its flexibility makes it perfect for curved edges, providing a clean, professional touch.
- Quilting Projects: Bias tape is the go-to choice for binding quilts. It creates a durable and decorative edge that can withstand years of use and washing. Custom-made tape allows you to perfectly match or contrast your quilt’s aesthetic.
- Home Decor Accents: Elevate everyday items like placemats, napkins, or throw pillows with a custom bias tape border. It can add a pop of color, define edges, or introduce a subtle texture.
- Piping: Transform your bias tape into elegant piping by enclosing a cord within it. Piping adds a luxurious, tailored finish to cushions, upholstery, and garments.
- Drawstrings and Ties: Fold and stitch wider bias tape to create sturdy and attractive drawstrings for bags, pouches, or loungewear.
- Appliqué and Decorative Embellishments: Use bias tape to create intricate designs or simple decorative lines on fabric. You can topstitch it onto a project in spirals, geometric patterns, or free-form shapes.
- Bag Making: Finish the raw edges of bag linings, create strap loops, or add decorative accents to handmade bags and clutches.
Experiment with different fabric types, colors, and widths to see how bias tape can transform your projects from ordinary to extraordinary. This simple yet powerful sewing technique will undoubtedly become one of your most cherished skills.
*All image credit belongs to Teresa DownUnder via YouTube. Follow and subscribe to her channel for more amazing sewing tutorials and creative inspiration!
Easy Continuous Bias Tape Tutorial for Beginners: Your Next Sewing Essential
Congratulations on taking the leap to master the continuous bias tape technique! This tutorial has guided you through the preparation, precise cutting, careful stitching, and the final forming of your very own custom bias tape. What once might have seemed like a complex endeavor is now demystified, revealing itself as an accessible and incredibly rewarding skill for any sewing enthusiast, especially beginners. The ability to create your own bias tape offers unparalleled control over your projects, ensuring perfect color matches, optimal fabric choices, and a significant reduction in material costs. You’re no longer limited by what’s available in stores; your creativity is the only boundary.
As you continue your sewing journey, you’ll find countless applications for this versatile tool. From achieving impeccably bound quilt edges and professional garment finishes to adding unique decorative flourishes to home decor, homemade continuous bias tape will become an indispensable part of your crafting arsenal. Remember, like any new skill, practice makes perfect. Don’t be discouraged if your first attempt isn’t flawless. Each strip you make will build your confidence and refine your precision. So, grab your fabric scraps, fire up your sewing machine, and start creating beautiful, custom bias tape today. You’re well on your way to becoming a more resourceful and skilled sewer, ready to tackle any project with flair and confidence!