
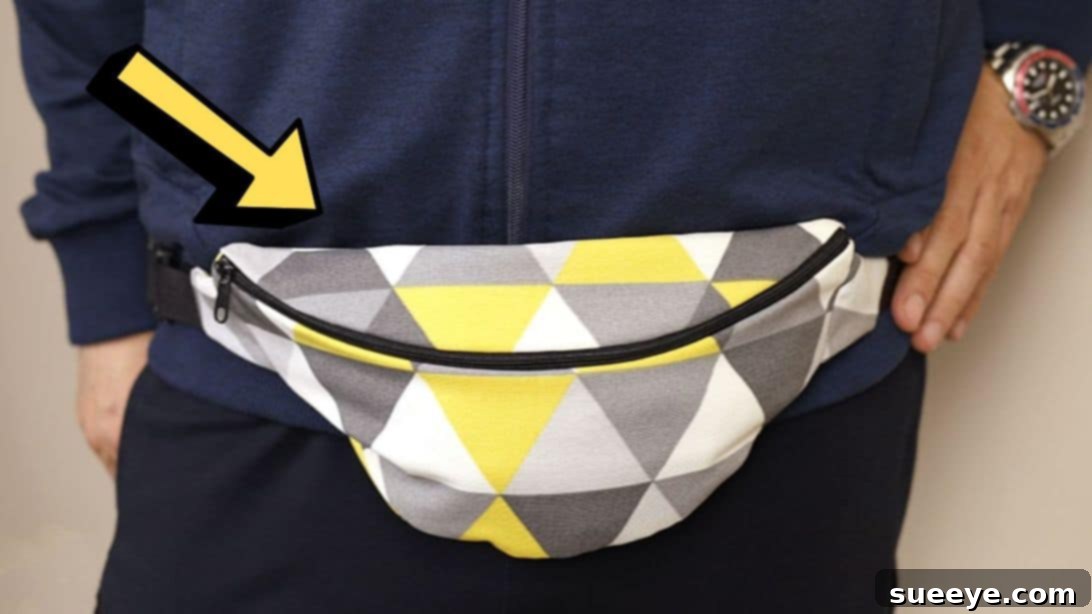
Easy DIY Fanny Pack Sewing Tutorial: Craft Your Own Stylish Waist Bag
Are you looking for a fun, practical, and incredibly satisfying sewing project to hone your skills? Look no further! This comprehensive guide will walk you through creating your very own stylish fanny pack, also known as a waist bag. Perfect for beginners and seasoned sewers alike, this project by the talented team at Hello Sewing offers a fantastic opportunity to create a personalized accessory that’s both fashionable and functional.
Fanny packs have made a triumphant return, becoming a must-have accessory for travel, festivals, walks, or simply keeping your essentials close and hands-free. While store-bought options are plentiful, there’s nothing quite like the pride of carrying a custom-made bag that perfectly matches your style. This tutorial is designed to be straightforward, using clear instructions and a simple pattern to ensure a smooth sewing experience. Get ready to transform some fabric into your next favorite accessory!
Why Sew Your Own Fanny Pack?
Beyond the sheer joy of creating something with your own hands, making a DIY fanny pack offers several compelling advantages:
- Personalization: Choose your favorite fabrics, colors, and patterns to create a bag that truly reflects your unique style. Match it to your wardrobe or make a bold statement!
- Cost-Effective: Often, sewing your own accessories can be more budget-friendly than purchasing high-end designer versions, especially if you use fabric scraps or sale items.
- Skill Development: This project is excellent for practicing fundamental sewing techniques such as cutting, zipper insertion, curved seams, and working with webbing – all valuable skills for future projects.
- Durability: By carefully selecting quality materials and using sturdy stitching, you can create a fanny pack that is built to last longer than many mass-produced items.
- Gift Idea: A handmade fanny pack makes a thoughtful and unique gift for friends and family, tailored to their tastes and needs.
Materials You’ll Need for Your DIY Fanny Pack:
Before you dive into the sewing, gather all your materials. Having everything ready will make the process much smoother. The pattern linked below is essential for accurate cutting.
- 18 x 22 inches (approx. 45 x 56 cm) of medium-weight woven fabric: This will be your main exterior fabric. Consider durable options like canvas, denim, twill, or even a sturdy cotton print. Think about how much wear and tear your fanny pack will endure.
- 18 x 22 inches (approx. 45 x 56 cm) of lightweight woven cotton fabric, for lining: A lighter cotton fabric is perfect for the interior lining. It adds a professional finish and protects the inside of your bag. Quilting cottons are a popular choice.
- 1 yard (approx. 90 cm) of 1-inch (2.5 cm) webbing: This strong, durable strap material will form the adjustable belt of your fanny pack. Choose a color that complements your main fabric.
- Plastic clip buckle: A crucial component for easy wearing and removal of your fanny pack. Ensure it matches the width of your webbing (typically 1 inch/2.5 cm).
- Zipper: The length of the zipper will depend on the pattern, but a standard 7-9 inch (18-23 cm) zipper is usually sufficient for the main compartment. A coil zipper is often easier for beginners.
- Bias tape: Approximately 1 yard (90 cm) of double-fold bias tape will be used to finish the raw edges of your zipper and provide a neat look. You can buy pre-made or create your own.
- Needle and matching thread: Choose a high-quality polyester thread that matches your main fabric color for a seamless finish. A universal needle (size 80/12 or 90/14) is usually suitable.
- Scissors or rotary cutter and a cutting mat: Sharp fabric scissors are a must for clean cuts, or a rotary cutter and self-healing mat for precision and speed, especially with curves.
- Ruler or measuring tape: For accurate measurements and marking.
- Iron, for pressing: Pressing seams as you go is vital for a professional-looking finish and helps ensure pieces fit together correctly.
- Sewing clips or pins: To hold fabric pieces together securely before sewing, preventing shifting. Clips are often preferred for thicker fabrics or projects involving webbing.
- Pattern: (Click here to download and print the pattern) Downloading and printing this pattern is your first essential step.
Step-by-Step Directions to Sew Your Fanny Pack:
Step 1: Pattern Preparation and Fabric Cutting
Begin by downloading the fanny pack pattern from Hello Sewing. Print it at 100% scale – it’s crucial not to let your printer scale the pattern, as this will affect the final size of your bag. Once printed, carefully cut out all the individual template pieces using your paper scissors. Next, take your lining fabric and trace each pattern piece onto it. Use a fabric marker or tailor’s chalk for clear lines, then cut these pieces precisely. Repeat this entire process for your main exterior fabric. Remember to cut the four side pieces for both the main and lining fabrics, ensuring you cut them mirrored. This means you should flip the pattern piece for two of the four cuts to ensure you have a left and a right side for a symmetrical bag. Accuracy in cutting is paramount for a professional finish, so take your time.
After cutting your fabric pieces, you’ll need to mark the midpoint at the top and bottom of your main fabric pieces. This can be done by folding the piece in half and making a small snip or a tiny chalk mark at the fold. These midpoints will serve as essential alignment guides later on. Now, prepare your zipper: take your bias tape and carefully cover the short, raw ends of the zipper. Fold the bias tape over the end, press it neatly, and then stitch it in place. This creates a clean, finished look and prevents the zipper tape from fraying.
It’s now time to assemble the lower front section of your fanny pack. Take the lower front lining piece and the lower front main fabric piece. Lay them together with their wrong sides facing each other. This creates a neat, concealed finish. Next, center your prepared zipper along the curved edge of these combined pieces, ensuring the right side of the zipper is facing the right side of your main fabric. Carefully pin or clip the zipper in place along this curve. Using a zipper foot on your sewing machine, stitch along the curve, securing the zipper. After this, take another piece of bias tape and pin it to the raw edge of the zipper tape, then sew it to enclose that raw edge, giving it a professional and durable finish. This step is critical for a smooth-opening zipper.
Step 2: Constructing the Main Body and Final Assembly
With the lower front piece ready, move on to the large front pieces. Lay the large front lining piece and the large front main fabric piece together, again with their wrong sides facing. Then, place your assembled lower front piece on top, ensuring the zipper is perfectly centered along the top curve of these larger pieces. Use plenty of clips or pins to secure all layers together around the curve. Stitch the zipper in place, carefully guiding your fabric to maintain a smooth curve. Once the zipper is attached, take another strip of bias tape and use it to cover the remaining raw side of the zipper tape, securing it with a stitch. This ensures all raw edges are enclosed and the zipper functions flawlessly.
Now, let’s address the corners for a tailored look. Gently gather any excess fabric in the corners of your front panel, creating a small dart-like effect. You can sew these gatherings by hand with a few small stitches to shape the bag and reduce bulk. This subtle detail contributes significantly to the final structure and aesthetic of your fanny pack.
Next, it’s time to prepare the belt components. Take your side pieces and your webbing pieces (which will form the belt). Sew the webbing pieces onto each side of your back main fabric pieces. Make sure the webbing is securely attached, as it will bear the weight of the bag. Attach one half of your plastic clip buckle to one end of the webbing, and the other half to the other end. Adjust the webbing length according to your preference; you can trim any excess later.
Almost there! Now, place your front fanny pack piece (with the zipper installed) on top of your back fanny pack piece (with the webbing attached), ensuring their right sides are together. This is a crucial step for achieving a neat interior finish. Before you start sewing, make sure to open the zipper halfway. This is a vital trick that allows you to turn the bag right side out easily once sewn. Carefully align all the edges, paying close attention to the midpoint markings you made earlier – these will help ensure perfect symmetry. Pin or clip all around the perimeter of the fanny pack. Using a regular straight stitch and a consistent seam allowance (typically 3/8 or 1/2 inch, check your pattern), sew all around the edges, leaving the zipper open as your turning gap.
Once you’ve sewn all the way around, carefully clip any curves (cut small notches into the seam allowance without cutting through your stitching) to help the fabric lie flat when turned. Now, reach through the partially open zipper and gently pull the entire fanny pack right side out. Take your time to push out all the seams and corners cleanly. A point turner or blunt object can help achieve crisp edges. Give your newly sewn fanny pack a final press with the iron, and voilà – you’re done! Your custom-made, easy-to-sew DIY fanny pack is ready to be worn and admired.
Tips for Sewing Success:
- Read Through First: Always read the entire tutorial and pattern instructions before you start cutting or sewing. This helps you understand the whole process and anticipate upcoming steps.
- Pressing is Key: Iron your fabric before cutting and press your seams after each sewing step. This makes a huge difference in the professional appearance of your finished project.
- Use the Right Tools: A walking foot can be helpful for sewing multiple layers or slippery fabrics. A zipper foot is essential for getting close to zipper teeth.
- Practice Makes Perfect: If you’re nervous about zipper insertion or curved seams, do a few practice runs on scrap fabric first.
- Don’t Rush: Sewing is a meditative process. Take your time, enjoy each step, and don’t be afraid to unpick stitches if something isn’t quite right.
- Check Your Machine: Ensure your sewing machine is threaded correctly, the bobbin is full, and your needle is sharp and appropriate for your fabric type.
Customization Ideas for Your Fanny Pack:
Make your fanny pack truly unique with these customization ideas:
- Add Pockets: Integrate an internal slip pocket or a small zippered pocket on the back panel for extra organization and security.
- Embellishments: Consider adding embroidery, patches, fabric paint, or even iron-on vinyl designs to the exterior for a personalized touch.
- Fabric Mixing: Use contrasting fabrics for different panels or the lining to add visual interest and a pop of color.
- Hardware: Experiment with different colored zippers, buckle styles, or even add D-rings for attaching keys or charms.
- Size Adjustments: Once you’re comfortable with the pattern, you might try slightly altering the dimensions to create a larger or smaller fanny pack.
Caring for Your Handmade Fanny Pack:
To ensure your DIY fanny pack lasts, consider the care instructions based on your fabric choices. Generally, a gentle cycle with cold water and air drying is recommended. If your fabrics are pre-shrunk, you’ll have less worry about future shrinkage. Always avoid harsh detergents that could fade colors or damage embellishments.
Conclusion: Your New Favorite Accessory Awaits!
Congratulations! You’ve successfully sewn a fantastic, custom-made fanny pack. This project is a testament to the joy of sewing and the satisfaction of creating something both beautiful and incredibly useful. Whether you’re using it for daily errands, a weekend adventure, or as a stylish statement piece, your handmade fanny pack is sure to turn heads and keep your essentials organized.
Remember that every stitch tells a story, and your fanny pack is a perfect reflection of your creativity and effort. We hope you loved this sewing project as much as we did bringing you this detailed guide. Don’t forget to visit Hello Sewing’s channel for more amazing tutorials and subscribe for endless inspiration!
*All these images are credited to Hello Sewing via YouTube. Give her channel a visit and subscribe for more!