
Ultimate Death by Chocolate Trifle: Your Go-To Recipe for Decadent Layers
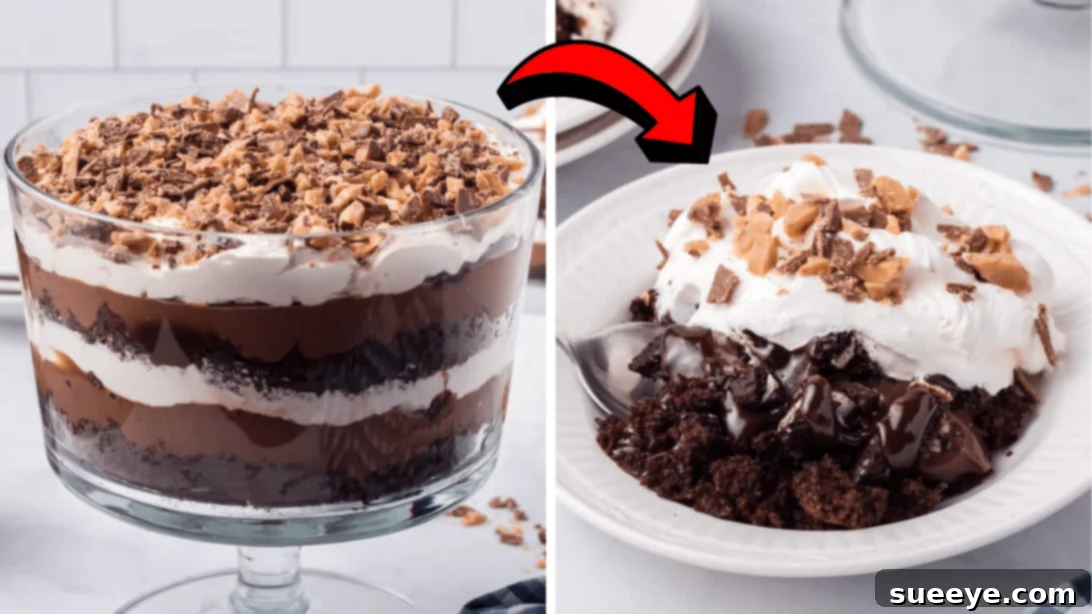
Prepare your taste buds for an unforgettable journey into chocolate bliss! This Death by Chocolate Trifle is not just a dessert; it’s an experience. Imagine layers of moist chocolate cake, velvety chocolate pudding, fluffy whipped topping, crunchy Oreo cookies, and delightful Heath bar bits, all coming together in a magnificent display. It’s an absolute showstopper that promises to impress at any gathering, from casual family dinners to elaborate holiday celebrations. Best of all, despite its luxurious appearance, this recipe is incredibly easy to make, making it perfect for both seasoned bakers and beginners alike. Get ready to create a dessert that will have everyone asking for a second helping!
This trifle isn’t just a treat; it’s a celebration of all things chocolate. Its simple assembly process means you can whip up this decadent creation without hours in the kitchen, freeing you up to enjoy your special moments. Whether you’re marking a birthday, an anniversary, or simply craving something extraordinary on an ordinary day, this Death by Chocolate Trifle fits the bill. It combines convenience with an undeniable homemade taste that feels truly gourmet. Dive into this recipe and discover why it’s destined to become a staple in your dessert repertoire.
Why You’ll Love This Easy Death by Chocolate Trifle Recipe
- Effortlessly Impressive: Achieving a stunning, layered dessert has never been easier. The visual appeal alone makes this trifle a centerpiece.
- Rich Chocolate Flavor: Every component is infused with chocolate, delivering an intensely satisfying experience for true chocolate lovers.
- Perfect for Any Occasion: From festive holidays to casual get-togethers, this trifle is a crowd-pleaser that fits right in.
- Minimal Baking Required: Using a boxed cake mix simplifies the process, cutting down on preparation time significantly.
- Customizable: Easily adapt the ingredients to suit your preferences or what you have on hand.
Ready to create this masterpiece? Follow along with our detailed instructions, and for a visual guide, be sure to watch the helpful video tutorial by Kitchen Fun With My 3 Sons on YouTube.
Ingredients for Your Decadent Death by Chocolate Trifle:
Gathering your ingredients is the first step to creating this irresistible dessert. Each component plays a crucial role in building the layers of flavor and texture that make this trifle so special.
- 1 (16.5oz) box of chocolate cake mix: This forms the foundational layer of our trifle. Opt for a rich dark chocolate or devil’s food cake mix for maximum impact. Remember to also have the additional ingredients listed on the cake mix box (usually eggs, oil, and water or milk).
- 2 (3.9oz) boxes of instant chocolate pudding mix: Instant pudding makes this recipe a breeze. Feel free to use milk chocolate, dark chocolate, or even a combination for varying depths of flavor. Prepare according to package directions, typically requiring cold milk.
- ½ cup of hot fudge sauce: This adds an extra layer of moisture and an intense, gooey chocolate punch. You can warm it slightly for easier spreading if desired.
- ½ cup of crushed Oreo cookies: These iconic cookies provide a delightful crunch and an additional layer of chocolatey goodness. Any variety of Oreo works, but the classic chocolate sandwich cookie is highly recommended.
- 16oz of Cool Whip: Thawed and ready to go, Cool Whip provides a light, airy contrast to the rich chocolate layers. For an even more luxurious touch, you can substitute with freshly whipped cream.
- 4-5 Heath candy bars: Crushed Heath bars are the secret ingredient for that irresistible toffee and chocolate crunch that elevates this trifle to another level.
Step-by-Step Guide: How to Assemble Your Death by Chocolate Trifle
Assembling this trifle is a fun and straightforward process. The key is even layering to ensure every spoonful offers a perfect balance of flavors and textures. Have your trifle bowl ready; its clear sides are perfect for showcasing the beautiful layers!
Step 1: Prepare Your Chocolate Cake Base
Begin by preparing the chocolate cake mix exactly according to the package instructions. Bake it in a 9×13 inch pan (or two 8-inch round pans) as directed. Once baked, it’s crucial to let the cake cool completely. This prevents the pudding and Cool Whip from melting when added. Once cooled, gently crumble the cake into bite-sized pieces. You can do this by hand or use a fork to achieve nice, fluffy crumbs. Set aside.
Step 2: Mix the Pudding and Crush the Heath Bars
Next, prepare the instant chocolate pudding mix. Follow the instructions on the box, typically whisking with cold milk until thickened. Allow it to set for a few minutes in the refrigerator while you prepare the Heath bars. Unwrap your Heath candy bars and place them in a resealable plastic bag. Using a rolling pin or a meat mallet, crush them into small, irregular chunks. A food processor can also be used for a finer crush. Once ready, ensure your trifle bowl is clean and ready for layering.
Step 3: Begin the First Layering Sequence
Take about half of your crumbled chocolate cake and spread it evenly across the bottom of your trifle bowl. This forms a sturdy and delicious base. Next, gently spoon half of the hot fudge sauce over the cake crumbs, spreading it as evenly as possible. Then, follow with half of the prepared chocolate pudding mixture, carefully spreading it to create a smooth layer over the fudge.
Step 4: Add the Crunch and Cream – Second Layering
Evenly sprinkle half of your crushed Oreo cookies over the pudding layer. The Oreos add a fantastic textural contrast. Following this, dollop half of the thawed Cool Whip on top and carefully spread it out to form a creamy, white layer. Now, you’ll repeat the entire layering process: add the remaining half of the crumbled cake, followed by the rest of the hot fudge sauce, the remaining chocolate pudding, and finally, the rest of the crushed Oreos. This ensures consistent flavor and texture throughout the entire trifle.
Step 5: Chill, Garnish, and Serve Your Trifle
Once all layers are assembled, cover your trifle bowl with plastic wrap. Place the trifle in the refrigerator to chill for a minimum of 1 to 2 hours. Chilling is essential as it allows the flavors to meld beautifully and the pudding and whipped topping to set firmly, making for easier serving. For best results and maximum flavor development, chilling overnight is highly recommended. Just before serving, top your magnificent trifle with the remaining crushed Heath bars. This adds a final touch of elegance and crunch. Serve chilled and watch it disappear!
Tips for Trifle Success
- Cooling is Key: Always ensure your cake is completely cool before crumbling and layering to prevent any melting of the creamy layers.
- Even Layers: Take your time to spread each layer evenly. This not only looks better but also ensures a balanced bite every time.
- Don’t Overmix Pudding: Follow the pudding package instructions precisely. Overmixing can result in a thinner, less set pudding.
- Get Creative with Crushing: If you don’t have a rolling pin, a sturdy glass or mug can work wonders for crushing cookies and candy bars in a bag.
- Chill Adequately: The chilling time is not just for setting; it allows the flavors to deepen and meld, making the trifle even more delicious.
Customization and Variations for Your Chocolate Trifle
While the classic Death by Chocolate Trifle is divine, don’t hesitate to get creative and personalize your dessert!
- Cake Variations: Instead of plain chocolate cake mix, try a dark chocolate brownie mix for a denser base, or a red velvet cake mix for a different color and flavor profile.
- Pudding Flavors: Experiment with white chocolate, French vanilla, or even a coffee-flavored instant pudding for an interesting twist.
- Added Fruits: Fresh raspberries, strawberries, or sliced bananas can add a wonderful freshness and tartness to cut through the richness of the chocolate.
- Nutty Additions: Sprinkle in chopped walnuts, pecans, or almonds for extra crunch and a different flavor dimension.
- Alternative Toppings: Instead of Heath bars, consider other chocolate candies, chocolate shavings, mini chocolate chips, or a drizzle of caramel sauce.
- Liqueur Infusion: For an adult version, lightly brush the cake crumbs with a chocolate liqueur, coffee liqueur, or even a little rum for an added depth of flavor.
Serving and Storage Suggestions
This Death by Chocolate Trifle is best served chilled. To serve, use a large spoon or a trifle server to scoop generous portions, ensuring each serving gets a bit of every delicious layer. It makes an excellent dessert for potlucks, parties, or as a special treat for family dinners. Pair it with a cup of coffee or a glass of milk for the ultimate indulgence.
If you have any leftovers (which is rare!), store the trifle covered tightly with plastic wrap in the refrigerator. It will stay fresh and delicious for 3-4 days. The flavors often deepen and improve on the second day, making it a wonderful make-ahead dessert.
This Death by Chocolate Trifle is more than just a recipe; it’s a guaranteed hit that brings joy and indulgence to any table. Its simplicity belies its incredible flavor and stunning presentation. So, go ahead, gather your ingredients, follow these easy steps, and prepare to delight everyone with this unforgettable dessert. Happy baking (and assembling)!
*All these images are credited to Kitchen Fun With My 3 Sons via YouTube. Give their channel a visit and subscribe for more delightful recipes!