
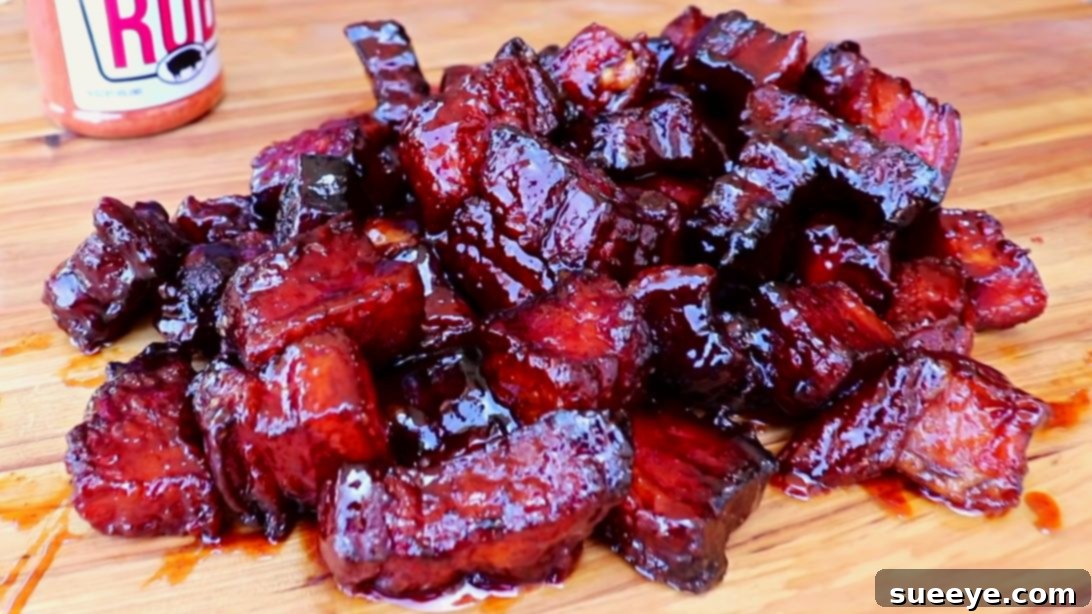
Ultimate Smoked Bacon Burnt Ends Recipe: Sweet, Smoky & Irresistibly Tender
Prepare to revolutionize your perception of bacon! If you thought bacon couldn’t get any better, think again. We’re diving into the world of **Bacon Burnt Ends**, a culinary marvel that takes humble bacon to an extraordinary level of deliciousness. This recipe, inspired by the masterful techniques of HowToBBQRight, transforms ordinary bacon into delectable, smoky, and incredibly tender bite-sized pieces, generously glazed with a savory-sweet sauce that creates an unforgettable experience. Imagine crispy edges, a tender, melt-in-your-mouth interior, and an explosion of flavor in every single bite. These aren’t just bacon; they’re an event. Perfect for game day, a family gathering, or simply elevating your weekend BBQ, these bacon burnt ends are guaranteed to be a crowd-pleaser and a conversation starter. Get ready to impress everyone with this surprisingly easy-to-make delicacy that combines the best of smoky BBQ with the undeniable allure of bacon.
What Exactly Are Bacon Burnt Ends?
The term “burnt ends” traditionally refers to the flavorful, crusty pieces cut from the point of a smoked beef brisket. These morsels are known for their intense smoky flavor, caramelized bark, and tender, juicy interior. Taking inspiration from this BBQ classic, “Bacon Burnt Ends” apply a similar concept to thick-cut bacon. Instead of brisket, chunks of bacon are slow-smoked until perfectly rendered, then coated in a rich, sweet, and tangy BBQ glaze before being returned to the smoker for a final caramelization. The result is a truly unique texture and flavor profile: crispy yet tender, smoky yet sweet, with a savory depth that will have you reaching for more. They’re not actually “burnt” in the traditional sense, but rather deeply caramelized and intensely flavored, making them a highly sought-after treat in the world of barbecue.
Why You Need to Make These Smoked Bacon Burnt Ends Today
There are countless reasons why this Bacon Burnt Ends recipe deserves a prime spot in your culinary repertoire. First and foremost, the flavor is simply unparalleled. The combination of smoky bacon, a robust BBQ rub, and a sweet, sticky glaze creates a complex symphony of tastes that dances on your palate. Secondly, the texture is a delightful contrast – a slight crispiness on the exterior yielding to an unbelievably tender, almost melt-in-your-mouth interior. They are incredibly versatile, serving as an exceptional appetizer, a standout side dish, or even a decadent topping for salads, burgers, or mac and cheese. They’re also surprisingly approachable for home cooks, even those new to smoking. Plus, they disappear fast at any gathering, making you the hero of the day! Once you try these, you’ll understand why they’re quickly becoming a legendary BBQ staple.
Essential Ingredients for Unforgettable Bacon Burnt Ends
Crafting the perfect batch of bacon burnt ends starts with selecting high-quality ingredients. Here’s what you’ll need, along with some insights to ensure the best results:
- 4 pounds of unsliced bacon: This is the cornerstone of our recipe. Opt for thick-cut, good-quality bacon. Unsliced bacon, often referred to as a “slab,” allows you to control the thickness of your cubes, ensuring they hold up well during the long cooking process. If unsliced isn’t available, a very thick-cut pre-sliced bacon can work, but avoid thin-cut varieties as they tend to become too crispy and fall apart.
- ½ cup of light brown sugar: Brown sugar is crucial for both the initial dry rub and contributing to the caramelization process. It adds a wonderful sweetness that balances the savory bacon and smoky flavors. Light brown sugar provides a subtle molasses note without overpowering the other ingredients.
- 2 tbsp of BBQ rub: A good quality BBQ rub is essential for building a foundational layer of flavor. Choose your favorite sweet and savory rub, or one with a slight hint of spice. This rub will adhere to the bacon, forming a delicious bark during the initial smoking phase.
- 18 ounces of BBQ sauce: The BBQ sauce forms the base of our luscious glaze. Select a sauce that you genuinely enjoy, as its flavor will be prominent. A thicker, richer sauce often works best, providing a good coating. You can choose a smoky, tangy, or sweet variety to customize the final taste profile.
- 6 ounces of rib glaze: A dedicated rib glaze, often thicker and sweeter than standard BBQ sauce, adds an extra layer of stickiness, shine, and depth to your burnt ends. It helps create that desirable candy-like coating. If a specific rib glaze isn’t available, you can substitute with more BBQ sauce, or a mixture of BBQ sauce and maple syrup or honey for added sweetness and viscosity.
Recommended Equipment for Smoking Bacon Burnt Ends
While the ingredients are key, having the right tools can make the smoking process much smoother and more enjoyable. Here’s a list of equipment that will help you achieve perfect bacon burnt ends every time:
- Smoker or Grill with Indirect Cooking Setup: Whether you use a dedicated pellet smoker, an offset smoker, a charcoal grill with a smoking setup, or even a gas grill configured for indirect heat, a stable temperature of 250°F (120°C) is crucial.
- Large Mixing Bowls: You’ll need one for tossing the bacon with the rub and another for mixing the glaze.
- Sharp Chef’s Knife and Cutting Board: For safely and precisely cutting the unsliced bacon into uniform cubes.
- Cooling Rack: Essential for allowing smoke to circulate evenly around each piece of bacon during the initial smoking phase.
- Large Baking Tray or Sheet Pan: To place under the cooling rack, catching any drips and making cleanup easier. Lining it with aluminum foil is highly recommended.
- Half-Size Aluminum Pan: Ideal for the final glazing stage. Its size helps keep the bacon pieces nestled together, ensuring they are thoroughly coated in the sauce.
- Tongs: For flipping bacon pieces and tossing them with the glaze.
- Measuring Cups and Spoons: For accurate ingredient proportions.
- Heat-Resistant Gloves (Optional but Recommended): For safely handling hot pans and grates.
- Digital Meat Thermometer (Optional): While bacon doneness is often visual, a reliable thermometer can help monitor the smoker’s ambient temperature.
Step-by-Step Directions: Crafting Your Legendary Bacon Burnt Ends
Follow these detailed steps to create a batch of smoked bacon burnt ends that will become your signature dish. Precision and patience are your best friends here!
Step 1: Prepare Your Smoker and Bacon
Begin by setting up your smoker or grill for indirect cooking. The target temperature should be a consistent 250 degrees Fahrenheit (120 degrees Celsius). For that signature smoky depth, add two medium-sized chunks of cherry wood to your hot coals or smoker box. Cherry wood imparts a mild, fruity smoke flavor that beautifully complements pork and bacon without overpowering it. While your smoker is coming up to temperature and producing clean, blue smoke, prepare your bacon.
Carefully remove the unsliced bacon from its packaging. Using a sharp chef’s knife, cut the entire slab of bacon into approximately 1½-inch strips lengthwise. Once you have these strips, proceed to cut each strip into uniform 1½-inch cubes. Consistency in size is important here, as it ensures even cooking and rendering. In a small mixing bowl, combine the light brown sugar and your chosen BBQ rub. Mix these together thoroughly until you have a uniform, fragrant seasoning blend. Transfer the cubed bacon pieces into a large mixing bowl, then generously sprinkle the brown sugar and BBQ rub mixture all over them. Give the bacon a nice, vigorous toss, using your hands or tongs, until every piece is evenly coated and seasoned. Lightly grease a cooling rack with canola oil or a non-stick spray – this prevents the bacon from sticking during smoking. Place this greased rack on top of a baking tray lined with aluminum foil to catch any drips and simplify cleanup. Arrange the seasoned bacon pieces in a single layer all over the rack, ensuring there’s a little space between each piece for optimal smoke circulation. Do not overcrowd the rack.
Step 2: The Initial Smoke – Developing Flavor and Texture
Once your smoker is stable at 250°F and producing clean smoke, carefully place the cooling rack with the seasoned bacon pieces onto the grill grates. Close the smoker lid and let the bacon cook undisturbed for approximately one hour. During this initial phase, the bacon will begin to render its fat, absorb that delicious cherry smoke flavor, and start to develop a beautiful reddish-brown color from the rub. After the first hour, open the lid and, using tongs, carefully flip each individual piece of bacon over. This ensures even rendering and browning on all sides. Close the smoker lid again and continue to cook for an additional hour. By the end of this second hour, your bacon pieces should be well-rendered, deeply colored, and the edges should be starting to crisp up, but they won’t be fully “burnt” yet – that comes in the next step.
Step 3: Glaze, Caramelize, and Perfect
While the bacon is undergoing its initial smoke, take this time to prepare your luscious glaze. In a mixing cup or small bowl, thoroughly combine the 18 ounces of BBQ sauce with the 6 ounces of rib glaze. Stir until the mixture is completely uniform and smooth. Once the two hours of initial smoking are complete, carefully remove the bacon burnt ends from the smoker. Transfer all the smoky, rendered bacon pieces into a half-size aluminum pan. This pan is perfect for containing the sauce and ensuring every piece gets coated.
Now, generously drizzle the prepared BBQ sauce and rib glaze mixture all over the top of the bacon burnt ends in the pan. Using tongs, gently toss the bacon pieces, ensuring each cube is thoroughly and evenly coated with the sticky, flavorful glaze. The goal is to have every piece glistening with sauce. Once coated, return the aluminum pan with the glazed bacon back into the smoker. Let them cook for an additional 20 to 30 minutes. During this final smoking period, the glaze will heat up, thicken, and caramelize onto the bacon, creating that signature sticky, glossy, and intensely flavorful “burnt end” exterior. Keep an eye on them towards the end to prevent actual burning; you’re looking for a beautiful, deep mahogany color and a tacky, irresistible finish.
Step 4: Rest, Serve, and Savor
After 20 to 30 minutes in the glaze bath, carefully remove the pan of glorious bacon burnt ends from the smoker. They will be incredibly hot and the glaze will be molten. It’s crucial to allow them to cool slightly for about 5-10 minutes before serving. This brief resting period allows the glaze to set up, becoming perfectly sticky and less likely to burn your tongue, and it also allows the flavors to meld beautifully. Once slightly cooled, these smoky, sweet, and savory morsels are ready to be devoured! Serve them as an appetizer, a side dish, or simply enjoy them straight from the pan. Prepare for an unforgettable flavor experience!
Pro Tips for Making the Best Bacon Burnt Ends
To ensure your bacon burnt ends are nothing short of spectacular, consider these expert tips:
- Choose Quality Bacon: As mentioned, thick-cut, unsliced bacon (pork belly) is ideal. The higher fat content and thickness are crucial for them to withstand the long smoking process and remain tender. Thin bacon will simply crisp up too much.
- Uniform Cuts: Strive for consistently sized bacon cubes (1.5 inches). This ensures they cook evenly and render at the same rate.
- Don’t Overcrowd: When arranging bacon on the cooling rack, leave a small gap between each piece. This allows for optimal smoke circulation and prevents steaming, ensuring a proper bark forms.
- Monitor Smoker Temperature: Consistency is key in low-and-slow smoking. Use a reliable thermometer to maintain that steady 250°F. Fluctuations can lead to uneven cooking.
- Wood Selection Matters: Cherry wood is a fantastic choice for pork, offering a mild, fruity smoke. Other great options include apple, pecan, or even a subtle oak. Avoid overly strong woods like mesquite for bacon, as it can be overpowering.
- Taste Your Rub and Sauce: Before applying, taste your BBQ rub and sauce. Adjust sweetness, spice, or tanginess if desired. Customizing these elements allows you to perfectly tailor the flavor profile to your preference.
- Experiment with Glaze: Don’t be afraid to try different combinations for your glaze. A touch of maple syrup, honey, or even a splash of bourbon can add complexity.
- Pat Dry (Optional but Recommended): Some pitmasters prefer to pat their bacon dry before applying the rub. This can help the rub adhere better and promote crispier edges.
- Patience is a Virtue: Resist the urge to constantly open the smoker lid. “If you’re looking, it’s not cooking!” Each time you open the lid, you lose heat and smoke, extending the cooking time.
Creative Serving Suggestions for Bacon Burnt Ends
These versatile morsels are delicious on their own, but they also shine in a variety of culinary applications:
- Appetizer Powerhouse: Simply arrange them on a platter with toothpicks for an irresistible party snack. They disappear faster than you can say “burnt ends.”
- Breakfast Elevated: Forget plain strips! Serve bacon burnt ends alongside eggs, pancakes, or waffles for a truly decadent breakfast or brunch.
- BBQ Side Dish: A perfect complement to pulled pork, smoked brisket, or ribs, adding another layer of smoky goodness to your spread.
- Topping Supreme: Chop them up and sprinkle over mac & cheese, baked potatoes, chili, green bean casserole, or even a fresh salad for an explosion of flavor.
- Sandwich & Burger Booster: Add them to a gourmet burger, a grilled cheese sandwich, or a BLT for an elevated taste and texture experience.
- Skewer Sensation: Thread them onto skewers with cherry tomatoes, bell peppers, or pineapple chunks for a vibrant and flavorful bite.
Delicious Variations to Explore
Once you master the classic recipe, feel free to experiment with these exciting variations to keep things fresh:
- Spicy Kick: Add a pinch of cayenne pepper or red pepper flakes to your dry rub, or a dash of your favorite hot sauce to the glaze for a fiery twist.
- Maple Bourbon Glaze: Replace some of the BBQ sauce or rib glaze with pure maple syrup and a splash of good quality bourbon for a sophisticated, boozy, and sweet finish.
- Garlic Parmesan Fusion: After the initial smoke, toss the bacon with garlic powder and a generous amount of grated Parmesan cheese before applying a lighter, less sweet glaze.
- Honey Mustard Delight: Create a glaze using a blend of Dijon mustard, honey, and a touch of apple cider vinegar for a tangy-sweet profile.
- Asian-Inspired: Use a glaze made with soy sauce, ginger, garlic, sriracha, and honey for a sweet and savory, umami-rich experience. Garnish with sesame seeds.
Storage and Reheating Your Bacon Burnt Ends
While it’s unlikely you’ll have many leftovers, if you do, these bacon burnt ends store and reheat surprisingly well. Allow them to cool completely before transferring them to an airtight container. They will keep in the refrigerator for up to 3-4 days. For reheating, the best method is to place them back in a preheated oven or toaster oven at 350°F (175°C) for 5-10 minutes, or until warmed through and the glaze is bubbly again. You can also reheat them gently in a skillet over medium-low heat, but be careful not to overcook and dry them out. Microwaving is an option for quick reheating, but it may result in a softer texture and less crispiness.
So, there you have it – your comprehensive guide to creating the most incredible, mouth-watering **Smoked Bacon Burnt Ends**. This recipe isn’t just about cooking; it’s about transforming a familiar favorite into an unforgettable culinary masterpiece. The combination of smoky flavor, tender texture, and that irresistible sweet and savory glaze makes these burnt ends a true showstopper. Whether you’re a seasoned pitmaster or a weekend grilling enthusiast, this recipe is accessible, rewarding, and guaranteed to impress. Don’t hesitate any longer; gather your ingredients, fire up your smoker, and embark on this delicious journey. Share these extraordinary bacon burnt ends with your family and friends, and watch their faces light up with pure joy. They’ll be asking for the recipe, and you’ll be the undisputed BBQ hero!
*These amazing images are all credited to HowToBBQRight via YouTube. Check his other content and follow for more!