
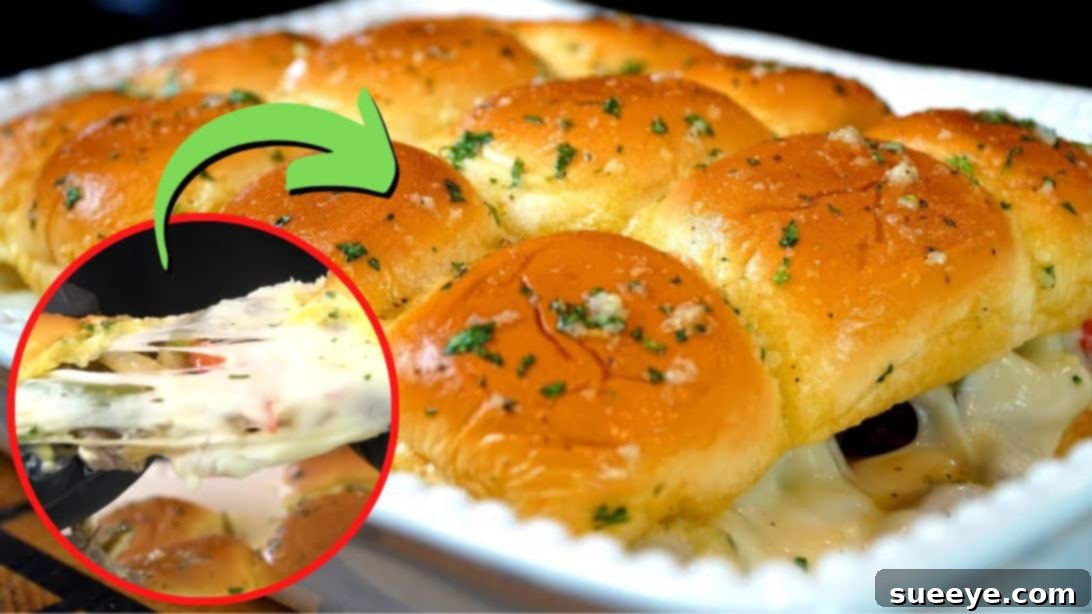
Craving the rich, savory taste of a classic cheesesteak but in a fun, bite-sized format? Why choose between bread and meat when you can have the ultimate fusion? This incredible recipe for Cheesesteak Sliders, brilliantly brought to life by Mr. Make It Happen on YouTube, is an absolute game-changer. Imagine soft, sweet Hawaiian rolls generously filled with perfectly seasoned, thinly shaved steak, sautéed bell peppers and onions, and a double layer of gooey, melted cheese. To elevate this culinary masterpiece even further, each slider is brushed with a fragrant garlic butter sauce and boasts a secret creamy, tangy, and slightly spicy spread that ties all the flavors together. These cheesesteak sliders aren’t just a meal; they’re an experience – perfect for game day, a casual get-together, or simply a delicious family dinner. Get ready to impress with minimal effort and maximum flavor!
Quick & Easy Cheesesteak Sliders: Your Ultimate Guide to Flavorful Bites
Cheesesteak sliders are more than just an appetizer; they are a celebration of flavor and convenience. Originating from the iconic Philly cheesesteak, these mini versions pack all the beloved elements into a compact, easy-to-eat package. The combination of tender steak, sweet caramelized vegetables, and a duo of cheeses nestled within soft rolls creates a symphony of textures and tastes. Whether you’re hosting a Super Bowl party, looking for a comforting weeknight dinner, or need a show-stopping dish for your next potluck, these sliders will undoubtedly be the star of the show. Their appeal lies not only in their incredible taste but also in their simplicity, making them accessible even for novice cooks.
Why You’ll Love These Savory Steak and Cheese Sliders
- Irresistible Flavor Combination: The sweet and savory balance of the rolls, steak, veggies, and cheese is simply divine.
- Perfect for Any Occasion: From casual gatherings to festive parties, these sliders are always a hit.
- Surprisingly Easy to Make: Despite their gourmet taste, the steps are straightforward and manageable.
- Crowd-Pleaser: Everyone, from kids to adults, will devour these delicious mini sandwiches.
- Customizable: Easily adjust the seasonings, spice level, or cheese types to suit your preference.
Essential Ingredients for Perfect Cheesesteak Sliders
Crafting the perfect cheesesteak slider begins with selecting high-quality ingredients. Each component plays a crucial role in building the layers of flavor that make this dish so special.
- 1.5 pounds of Shaved Steak:
- Choice Cut: Opt for quality cuts like sirloin, ribeye, or strip steak for the best flavor and tenderness. These cuts have a good amount of marbling that keeps the meat juicy.
- Preparation: While you can buy pre-shaved steak, thinly slicing it yourself ensures freshness and control over thickness. For easier slicing, partially freeze the steak for about 20-30 minutes before cutting against the grain into very thin pieces. This semi-frozen state makes the meat firm enough for precise, paper-thin slices.
- 1 Red Bell Pepper & 1 Green Bell Pepper:
- Flavor and Color: These add a lovely sweetness, a slight crunch, and vibrant color to the filling. Red bell peppers are sweeter, while green bell peppers offer a slightly more herbaceous, classic “Philly” taste.
- Preparation: Slice them thinly into strips or chop them, depending on your preferred texture.
- 1 Onion:
- Sweet & Aromatic: When sautéed, onions caramelize beautifully, adding a depth of sweetness and an aromatic base to the filling.
- Preparation: Slice or chop the onion according to your preference for texture.
- Mozzarella Cheese, sliced:
- Melty Goodness: Mozzarella provides an excellent stretch and a mild, creamy flavor that melts wonderfully, creating that desirable gooey texture.
- American Cheese, sliced:
- Classic & Creamy: American cheese is a staple in many cheesesteak recipes for its exceptional meltability and creamy texture, ensuring every bite is rich and smooth.
- 1 package (12 pieces) of Hawaiian Sweet Rolls:
- The Perfect Base: The slightly sweet and incredibly soft texture of Hawaiian rolls makes them the ideal vehicle for these savory fillings. They hold up well to the moisture and provide a delightful contrast.
Garlic Butter Topping:
This savory topping is what takes these sliders from great to extraordinary, infusing the buns with a golden, garlicky aroma and flavor.
- 1 stick of butter: Melted butter serves as the rich base.
- ¼ cup of chopped parsley: Fresh parsley adds a vibrant color and a fresh, herbaceous note.
- 2 tbsp of garlic paste or minced garlic: The star of the topping, providing intense garlic flavor.
- Salt, pepper, garlic, and onion powder: These seasonings enhance the overall taste, ensuring a perfectly seasoned butter blend. Adjust to your taste preferences.
Signature Sauce:
This creamy sauce is generously spread on the bottom buns, adding a layer of tangy, spicy, and savory flavor that complements the steak and cheese perfectly.
- ½ cup of mayonnaise: The creamy base for the sauce.
- 1 tsp of Worcestershire sauce: Adds a deep, savory, umami kick that brings complexity to the sauce.
- 1-2 tbsp of Sriracha: Provides a pleasant heat and a touch of sweetness. Adjust the amount based on your desired spice level.
- 1 tbsp of garlic paste: Intensifies the garlic flavor within the sauce.
- Salt and pepper: Essential for balancing and enhancing all the flavors in the sauce. Taste and adjust as needed.
Step-by-Step Guide to Crafting Your Cheesesteak Sliders
Follow these detailed instructions to create perfectly gooey, flavorful cheesesteak sliders that will disappear in minutes!
Step 1: Prepare the Vegetables, Meat, and Signature Sauce
Begin by preparing your fresh ingredients to ensure a smooth cooking process.
- Vegetable Prep: Start by washing your red and green bell peppers and the onion. Slice or chop them into thin strips or small pieces, as desired. Consistency in size will help them cook evenly. Set them aside.
- Meat Prep: For easier and thinner slicing, place your steak in the freezer for about 20 minutes. This will firm it up without freezing it solid, allowing you to achieve those signature paper-thin slices. Once firmed, carefully slice the meat against the grain into very thin pieces. This technique ensures maximum tenderness. Set the sliced steak aside.
- Crafting the Signature Sauce: In a medium mixing bowl, combine the mayonnaise, garlic paste, sriracha, Worcestershire sauce, a pinch of salt, and a dash of black pepper. Whisk all these ingredients together thoroughly until the mixture is completely smooth and uniform in color and consistency. Taste and adjust seasonings if necessary; you might want more sriracha for extra heat or a bit more Worcestershire for depth. This sauce is a key flavor component, so ensure it’s just right.
- Sautéing the Vegetables: Place a large skillet or frying pan on your stove over medium-high heat. Add a tablespoon or two of cooking oil (such as vegetable, canola, or olive oil) and let it heat until shimmering. Add the sliced onions and bell peppers to the hot pan. Sauté them, stirring occasionally, until they begin to soften and slightly caramelize, about 5-7 minutes. Season the vegetables with a pinch of salt, black pepper, and onion powder to enhance their natural flavors. Give them a good toss. To add an extra layer of savory depth, splash in about a teaspoon of Worcestershire sauce, toss again, and continue cooking for another 2-3 minutes until they are tender-crisp. Remove the sautéed vegetables from the pan and set them aside in a bowl.
- Cooking the Shaved Steak: Using the same pan, add a bit more oil if needed, and increase the heat to high. Once the oil is hot and shimmering, add the thinly sliced steak in a single layer if possible, avoiding overcrowding the pan to ensure a good sear. Season the steak generously with salt, black pepper, and onion powder. Cook for 2-3 minutes without stirring to allow a nice brown crust to form. Then, give the meat a good mix and continue to cook, breaking up any larger pieces with your spoon, until it’s nicely browned and fully cooked through. This usually takes another 3-5 minutes, depending on the thickness of your slices. Once cooked, you can either mix the cooked vegetables back in with the steak for a combined filling or keep them separate to layer later.
Step 2: Assemble, Bake, and Garnish Your Sliders
Now comes the exciting part: assembling your delicious sliders and baking them to golden perfection.
- Preheat Oven & Prepare Rolls: At this point, preheat your oven to 400°F (200°C). Take your package of Hawaiian sweet rolls and, using a serrated knife, carefully slice the entire block of rolls horizontally through the middle, creating a top half and a bottom half, but keeping them connected. Lightly grease a casserole dish or a sheet pan with non-stick cooking spray or a thin layer of butter to prevent sticking.
- Layering the Sliders: Place the bottom part of the sliced bun rolls directly into the greased dish, ensuring they fit snugly. Spread a generous layer of your prepared signature sauce evenly over the entire surface of the bottom buns. Next, lay down a single layer of sliced American cheese over the sauce. This cheese will melt wonderfully and provide a creamy base. Now, evenly distribute the cooked shaved steak over the cheese. Follow this with a layer of your sautéed bell peppers and onions. To complete the filling, add another layer of cheese, this time using the sliced mozzarella cheese. You can repeat the layering process if you have extra ingredients, ensuring you use them all up for maximum flavor. The topmost layer of the filling should always be cheese to ensure a gooey, melty finish.
- Top and Bake: Gently place the top half of the Hawaiian rolls back over the layered filling, aligning them perfectly with the bottom buns. Transfer the casserole dish to the preheated oven and bake for approximately 10 minutes. This initial bake time allows the cheeses to melt, and the ingredients to warm through.
- Prepare the Garlic Butter Topping: While the sliders are baking, prepare your flavorful garlic butter topping. In a small mixing bowl, melt the stick of butter. To the melted butter, add the garlic paste (or finely minced fresh garlic), chopped fresh parsley, a pinch of salt, black pepper, and onion powder. Whisk everything together until well combined.
- Final Bake and Serve: After 10 minutes, carefully remove the sliders from the oven. Using a pastry brush, generously brush the prepared garlic butter mixture all over the tops of the baked buns. Ensure every roll is coated for that irresistible golden crust and extra garlic flavor. Return the sliders to the oven and continue baking for another 5 to 6 minutes, or until the tops are beautifully golden brown and the cheese is bubbling and completely melted.
- Enjoy: Once baked, remove the sliders from the oven. Let them cool for a few minutes before slicing them along the natural divisions of the rolls. Serve immediately while they are warm and gooey. These cheesesteak sliders are best enjoyed fresh!
Pro Tips for the Best Cheesesteak Sliders
To ensure your cheesesteak sliders are absolutely perfect every time, consider these expert tips:
- Don’t Overcrowd the Pan: When cooking the steak, work in batches if necessary. Overcrowding will steam the meat instead of searing it, preventing a nice brown crust and tender texture.
- Adjust Spice Levels: The Sriracha in the signature sauce is key for a little kick. If you prefer less heat, reduce the amount, or omit it entirely. For more heat, add an extra dash!
- Cheese Variations: While American and mozzarella are classic, feel free to experiment with other melting cheeses like provolone, sharp cheddar, or even a Monterey Jack for a different flavor profile.
- Make Ahead Components: You can prepare the signature sauce and slice the vegetables ahead of time. Store them in airtight containers in the refrigerator. Cook the steak and assemble just before baking for the freshest results.
- Serving Suggestions: These sliders are hearty enough on their own but pair wonderfully with a simple green salad, coleslaw, or even some crispy French fries.
Frequently Asked Questions (FAQ) About Cheesesteak Sliders
Can I use ground beef instead of shaved steak?
While you certainly can use ground beef, the texture and authentic “cheesesteak” experience will be different. Shaved steak provides that signature thinly sliced, tender bite that is characteristic of a true cheesesteak. If using ground beef, ensure it’s well-seasoned and browned.
What other vegetables can I add to the sliders?
Feel free to customize! Sautéed mushrooms, finely diced jalapeños for a spicy kick, or even some spinach can be delicious additions. Just make sure to sauté them down so they don’t release too much moisture during baking.
How do I store and reheat leftover cheesesteak sliders?
Store any leftover sliders in an airtight container in the refrigerator for up to 3 days. To reheat, place them on a baking sheet and warm them in a preheated oven at 300°F (150°C) for about 10-15 minutes, or until heated through and the cheese is re-melted. Microwaving is an option, but the buns might become soft, and the cheese less crispy.
Can I assemble these cheesesteak sliders ahead of time for a party?
Yes, you can assemble the sliders (layers of buns, sauce, filling, and cheese) a few hours in advance and keep them covered in the refrigerator. However, hold off on brushing with the garlic butter topping until just before baking to ensure the buns don’t get soggy and achieve that perfect golden crust.
There you have it – a comprehensive guide to making the most irresistible cheesesteak sliders that are guaranteed to be a hit at any gathering or a delightful treat for your family. Inspired by the culinary expertise of Mr. Make It Happen, this recipe combines the classic flavors of a Philly cheesesteak with the convenience and fun of slider-style eating. With rich, savory steak, sweet peppers and onions, a melty double layer of cheese, and that aromatic garlic butter topping, every bite is a burst of deliciousness. Don’t hesitate to dive into this recipe and experience the joy of homemade cheesesteak sliders. Happy cooking, and prepare for rave reviews!
*All image credit belongs to Mr. Make It Happen via YouTube. Follow and subscribe to his channel for more amazing recipes and culinary inspiration!