
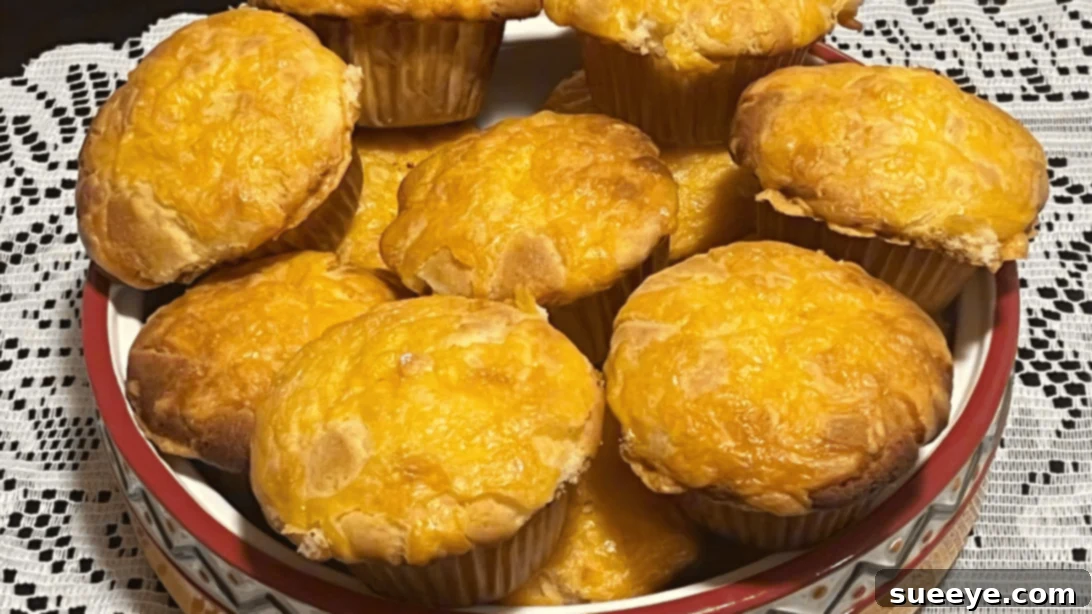
Tired of the usual sweet treats and looking for something with a delightful savory kick? For anyone who adores the rich, comforting flavor of cheese, these easy cheesy cupcakes are an absolute revelation! While there’s no shortage of fantastic cupcake recipes online, finding one that perfectly blends the fluffy texture of a cupcake with the irresistible tang of cheese can be a challenge. But fear not, because we’ve stumbled upon a true gem shared by the talented Josephine Willard on YouTube, and it’s guaranteed to become your new go-to recipe.
Imagine biting into a soft, airy cupcake, only to be met with bursts of melted cheese and a subtly sweet undertone – it’s a culinary experience you won’t soon forget! These cheese-flavored delights are incredibly versatile, making them perfect not just as an unexpected dessert, but also as a delightful snack, a unique breakfast pastry, or even a savory side dish to complement your dinner. They are a fantastic addition to any brunch spread, a standout at potlucks, and an absolute hit with kids and adults alike. Prepare to impress your friends and family with this innovative take on a classic bake.
RELATED: Craving something sweet? Try our Easy Bubble Chocolate Cupcakes Recipe
This recipe is designed with simplicity in mind, making it accessible even for beginner bakers. With straightforward steps and readily available ingredients, you’ll be whipping up a batch of these irresistible goodies in no time. Pair them with your favorite hot beverage, a glass of cold milk, or even a light soup for a truly satisfying meal. We promise, once you try these homemade cheesy cupcakes, they’ll earn a permanent spot in your recipe collection. Dive into the detailed instructions below and make sure to watch Josephine Willard’s video tutorial for visual guidance, ensuring a perfect batch every time!
Essential Ingredients for Your Delicious Cheese Cupcakes
Crafting the perfect cheesy cupcake requires a thoughtful selection of ingredients, each playing a vital role in achieving that ideal balance of texture and flavor. Here’s what you’ll need to gather:
- 1¾ cups of All-Purpose Flour, sifted for a lighter texture
- 2 tsp of Baking Powder, the leavening agent for a fluffy rise
- ¼ tsp of Salt, to enhance all the flavors and balance the sweetness
- ½ cup of Unsalted Butter, softened to room temperature for smooth creaming
- ½ cup of Granulated Sugar, for a subtle sweetness that complements the cheese
- 2 Large Eggs, at room temperature, to bind ingredients and add richness
- 1 (14 ounces) can of Sweetened Condensed Milk, for moisture, sweetness, and a tender crumb
- ½ cup of Quick-Melt Cheese, shredded, for gooey pockets of melted cheese within the cupcake
- 1 cup of Sharp Cheddar Cheese, shredded, for a robust cheesy topping and flavor throughout
Pro Tip: Using room temperature butter and eggs is crucial for achieving a smooth, emulsified batter. This allows the ingredients to combine more effectively, resulting in a more uniform texture in your baked cupcakes. Sifting the flour also prevents lumps and ensures a delicate crumb.
How to Master the Art of Making Cheesy Cupcakes: A Step-by-Step Guide
Follow these detailed steps to create your own batch of irresistible cheese cupcakes. Precision and care at each stage will guarantee a delectable outcome!
Step 1: Preparing Your Workspace and Dry Ingredients
Begin by preheating your oven to 350°F (175°C). This ensures the oven is at the correct temperature when your batter is ready, allowing for even baking. Next, prepare a 12-cup muffin pan by lining each cavity with paper cupcake liners. These liners not only prevent sticking but also make for easy handling and serving. Set the prepared pan aside.
In a medium-sized mixing bowl, combine your sifted all-purpose flour, baking powder, and salt. Sifting the flour beforehand removes any lumps and helps to aerate it, leading to a lighter cupcake texture. Whisk these dry ingredients together thoroughly for about 30 seconds. This step is crucial to ensure that the baking powder and salt are evenly distributed throughout the flour, guaranteeing a consistent rise and flavor in every cupcake. Once combined, set this bowl aside.
Step 2: Combining Wet Ingredients and Forming the Batter Base
Now, in a large mixing bowl, add your softened butter, granulated sugar, and eggs. Using an electric mixer (or a whisk and a lot of elbow grease!), beat these ingredients together until they are light, fluffy, and well combined. This creaming process incorporates air into the mixture, which is essential for a tender and airy crumb. Scrape down the sides of the bowl occasionally to ensure everything is fully incorporated.
Once your butter-sugar-egg mixture is beautifully creamy, it’s time to slowly introduce the dry ingredients and the sweetened condensed milk. Add the flour mixture in three separate batches, alternating with the sweetened condensed milk. Begin and end with the dry ingredients. For example, add about one-third of the flour mixture, beat on low speed until just combined, then add half of the condensed milk, beat again, then the second third of flour, remaining condensed milk, and finally the last third of flour. Ensure you beat well on low speed after each addition, but be careful not to overmix. Overmixing can develop the gluten in the flour too much, leading to tough cupcakes.
Step 3: Incorporating the Cheese and Filling the Muffin Pan
With your smooth and luscious batter ready, it’s time for the star ingredient: cheese! Gently fold in the shredded quick-melt cheese into the batter. Use a spatula to carefully incorporate the cheese until it’s evenly distributed throughout the mixture. Avoid vigorous stirring at this stage to maintain the airiness of the batter. The quick-melt cheese will create delightful gooey pockets within your cupcakes once baked, adding an extra layer of flavor and texture.
Using a spoon or an ice cream scoop, evenly distribute the batter into each of the prepared muffin pan cups. Aim to fill each cup approximately ¾ full. This ensures that the cupcakes have enough room to rise without overflowing, creating beautifully domed tops. Finally, generously sprinkle the shredded sharp cheddar cheese on top of each filled cupcake. This layer of cheddar will create a wonderfully golden, slightly crispy, and intensely cheesy crust, adding a fantastic textural contrast and robust flavor. Carefully place the muffin pan into your preheated oven.
Step 4: Baking, Cooling, and Serving Your Cheesy Masterpiece
Allow your cheesy cupcakes to bake for approximately 20 to 25 minutes. Baking times can vary slightly depending on your oven, so keep a close eye on them. You’ll know they’re perfectly baked when a toothpick inserted into the center of a cupcake comes out clean, and the tops are beautifully golden brown. The aroma filling your kitchen will be a good indicator too – a delightful blend of sweet and savory notes!
Once baked to perfection, carefully remove the muffin pan from the oven. Do not let them cool in the pan for too long, as this can make the bottoms soggy. After a few minutes, gently transfer the cupcakes from the muffin pan to a wire cooling rack. Allow them to cool completely before serving, though a slightly warm cupcake with melting cheese is also incredibly tempting! Cooling them on a rack allows air to circulate, preventing condensation and ensuring a perfect texture. Serve them as a unique snack, a delightful dessert, or a savory accompaniment to your favorite meal. Enjoy every cheesy bite!
Tips for Perfect Cheesy Cupcakes Every Time:
- Room Temperature Ingredients: This is a golden rule in baking! Softened butter and room temperature eggs emulsify better, leading to a smoother batter and a finer crumb in your cupcakes.
- Don’t Overmix: After adding the flour, mix just until combined. Overmixing develops gluten, which can result in tough, dense cupcakes instead of light and fluffy ones.
- Cheese Quality Matters: While quick-melt cheese is great for gooeyness, don’t skimp on a good quality sharp cheddar for the topping. It provides a more robust and satisfying flavor.
- Filling Uniformly: Use an ice cream scoop to ensure each cupcake cup is filled with roughly the same amount of batter. This leads to evenly sized and baked cupcakes.
- Cooling Rack is Key: Always transfer baked cupcakes to a wire rack to cool. This prevents the bottoms from becoming soggy due to trapped steam.
Serving Suggestions & Creative Variations:
These cheesy cupcakes are incredibly versatile. Enjoy them warm for that ultimate melty cheese experience, or at room temperature. They pair wonderfully with a morning coffee or tea, making for a delightful breakfast or brunch item. For a savory meal, serve them alongside a bowl of creamy tomato soup, a fresh garden salad, or as a unique bread roll alternative with your main course. Kids will love them as an after-school snack, and they’re guaranteed to be a hit at any party or gathering.
Feeling adventurous? Don’t hesitate to customize your batch! Consider adding a sprinkle of fresh herbs like chopped chives, parsley, or dried oregano to the batter for an aromatic twist. A pinch of black pepper or even a tiny dash of cayenne pepper can elevate the savory notes. You could also experiment with different types of cheese – a mix of Parmesan and Gruyère, or even a Monterey Jack, could offer a distinct flavor profile. For an extra savory kick, try mixing in some crispy bacon bits or finely diced ham into the batter. The possibilities are endless when it comes to personalizing these delightful treats!
Storing Your Homemade Cheesy Cupcakes:
To keep your cheesy cupcakes fresh and delicious, store them in an airtight container at room temperature for up to 2-3 days. If you live in a warm or humid climate, or if you plan to keep them longer, it’s best to refrigerate them. When refrigerated, they will last for about 4-5 days. Simply bring them back to room temperature or warm them slightly in the microwave before serving to revive their soft texture and melty cheese goodness. These cupcakes also freeze beautifully for up to 2-3 months. Just ensure they are properly wrapped in plastic wrap and then placed in a freezer-safe bag or container.
Whether you’re a seasoned baker or just starting your culinary journey, this easy cheesy cupcake recipe is a must-try. Its unique savory profile makes it stand out from the crowd, offering a comforting and satisfying experience with every bite. Josephine Willard has truly shared a fantastic recipe that is both simple to execute and incredibly rewarding. So, gather your ingredients, follow these steps, and prepare to delight your taste buds with these amazing cheesy cupcakes!
*All these amazing images are thanks to Josephine Willard via YouTube. Do visit her channel to see more videos like this and explore her fantastic recipes!