
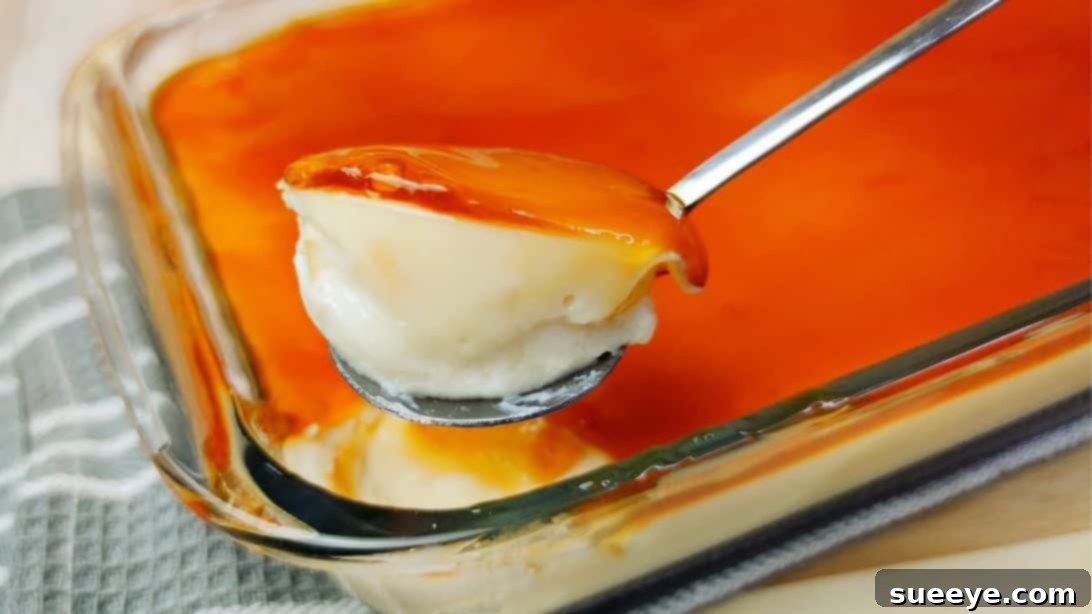
Easy & Creamy Caramel Pudding Recipe: A Sweet Indulgence for Any Occasion
There’s something undeniably comforting and luxurious about a creamy dessert, and among my all-time favorites, a perfectly crafted caramel pudding stands out. Its rich, silky texture combined with the deep, buttery notes of caramel creates an exquisite experience that satisfies the sweetest cravings. This particular recipe, inspired by the talented Yummy Kitchen on YouTube, transforms simple ingredients into an extraordinary treat. Whether you’re concluding a hearty meal, looking for an afternoon pick-me-up, or celebrating a special moment, this homemade caramel pudding is an impeccable choice that never disappoints.
What makes this caramel pudding recipe truly exceptional is its sheer simplicity and reliability. You don’t need to be a seasoned chef to achieve professional-level results. With just a few common pantry staples and a straightforward process, even novice cooks can whip up this delightful dessert with confidence. Prepare to impress your family and friends with a dessert that tastes far more intricate than it actually is to make. Follow our detailed instructions and the accompanying video tutorial to master this sweet sensation on your very first attempt.
Why Choose This Easy Homemade Caramel Pudding?
In a world of complex desserts, this easy caramel pudding recipe shines through for its accessibility and guaranteed deliciousness. Here are a few compelling reasons why it should be your next kitchen adventure:
- Beginner-Friendly: The steps are incredibly clear and concise, making it perfect for those new to dessert making. No complicated techniques or obscure ingredients are required.
- Minimal Ingredients: You’ll be surprised by how few items you need to create such a decadent treat. Most are likely already in your kitchen.
- Quick Preparation: While chilling time is essential, the active cooking process is surprisingly fast, allowing you to focus on other tasks.
- Versatile Serving: It’s equally fitting for an elegant dinner party or a casual family gathering. Its universal appeal means everyone will love it.
- Cost-Effective: Making desserts at home is often more economical than purchasing them, and this recipe is no exception, delivering gourmet taste without the gourmet price tag.
- Unforgettable Flavor: The combination of creamy milk pudding and luscious, golden caramel creates a harmonious balance of textures and tastes that is truly irresistible.
RELATED: Easy Rich & Creamy Custard Pudding Cake Recipe
Essential Ingredients for Your Creamy Caramel Pudding:
The beauty of this caramel pudding lies in its humble yet powerful ingredients. Each component plays a crucial role in creating the perfect texture and flavor profile. Let’s delve into what you’ll need:
For the Velvety Milk Pudding Base:
- 1 liter or 4¼ cups of Milk: This is the heart of your pudding. You have flexibility here – whole milk provides the richest, most luxurious texture. Evaporated milk will yield an even denser, creamier result, while fresh milk works perfectly for a lighter yet still delightful pudding. Choose according to your preference for creaminess.
- ¾ cup of Sugar: This provides the sweetness for your pudding. Remember, this is a starting point; feel free to adjust the amount to suit your personal taste. Some prefer a sweeter pudding, while others might like it less intense, especially with the sweet caramel topping.
- 1 cup of Cornstarch: The essential thickening agent. Cornstarch ensures your pudding sets beautifully, providing that characteristic silky-smooth consistency. It’s crucial for achieving a pudding that holds its shape yet melts in your mouth.
- ½ tbsp of Vanilla Extract (Optional): A touch of vanilla elevates the flavor of the milk pudding, adding a warm, aromatic note that complements the caramel perfectly. While optional, it’s highly recommended for an enhanced taste experience.
For the Rich Golden Caramel Topping:
- ½ cup of Sugar: This sugar will be transformed into the star of the show – a beautiful, golden caramel sauce. The magic of caramelization creates a complex flavor that is both sweet and slightly bitter, adding depth to the dessert.
- 1 tbsp of Cornstarch: Here, cornstarch acts as a stabilizer and thickener for the caramel sauce. It helps prevent the caramel from crystallizing and gives it a smooth, pourable consistency, ensuring it adheres beautifully to the pudding.
- 1 cup of Water or Milk: This liquid is added to the caramelized sugar to create the sauce. Using water will result in a purer caramel flavor, while using milk will give you a creamier, slightly milder caramel sauce. Both options work wonderfully, so choose based on your desired richness.
Crafting Your Perfect Caramel Pudding: A Step-by-Step Guide
Creating this delicious caramel pudding involves two main components: the silky milk pudding base and the luscious caramel topping. Follow these steps carefully for a flawless dessert.
Step 1: Preparing the Silky Milk Pudding Base
Begin by combining all the ingredients for the milk pudding – the milk, sugar, and cornstarch – in a large, heavy-bottomed pot or saucepan. It’s crucial to stir these ingredients thoroughly with a whisk until the sugar and cornstarch are completely dissolved. This initial mixing prevents lumps from forming later. Once smooth, place the pot over low heat. Continue to stir occasionally as the mixture gradually heats up. The key is patience; gentle heat allows the cornstarch to activate slowly, resulting in a perfectly smooth pudding. Allow the mixture to come to a gentle boil while stirring, at which point it will begin to thicken considerably. Once it has reached your desired consistency, add a few drops of vanilla extract, if using, and stir well to incorporate the fragrant essence.
Step 2: Setting the Pudding Base
After the milk pudding has thickened and boiled for about 1 to 2 more minutes to ensure the cornstarch is fully cooked, remove it from the heat. Promptly transfer this warm, creamy mixture into your chosen baking dish or pan. To achieve a perfectly flat and even top, gently tap the dish a few times on your kitchen counter. This helps release any trapped air bubbles and settles the pudding uniformly. Allow the pudding to cool down at room temperature for a while before transferring it to the refrigerator. Chilling for at least 30 minutes is essential for the pudding to set properly and firm up, creating the ideal base for your caramel topping.
Step 3: Initiating the Caramel Sauce
While your milk pudding chills, you can begin preparing the luscious caramel topping. In a small mixing bowl, combine the water (or milk) with the tablespoon of cornstarch. Stir this mixture vigorously until the cornstarch is completely dissolved and no lumps remain. Set this slurry aside, as it will be added to the hot caramel later. Now, take a clean, dry pan and add the ½ cup of sugar for the caramel. Place the pan over medium heat. As the sugar begins to melt and caramelize, it’s important not to stir it with a spoon. Instead, gently swirl the pan consistently to ensure even melting and prevent burning. Watch the sugar carefully as it transforms into a beautiful amber liquid – this stage requires vigilance as caramel can go from perfect to burnt in a matter of seconds.
Step 4: Creating the Smooth Caramel Sauce
Once the sugar has fully melted and reached a rich, golden amber color (be careful not to let it get too dark, or it will taste bitter), it’s time to incorporate the cornstarch mixture. Remove the pan from the heat briefly to avoid excessive splattering and carefully add the cornstarch slurry a little at a time. This step needs continuous stirring to ensure the mixture is fully incorporated and to prevent any lumps from forming. Return the pan to low heat and continue cooking and stirring the caramel until it thickens to a glossy, pourable consistency. When it starts to boil gently, stir well to ensure it is smooth and free of any sugar crystals or lumps. Use a spatula to scrape the edges of the pan, bringing all the caramel into the center. Once achieved, turn off the heat and allow the caramel to cool down slightly for a few minutes before pouring.
Step 5: Assembling and Chilling Your Dessert
With both components ready, it’s time for the final assembly. Carefully pour the slightly cooled caramel sauce over the chilled milk pudding, ensuring you spread it evenly across the entire surface. The contrast in temperatures will help the caramel set beautifully on top. Once the caramel is spread, place the pudding back into the refrigerator. Allow it to chill for at least another 30 minutes, or ideally longer, to allow the caramel to fully set and for the flavors to meld together perfectly. Once thoroughly chilled and set, your exquisite homemade caramel pudding is ready to be sliced and served. Enjoy every creamy, sweet bite!
Tips for Success & Delightful Variations
To ensure your caramel pudding turns out perfect every time and to inspire you to explore new flavors, consider these additional tips and variations:
- Preventing Lumps in Pudding: Always mix cornstarch with cold liquid first to form a slurry before adding it to hot mixtures. This prevents clumping. For the milk pudding, ensure sugar and cornstarch are fully dissolved in cold milk before heating.
- Caramelization Caution: When making caramel, watch it closely. It can go from perfect to burnt very quickly. If it burns, it will be bitter and you’ll need to start over. Use a light-colored pan to better monitor the color change.
- Achieving Smooth Caramel: If your caramel sauce seems to have sugar crystals after adding the liquid, continue to stir gently over low heat until they dissolve. Using a whisk can help break down any stubborn bits.
- Serving Suggestions: This caramel pudding is fantastic on its own, but you can elevate it further. Serve with a dollop of fresh whipped cream, a sprinkle of sea salt to enhance the caramel flavor, or some fresh berries for a refreshing contrast.
- Storage: Store leftover caramel pudding covered in the refrigerator for up to 3-4 days. It tastes even better the next day as the flavors deepen and meld.
- Flavor Variations:
- Coffee Caramel: Add a teaspoon of instant coffee powder to your milk pudding mixture for a subtle coffee note that pairs wonderfully with caramel.
- Spiced Caramel: Infuse your caramel sauce with a pinch of cinnamon or a tiny dash of cardamom for an aromatic twist.
- Chocolate Swirl: Melt a small amount of dark chocolate and swirl it into the milk pudding before chilling, or drizzle it over the caramel topping for a chocolate-caramel delight.
This easy and creamy caramel pudding recipe is more than just a dessert; it’s an invitation to create joy in your kitchen. Its simple ingredients and straightforward process make it accessible to everyone, promising a decadent reward for minimal effort. So, gather your ingredients, follow these steps, and prepare to indulge in a homemade treat that truly satisfies. Happy cooking, and enjoy every blissful spoonful!
*All images are credited to Yummy Kitchen via YouTube. We highly recommend visiting her channel and subscribing for more delightful and easy-to-follow recipes!
Easy 4-Ingredient Caramel Pudding Recipe