
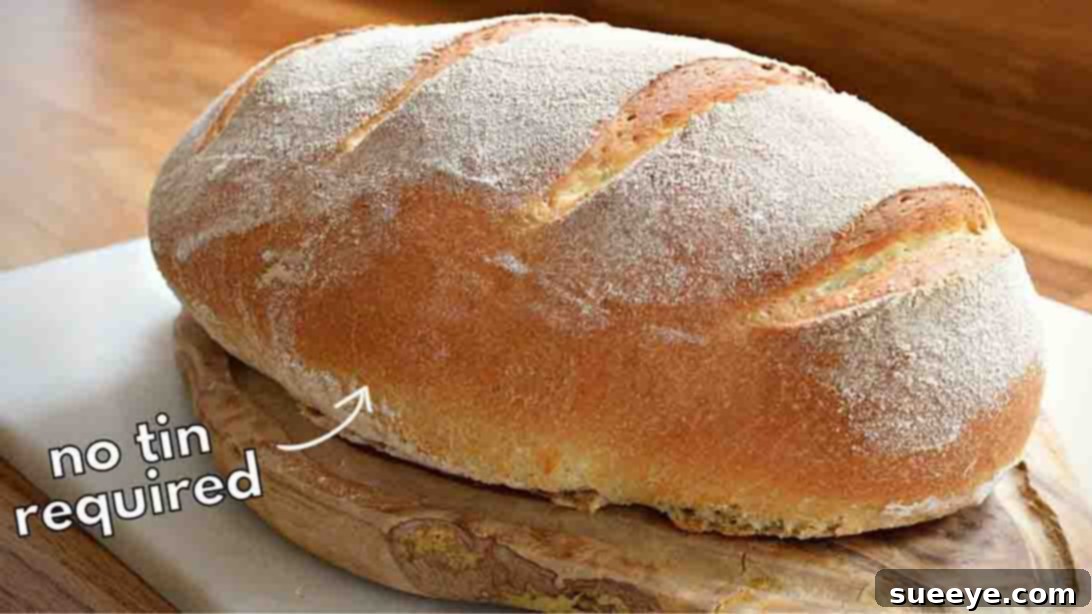
There’s nothing quite like the aroma of freshly baked bread filling your home. It’s a scent that promises comfort, warmth, and deliciousness. While many perceive bread making as a complex art requiring a myriad of ingredients and advanced techniques, we’re here to show you that it doesn’t have to be. This remarkable recipe, inspired by the talented Dom Bill, strips bread-making down to its beautiful essence, proving that extraordinary results can be achieved with absolute simplicity.
Imagine a loaf with a perfectly golden, crackling crust that gives way to an incredibly soft, airy, and flavorful interior. This isn’t a dream – it’s the reality of what you’ll create with just five basic ingredients. This guide is designed to demystify the process, making it accessible and enjoyable for even the most novice bakers. You’ll discover that producing an artisan-quality bloomer loaf is not only possible but wonderfully straightforward.
From the initial mixing of the dough to the satisfying moment you pull your golden creation from the oven, we will walk you through every crucial step. You’ll learn the secrets to achieving that enviable rise, the ideal texture, and the rich, satisfying flavor that makes this bread truly irresistible. Forget complicated schedules or endless ingredients; this is about embracing the joy of simple, effective baking. Get ready to transform your kitchen into a bakery and delight in the simple pleasure of making something truly delicious from scratch.
RELATED: Pull-Apart Cheese Garlic Loaf Recipe
Essential Ingredients for Your Bloomer Loaf
The beauty of this recipe lies in its minimalist approach. With just five fundamental ingredients, readily available in any kitchen, you’re equipped to create a masterpiece. Each ingredient plays a vital role in developing the perfect texture and flavor profile of your homemade bloomer loaf.
- 1/2 tbsp Salt: Essential for flavor and also plays a crucial role in controlling yeast activity and strengthening gluten structure.
- 1/2 tbsp Fast-Action Dried Yeast: The leavening agent responsible for giving your bread its rise and airy texture. Fast-action yeast is convenient as it doesn’t require prior activation.
- 1 1/2 cups Cool Water: Hydrates the flour, activates the yeast, and helps form the gluten network. Using cool water helps to slow down fermentation, allowing for a longer, more flavorful proof.
- 3 tbsp Olive Oil: Adds richness, moisture, and a subtle flavor to the dough, contributing to a tender crumb and a crispier crust.
- 3 cups Bread Flour: High in protein, bread flour is ideal for creating a strong gluten network, which is necessary for a well-structured, chewy loaf with excellent rise.
Baking Your 5-Ingredient Bloomer Loaf: Step-by-Step Guide
Step 1: Mixing the Dough and Initial Kneading
The journey to a perfect bloomer loaf begins with carefully combining your ingredients. In a generously sized mixing bowl, start by adding the 3 cups of high-quality bread flour. Next, sprinkle in the 1/2 tablespoon of salt. Give these dry ingredients a gentle mix to ensure even distribution, as salt can inhibit yeast if in direct contact for too long. After this, add the 1/2 tablespoon of fast-action dried yeast, distributing it evenly over the flour mixture. It’s crucial to mix these dry components well at this stage to prevent pockets of unmixed ingredients later.
Now, introduce the wet elements. Pour in the 3 tablespoons of olive oil. Then, begin adding the 1 1/2 cups of cool water gradually. This gradual addition is key; it allows the flour to absorb the liquid more evenly and helps you gauge the dough’s consistency. Using your hands, combine the mixture until a shaggy, cohesive dough begins to form. Once the dough has come together, transfer it to a lightly oiled work surface – a little olive oil here prevents sticking and adds to the dough’s pliability. Knead the dough vigorously for five to ten minutes. The goal is to develop the gluten, which will make the dough smooth, elastic, and stretchy. You’ll know it’s ready when it passes the “windowpane test” – if you can stretch a small piece of dough thin enough to see light through it without tearing, your gluten is sufficiently developed.
Step 2: First Proofing and Shaping Your Loaf
After achieving a beautifully kneaded, elastic dough, it’s time for its first proofing, a crucial stage where the yeast gets to work, fermenting the sugars and producing carbon dioxide, which gives the bread its characteristic airy texture and develops its flavor. Transfer the dough into a clean, lightly oiled bowl, ensuring there’s enough room for it to expand. Cover the bowl securely with a plastic sheet or cling film to prevent the dough from drying out. Allow it to proof at room temperature for approximately three hours. During this time, the dough should significantly increase in size, ideally doubling, indicating that the yeast is active and thriving.
While your dough is proofing, prepare your baking environment. Line a baking tray with parchment paper; this prevents sticking and makes transfer easier. Set it aside. Once the first proof is complete, gently transfer the dough onto a lightly floured surface. The next step is to “knock the gas out” of the dough. This isn’t as harsh as it sounds; it simply involves gently pressing down on the dough to release the accumulated gases. This redistributes the yeast, sugars, and gluten, leading to a finer, more even crumb. After degasing, carefully roll the dough on itself, creating a tight, elongated cylinder. Then, gently sculpt the loaf into the classic bloomer shape, ensuring a smooth surface and taut skin. Place this meticulously shaped dough onto your prepared baking tray, cover it loosely once more, and let it undergo its second proof for 45 minutes to an hour. This shorter proof allows the dough to relax and achieve its final structure before baking.
Step 3: Scoring, Steaming, and Baking to Perfection
The final stages before baking are what will give your bloomer loaf its signature crust and rise. Once the second proof is complete, the dough should appear puffy and slightly larger. Before placing it in the oven, take a moment to prepare its surface. Lightly sprinkle some water over the dough; this helps create steam in the oven’s initial moments, contributing to a thin, crispy crust. Immediately after, gently dust some flour over the top, spreading it evenly across the surface. This flour not only adds to the rustic aesthetic but also aids in the scoring process. Using a sharp razor or a baker’s lame, carefully slash the surface of the dough with a few deep, angled cuts. These slashes are more than just decorative; they act as “vents,” allowing the dough to expand freely and preventing uncontrolled tearing as it bakes, resulting in a beautiful, controlled oven spring.
Now, it’s time to bake! Ensure your oven is preheated to a scorching 425 degrees F (220 degrees C). For that truly professional, artisan-style crust, place a separate baking tray with some hot water in the bottom rack of your oven. This creates a steamy environment during the initial bake, which delays the crust formation, allowing the loaf to expand maximally before the crust sets. Carefully place your bloomer loaf on the prepared tray in the center rack. Bake for 20 to 25 minutes. Keep an eye on the crust color; it should be a deep golden brown, and when tapped on the bottom, the loaf should sound hollow, indicating it’s fully cooked through. Once baked, transfer the loaf to a wire rack to cool completely. This cooling period is vital, as it allows the internal structure to set and flavors to fully develop.
Why Bake Your Own 5-Ingredient Bloomer Loaf?
Beyond the undeniable satisfaction of creating something delicious from scratch, baking your own bloomer loaf offers a myriad of benefits. Firstly, it provides unparalleled freshness. Store-bought bread, even “freshly baked” supermarket loaves, often contain preservatives and additives to extend shelf life. When you bake at home, you control every ingredient, ensuring a clean, wholesome product free from anything unnecessary. The simple list of five ingredients in this recipe means you know exactly what you’re consuming.
Secondly, the flavor and texture are simply superior. The slow fermentation process, even with fast-action yeast, develops complex flavors that are often missing in commercially produced bread. The crust you achieve with homemade bread, especially with the steam method described, is exceptionally crisp and flavorful, contrasting beautifully with the soft, open crumb. Thirdly, it’s incredibly cost-effective. Basic flour, yeast, salt, water, and olive oil are inexpensive staples, making homemade bread a budget-friendly option compared to specialty bakery loaves. Lastly, there’s the therapeutic aspect of baking. The rhythmic kneading, the anticipation of the rise, and the glorious aroma that permeates your kitchen are all wonderful parts of the experience, turning a simple task into a fulfilling hobby.
Expert Tips for a Perfect Homemade Bloomer Loaf
While this recipe is designed for simplicity, a few expert tips can elevate your baking experience and ensure consistent success:
- Measure Accurately: Especially with baking, precision is key. Use kitchen scales for flour if possible, as cup measurements can vary.
- Water Temperature Matters: While we suggest cool water for a longer proof, ensure it’s not ice-cold, which can inhibit yeast. Lukewarm water (around 70-80°F / 21-27°C) is ideal if you’re looking for a slightly faster initial rise without sacrificing flavor.
- Don’t Skimp on Kneading: The 5-10 minutes of kneading is crucial for gluten development. An underdeveloped gluten network will result in a dense, crumbly loaf. Keep kneading until the dough is smooth, elastic, and passes the windowpane test.
- Patience During Proofing: Resist the urge to rush the proofing stages. Temperature affects proofing time, so use the “doubled in size” visual cue rather than strictly adhering to the clock. Under-proofed bread will be dense, while over-proofed bread might collapse in the oven.
- Create Steam: The tray of hot water in the oven is a game-changer for crust development. Don’t skip this step! The steam keeps the crust soft initially, allowing the loaf to expand fully before the crust hardens, leading to a much better oven spring and a crispier, shinier finish.
- Cool Completely: As tempting as it is, slicing into hot bread can result in a gummy texture. Allow your bloomer loaf to cool completely on a wire rack. This lets the internal structure stabilize and the moisture distribute evenly, leading to the perfect crumb.
Serving Suggestions and Variations
Once your glorious 5-ingredient bloomer loaf is baked and cooled, the possibilities for enjoyment are endless. Its robust flavor and satisfying texture make it incredibly versatile. Serve thick slices alongside a hearty soup or stew for a comforting meal. It’s the perfect accompaniment to a simple salad, soaking up dressings and flavors beautifully. For breakfast or a light snack, toast a slice and slather it with butter and your favorite jam or marmalade. It also makes an exceptional base for open-faced sandwiches, piled high with fresh ingredients.
While the classic bloomer is fantastic on its own, don’t hesitate to experiment with variations. Before the second proof, you could gently fold in some dried herbs like rosemary or thyme for an aromatic twist. For a touch of savory goodness, mix in some grated hard cheese like Parmesan or cheddar into the dough during the initial mixing stage. For a slightly different texture, you could try incorporating a small amount of whole wheat flour (replacing about 1/4 cup of bread flour) for a nuttier flavor. The simplicity of this base recipe makes it a wonderful canvas for your culinary creativity.
Your Ultimate 5-Ingredient Bloomer Loaf Recipe
You now possess all the knowledge and guidance needed to bake an impressive, delicious bloomer loaf with minimal effort and just five basic ingredients. This recipe by Dom Bill isn’t just about making bread; it’s about discovering the joy and satisfaction that comes from creating something wonderful from scratch. Embrace the process, trust your instincts, and prepare to be amazed by the results. The golden crust, the airy interior, and the irresistible aroma will quickly make this easy homemade bloomer loaf a staple in your kitchen. Happy baking!