
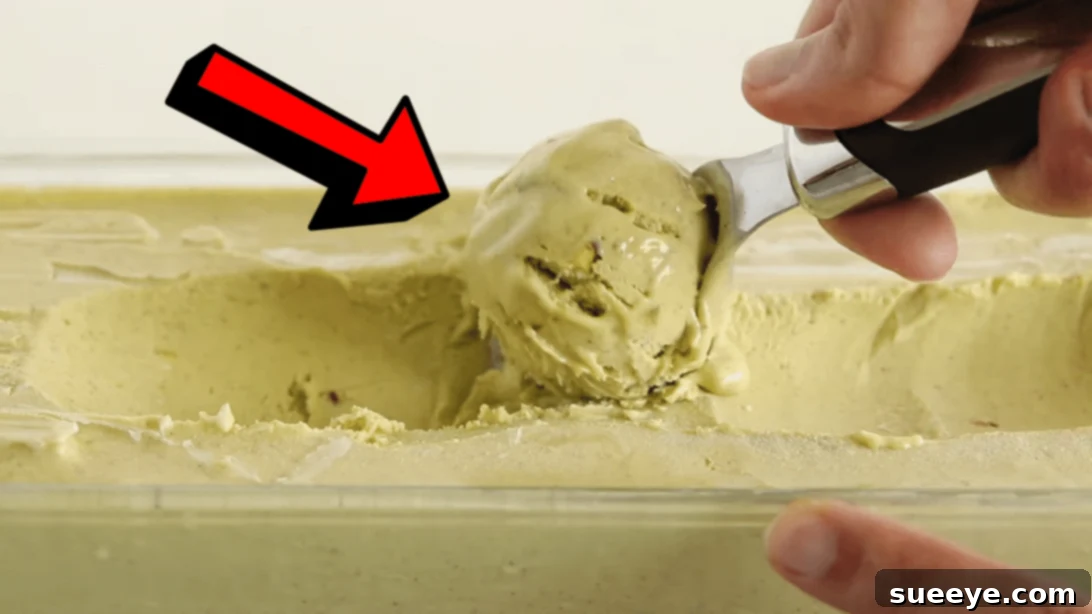
Pistachio nuts hold a special place in my heart, not just as a snack, but as an ingredient that elevates any dish. Their unique, subtly sweet, and earthy flavor, combined with their vibrant green hue, makes them irresistibly appealing. Beyond their deliciousness, pistachios are nutritional powerhouses, packed with healthy fats, fiber, protein, and antioxidants. While I enjoy them roasted and salted, one of my absolute favorite ways to transform these emerald gems is into a rich, creamy, and authentic pistachio ice cream. And I’m not talking about artificial flavors or neon green dyes; I’m talking about a decadent dessert infused with the genuine taste and texture of real pistachios.
Imagine indulging in a scoop of ice cream that perfectly captures the essence of pistachios – a delightful balance of nutty sweetness with a hint of salt, and a wonderfully smooth texture punctuated by tiny bits of chopped nuts. What if I told you that this luxurious dessert is incredibly simple to make right in your own kitchen, without the need for an expensive ice cream maker? That’s right! This no-churn pistachio ice cream recipe requires only an electric handheld mixer and a few basic bowls. It’s so straightforward, you’ll wonder why you ever bought store-bought versions.
The beauty of this recipe lies in its simplicity and accessibility. You’ll only need four essential ingredients, most of which you likely already have stashed in your pantry or refrigerator. This recipe, inspired by the fantastic creation from The Cooking Foodie on YouTube, promises an unforgettable homemade ice cream experience. Get ready to impress your family and friends, or simply treat yourself to a gourmet dessert crafted with love and minimal effort. You definitely won’t regret diving into this delightful culinary adventure.
Why Choose Homemade No-Churn Pistachio Ice Cream?
There’s a distinct charm and satisfaction that comes with making your own ice cream at home. Beyond the personal touch, homemade ice cream often boasts superior flavor and quality compared to its commercial counterparts. When you make it yourself, you control the ingredients, ensuring freshness and avoiding artificial flavors, colors, and excessive preservatives often found in store-bought options. This recipe, in particular, champions the authentic taste of pistachios, letting their natural goodness shine through.
The “no-churn” method is a game-changer for home cooks. Traditionally, making ice cream required a specialized machine to continuously churn the mixture as it freezes, preventing ice crystal formation and creating a smooth texture. However, with the no-churn technique, the magic happens with just two main components: whipped heavy cream and sweetened condensed milk. The whipped cream incorporates air, giving the ice cream its light and airy texture, while the condensed milk provides sweetness and helps keep the mixture from freezing solid into an icy block. This ingenious method means delicious, creamy ice cream is within reach for everyone, regardless of kitchen gadgetry.
Pistachios: A Nutritional Powerhouse of Flavor and Health
Before we dive into the recipe, let’s take a moment to appreciate the star ingredient: pistachios. These small, green nuts are not only incredibly versatile in culinary applications but also come packed with a wealth of health benefits. They are an excellent source of protein, dietary fiber, and healthy monounsaturated and polyunsaturated fats, which are vital for heart health. Pistachios also contain a remarkable array of vitamins and minerals, including vitamin B6, thiamine, potassium, magnesium, and phosphorus. Their vibrant green color is attributed to beneficial antioxidants like lutein and zeaxanthin, known for promoting eye health.
Historically, pistachios have been cherished for thousands of years, with archaeological evidence suggesting their consumption dates back to 6000 B.C. They were a prized food among ancient royalty and traders, often referred to as the “green almond” or “smiling nut.” Today, they continue to be celebrated worldwide, from Middle Eastern desserts to Italian gelato. Their distinct flavor profile, which can be described as slightly sweet, earthy, and mildly buttery, makes them a favorite for both sweet and savory dishes. Incorporating real pistachio paste into our ice cream ensures we capture this authentic, complex flavor in every spoonful, offering a truly gourmet experience that also provides a nutritious boost.
Essential Ingredients for Your Creamy Pistachio Delight:
- 250g or 1 cup of high-quality pistachio paste
- 1 (14oz) can of sweetened condensed milk
- 2 cups of heavy cream, ensure it’s very cold for best whipping results
- Vanilla extract, optional, but highly recommended for an added depth of flavor
Let’s talk briefly about these key ingredients. The pistachio paste is the heart of this recipe. You can buy pre-made, high-quality pistachio paste from specialty stores or online, but for the most vibrant flavor and color, making your own from scratch is truly the best option. We’ll cover how to do this in the steps below. The sweetened condensed milk provides the necessary sweetness and creamy texture without requiring additional sugar, acting as the perfect stabilizer for our no-churn base. Heavy cream, when whipped cold, creates the airy, rich foundation of the ice cream. Its high fat content is crucial for achieving that desirable smooth mouthfeel. Finally, a touch of vanilla extract, though optional, works wonders by complementing and enhancing the natural pistachio flavor, adding a subtle warmth to the overall profile. Don’t underestimate its ability to round out the taste.
How to Make Pistachio Ice Cream: A Step-by-Step Guide to Perfection
Step 1: Preparing Your Pistachios for Paste
Begin by meticulously peeling the shells off your raw pistachios. Discard the shells. Once shelled, place the pistachios in a clean kitchen towel. Gather the corners of the towel to form a pouch and gently rub or shake the nuts vigorously. This action helps to loosen and remove as much of the thin, purplish-brown skin as possible. While removing every speck of skin isn’t absolutely necessary, taking the time to do so will result in a brighter green paste and a purer pistachio flavor, free from any slight bitterness the skin might impart. This step is crucial for achieving that vibrant color and authentic taste in your homemade pistachio ice cream.
Step 2: The Art of Making Pistachio Paste
Transfer your prepared, peeled pistachios into a powerful blender or food processor. The key here is patience. Blend the pistachios for approximately 10 to 15 minutes, pausing occasionally to scrape down the sides of the blender jar. Initially, the pistachios will turn into a coarse meal, then a sticky powder, and finally, as their natural oils release, they will transform into a smooth, creamy, and slightly warm paste. The duration may vary depending on your blender’s power. Aim for a consistency that is akin to a thick nut butter, ensuring there are no large chunks remaining. Once smooth and glossy, carefully pour this aromatic homemade pistachio paste into a clean bowl, ready for the next step of your delicious ice cream creation.
Step 3: Whipping Up the Creamy Base
Pour the very cold heavy cream into a large mixing bowl. Using an electric handheld mixer equipped with whisk attachments, begin whipping the cream on medium-high speed. Continue to whisk until stiff peaks form. Stiff peaks mean that when you lift the whisk, the cream holds its shape firmly without collapsing. Be careful not to over-whip, as it can turn grainy. Once your cream is perfectly whipped, gently fold in the can of sweetened condensed milk. Then, add the freshly made pistachio paste (or store-bought, if using). If you’ve opted for vanilla extract, now is the time to add a dash, enhancing the overall flavor profile of your creamy base.
Step 4: Folding in the Flavor & Texture
With the sweetened condensed milk and pistachio paste added to the whipped cream, continue to whisk them gently on low speed using your electric mixer, just until all ingredients are well incorporated and the mixture boasts a uniform, beautiful pale green hue. Be careful not to deflate the whipped cream too much. For an added textural delight and an extra burst of pistachio flavor, chop some additional pistachios into small pieces. Gently fold these chopped nuts into the ice cream mixture using a spatula. This ensures an even distribution of those delightful crunchy bits throughout your creamy dessert, providing a wonderful contrast in every bite.
Step 5: Freezing for Perfection
Carefully transfer the glorious pistachio ice cream mixture into a freezer-safe container. A loaf pan or a shallow plastic container with a lid works perfectly. Spread the mixture evenly using your spatula, smoothing out the top. Cover the container tightly, either with its lid or with plastic wrap pressed directly onto the surface of the ice cream to prevent ice crystal formation. Place the container in the coldest part of your freezer. Allow it to freeze for a minimum of 6 hours, but for the best, most firm consistency, leaving it overnight is highly recommended. Once thoroughly frozen, scoop out generous portions of your homemade, no-churn pistachio ice cream, serve it in bowls or cones, and savor every single, utterly delicious bite!
Tips for the Best No-Churn Pistachio Ice Cream:
- Keep it Cold: Ensure your heavy cream is very cold before whipping. You can even chill your mixing bowl and whisk attachments in the freezer for 10-15 minutes prior to whipping for even better results.
- Don’t Over-Whip: While stiff peaks are desired for the heavy cream, be careful not to over-whip it into butter. Stop as soon as the peaks hold their shape.
- Quality Pistachios Matter: The flavor of your ice cream largely depends on the quality of your pistachios. Opt for raw, unsalted pistachios for the best paste.
- Patience is Key: Don’t rush the freezing process. Allowing the ice cream to freeze completely (preferably overnight) will yield the best texture.
- Airtight Storage: Always store your homemade ice cream in an airtight container to prevent freezer burn and maintain its creamy texture.
Serving Suggestions & Creative Variations:
This luscious pistachio ice cream is fantastic on its own, but you can elevate the experience with a few simple additions. Serve it in a crisp waffle cone, a chilled bowl, or alongside a slice of warm apple pie. Drizzle with a touch of honey or sprinkle with extra chopped pistachios for an added crunch. For a gourmet touch, a light dusting of powdered sugar or a dollop of fresh whipped cream never hurts.
Feeling adventurous? Here are some variations to consider:
- Chocolate Swirl: Gently fold in melted dark chocolate ribbons into the mixture before freezing for a chocolate-pistachio delight.
- Cardamom Kiss: Add a pinch of ground cardamom to the mixture for an exotic, aromatic twist that pairs beautifully with pistachios.
- Almond Extract: For those who love a more pronounced nutty aroma, a tiny drop of almond extract can be added with the vanilla.
- Salted Pistachio: A tiny pinch of sea salt added to the mixture can enhance the overall sweetness and bring out the nuttiness even more.
Storage and Shelf Life:
Your homemade no-churn pistachio ice cream, when stored properly in an airtight container in the freezer, will maintain its best quality for about 2-3 weeks. Beyond that, it may start to develop ice crystals and lose some of its creamy texture, though it will still be safe to eat for up to 1-2 months. To prevent freezer burn, ensure the container is tightly sealed, and for extra protection, press a piece of plastic wrap directly onto the surface of the ice cream before securing the lid.
This easy 4-ingredient pistachio ice cream recipe is a testament to the fact that delicious, gourmet desserts don’t have to be complicated or require special equipment. With just a handful of simple ingredients and a little bit of patience, you can create a truly unforgettable frozen treat that celebrates the rich, distinctive flavor of pistachios. So go ahead, gather your ingredients, follow these steps, and prepare to delight your taste buds with a homemade indulgence that’s sure to become a new family favorite. Happy scooping!
*All image credit belongs to The Cooking Foodie via YouTube. Follow and subscribe to their channel for more inspiring recipes!