
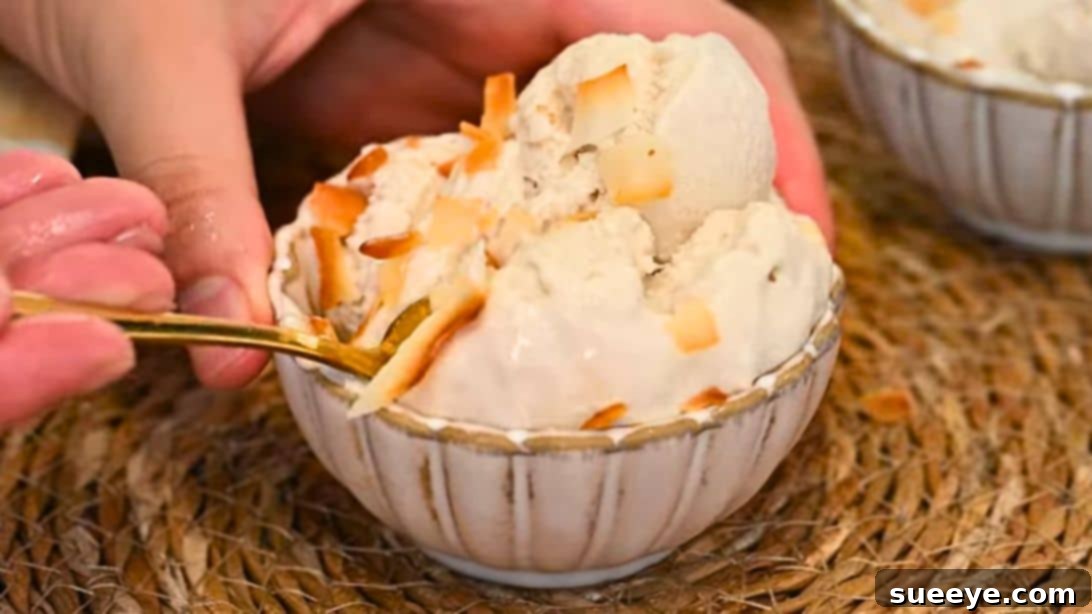
As the mercury rises and the sun shines brighter, there’s one thought that universally brings joy: ice cream! While store-bought options are convenient, nothing quite compares to the fresh, customizable taste of a homemade treat. This summer, we invite you to step into your kitchen and craft an unbelievably simple yet exquisitely delicious dessert that requires minimal effort and no fancy equipment. We’re talking about a phenomenal **4-ingredient no-churn coconut ice cream** recipe, inspired by the wonderful creators at LowCarbSpark. It’s a sweet, creamy, and wonderfully tropical delight that has quickly become a classic favorite in our household, making multiple appearances throughout the warmer months.
Forget the complexities often associated with homemade ice cream. This recipe revolutionizes the process, proving that you don’t need an ice cream machine, a hand mixer, or any specialized gadgets to achieve a perfectly smooth and rich texture. What you *do* need are just four core ingredients: luxurious full-fat coconut milk, your choice of sweetener, a hint of fragrant vanilla extract, and a pinch of sea salt to balance the flavors. While completely optional, a sprinkle of toasted coconut flakes elevates the experience, adding a delightful crunch and intensifying the tropical essence. But don’t stop there! This recipe is a blank canvas, eagerly awaiting your personal touch. Feel free to incorporate nuts, chocolate chips, a swirl of caramel, fresh fruit, or any other topping that sparks your culinary imagination.
RELATED: Indulge further with our Chewy Coconut Bars Recipe!
4-Ingredient No-Churn Coconut Ice Cream: Your Easy Summer Delight
The allure of homemade ice cream lies in its purity and the sheer joy of creating something delicious from scratch. This no-churn coconut ice cream isn’t just easy; it’s a revelation for anyone seeking a dairy-free, vegan-friendly, or simply a healthier alternative to traditional ice cream. It’s a testament to how simple ingredients can come together to form an extraordinary dessert that rivals even the finest store-bought varieties.
Before we dive into the steps, let’s explore why this recipe stands out and how you can truly make it your own. From understanding the role of each ingredient to mastering the freezing process, we’ll guide you through every detail to ensure your homemade coconut ice cream is nothing short of perfection.
Here’s another delightful coconut dessert for you to explore: Whip up a taste of the islands with our Hawaiian Pineapple Coconut Poke Cake!
Why Choose Homemade, No-Churn Ice Cream?
In a world of endless choices, opting for homemade ice cream offers a myriad of benefits. Firstly, you have complete control over the ingredients, allowing you to avoid artificial flavors, colors, and preservatives often found in commercial products. This is particularly appealing for those with dietary restrictions or specific health goals. Secondly, making ice cream at home is surprisingly cost-effective, especially when you consider the quality and quantity you can produce compared to specialty brands. Thirdly, it’s an incredibly rewarding and fun activity, perfect for engaging the whole family. And finally, the “no-churn” aspect is a game-changer. It democratizes the art of ice cream making, removing the barrier of expensive, single-use kitchen appliances. All you need is a bowl, a whisk, and a freezer, making delicious, creamy ice cream accessible to everyone.
Essential Ingredients for Your Easy Coconut Ice Cream
The beauty of this recipe lies in its simplicity, utilizing only a handful of readily available ingredients that create a profound flavor profile. Each component plays a crucial role in achieving that coveted creamy texture and balanced taste.
- 2 cans of full-fat coconut milk: This is the hero ingredient, providing the rich, creamy base and distinct tropical flavor. Full-fat is absolutely essential here; light coconut milk will result in an icy, less satisfying consistency. For best results, chill the cans in the refrigerator overnight. This helps the thick coconut cream separate from the water, allowing you to scoop out the thickest part for maximum creaminess.
- 3/4 cup of sweetener: The choice of sweetener offers flexibility. If you’re following a low-carb diet, erythritol or monk fruit sweetener blends are excellent options, aligning with the original LowCarbSpark philosophy. For a traditional sweet treat, granulated sugar works wonderfully. You can also experiment with natural liquid sweeteners like maple syrup or agave nectar for a slightly different flavor and texture, though these may require slight adjustments to the overall sweetness level.
- 2 teaspoons of vanilla extract: A staple in most dessert recipes, vanilla extract isn’t just for flavor; it enhances and rounds out the sweetness, adding depth and warmth to the tropical notes of the coconut. Opt for pure vanilla extract for the best quality and aroma.
- 1/4 teaspoon of sea salt: A small but mighty ingredient, sea salt plays a critical role in balancing the sweetness of the ice cream, preventing it from tasting overly saccharine. It also brightens and intensifies all the other flavors, making each spoonful more complex and satisfying.
- Toasted coconut flakes (optional): While not essential for the base, toasted coconut flakes are a fantastic addition. They offer a delightful textural contrast and an intensified coconut flavor that elevates the entire dessert. You can easily toast them in a dry pan over medium-low heat for a few minutes until golden and fragrant, or buy them pre-toasted.
Crafting Your Delicious Coconut Ice Cream: Step-by-Step Guide
The process of making this no-churn ice cream is remarkably straightforward, requiring minimal hands-on time and yielding maximum deliciousness. Follow these simple steps for a perfect batch every time.
Step 1: Combine the Core Ingredients
Begin by gathering your chilled full-fat coconut milk cans. If they’ve been refrigerated, carefully open them and scoop out the thick, solid coconut cream that has risen to the top. Discard any excess watery liquid at the bottom of the can, or save it for smoothies. In a large mixing bowl, combine the thick coconut cream, 3/4 cup of your chosen sweetener, 2 teaspoons of vanilla extract, and 1/4 teaspoon of sea salt. Using a sturdy whisk, beat everything together vigorously until the mixture is completely smooth and wonderfully creamy. Ensure that the sweetener is fully dissolved and no lumps remain. This blending step is crucial for achieving that silky-smooth ice cream texture.
Step 2: Prepare for Freezing
Before you begin mixing, it’s highly recommended to place your freezer-safe container into the freezer for at least 30 minutes, or even an hour. This pre-chilling step helps the ice cream freeze more evenly and prevents the formation of large ice crystals, contributing to a smoother consistency. Once your mixture is perfectly blended, carefully transfer the coconut ice cream mixture into your pre-frozen container. Choose a container that is wide and shallow rather than deep, as this also aids in faster and more even freezing.
Step 3: Freeze to Perfection
Once the mixture is in the container, it’s time for the magic of freezing. Place the container into the freezer and allow it to freeze for a minimum of 3 hours. For the creamiest results and to prevent the formation of ice crystals on the surface, cover the container with a layer of cling wrap (plastic film). Crucially, make sure the cling wrap is pressed directly onto the surface of the coconut ice cream mixture, touching it completely. This creates a barrier against air, which is the primary cause of iciness. For an even firmer consistency, you might consider freezing it overnight. Check on it periodically; different freezers can vary in their cooling power.
Step 4: Serve and Savor
Patience is a virtue, especially when it comes to homemade ice cream! Approximately 10 to 15 minutes before you plan to serve, remove the ice cream from the freezer and let it sit at room temperature. This brief softening period will make it much easier to scoop, transforming it from a rock-hard block into a beautifully scoopable, creamy texture. Scoop generous portions into bowls or cones, then unleash your creativity with toppings. A sprinkle of the optional toasted coconut flakes is highly recommended for that extra tropical crunch and flavor. You can also add fresh berries, a drizzle of chocolate syrup, chopped nuts, or a dollop of dairy-free whipped cream. Enjoy every single spoonful of your homemade, tropical masterpiece!
Tips for Achieving the Ultimate Creamy Coconut Ice Cream
While the recipe is incredibly forgiving, a few expert tips can elevate your homemade coconut ice cream from good to absolutely phenomenal:
- Chill Your Coconut Milk: As mentioned, chilling full-fat coconut milk in the refrigerator overnight allows the thick cream to separate. This dense cream is vital for the luxurious texture.
- Use a Cold Mixing Bowl: If possible, chill your mixing bowl in the freezer for 15-20 minutes before whisking the ingredients. This helps keep the mixture colder, which can contribute to a smoother final product.
- Don’t Skimp on Full-Fat: This cannot be stressed enough – full-fat coconut milk is non-negotiable for a creamy, scoopable, no-churn ice cream. Light versions will invariably lead to an icy disappointment.
- Taste and Adjust: Before freezing, taste your mixture and adjust the sweetness or even the salt level to your preference. Remember that flavors can be slightly muted when frozen.
- Airtight Storage: Always store your ice cream in an airtight container in the coldest part of your freezer. The cling wrap directly touching the surface is key for the initial freeze, but an airtight lid for long-term storage is equally important.
- Softening Time is Crucial: Don’t rush the serving process. Allowing the ice cream to soften for 10-15 minutes at room temperature is essential for easy scooping and the best texture experience.
- Experiment with Flavors: While the basic recipe is fantastic, don’t hesitate to get creative! Add a tablespoon of unsweetened cocoa powder for chocolate coconut ice cream, a few drops of almond extract for an almond joy twist, or swirl in a fruit puree like mango or passion fruit before freezing.
Customization and Delicious Variations
This 4-ingredient base is incredibly versatile, allowing for endless customization to suit any palate or craving. Here are some ideas to spark your imagination:
- Fruity Fun: Swirl in fresh berry compote (strawberries, raspberries, blueberries), mango puree, or finely diced pineapple. For an exotic twist, try passion fruit pulp or a squeeze of lime juice.
- Chocolate Lover’s Dream: Fold in chocolate chips, cocoa nibs, or a generous swirl of dairy-free chocolate fudge sauce. A dash of espresso powder can also enhance chocolate flavors.
- Nutty Indulgence: Mix in chopped almonds, pecans, walnuts, or cashews. A drizzle of your favorite nut butter can also add richness and flavor.
- Spice it Up: A pinch of cinnamon, cardamom, or even a touch of ginger powder can introduce a warm, aromatic depth to the tropical base.
- Herbal Notes: For the adventurous, finely chopped fresh mint or basil can add an unexpected and refreshing element.
- Tropical Bliss: Beyond toasted coconut flakes, consider adding macadamia nuts, candied ginger, or a hint of rum extract for an adult-friendly treat.
Storage and Re-serving Your Homemade Treasure
Your homemade coconut ice cream will keep well in an airtight container in the freezer for up to 2-3 weeks. Beyond that, while still safe to eat, its texture might start to degrade, becoming icier. When you’re ready to enjoy another scoop, always remember to let it sit out for 10-15 minutes before attempting to scoop. If it’s been in the freezer for an extended period and is very hard, you might need to leave it out for a bit longer, or even briefly run your scooper under hot water to help it glide through the creamy goodness.
Frequently Asked Questions About No-Churn Coconut Ice Cream
We’ve covered a lot, but here are quick answers to some common questions you might have:
Q: Do I really not need an ice cream maker?
A: Absolutely not! This is a true no-churn recipe. The combination of full-fat coconut milk and the freezing method allows it to set beautifully without churning.
Q: Why did my ice cream turn out icy?
A: The most common culprits are using light coconut milk instead of full-fat, not covering the surface directly with cling wrap during freezing, or not whisking the mixture until completely smooth initially. Ensure all ingredients are properly emulsified.
Q: Can I use a different type of milk?
A: For this specific recipe, full-fat coconut milk is crucial for texture and flavor. Other plant-based milks typically lack the high-fat content needed for a creamy, no-churn consistency.
Q: How long does it take to freeze?
A: It needs at least 3 hours to set, but 6 hours or overnight is often ideal for a firmer texture. Pre-chilling your container can help speed up the process.
Q: Can I reduce the amount of sweetener?
A: Yes, you can adjust the sweetener to your taste. Start with less and taste the mixture before freezing. Remember that cold dulls sweetness slightly, so it might need a bit more than you’d expect.
Your Go-To 4-Ingredient Coconut Ice Cream Recipe
This simple yet incredibly satisfying 4-ingredient coconut ice cream recipe is a testament to the fact that you don’t need complex techniques or expensive equipment to create gourmet-quality desserts at home. It’s perfect for hot summer days, a delightful treat for those following dairy-free or vegan diets, or simply anyone looking for an easy, refreshing, and incredibly tasty dessert. So, embrace the summer spirit, whip up a batch of this tropical delight, and prepare to be amazed by the creamy, dreamy results. Share your creations and enjoy the sweet success!