
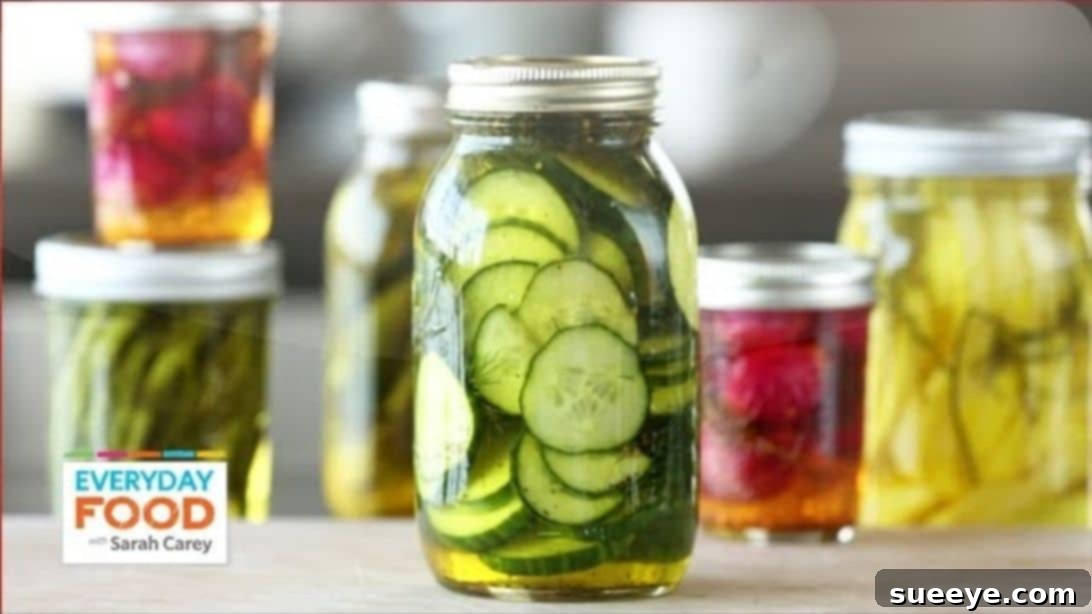
There’s nothing quite like the crisp, tangy bite of a perfectly pickled cucumber. While store-bought options can satisfy a craving, crafting your own homemade pickles elevates the experience to an entirely new level. Imagine pickles that are just the right balance of sweet, sour, and salty, with an irresistible crunch that makes your taste buds sing. This super easy and quick pickle recipe, inspired by culinary experts, is designed to bring that delightful experience right into your kitchen. Say goodbye to preservatives and hello to fresh, flavorful pickles you can enjoy as a standalone snack, or as a vibrant addition to your favorite sandwiches, salads, dips, and even pizzas! Once you try these, you’ll find yourself hooked, making them a staple in your culinary repertoire.
Why Homemade Pickles are a Game Changer
Beyond the undeniable satisfaction of creating something delicious from scratch, making your own pickles offers numerous advantages. Firstly, you have complete control over the ingredients, allowing you to tailor the sweetness, tartness, and spice level to your exact preference. This means no artificial colors, flavors, or excessive sodium often found in commercial products. Secondly, homemade pickles burst with a freshness that simply can’t be matched, retaining more of the cucumber’s natural texture and vibrant flavor. It’s also a surprisingly cost-effective way to preserve produce, especially when cucumbers are in season. Moreover, the process itself is incredibly rewarding and surprisingly simple, making it an excellent starting point for anyone interested in food preservation.
Choosing the Perfect Cucumbers for Pickling
The secret to truly spectacular pickles begins with selecting the right cucumbers. Not all cucumbers are created equal when it comes to pickling. The ideal candidates are those with thin skins, few seeds, and a firm, crisp texture. Varieties such as Kirby cucumbers, also known as pickling cucumbers, are specifically bred for this purpose due to their low water content and excellent crunch retention. Small Persian cucumbers or even larger European cucumbers can also work wonderfully, provided they meet these criteria. Avoid slicing cucumbers like English hothouse varieties, which tend to be too watery and soft for pickling. When shopping, look for firm, unblemished cucumbers free from soft spots or yellowing, indicating they are past their prime. Freshness is paramount for achieving that coveted snap.
Essential Ingredients for Your Quick Pickles
This recipe calls for a straightforward list of ingredients, each playing a crucial role in creating that signature sweet, sour, and crunchy pickle. Understanding their purpose will help you appreciate the magic of pickling.
- 3 cups of white vinegar: This is the backbone of your brine, providing the necessary acidity for preservation and that characteristic tangy flavor. While white vinegar is traditional, you can experiment with apple cider vinegar for a slightly fruitier, more mellow tang, or even rice vinegar for a lighter, Asian-inspired pickle.
- 1 1/2 cups of granulated sugar: Sugar balances the acidity of the vinegar, adding sweetness and contributing to the pickle’s overall flavor profile. It also plays a subtle role in maintaining the cucumber’s crispness. Feel free to adjust the quantity to suit your preference for sweeter or more tart pickles.
- 2 teaspoons of coarse salt: Salt is vital for both flavor and texture. Coarse salt, such as kosher salt or pickling salt, is preferred as it dissolves slower than fine table salt, allowing for better control and preventing over-salting. Avoid iodized salt, as it can sometimes make the brine cloudy and alter the flavor.
- 1/2 teaspoon of mustard seed: A classic pickling spice, mustard seeds add a warm, pungent undertone that is quintessential to traditional dill pickles.
- 1/2 teaspoon of celery seed: Celery seeds provide a slightly bitter, earthy note that complements the other spices beautifully, adding depth to the brine’s flavor.
- 2 to 4 small red chiles (optional): For those who enjoy a little heat, small red chiles (such as bird’s eye or serrano) offer a lovely kick. You can adjust the quantity based on your desired level of spiciness, or omit them entirely if you prefer a milder pickle.
- 1/8 teaspoon of ground turmeric: Turmeric primarily contributes a beautiful golden hue to your pickles, making them visually appealing. It also adds a very subtle earthy flavor and is known for its antioxidant properties.
- 1 1/2 cups of fresh dill fronds: Fresh dill is arguably the star of dill pickles, imparting its distinctive aromatic, slightly anise-like flavor. Using fresh dill is crucial for the best taste and aroma. You can also add a few dill flower heads if available for an even more intense dill flavor.
- Cucumbers: As discussed, choose fresh, firm, thin-skinned pickling cucumbers for optimal results.
- Jars: Clean, sterile glass jars with tight-fitting lids are essential for storing your pickles safely. Mason jars are ideal for this purpose.
Essential Equipment for Homemade Pickles
While pickling might sound intimidating, the equipment needed is surprisingly minimal and likely already in your kitchen:
- Colander: For salting and rinsing cucumbers.
- Large pot: To prepare the pickling brine.
- Measuring cups and spoons: For accurate ingredient proportions.
- Cutting board and sharp knife: For slicing cucumbers.
- Glass jars with lids: Quart-sized (or similar) Mason jars are perfect. Ensure they are thoroughly cleaned and sterilized.
- Funnel (optional): Can be helpful for pouring hot brine into jars without spills.
- Ladle or heat-proof measuring cup: For transferring hot brine.
Step-by-Step Instructions for Super Easy Quick Pickles
Follow these detailed steps to create your perfect batch of crunchy, flavorful quick pickles.
Step 1: Preparing the Cucumbers for Peak Crunch
Begin by washing your cucumbers thoroughly under cold running water. Next, decide on your preferred cut: slice them into rounds approximately 1/8th of an inch thick for classic pickle chips, cut them into spears for a longer, more substantial bite, or halve them lengthwise for wedges. The key is to aim for consistent thickness to ensure even pickling. Place your sliced cucumbers in a colander. Sprinkle them generously with about a tablespoon of coarse salt. Toss the cucumbers with the salt to ensure every piece is coated. This crucial step draws out excess moisture from the cucumbers, which is essential for maintaining their crispness and preventing mushy pickles. Once salted, place the colander with the cucumbers over a bowl (to catch the drained liquid) in the refrigerator for about 3 hours. For an extra boost of crunch, you can add a generous handful of ice cubes directly to the cucumbers during this chilling period. The cold temperature further firms up the cucumber cells.
Step 2: Rinsing and Drying for Optimal Flavor
After the 3-hour salting period, retrieve your cucumbers from the refrigerator. You’ll notice they’ve released a significant amount of water. Thoroughly rinse the cucumbers under cold running water to remove all excess salt. This step is vital to prevent your pickles from becoming overly salty. Once rinsed, gently pat the cucumber slices dry with clean paper towels or a clean kitchen towel. Removing surface moisture helps the cucumbers better absorb the brine and ensures the flavors are not diluted.
Step 3: Layering the Jars with Flavor and Style
Now it’s time to pack your clean, sterile jars. Take your prepared cucumber slices and layer them tightly into the jars, alternating with fresh dill fronds. You can be creative here – either tuck the dill fronds between layers or place a large sprig at the bottom and top of the jar. For an extra layer of flavor, consider adding a peeled garlic clove or a few thin slices of onion to each jar at this stage. Pack the cucumbers snugly but avoid crushing them, as this can lead to bruising and affect their texture.
Step 4: Crafting the Perfect Brine – The Heart of Your Pickles
In a medium pot, combine three cups of white vinegar, 1 1/2 cups of granulated sugar, 2 teaspoons of coarse salt, 1/2 teaspoon of mustard seed, 1/2 teaspoon of celery seed, and 1/8 teaspoon of ground turmeric. If you’re adding red chiles, toss them in now. Place the pot over medium heat and stir continuously until the sugar and salt are completely dissolved. This typically takes a few minutes. Once dissolved, increase the heat and bring the brine to a rolling boil. Boiling the brine ensures that all the flavors are fully infused and helps to sterilize the liquid, which is crucial for preserving your pickles.
Step 5: Filling and Sealing for Freshness
Carefully transfer the hot brine into a heat-proof measuring cup or use a funnel to pour it directly into your packed jars. Fill each jar, ensuring that the cucumber slices are completely submerged in the liquid. This is vital for proper pickling and to prevent spoilage. Leave at least half an inch of “headspace” – the gap between the brine and the rim of the jar. This allows for any slight expansion of the liquid as it cools and helps ensure a good seal. Once filled, allow the jars to cool undisturbed to room temperature. This gradual cooling process helps the pickles retain their crunch. Once cooled, secure the lids tightly. Your quick pickles are ready to be refrigerated.
Storing and Enjoying Your Homemade Quick Pickles
These are refrigerator pickles, meaning they are not processed for long-term shelf stability like traditional canned pickles. They must be stored in the refrigerator and are best enjoyed within 2-4 weeks, though they often last longer if properly stored. The flavors will deepen and meld over the first 24-48 hours, so while tempting, it’s best to wait a day or two before diving in for the optimal taste experience. Always use a clean utensil when retrieving pickles from the jar to maintain freshness. If you notice any signs of spoilage such as unusual smells, mold, or extreme cloudiness not present initially, it’s best to discard them.
Creative Ways to Savor Your Quick Pickles
Once you have a batch of these delectable quick pickles, the possibilities for enjoyment are endless:
- Snack Time: Enjoy them straight out of the jar as a refreshing, low-calorie snack.
- Sandwich and Burger Booster: Elevate any sandwich, burger, or hot dog with a few slices for a tangy counterpoint to rich flavors.
- Salad Enhancer: Chop them up and add to potato salad, tuna salad, chicken salad, or even a simple green salad for an extra burst of flavor and crunch.
- Dip Dynamo: Finely dice them and mix into creamy dips like tartar sauce, a yogurt-based dill dip, or even hummus for a zesty twist.
- Unconventional Topping: Feeling adventurous? Try adding thinly sliced pickles to homemade pizza or flatbreads before baking.
- Cocktail Garnish: They make an excellent, flavorful garnish for a Bloody Mary or other savory cocktails.
- Fried Pickles: Batter and fry them for a restaurant-style treat at home.
Troubleshooting and Tips for Perfect Pickles
- Mushy Pickles: This is a common issue. Ensure you’re using pickling cucumbers, salting them properly, rinsing thoroughly, and not overcooking the brine. Rapid cooling can also help maintain crunch.
- Too Salty/Sweet/Sour: The beauty of homemade pickles is customization. Next time, adjust the sugar or salt content in the brine to better suit your palate. For more sour, reduce sugar; for less, increase sugar slightly.
- Cloudy Brine: For quick pickles, a slightly cloudy brine is often harmless and can be due to natural oils from the spices or residual starches from the cucumbers. However, if accompanied by a foul smell or fuzzy growth, discard the batch.
- Experiment with Spices: Don’t be afraid to customize! Add whole black peppercorns, bay leaves, coriander seeds, fennel seeds, or even a pinch of red pepper flakes to the brine for different flavor profiles.
- Other Vegetables: This quick pickling method works well for other vegetables too, such as sliced carrots, green beans, bell peppers, or even onions.
Super Easy and Quick Pickles: Your New Favorite Homemade Treat
Making your own pickles is an incredibly rewarding culinary adventure that yields delicious results with minimal effort. This super easy and quick recipe will equip you with the knowledge and confidence to create batch after batch of perfectly balanced, delightfully crunchy pickles that will impress family and friends alike. So gather your ingredients, follow these steps, and prepare to fall in love with the satisfying world of homemade quick pickles. Happy pickling!