
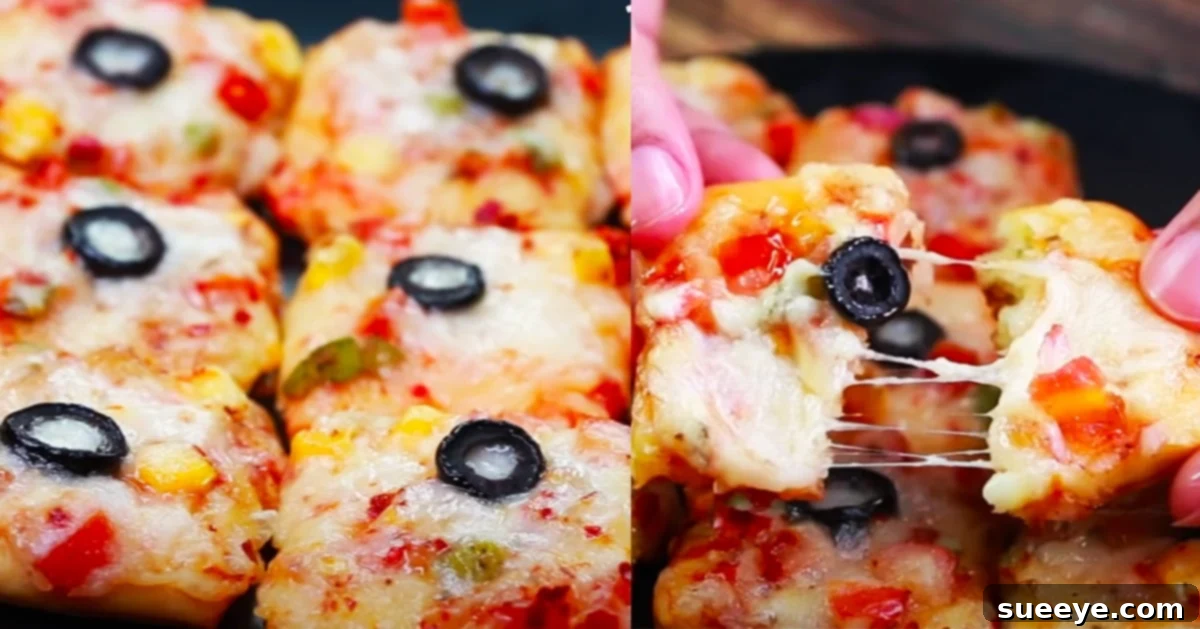
Effortless Mini Pizza Squares: Your Go-To No-Yeast Recipe for Quick Bites
There’s hardly a soul who can resist the universal appeal of pizza. It’s a culinary masterpiece that transcends cultures, loved by young and old alike, with its endless possibilities for customization. Whether you prefer a classic pepperoni slice or a vibrant vegetarian medley, pizza offers a canvas for your culinary imagination. Today, we’re diving into the delightful world of mini pizza squares – a recipe designed for ultimate convenience and speed, requiring absolutely no yeast! This means no lengthy waiting for dough to rise, making it perfect for those sudden cravings or last-minute gatherings.
This particular recipe champions a vegetarian-friendly approach, bursting with fresh garden vegetables. However, the beauty of homemade pizza lies in its adaptability; feel free to incorporate your favorite meats like savory pepperoni, grilled chicken, or any other toppings that tantalize your taste buds. Inspired by a wonderfully straightforward video from Toasted, this guide offers a step-by-step journey to crafting these easy, bite-sized snacks in mere minutes. The visual aid from the original inspiration, complete with helpful subtitles, ensures you can precisely follow along with measurements and techniques, transforming you into a mini pizza maestro in no time.
Why Choose No-Yeast Pizza? The Secret to Speedy Satisfaction
The “no-yeast” aspect of this recipe is a game-changer for several reasons. Traditional pizza dough often requires proofing time – a period where yeast ferments, causing the dough to rise. While this process develops complex flavors and textures, it can add hours to your cooking time, making it impractical for quick meals or spontaneous snack attacks. By opting for a no-yeast dough, we leverage common leavening agents like baking powder and baking soda. These ingredients react with the moisture and acidity in the dough (like curd, in this case) to create carbon dioxide bubbles, resulting in a wonderfully soft and slightly airy crust without any waiting period.
This method is ideal for beginner bakers who might be intimidated by working with yeast, or for anyone seeking a foolproof way to enjoy homemade pizza on a tight schedule. Imagine whipping up a batch of fresh, warm pizza squares for an unexpected guest, a sudden craving during a movie night, or as a fun activity with kids. The ease and speed of preparation mean you can have delicious, customized pizza on your table in under an hour, from start to finish. It’s the ultimate solution for instant gratification when a craving hits, or for preparing delightful appetizers for your next party without all the fuss.
The Charm of Mini Pizza Squares: Perfect Portions for Every Occasion
Beyond the speed, the “mini squares” format adds another layer of appeal to this recipe. Forget the struggle of cutting perfect slices from a large round pizza; these squares offer built-in portion control, making them ideal for appetizers, lunchbox treats, or serving at parties. Their compact size means they’re incredibly easy to handle, reducing mess and making them a fantastic finger food option. Kids absolutely adore mini pizzas, and the square shape offers a unique, visually appealing twist on the classic round pie.
The consistent sizing of squares also ensures more even baking, as each piece is exposed to similar heat conditions. This leads to uniformly cooked crusts and perfectly melted cheese across every single mini pizza. Whether you’re hosting a casual get-together, preparing snacks for a game night, or simply looking for a fun and versatile meal option, these mini pizza squares hit all the right notes. They’re not just food; they’re a delightful experience, easy to share and customize to individual preferences, guaranteeing smiles all around.
Gathering Your Culinary Arsenal: Ingredients for Delightful Mini Pizzas
Preparing these mini pizza squares requires a simple collection of everyday ingredients, split into two main categories: the vibrant toppings and the foundational no-yeast dough. Freshness and quality are key to maximizing flavor, so opt for the best produce you can find.
For the Fresh & Flavorful Toppings:
- 1/4 cup finely diced tomato: Provides a burst of fresh acidity and sweetness.
- 2 tbsp finely chopped onion: Adds a pungent depth and aromatic base.
- 2 tbsp finely diced capsicum (bell pepper): Contributes a vibrant color and crisp texture. You can use green, red, or yellow for variety.
- 1 tbsp sweet corn (boiled): Offers a touch of sweetness and a delightful pop. Ensure it’s cooked before adding.
- Salt to taste: Essential for enhancing the overall flavors of the vegetables.
- 1/4 tsp black pepper: Adds a gentle warmth and spice. Adjust to your preference.
- 1/4 tsp dried oregano: The quintessential pizza herb, imparting an earthy, aromatic note.
For the Soft & Speedy Dough:
- 1 cup all-purpose flour: The base for our tender, no-yeast crust.
- 1/2 tsp baking powder: A primary leavening agent, crucial for a light texture.
- 1/2 tsp baking soda: Works in conjunction with baking powder and curd to create lift.
- Salt to taste: Seasoning the dough itself is vital for a balanced flavor.
- 1/4 cup curd (plain yogurt): Adds moisture, tenderness, and acidity, which activates the baking soda.
- Water: Used sparingly, just enough to bring the dough together to a soft, pliable consistency.
The Essential Pizza Components:
- Tomato sauce: Your choice of pizza sauce, marinara, or even a simple ketchup-based sauce.
- Mozzarella cheese: The classic choice for its incredible melt and stretch. Shredded is best for even coverage.
- Chili flakes: For a touch of heat and visual appeal, entirely optional.
- Black olives: Sliced black olives add a briny, salty counterpoint to the other flavors.
Your Culinary Journey: Step-by-Step Directions to Pizza Perfection
Follow these detailed steps to effortlessly create your own batch of delicious no-yeast mini pizza squares. Precision and patience will lead to the most satisfying results.
Step 1: Preparing Your Flavorful Toppings
In a medium-sized mixing bowl, combine all your pre-prepared topping ingredients: the finely diced tomato, chopped onion, diced capsicum, and boiled sweet corn. Season this vibrant mix generously with salt, black pepper, and dried oregano. Stir everything together thoroughly to ensure the flavors are well distributed. Set this bowl aside, allowing the flavors to meld slightly while you prepare the dough. This simple step ensures every bite of your mini pizza is packed with seasoned vegetable goodness.
Step 2: Crafting the Soft & Speedy Dough
In a separate, larger mixing bowl, combine your dry dough ingredients: the all-purpose flour, baking powder, baking soda, and a pinch of salt. Whisk these together to ensure they are evenly distributed. Next, add the 1/4 cup of curd (plain yogurt) to the dry mixture. Begin mixing with your hands or a spoon, gradually adding small amounts of water, just a tablespoon at a time. Continue to mix and lightly knead until a soft, pliable, and non-sticky dough forms. Be careful not to add too much water; the dough should be soft but manageable. Once the dough is ready, gently roll it out onto a lightly floured surface to your desired thickness – typically about 1/4 inch. Using a fork, prick the surface of the dough all over. This crucial step prevents the dough from puffing up excessively in the center during cooking, ensuring a flat base for your toppings.
Step 3: Assembling Your Mini Masterpieces
Now comes the fun part – assembling your pizzas! Cut your rolled and pricked dough into small squares of your preferred size. A good starting point is about 2×2 inches, but feel free to adjust. Carefully spread a thin layer of your chosen tomato sauce over each dough square, leaving a small border around the edges. Next, generously spoon your prepared vegetable topping mixture onto each square, distributing it evenly. Finally, crown each mini pizza with a generous sprinkle of shredded mozzarella cheese. The amount of cheese is entirely up to your preference for cheesiness!
Step 4: The Cooking Process: Stove-top or Oven
You have two excellent options for cooking these mini pizza squares, depending on your equipment and preference:
- Stove-top Method: Heat a non-stick pan or griddle over low to medium-low flame. Once warm, carefully place the assembled mini pizza squares onto the pan, ensuring they are not overcrowded. Cover the pan with a lid. Cook for approximately 30-40 minutes, or until the dough is cooked through, the cheese is beautifully melted and bubbly, and the bottom crust is golden brown and crispy. The low flame and covered cooking create an oven-like environment, allowing the dough to cook evenly and the cheese to melt perfectly.
- Oven Baking Method: Preheat your oven to 350°F (175°C). Arrange the assembled mini pizza squares on a baking sheet lined with parchment paper. Bake in the preheated oven for 35-45 minutes, or until the crust is golden brown, firm, and cooked through, and the mozzarella cheese is fully melted, bubbly, and slightly golden at the edges. Keep an eye on them towards the end of the baking time to prevent overcooking.
Step 5: The Finishing Touches & Serving
Once cooked to perfection, carefully remove the mini pizza squares from the pan or oven. For an added kick, sprinkle with chili flakes and artfully place a few sliced black olives on top of each square. Allow them to cool for a minute or two before serving, as the cheese will be extremely hot. This vibrant and colorful mini pizza square recipe not only looks amazing but promises a delightful culinary experience. It’s wonderfully vegetarian-friendly, making it a fantastic dish to share with all your friends and family, catering to diverse dietary preferences.
Unleash Your Creativity: Customization and Creative Twists
While the basic recipe is fantastic as is, the true joy of homemade pizza lies in its endless customization possibilities. Don’t be afraid to experiment with different toppings and flavors to make these mini pizza squares uniquely yours.
- Meat Lovers’ Delight: For those who prefer meat, crumbled cooked sausage, finely diced cooked chicken, small pieces of pepperoni, or even crispy bacon bits can be added to the topping mix before baking.
- More Veggie Power: Expand your vegetable palette with thinly sliced mushrooms, spinach (wilt it slightly before adding to prevent too much moisture), finely chopped bell peppers of various colors, or even thinly sliced zucchini.
- Cheese Exploration: While mozzarella is classic, consider blending it with a sprinkle of provolone for a sharper taste, or a touch of Parmesan for a nutty undertone. A tiny bit of goat cheese could add a tangy twist.
- Sauce Swaps: Beyond traditional tomato sauce, try a basil pesto for a herbaceous flavor, a creamy Alfredo sauce for a richer experience, or even a barbecue sauce for a smoky, savory treat.
- Herb & Spice It Up: Experiment with different herbs like basil, thyme, or rosemary. A pinch of garlic powder in the sauce or dough can also elevate the flavor profile.
- Dough Variations: For a slightly healthier twist, substitute a portion of the all-purpose flour with whole wheat flour. The texture will be a bit denser, but still delicious.
These mini pizzas are incredibly versatile – serve them as elegant appetizers at your next dinner party, pack them into lunchboxes for a delightful midday meal, or enjoy them as a satisfying snack any time of day. Their small size makes them perfect for little hands and encourages adventurous eating.
Tips for Achieving Mini Pizza Perfection Every Time
To ensure your no-yeast mini pizza squares turn out perfectly every single time, keep these expert tips in mind:
- Don’t Overwork the Dough: Since this is a no-yeast dough, over-kneading can make it tough. Mix just until the ingredients are combined and a soft dough forms.
- Proper Dough Thickness: Aim for about 1/4 inch thickness. Too thick, and it might not cook through evenly; too thin, and it might become too crispy or brittle.
- Pricking is Key: Remember to prick the rolled-out dough with a fork. This prevents large air bubbles from forming and ensures a flat, stable base for your toppings.
- Don’t Overload Toppings: While tempting, too many toppings can make the pizza soggy and prevent the dough from cooking properly. A thin, even layer is best.
- Preheat Your Pan/Oven: Whether you’re using a stove-top or oven, ensuring it’s preheated to the correct temperature is crucial for an even cook and a crispy base.
- Low and Slow (Stove-top): If using the stove-top method, keeping the flame low is essential. This allows the dough to cook through without burning the bottom, while the lid helps melt the cheese and cook the top.
- Monitor Baking: Ovens can vary. Keep an eye on your pizzas, especially towards the end of the suggested cooking time, to prevent them from burning.
- Serve Warm: Mini pizzas are best enjoyed fresh out of the oven or pan when the cheese is still melty and the crust is warm and tender.
- Storage and Reheating: Leftovers can be stored in an airtight container in the refrigerator for up to 2-3 days. Reheat them gently in a toaster oven or a warm pan to regain some crispness.
Why You’ll Fall in Love with This No-Yeast Mini Pizza Recipe
This no-yeast mini pizza squares recipe isn’t just a meal; it’s an experience that delivers satisfaction on multiple levels. It’s incredibly quick, making it a lifesaver on busy weekdays or when unexpected hunger strikes. The simplicity of the ingredients and steps makes it approachable for even the most novice cooks, building confidence in the kitchen. But beyond the ease, these mini pizzas are undeniably delicious – a perfect blend of a tender crust, tangy sauce, fresh vegetables, and gooey melted cheese. The vibrant colors and appealing square shape make them a feast for the eyes as well as the palate.
Moreover, the inherent customizability of this recipe ensures that everyone can create their perfect mini pizza, making it an excellent option for families with diverse tastes or for catering to guests’ preferences. You can easily adapt it to be gluten-free by using an appropriate flour blend or vegan by substituting dairy products. It’s truly a recipe for everyone to enjoy. Get ready to impress your friends and delight your family with these fantastic homemade mini pizza squares!